How To Make DIY Drawer Dividers

Updated: Aug. 05, 2022
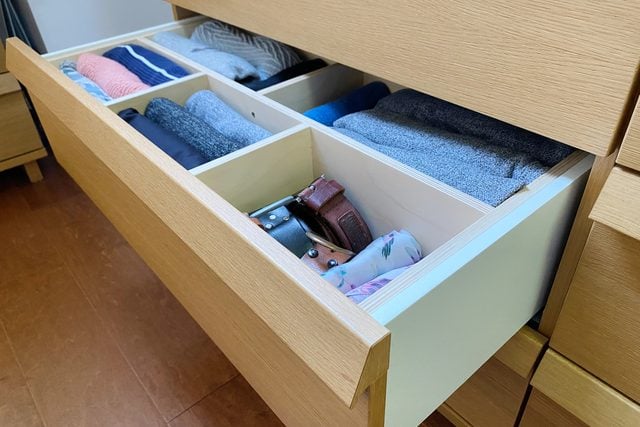
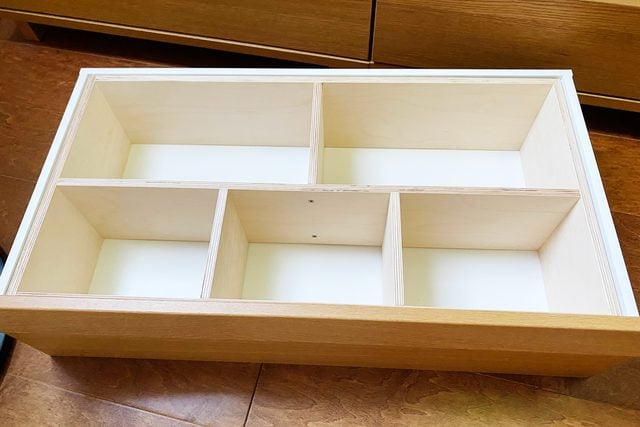
Organize your drawers (and your life!) with DIY drawer dividers. Make them in whatever configuration works best for you, your drawers and your stuff.

2 to 5 hours
Beginner
$20 - $80
Introduction
If you're anything like me, the drawers in your home are always disorganized and overflowing. The problem is, we don't have room for more drawers.
That's where custom-sized DIY drawer dividers can help. Whether you've got a kitchen drawer stuffed with utensils, a disastrous craft drawer in the living room, or a messy workout clothes drawer in your bedroom, these DIY drawer dividers can help.
Our design is for a clothing dresser drawer, but you can easily adapt it to any size and shape. If you don't anticipate using a full 4x8-foot sheet of Baltic birch for future projects, The Home Depot has smaller sizes, like 2x4 feet.
Tools Required
- Drill and drill bit index
- Finishing sander with 120 and 180 grit paper
- Miter saw or hand saw
- Notepad
- Pencil
- Screwdriver or impact driver
- Shop vacuum
- Table saw or circular saw and straight edge
- Tape measure
- Utility knife
Materials Required
- 1 sheet 3/8-inch furniture grade plywood
- 1-1/2-inch flat-head wood screws
- Wood finish of your choice (optional)
Project step-by-step (7)
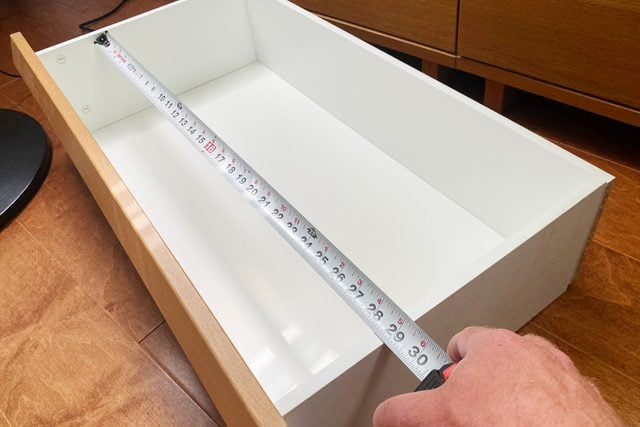
Remove and Measure the Drawer
- Remove the drawer, being careful not to damage it or its sliders.
- Place the drawer gently on the floor, then get your tape measure and your phone (or a notepad and something to write with).
- Measure all inner dimensions of the drawer: length, width and depth.
- Note the measurements in your phone or write them down.
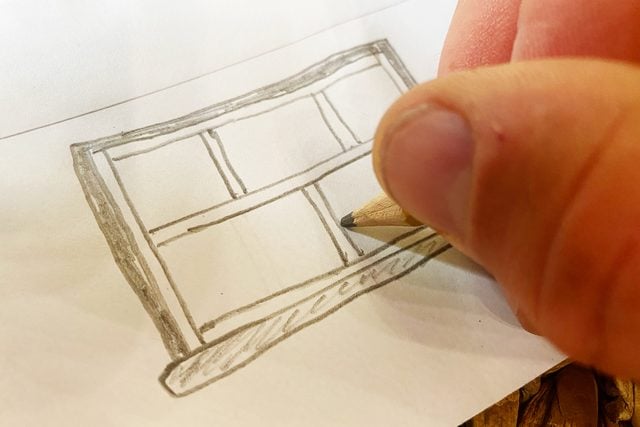
Design the Divider
- Decide which objects you’d like to store in the drawer, and how to organize them.
- Measure these objects, then decide how to divide the drawer space to make the best use of it.
- Record all measurements, then draw a top-view diagram of how your drawer divider will look. You could also use a simple sketching app. (It doesn’t have to be too neat, just clear enough so you understand how the parts will be arranged.)
- Calculate the precise number and length of divider pieces you’ll need. The finished unit will be a plywood rectangle with smaller pieces of plywood fastened within the perimeter pieces, forming the divisions.
- Aim to make the outer rectangle of your divider 1/8-inch smaller in length and width than the inner dimensions of the drawer.
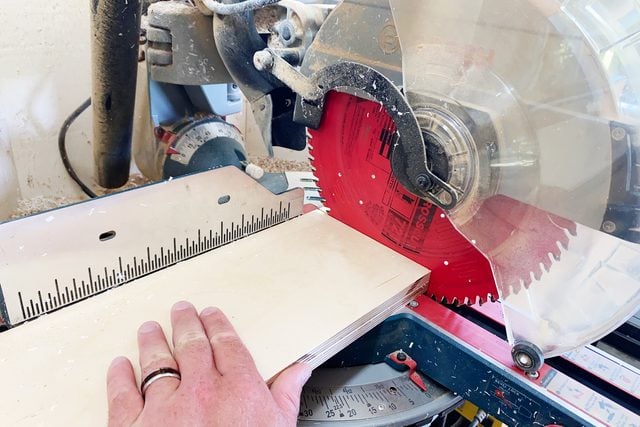
Cut the Parts
- With your table or circular saw, cut your plywood into strips 1/8-inch narrower than the vertical depth of your drawer.
- Rip-cut all the strips you’ll need to make all parts of your drawer divider.
- Take your utility knife and mark the lengths of parts you’ll need on these strips. (Precision matters with projects of this sort. A utility knife is a much narrower, more accurate marking tool than a pencil.)
- With a miter, circular or hand saw, cut all parts to the final length.
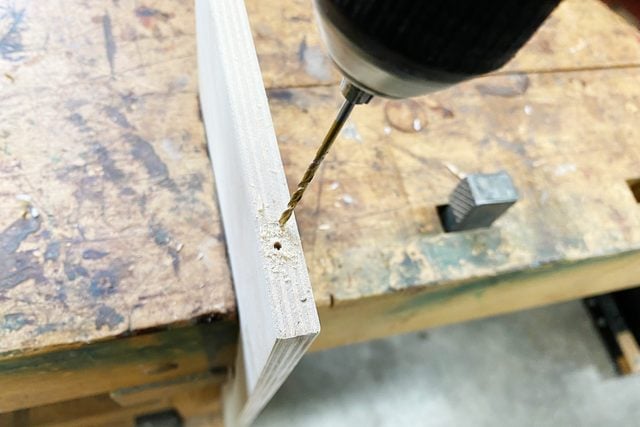
Pre-drill Parts for Screws
- Measure and mark the location of the screws that will join your parts together. Mark for two screws per joint, possibly three if your drawer is vertically deeper than six inches or so.
- Select two drill bits from your index — one large enough so your wood screws pass through the hole it creates without the threads biting into the wood, and the other small enough so the threads will engage.
- Drill the large “through holes” first. Then do a dry fit of all parts, poking a screw through each outer hole into the edge of the adjoining piece hard enough to make a mark.
- Use these marks to drill the second, smaller holes in the edges of your divider parts.
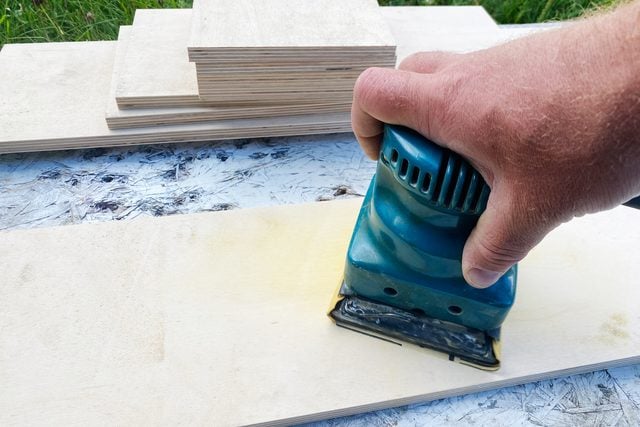
Sand Parts and Ease Corners
- Sand the front and back sides of all parts with 120-grit paper, then 180-grit sandpaper.
- Sand all edges of all parts by hand with 120-grit sandpaper.
- Lightly sand all corners of all pieces to round them slightly. (This prevents splintering and makes any finish you apply last longer.)
- Vacuum all parts thoroughly, removing all sawdust.
- Apply finish if you want. It’s not necessary.
Assemble Parts
- Lay out all the parts in their final positions. Double-check that everything is where you want it.
- Drive wood screws into the predrilled holes, joining everything together.
- Make assembly easier by cutting scrap plywood into spacers of the precise sizes needed to hold your divider parts the right distances apart while fastening them together.
Install Divider and Replace Drawer
- Carefully place your completed drawer divider into its drawer, ensuring it fits correctly.
- Fill the compartments as you see fit.
- Replace the drawer in the dresser or cabinet where it belongs.