
How To Build Your Own Self-Watering Planter
Updated: Mar. 14, 2024
Build a raised planting bed and have tonight's salad at your fingertips!
Multiple Days
Beginner
$101–250
Introduction
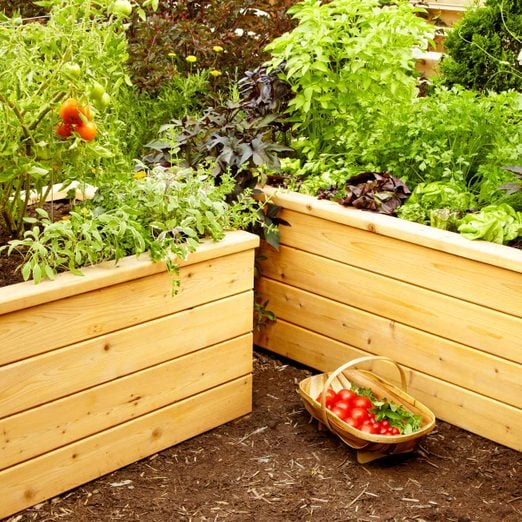
Save water and grow healthier veggies and flowers with a self-watering planter. This attractive cedar design uses perforated drain pipe to store and distribute the water.Tools Required
- Clamps
- Combination square
- Cordless drill
- Countersink drill bit
- Drill bit set
- Framing square
- Hacksaw
- Jigsaw
- Level
- Miter saw
- Router
- Safety glasses
- Stapler
- Utility knife
About Self Watering Pot Planters
Who doesn’t love to grow fresh salad greens, tomatoes and herbs? Unfortunately, growing veggies during the height of summer requires daily watering, which can quickly become a problem when you go away for vacation. In the past, we’ve hired the neighbor kid—sometimes he remembered, and sometimes we came home to withered veggies.
But it turns out there’s a better way to beat the heat and keep your plants routinely watered- self-watering planters that you can leave for a week without watering. When we tasked our editors with designing some DIY self-watering planters, the results were incredible. The self-watering planter boxes themselves were gorgeous, they kept rabbits and other critters from munching on the greens, and we went for weeks on end without having to water. We watered three times all summer long (no kidding), and we had garden-fresh salads until frost. In this article, we’ll show you how to build self-watering planters for yourself. The secret of self-watering planters is in the perforated drain pipe.
The total cost of this 3 x 6-ft. cedar planter was $330. If you use treated wood, the price would drop to about $250. And we used a thick EPDM pond liner, which cost $120. (You can buy thinner versions at home centers for about $35. All the other materials are available at home centers or garden/landscape centers.) To give the box a nice finished look, we routed the boards and sanded the faces and cap. We left the cedar unfinished, but you could seal yours. After we built the basic box, we moved the planter to its final position and then added the self-watering system, soil and plants. Even without the soil and plants, this DIY planter box is heavy!
Project step-by-step (14)
Store Water in Drain Pipes
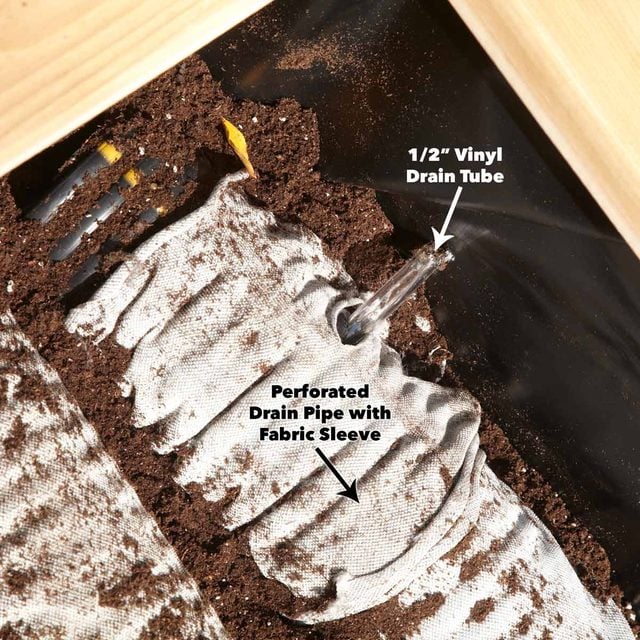
Self-watering planters are sometimes called “sub-irrigated planters” or SIPs, because your plants get to “sip” water whenever they want. Our version uses inexpensive perforated drain pipe with a fabric sleeve in the bottom of the planter. Once you fill the drain pipe reservoirs, they allow air to circulate and water to wick up to your plants’ roots whenever they need it. When plants are watered from below, the roots stay consistently moist, there’s less evaporation and you don’t need to water as much. The vinyl tubing allows any overflow water to drain. There are many commercial self-watering planters available—the EarthBox is a great optiom, but you can also easily make your own.
Top 8 Reasons to Build This Self-Watering Planter
- It saves your back and knees.
- You’ll have fewer weeds.
- It waters your plants while you’re away.
- It saves water.
- You’ll have fresh veggies steps from your back door.
- It’s easy to create the perfect soil.
- It protects your veggies from hungry critters.
- It’s a handsome addition to your patio.
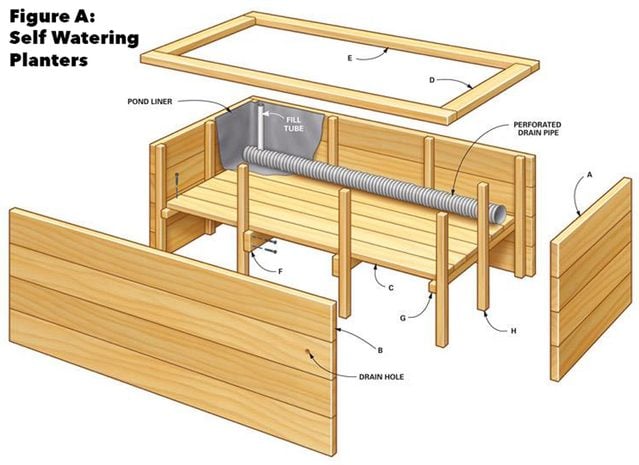
Self Watering Planter Basics
For Material List, Cutting List, and Plant choices for containers, see Additional Information below. It’s also important to note that we notched the flooring to fit. You can also fit the floor within the 2x2s as shown and let the liner span the gap.
- Choose a spot that gets at least six hours of sun. If your planter is against a wall, you can get by with less sun because of the reflected heat.
- A 4-ft.-wide planter is ideal for harvesting from both sides. Keep it to 3 ft. wide if you’re placing your planter against a wall or fence.
- Line your planter with a “fish-safe” rubber membrane. It will prolong the life of the wood without leaching chemicals into the soil (and your food). You can buy fish-safe pond liners in different thicknesses and materials at home centers, garden centers and online retailers.
- Don’t use garden soil or a heavy potting soil in your raised garden. Use a light, fluffy “soilless” blend that will retain moisture without compacting or becoming waterlogged. You can also buy potting soil specifically formulated for self-watering planters.
- Mulch your containers to keep weeds down and to slow evaporation.
- For more great ideas for building sub-irrigated planters (SIPs), visit insideurbangreen.org.’
Additional Information
Screw the Box Ends Together
- Pick the straightest 2x2s for the corner cleats.
- Align the parts with the corner of your worktable to keep the assembly square.
- Pro Tip: When assembling the box ends and sides, leave gaps between the planks to allow for expansion and contraction. We used 1/16-in. washers as spacers.

Construct the Box Sides
- Straighten bowed boards with a clamp. The top boards need to be straight so the cap will go on straight and tight.

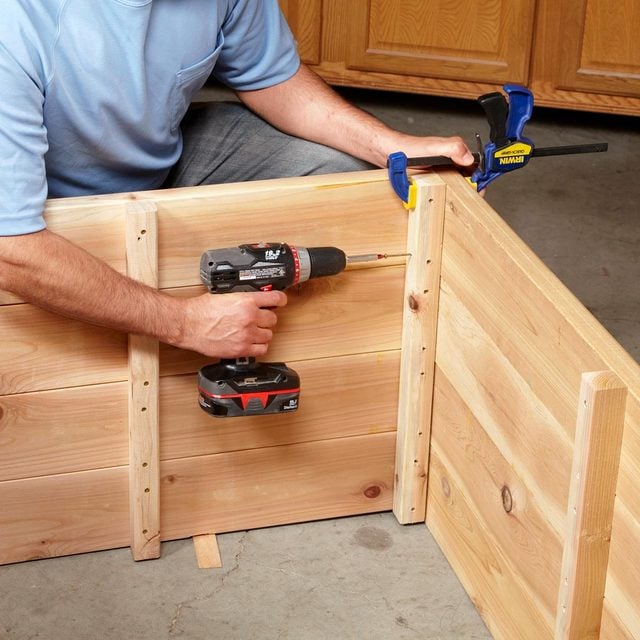
Screw the Box Together
- Clamp the edges together and press firmly with the other hand when screwing each plank so everything comes together tightly.
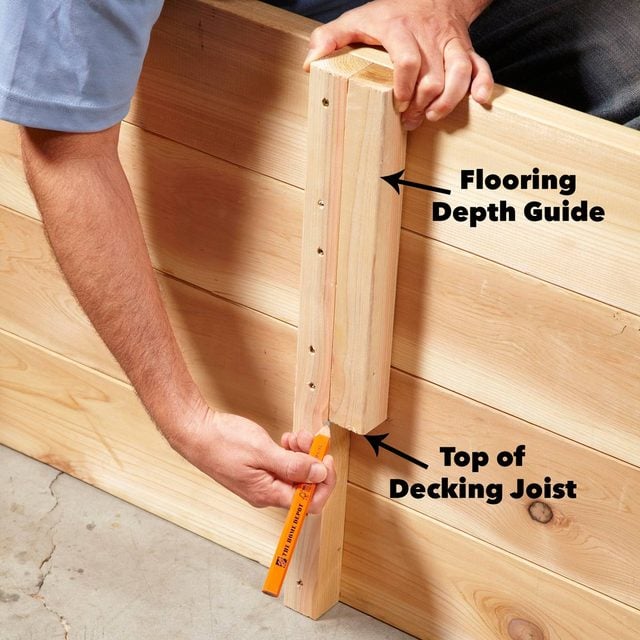
Mark for the Decking Joists
- To determine where to put your planter floor add together your soil depth, the flooring thickness, and the height of the drain pipe and add an inch to that so the soil level will sit an inch below the top of the box.
- Cut a block at that length to make it easy to mark the locations of the horizontal cleats and joists.
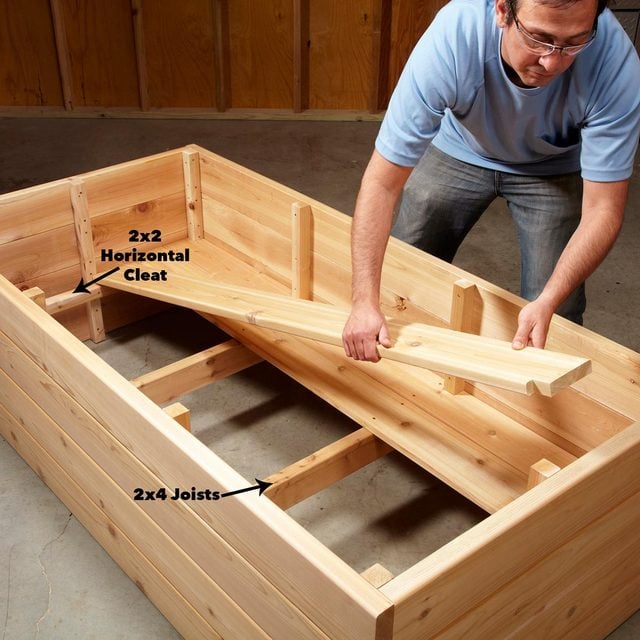
Attach the Joists and Lay the Floor
Screw the horizontal end cleats in place first and then the center joists. Notch your deck boards to fit around the vertical supports. For greater strength, use 2×2 horizontal cleats (33 in. long for our planter) for each end and 2x4s for the center two joists.
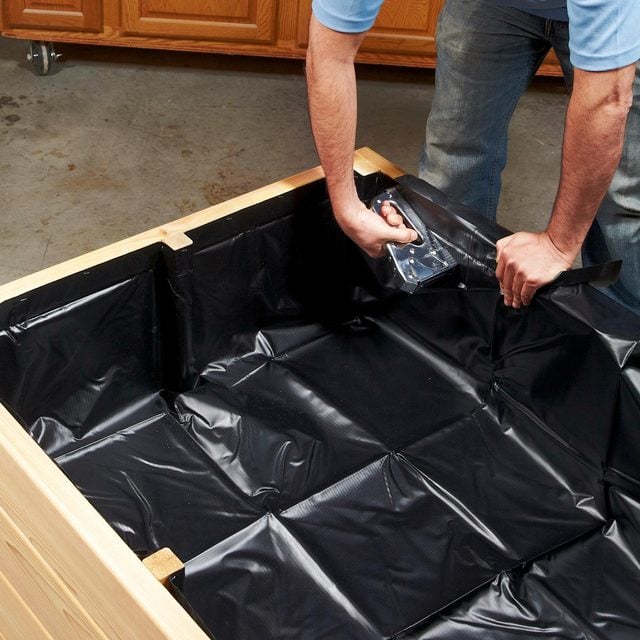
Staple the Rubber Membrane in Place
- Fold the pond liner at the corners and staple it around the perimeter.
- Trim the excess.
- Pro Tip: Don’t miter the top cap—miter joints open with changes in humidity. Butt joints will look neater than miter joints over time.
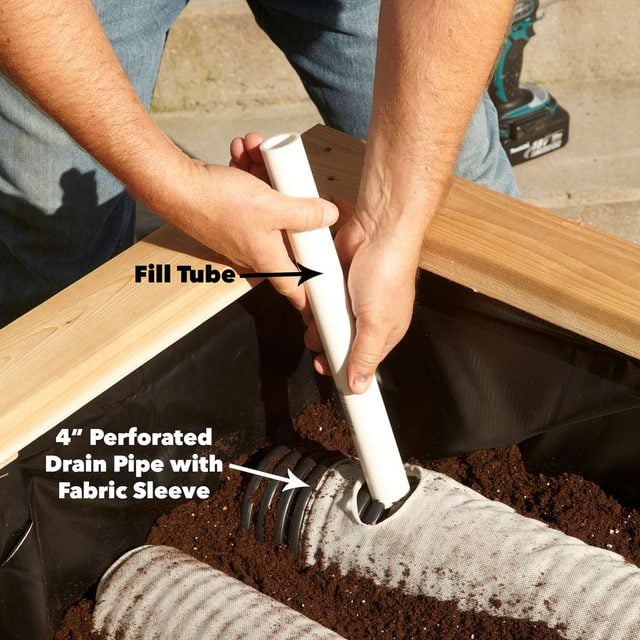
Position the Drain Pipe and the Fill Tube
- Cut the perforated drain pipe into 6-ft. lengths.
- Space the drain pipes evenly along the deck floor, wedging the ends tightly against the short sides of the planter to keep the soil out.
- Wedging the ends of the drain pipe against the planter will prevent potting mix from getting into the pipes.
- Pack potting mix around the pipes to keep them straight.
- Stick a fill tube in the top end of one of the outside drain pipes. The water will flow from there into the other drain pipes through the perforations in the tubes.
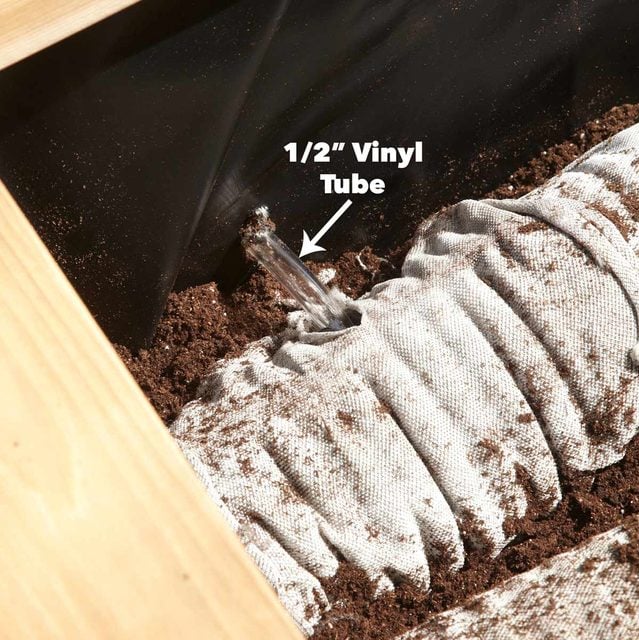
Drill a Drain Hole and Fit the Tubing
- At the end of the planter opposite your fill tube, drill a drainage hole just above the height of the pipe.
- Run vinyl tubing from the drain pipe to the drainage hole.
- Wedge the CPVC fill tube tightly into the top of the drain pipe. It should be long enough to poke out of the top of your soil once your container is planted. You only need one—the water will flow into all the drain pipes.
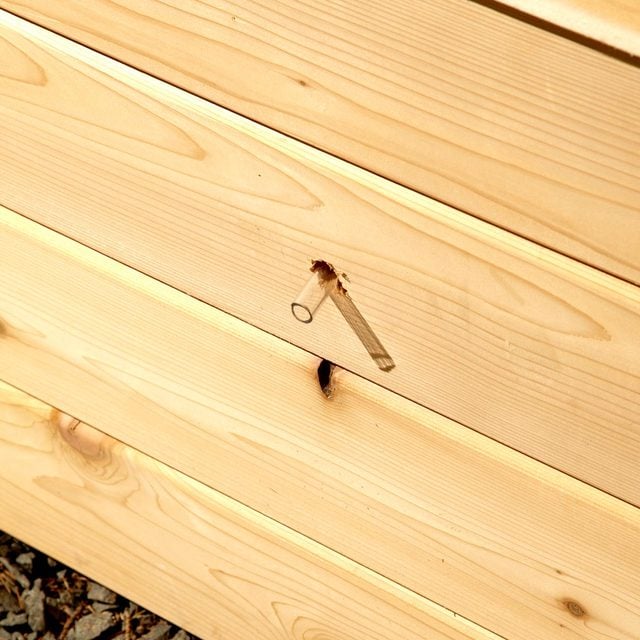
Drain Hole
Extend the vinyl drainage tubing out the side. Once you’re ready to plant, add a soilless mix to just below the top of the planter.
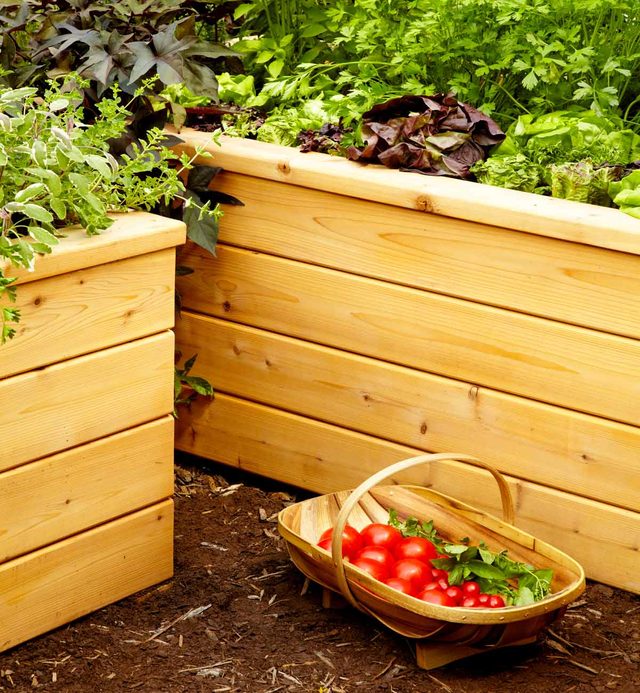
Plants in the Planter
- Once your plants are in, fill the drain pipe reservoirs through the fill tube until water runs out the drainage hole (this can take a while).
- The water will slowly wick out of the perforated pipes into the potting mix packed around it and eventually up into the potting mix and plant roots above.
You’ll have to experiment to see how long your planter will stay moist. Fill the drain pipes whenever the soil feels dry 2 or 3 in. down. When we set ours up, we filled the drain pipes and gave the plants an initial surface watering and then mulched around them. After that, and despite a record hot summer, we refilled the pipes only three times over the summer and we had herbs and greens growing until the first frost!

Video: How to Build a Sub Irrigated Planter System
In this video Elisa Bernick, an editor at Family Handyman, shows you how to build a sub-irrigated planter system that will allow you to grow your favorite foods and keep them watered, even while you are on vacation.