
Mold Remediation: How to Remove Mold
Updated: Feb. 27, 2024
A major mold infestation can ruin your home — and your health! The first step in mold remediation is learning how to remove it.
Multiple Days
Beginner
Varies
Introduction
Almost every home gets mold. We'll show you how to identify and remove it.Tools Required
- Drywall saw
- N-95 respirator
- Paintbrush
- Rubber gloves
- Safety glasses
- Scrub brush
- Shop vacuum
- Utility knife
- Window fan
Materials Required
- 6 mil plastic garbage bags
- Bleach
- Heavy-duty cleaner
- Painter's tape
- Plastic sheeting
- Shellac- or oil-based primer
Mold is a major-league nuisance. It blackens the grout lines in your shower, discolors drywall, shows up as black spots on siding, darkens decks, and grows on and rots damp wood everywhere. Even worse, it can be bad for your health. Mold releases microscopic spores that cause allergic reactions, runny noses and sneezing, as well as irritating and even injurious odors. We’ll cover how to remove mold, how to get rid of black mold, how to kill mold on wood and what kills mold in a few steps.
Watch this video to learn which surfaces you’re better off ripping out and replacing rather than trying to clean:
Project step-by-step (10)
Mold Removal Safety Precautions
If you have to remove mold concentrations or perform any black mold removal covering more than a few square feet, we recommend you take these precautions:
- Wear old clothes and shoes that you can launder or throw away after the cleanup work.
- Wear special N-95 or P-100 respirators, in addition to goggles and gloves.
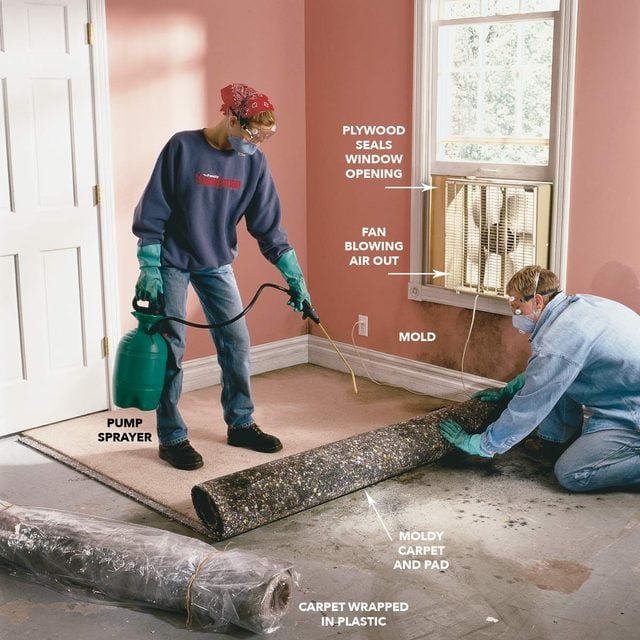
- Set an old box fan or a cheap new one in a window to ventilate the room while working. Throw it out when you’re done cleaning, because the spores are almost impossible to clean off. Tape plywood or cardboard around the window openings so the spores can’t blow back in.
- Wrap and tape moldy carpeting in 6-mm plastic, and double-bag mold-infested debris in garbage bags for disposal.
- To control airborne spores, moisten moldy areas with a garden sprayer while you work.
- Turn off your furnace and air conditioner and cover ducts and doors to contain spores.
- Keep your wet/dry vacuum outside when you vacuum.
Remove Moldy Carpet
- Cut stained or musty carpet and pads into 6×8-ft. sections with a utility knife.
- Using a pump sprayer, mist the surfaces with water to control the spread of spores, and roll up the sections. Double-wrap them in 6-mm plastic and tape them with duct tape for disposal.
- Pro tip: Wear protective clothing and run an exhaust fan in the window.
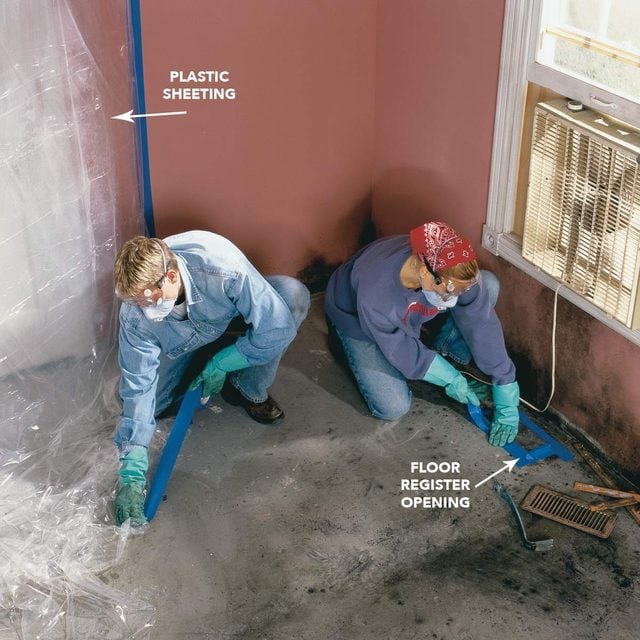
Seal Off the Damaged Area
Seal the room from the rest of the house.
- Cover the doorway with a barrier made of overlapping plastic sheeting and tape it to the wall and floor.
- Cover all air ducts in the room with plastic and tape.
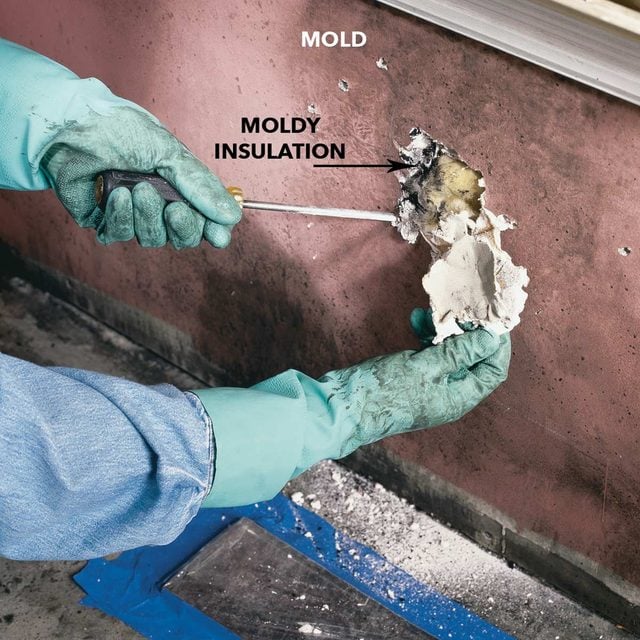
Open Up Moldy Walls
- Pry off baseboards and trim from contaminated areas with a pry bar and block of wood.
- Probe heavily stained or moisture-swollen walls using a screwdriver to discover and open up moisture damage and hidden mold in the insulation and wall framing.
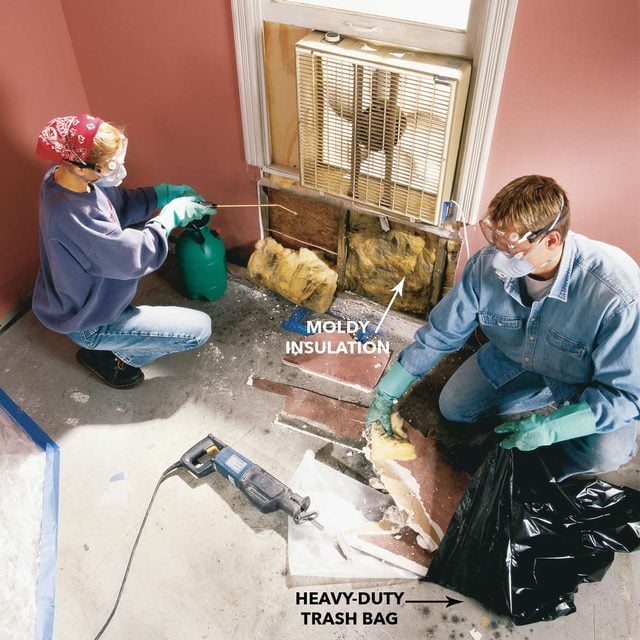
Moisten and Then Bag Moldy Materials
You have to open up the wall to get at the mold growing inside. Since you need to repair the wall anyway, don’t hesitate to cut the drywall back beyond the obvious damage to find all the mold and let the wall dry out.
- To avoid cutting electrical wires, poke a hole through the damaged section and locate the wires first.
- Turn off the power to the outlets before you cut.
- Mist the moldy drywall and insulation with the pump sprayer to avoid spreading mold spores.
- Double-bag moldy material in heavy-duty plastic bags and tie them shut.
If the moisture damage has been neglected or gone unnoticed for long, you’re likely to find rot.
- Where possible, remove and replace soft, spongy studs and wall sheathing.
- Where removal is difficult, treat the affected areas with a wood preservative after cleaning the wood and allowing it to dry. Then double up rotted members with pressure-treated wood.
Cleanup and Repair
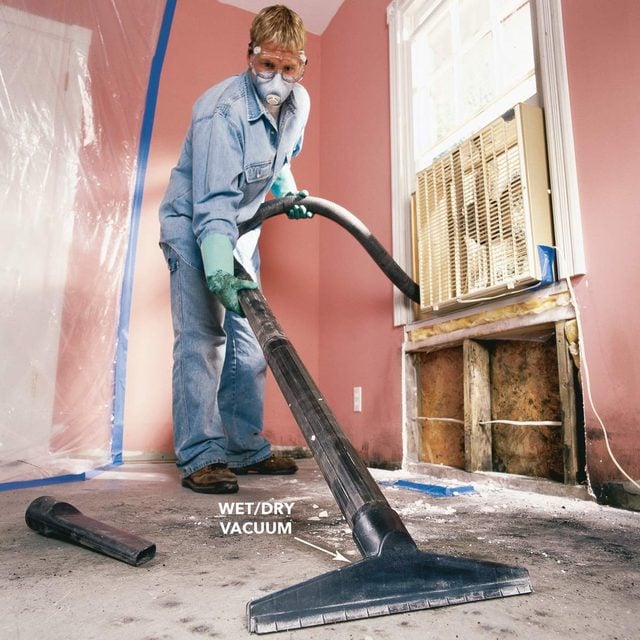
Complete the initial cleanup by vacuuming up the debris.
- Vacuum up moldy debris with a standard wet/dry vacuum.
- Pro tip: Buy an extra length of hose and run it out the window so you can keep the vacuum outside to avoid further spore spread.
- Thoroughly clean the wet/dry vac afterward by disposing of the filter and washing out the tank, hose and attachments with the bleach-and-water solution.
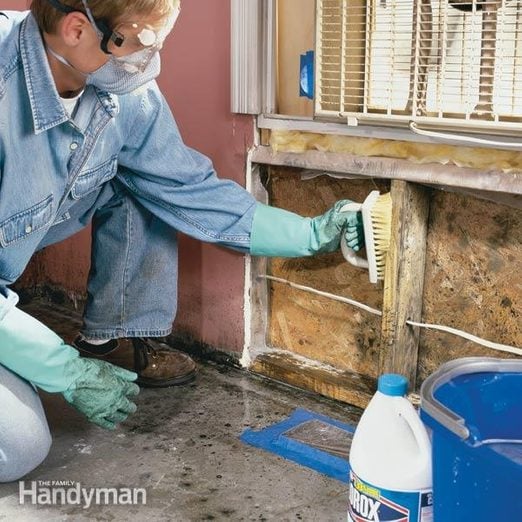
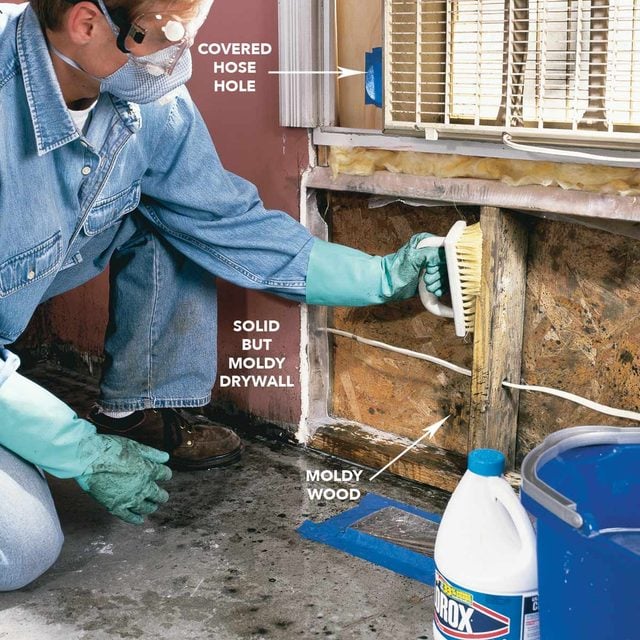
Scrub Moldy Surfaces With Mold Cleaner
- Scrub the surface mold stains from walls and wood trim with a mixture of one quart water and 1/2-cup bleach mold cleaner to kill the mold.
- Use a soft brush and work until signs of the mold disappear.
- After scrubbing the surfaces, allow the bleach solution to continue to penetrate the surfaces and dry.
- Wipe off, but DO NOT RINSE these surfaces.
- Set trim in direct sunlight to dry. Scrub concrete with TSP or automatic dishwasher detergent.
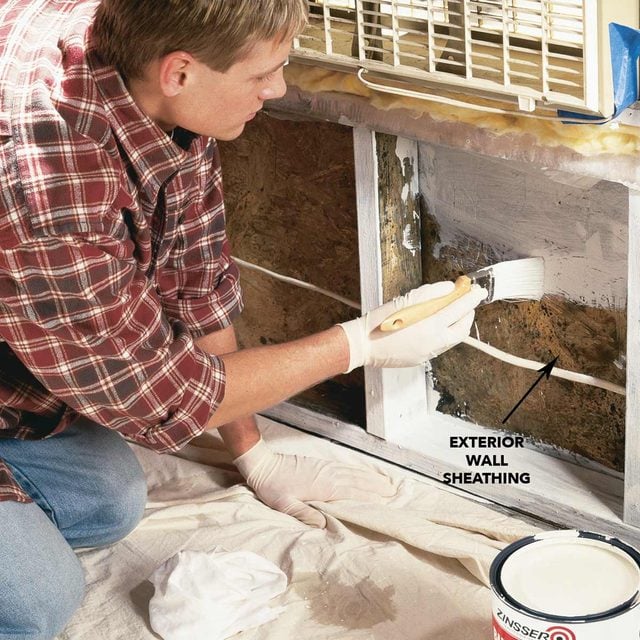
Seal Moldy Areas After They Dry
- Set out dehumidifiers and new fans to dry the now-cleaned areas for at least three days, then check them by sight and smell for mold.
- Pro tip: If you discover more mold, clean again with bleach for mold remediation.
- When you’re sure the mold has been eliminated, seal the wood surfaces with pigmented shellac like BIN or an oil-based primer like KILZ.
- Repaint cleaned wall surfaces with a regular latex paint that contains a mildewcide to help stop future mold growth.
- Install new insulation and drywall and nail the trim back on. Keep in mind that if the moisture returns, mold will return.
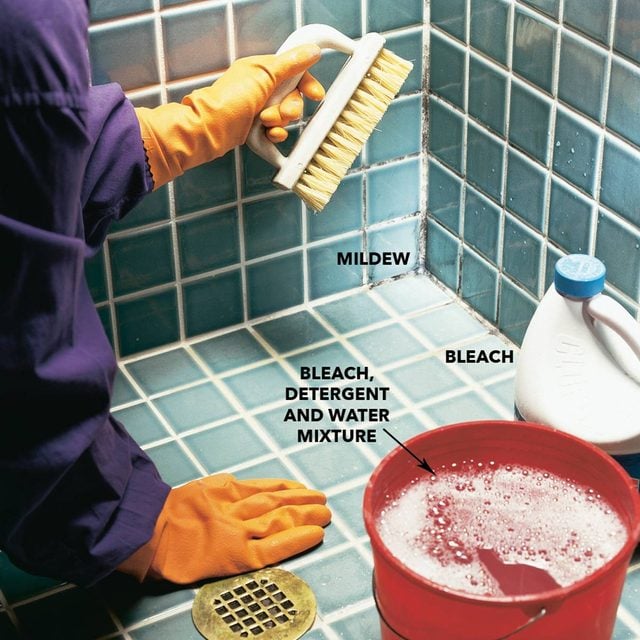
Techniques for Cleaning Surface Mold
Surface molds grow in just about any damp location, such as the grout lines of a ceramic tiled shower. They’re easy to scrub away with a mold cleaner mixture of 1/2 cup bleach, one quart of water and a little detergent. In mold remediation, the bleach in the cleaning mixture kills the mold. The detergent helps lift it off the surface so you can rinse it away and it won’t return as fast.
- Even for simple cleaning, protect yourself from contact with mold and the bleach solution by wearing a long-sleeve shirt and long pants as well as plastic or rubber gloves and goggles.
- If the mold doesn’t disappear after light scrubbing, reapply the cleaning mix and let it sit for a minute or two. Then lightly scrub again for mold remediation.
- Seal the clean surfaces when they’re thoroughly dry to slow future moisture penetration. Apply a grout sealer (available at tile shops and home centers) to tile joints to help your how to remove mold project
Note: Do not mix ammonia or any detergent containing ammonia with bleach. The combination forms a poisonous gas.
Tips for Mold Prevention
After you learn how to remove mold, focus on preventing it in the future. Controlling dampness is the key to stopping most mold. The worst infestations usually occur in damp crawl spaces, attics, walls where water leaked in from the outside, and in basements with poor foundation drainage. Stopping leaks, ensuring good ventilation in attics, keeping crawl spaces dry and routing water away from the foundation are the best defenses against mold. Find out if the mold in your basement can affect the upstairs living areas of your home.
Mildewcide in paint is usually effective for controlling surface mold in damp rooms like bathrooms, and outside in shady areas. Many paints already have mildewcide in them. Check with your paint dealer about mold removal products.