
How To Build a Workbench for Small Spaces
Updated: Jan. 03, 2024
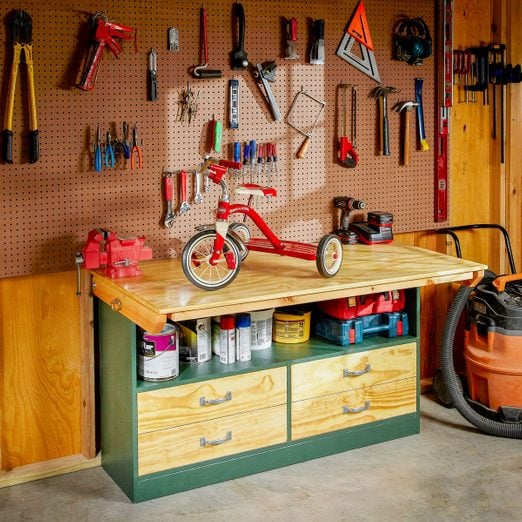
This simple garage workbench folds out to make a spacious benchtop and folds back down to make more room for your car.
A full day
Beginner
$101–250
Introduction
Our compact garage workbench has an expanding top that folds out for extra work space and tucks away when not in use. It also has easy-to-assemble drawers and a shelf for convenient storage. And you can build this simple workbench in one day.Tools Required
- Circular saw
- Drill bit set
- Drill/driver - cordless
- Framing square
- Jigsaw
- Paintbrush
- Speed square
- Straightedge
- Tape measure
Materials Required
- 120-grit sandpaper
- Wood filler
- Wood glue
Some garages are smaller than others, but that doesn’t mean you have to compromise on turning into your workshop and still keep the space organized. You just need a right-sized workbench.
This compact, foldable workbench makes the most of a small space—in this case, we worked with just a few feet between the garage wall and the space normally occupied by parked cars. When folded, the top works fine for smaller jobs, while unfolding it allows space to work on larger projects.
Workbenches are a great project for aspiring DIYers at the beginner or intermediate skill levels. They’re simple to build and easily customizable. You just need a solid basic plan and a few tools.
For this one, you’ll need a circular saw, drill and jigsaw, and you should be able to knock this out in a day, not including time for painting and varnishing.
Project step-by-step (12)
Make Your Cuts
- Cut the 3/4-in. plywood parts to size following the Cutting List and Cutting Diagrams.
- Cut a 15-in. x 8-ft. strip out of the 1/4-in. plywood to use as drawer bottoms.
- Use the leftover for the back (E) by ripping it to the correct length.
- Note: Don’t cut the drawer fronts until after the workbench carcass is assembled.
- Cut the 2x4s that make up the top and bottom frames (F and G).
Build the Top and Bottom
- Lay the top upside down and attach the sides with six 1-5/8-in. screws.
- Flip the whole thing over and attach the bottom.
- Note: Try to position all the wood so the best sides are facing the outside and top.
- Pro tip: Countersink the screws on the top so you can fill them with wood filler.

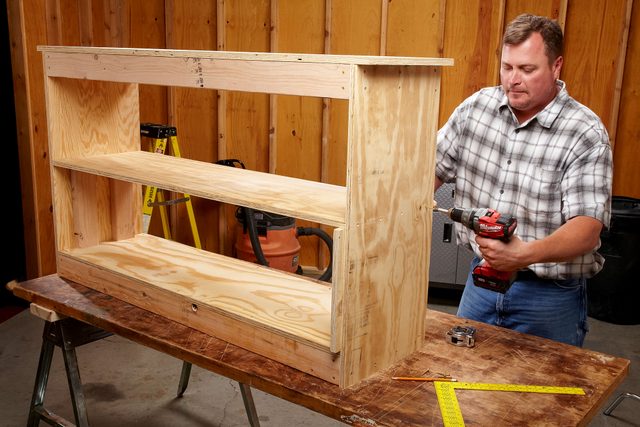
Attach the Sides
- Lay the top upside down and attach the sides (B) with six 1-5/8- in. screws.
- Flip the sides and top upside down and set it on the flattest surface available, then attach the bottom with 1-5/8-in. screws as well.
Fasten the Shelf and Drawer Divider
- Cut a couple of scrap 2x4s to the same height as your drawer divider (D).
- Use the divider on one side and the 2×4 scraps on the other as guides to achieve the proper height for your shelf (C).
- Predrill 1/8-in. holes through the plywood into the shelf before installing the four 1-5/8-in. screws.
- Use a framing square to mark the location of the drawer divider.
- Predrill holes through the plywood and into the divider before securing it in place with four 1-5/8-in. screws on both the top and bottom.
Install the Drawer Guides
- Install the bottom drawer guides first.
- Cut a scrap of plywood to act as a spacer for the upper guides.
- Fasten the guides with glue and trim-head screws.

Build the Drawers
- Build the drawer boxes so there is at least a 1/8-in. gap on each side of the drawer.
- Use 1-5/8-in. screws to assemble the frames and 1-1/4-in. screws to attach the bottom.
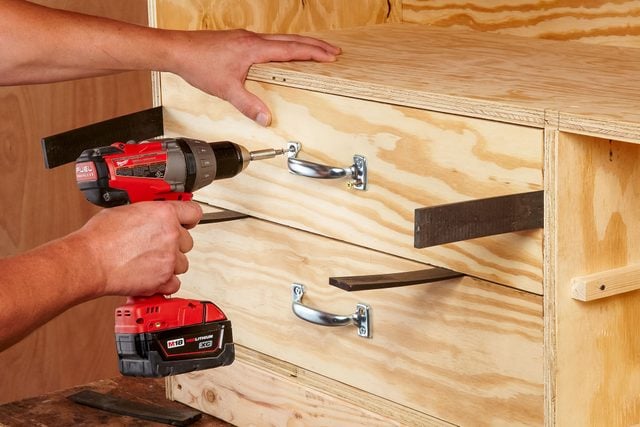
Position Drawer Fronts Perfectly
- With the drawer box in place, position the front with shims.
- Fasten the pulls with 1-1/4-in. screws.
- Note: Those screws will hold the front in place so you can pull the drawer out and add more screws from inside.
Attach the Back
- Use a framing square to make sure everything is all squared up before you fasten the back (E).
- Pro tip: If you don’t have a framing square, you can measure diagonally from top to bottom both ways. If the numbers aren’t the same, tweak it one way or the other until they are.
- Predrill the holes, then fasten the back with 1-1/4-in. trim screws.
- Note: Don’t glue the back on—you’ll want to be able to remove it when it’s time to paint and stain.
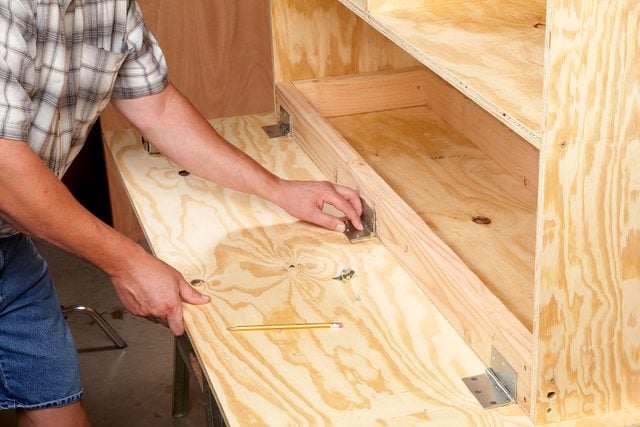
Install the Folding Top
- Flip the bench upside down and push the folding top tightly up to it.
- Mark the hinge screw locations with a pencil, and use a nail set to create a starter hole.
- Use 3/4-in. screws to connect the hinge to the bench top so they don’t poke all the way through.
- Note: The screws that come with the hinges will likely poke through.
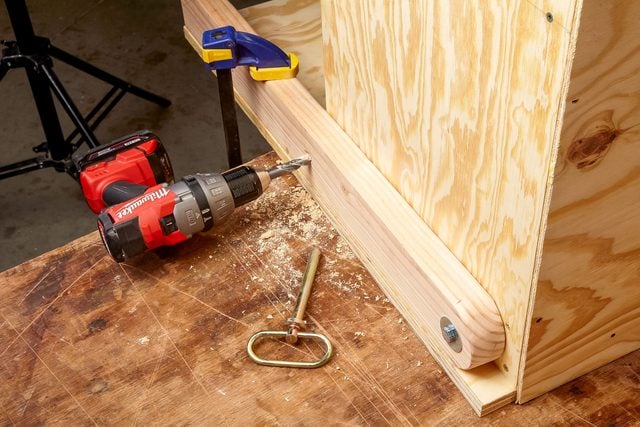
Cut and Assemble the Support Arms
- Cut the support arms (H) to length
- Use a compass to mark a half-circle on one end of the arms, and then trim them with a jigsaw.
- Cut a 45-degree angle on the other side.
- With the bench still upside down and the support arm clamped down about 1 in. in from the back of the bench, predrill a 1/4-in. hole for the lag/pivot screw.
- Pro tip: Start the hole at the center of the circle you made at the end of the arm. Drill through the arm and into the bench. Make sure you avoid the 3-in. screws that hold the top frame together.
- Install the lag screws with a washer on both sides of each arm.
- Note: Check to see that they swing back and forth freely. You may have to trim a little off if they rub on the bench top.
Fasten the Brace Board and Screen Molding
- Glue, clamp and screw on the benchtop brace board (J).
- Pro tip: The brace board should be at least 1/4 in. shorter than the opening of the area above the shelf. If you countersink 3/8-in. holes in the bottom of the brace, 1-5/8-in. screws will work from the bottom up. Screen molding (Q) helps protect the exposed plywood edges of the bench tops. Install the molding with the folding top up. Leave a small gap between the two tops so the molding doesn’t bind when the top is folded down.
- Use glue and brad nails, or a trim gun if you have one.
Apply a Finish
- To finish the workbench body, we used a primer formulated for raw wood and enamel paint for durability. Be sure to paint the bottom to prevent moisture from wicking up into the raw wood.
- Finish the tops and drawer fronts satin polyurethane.
- We also used poly on areas the drawers come in contact with (painted parts tend to stick together).
- If the drawers start to bind, try a coating of shellac on the drawers and drawer guides.