How To Build a Ladder Shelf
Updated: Jan. 03, 2024
This stylish but sturdy leaning ladder shelf unit will neatly hold your stuff—and you can build it in a day
A full day
Intermediate
$51–100
Introduction
We'll show you everything you need to know to build this handsome leaning ladder shelf in a day. The shelves are tough enough to hold books, while its whimsical look makes it a perfect addition to almost any room. It's a great woodworking project to give as a gift or use in your own home.Tools Required
- Air compressor
- Air hose
- Brad nail gun
- Cordless drill
- Drill bit set
- Extension cord
- Hammer
- Hearing protection
- Level
- Miter saw
- Pipe clamps work best for this project.
- Safety glasses
- Sawhorses
- Speed square
- Tape measure
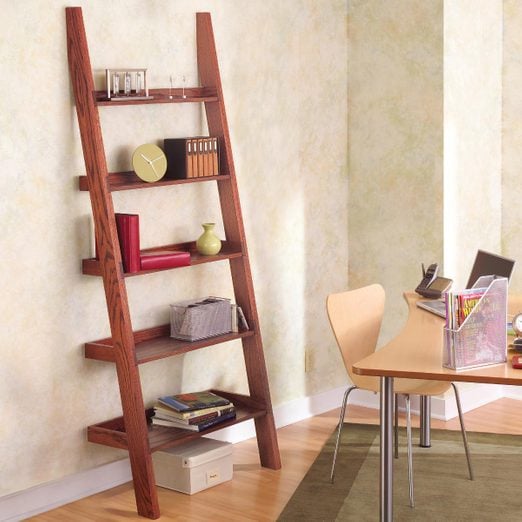
This leaning ladder shelf unit may look lightweight and easy to topple. But don’t be fooled. It’s a real workhorse. The 33-1/2 in. x 82-3/4 in. tower features five unique, tray-like shelves of different depths to hold a wide variety of items up to 13-1/4 in. tall. Despite its 10-degree lean, the unit is surprisingly sturdy and its open design won’t overpower a room.
Whether you make this piece more functional, as in this office setting, or place it in the family room to showcase treasures, the basic construction is the same. You select the type of wood and stain or paint to dress it up or down to fit the look of any room.
We built our unit with red oak and oak veneer plywood and finished it with two coats of red oak stain. The beauty of this project is that any wood species will work. If you plan to paint it, select alder or aspen for the solid parts and birch for the plywood.
One note when buying boards: Use a tape measure to check the “standard” dimensions of 1x3s and 1x4s. They sometimes vary in width and thickness. Also check the two full-length 1x4s you plan to use as the uprights to be sure they’re straight, without warps or twists. Always examine the ends, edges and surface for blemishes or rough areas that won’t easily sand out.
All the materials can be purchased in home centers or lumber yards. The only special tools you’ll need are a power miter box for crisp angle cuts and an air-powered brad nailer for quick assembly and almost invisible joints. And you’ll have to rustle up an old clothes iron to apply oak edge-banding material. Once you’ve gathered all the material, you can build the ladder shelf unit in one afternoon.
Additional information
Project step-by-step (9)
Use a jig and circular saw to cut the shelves
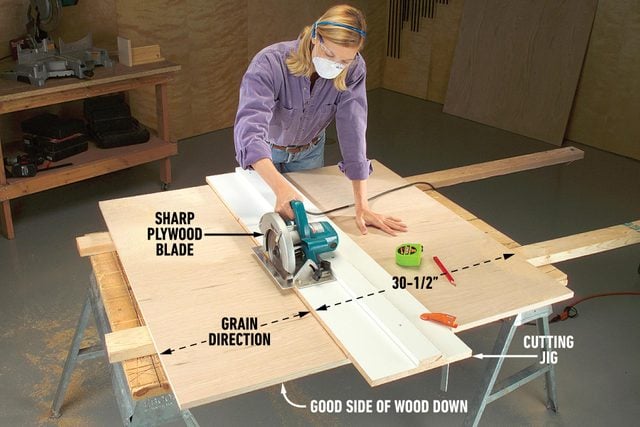
- Cut 3/4-in. shelf plywood to width first, using a circular saw and a homemade jig.
- Pro tip: Use a sharp plywood blade and cut with the best side of the wood facing down to minimize splintering.
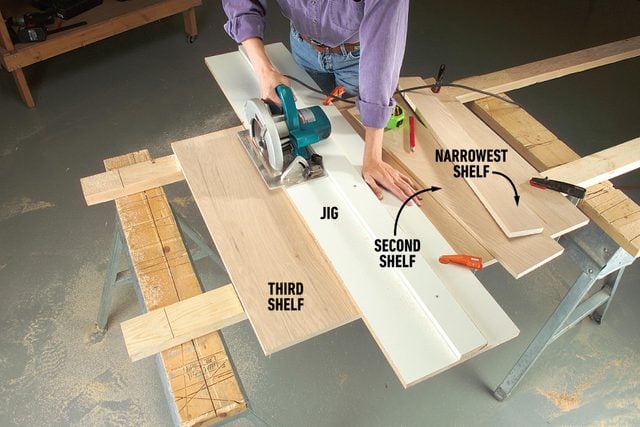
Cut the narrowest shelf first
- Beginning with the narrowest one, cut the individual shelves using the jig for perfectly straight cuts.
Cut the angles in the uprights
- Cut both shelf uprights to length with a miter saw.
- Clamp the uprights to sawhorses.
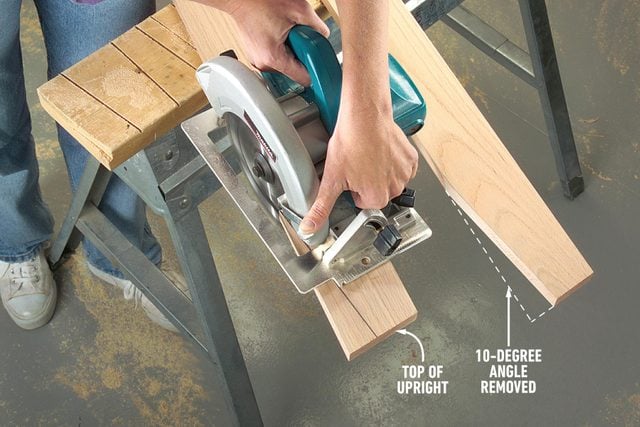
- Mark the 10-degree angle at the top (dimensions in Figure B), then cut with a circular saw.
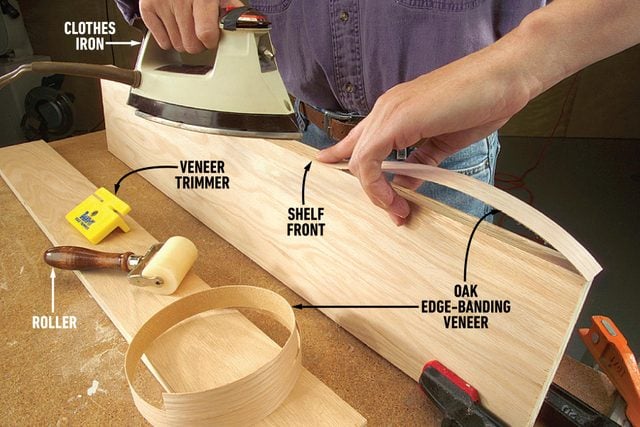
Iron on the veneer edging
- Iron the edge-banding veneer to the front edge of all five shelves.
- Roll the entire surface to ensure a solid bond, and trim the edges.
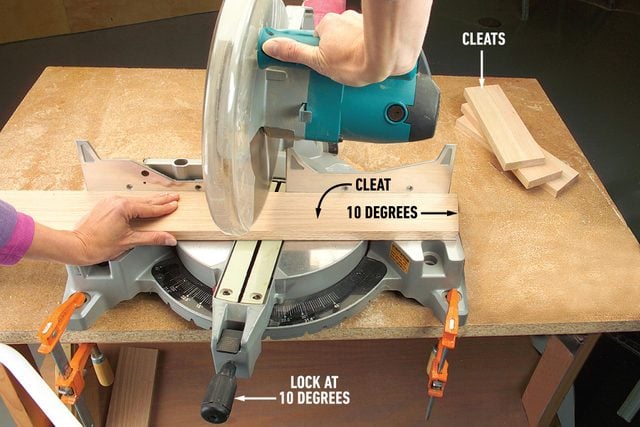
Cut the angled pieces at 10 degrees
- To maintain accuracy, lock the miter box at 10 degrees, then cut all angled pieces—uprights, cleats and one end of shelf sides—without changing the table.
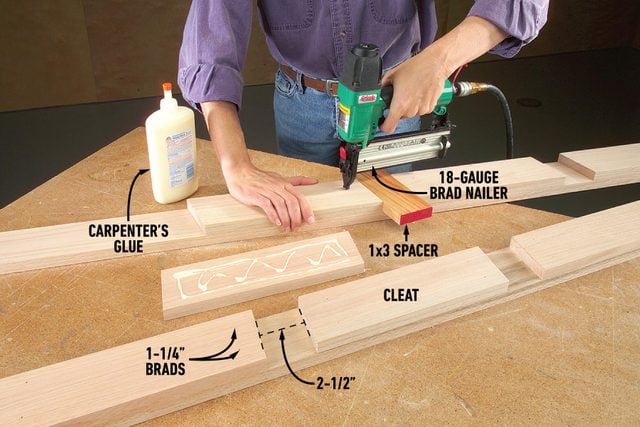
Attach the cleats to the uprights
- Glue and nail the shelf cleats to the uprights using a 1×3 spacer.
- Note: Hold each cleat tight to the spacer.
Attach the shelf backs and sides
- Glue and nail the shelf backs, then attach the sides to the plywood shelves.
- Position the sides to overlap the shelf base as shown.
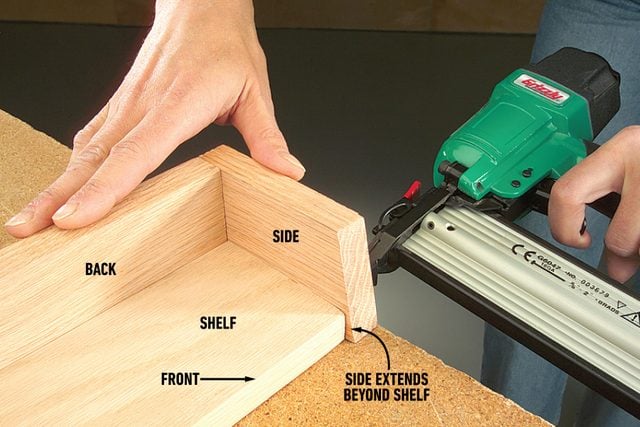
Nail the shelves in place
- Clamp the shelves into one upright.
- Spread glue in the shelf notches of the other upright, position it flush with the front of the shelves and nail.
- Flip the unit over and attach the other upright.
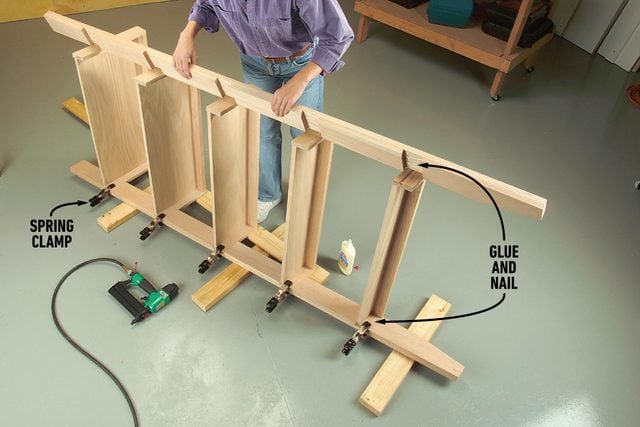
Clamp the unit until the glue dries
- Stick foam pads to the bottom of the uprights to keep the ladder shelf from moving on a slippery floor.
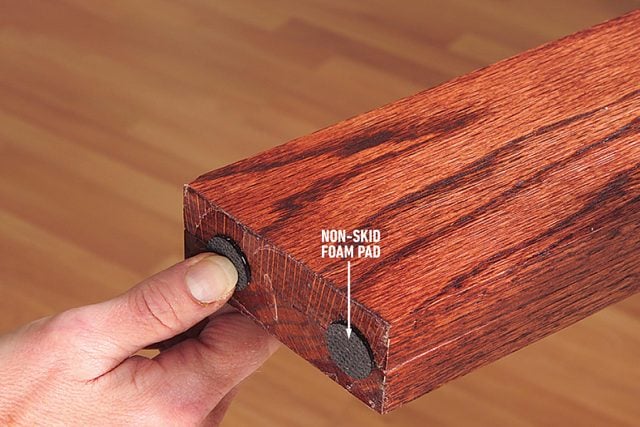
- Set the shelf unit against a straight wall.
- Check for squareness.
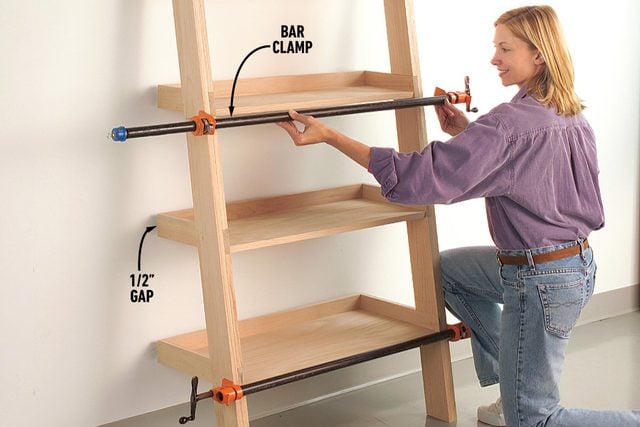
- Apply three bar clamps until the glue dries.
