
How to Build a Beehive
Updated: Jun. 13, 2023
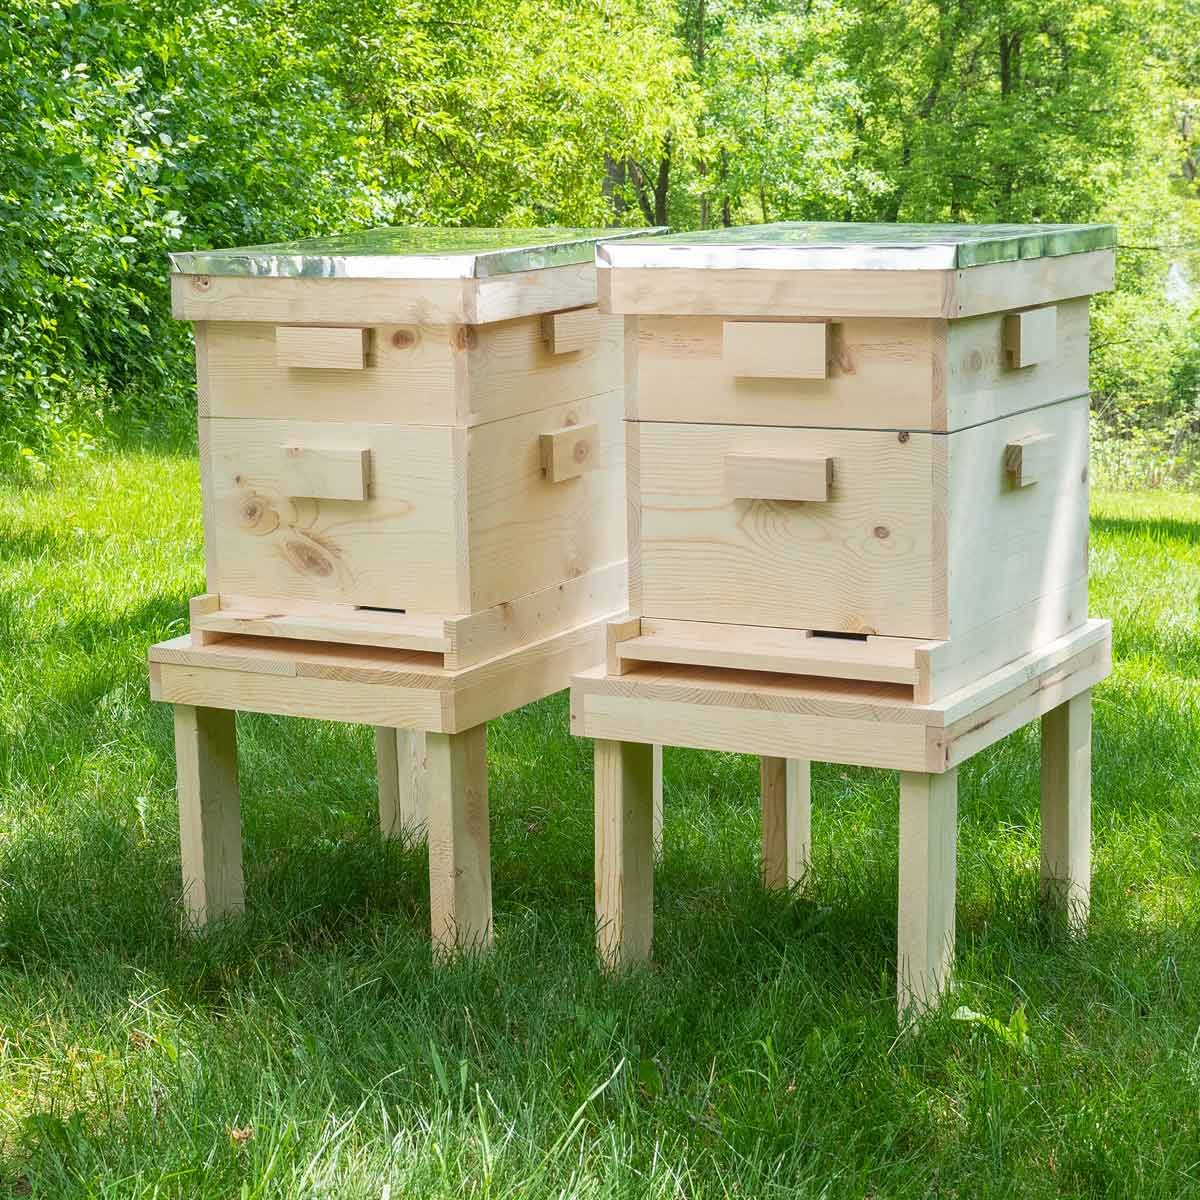
Start your beekeeping hobby by building this Langstroth beehive. It is much easier than you think.
Beginner
$101–250
Introduction
Beekeeping is the maintenance of bee colonies for the purpose of collecting their honey, beeswax, flower pollination and more. Modern beekeeping attempts to revert to a less industrialized way of obtaining honey by utilizing smaller colonies, usually between 10,000 and 30,000 bees and the whole operation is based around the hive. Below we will teach you how to build a Langstroth hive which is common to North American and Australian beekeeping. This particular type of hive is customizable to the size of your colony which means you don’t need to build and plan out everything at the beginning of the journey. You can keep building and adding depending on how many bees you want. Below we will describe the parts of the Langstroth beehive and the functions of each.Tools Required
- dado stack
- Drill
- Hand saw
- Miter saw
- Table saw
- Tin snips
Materials Required
- 1-1/2” trim-head screws
- 1-1/4” trim-head screws
- 1/4” plywood
- 1x10 board
- 1x2 board
- 1x3 board
- 2" trim-head screws
We talked with Gary S. Reuter, an apiculture technician in the University of Minnesota’s Department of Entomology, and he flooded us with great information about beekeeping and hives. He strongly recommends that beginner beekeepers take a few classes or read up on beginning beekeeping. Gary, along with some of his colleagues at the University of Minnesota, has written a comprehensive guide to beekeeping in northern climates.
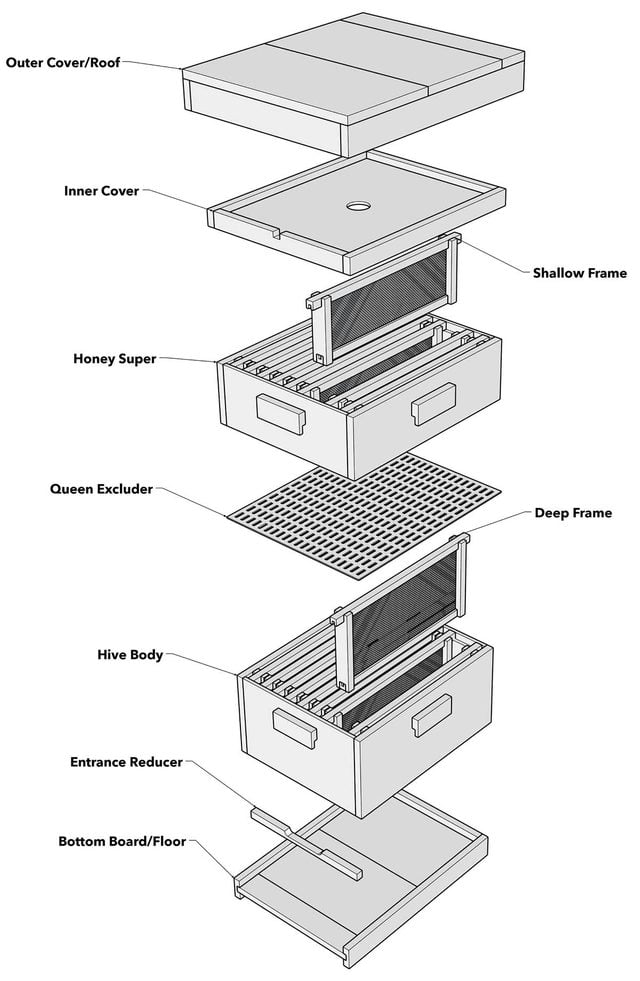
Parts of the Beehive (From Bottom – Up)
Bottom Board/Floor: This is the base of the beehive. As you continue to build up, you’ll realize that you don’t want the bees to get out of the top of the hive. This is their only exit.
Entrance Reducer: An entrance reducer is a cleat used to adjust the size of the hive’s entrance and controls ventilation and temperature during cooler months. You won’t fasten this small piece to the rest of the assembly but rather use it as an optional accessory. They are used more frequently during the winter months when other animals, such as mice, will try to enter the hive for warmth. During the summer, especially at the height of nectar flow, you can remove it to maximize honey production.
Hive Bodies/Deep Super: Hive Bodies are the boxes where the bees live. The hive bodies contain the comb frames. The height is standardized at 9-1/4 in. which makes building one out of dimensional lumber very easy. You can have two deep hive bodies (one for the brood or family, one for the food) and then continue with the honey supers (see below) above. In cold weather locations, a bee colony can survive with only one deep hive body. We added foil tape to the rabbets on these boxes. Gary told us that the foil tape isn’t necessary, adding “I like a piece of metal in the rabbet. It doesn’t necessarily make the frames come out easier, but it makes it easier to scrape the wax and propolis (a resin-like material) from the rabbet when the frames are out. The metal protects the wood from getting scraped away.”
Queen Excluder: This part is only used during honey season. The queen bee isn’t involved with the actual production of honey, so you place the queen excluder between the brood and honey production. There are slits to let colony bees through but not the queen. Excluders come in plastic or metal.
For the plastic one we used, click here.
Honey Super: This is where the surplus honey is collected. This is your honey, the stuff you can harvest from the bees. You need to leave the honey in the deep hive bodies for the bees to survive. Supers are identical in design to the deep hive bodies but are slightly shallower. The typical sizes are 5-3/4 in. tall or 6-5/8 in. tall, known as an Illinois super. You’ll only need one honey super during your first season of beekeeping but can add two or three for the upcoming seasons.
Frames: Bees build their honeycomb into the frames. You can easily inspect and work on the frames because they’re removable. You will often see frame ends have a taper in them. We decided to not use a taper but if you want to, cut 1/8-in. from each edge of the part [what part?] with a jigsaw. As Gary Reuter told us, “The wider part at the top is to make them space correctly by just pushing them together. The narrow part allows the bees to walk through.” Each frame needs a single sheet of beeswax foundation. Foundations come in three sizes, corresponding to the different depths of hive bodies and supers. Beeswax foundations are delicate and tough to work with at first, so be patient. By the third frame, you’ll be a master. Many beekeepers now use plastic foundations.
Click here to find the beeswax foundations that we used.
Buy plastic foundations from Amazon here.
Inner Cover: The inner cover is a tray with a hole and small notch used for ventilation. Screened inner covers have gained popularity because they provide great ventilation with no fuss.
Outer Cover/Roof: Just like the roof on your house, the outer cover protects the bees from the elements. You can extend the life of your hive by attaching a weatherproof material like aluminum flashing to the top of the roof.
Cutting List
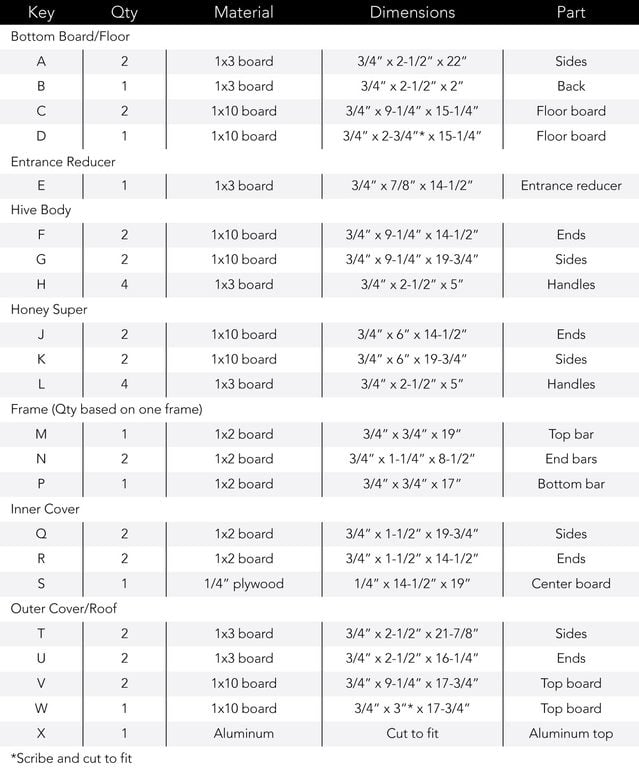
Beehive Project Plans
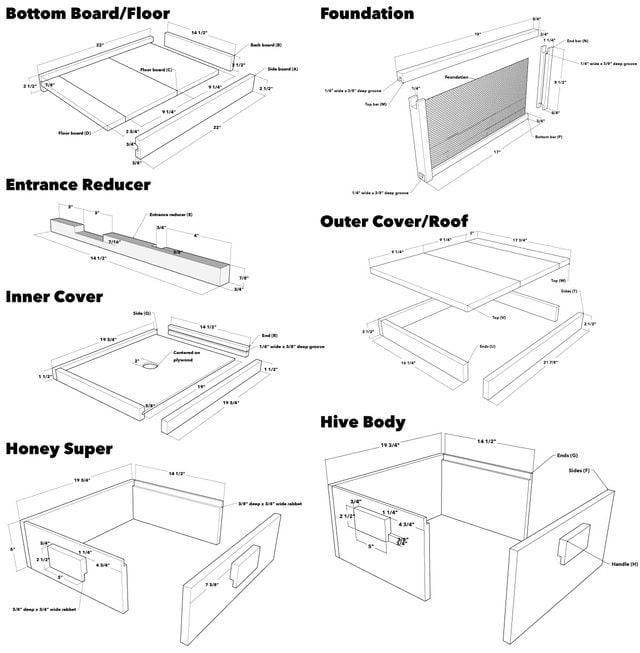
Click here for a printable PDF of all the different beehive parts.
Project step-by-step (7)
Bottom Board/Floor
Cut parts A-D to length on the miter saw. Center a 3/4 in. wide x 3/8 in. deep dado on the sides (A). Fasten the sides to the end (B) with glue and 2 in. trim-head screws.
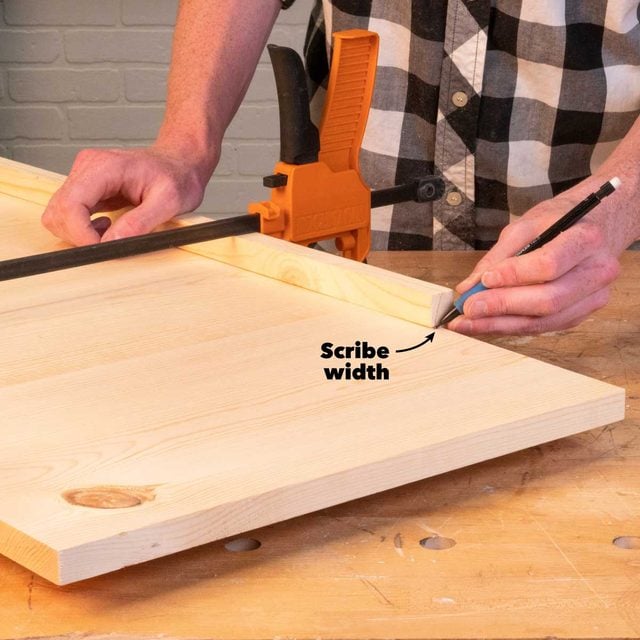
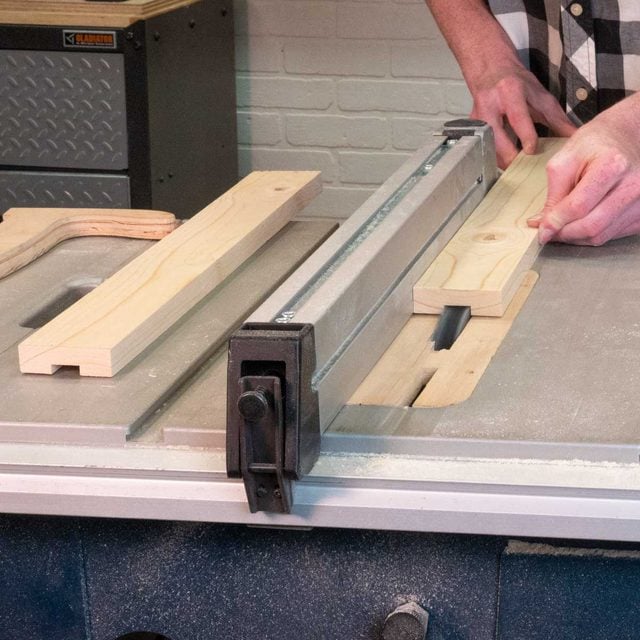
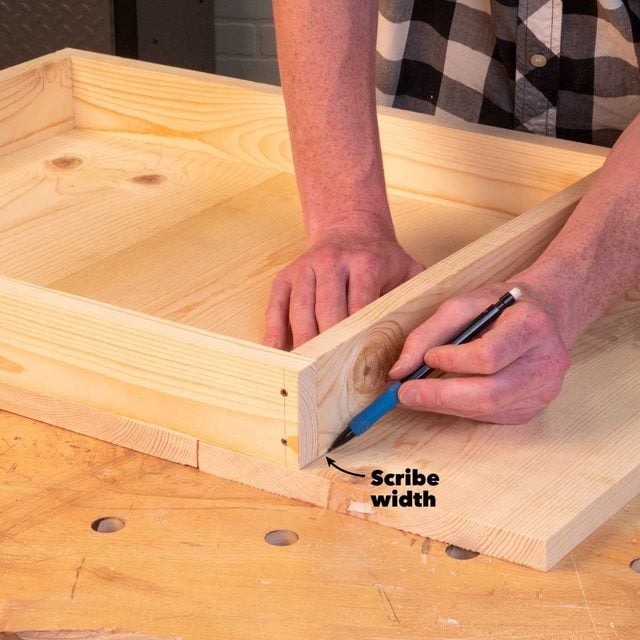
Slide two 1×10 floor boards (C) into place and clamp the sides together to hold the floor boards in place. Place the final floor board (D) in the assembly and scribe its width. Rip the board to the scribed width on the table saw.
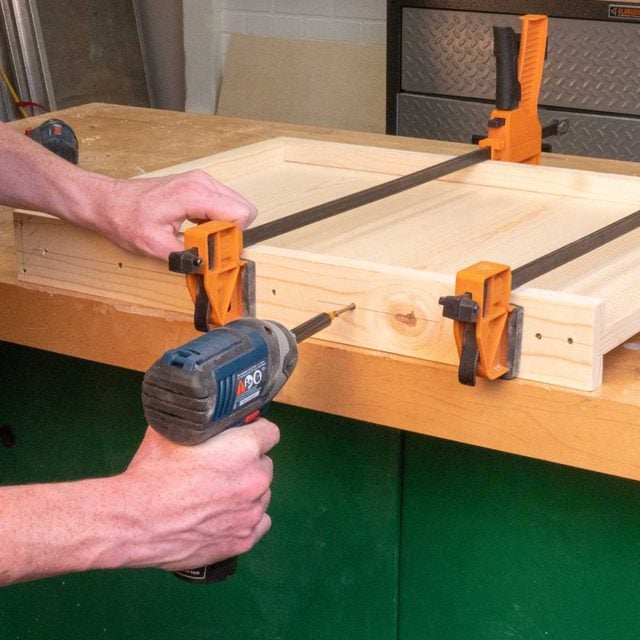
Glue and screw the floor boards into place. Fill the screw holes with wood filler and sand to 100-grit.
Entrance Reducer
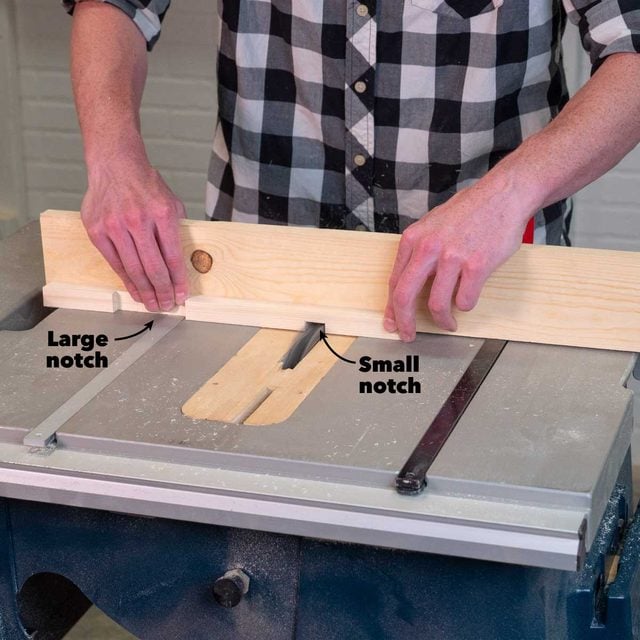
Crosscut a 1×3 to 14-1/2 in. and then rip it to 7/8 in. on the table saw. Mount a fence to your table saw’s miter gauge. Set the dado stack to cut 3/4 in. wide x 3/8 in. deep notch. Cut a 3-in. wide notch into the entrance reducer, 3 in. from one end. Rotate the entrance reducer 90-degrees and make one pass 4 in. from the other end. Sand the entrance reducer with 100-grit sandpaper.
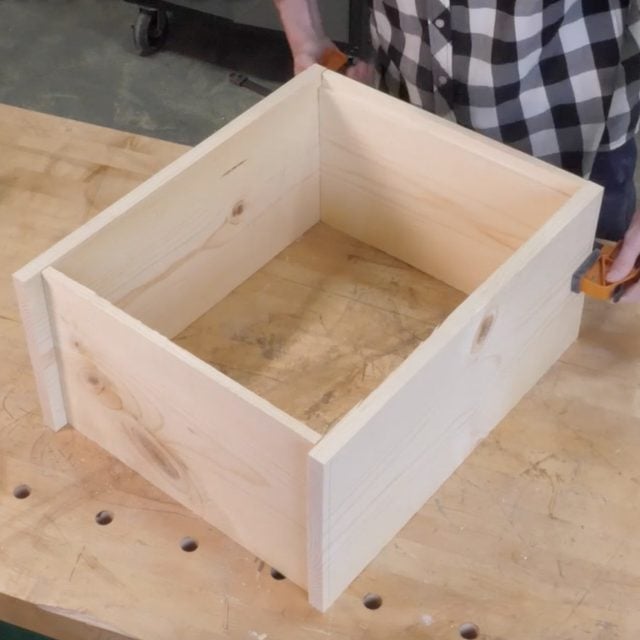
Hive Bodies
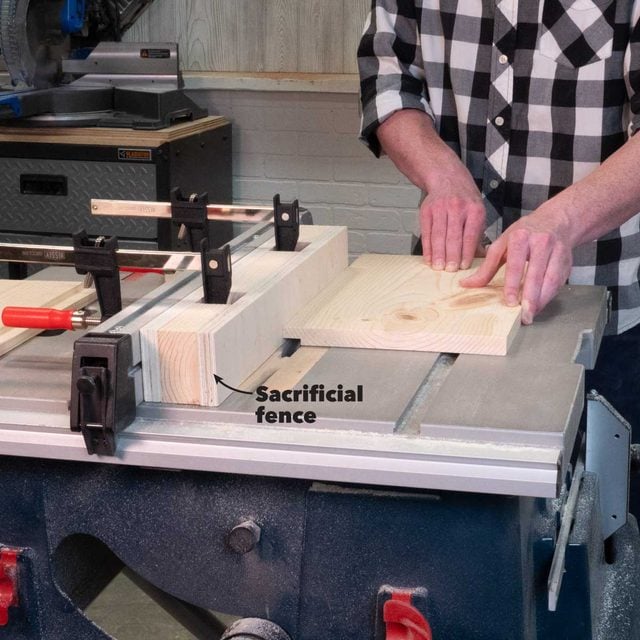
Crosscut the parts to length. Cut a 3/8 in. deep x 3/4 in. wide rabbet into one edge of the hive body ends (G) using a sacrificial fence clamped to the table saw’s fence. Fasten the hive body sides (F) to the hive body ends using glue and 2 in. trim-head screws. Press foil tape into the rabbets in the hive body ends.
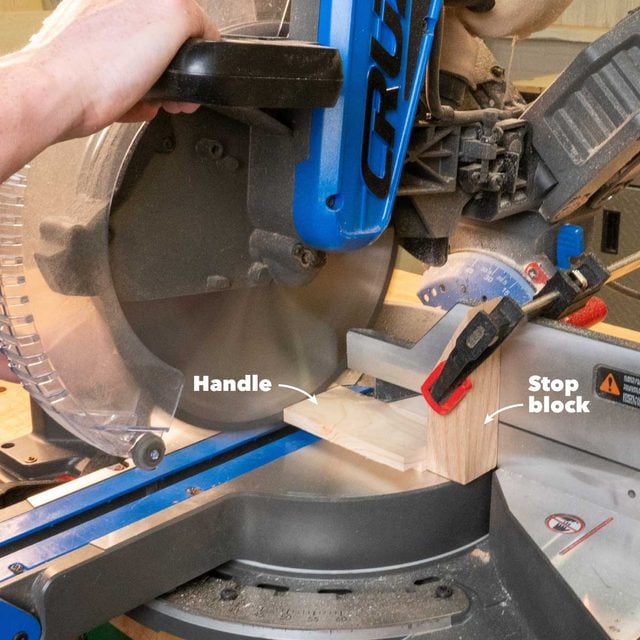
Cut a 3/8 in. deep x 3/4 in. wide rabbet into a 22 in. long 1×3 on the table saw. Crosscut the four 5 in. long handles (H) out of the 1×3.
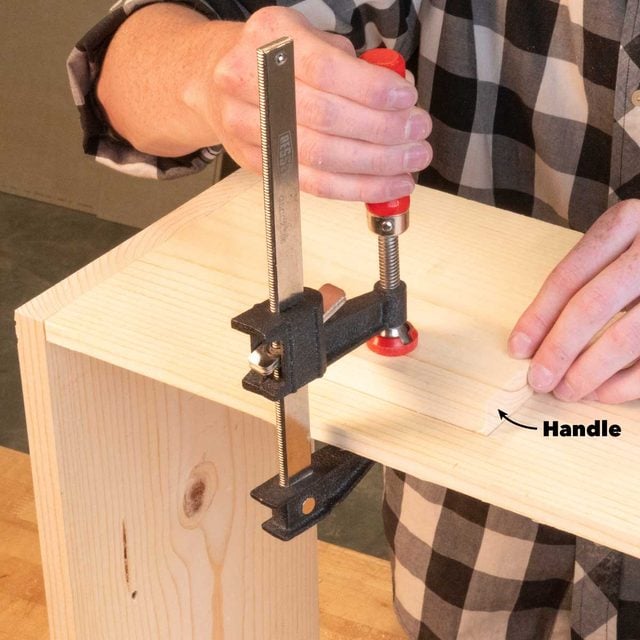
Center the handles on each face of the hive body, 1-1/4-in. down from the rabbeted edge. Fasten in place with glue and 1-1/4 in. screws. Fill the screw holes with wood filler and sand to 100-grit.
Honey Super
The honey supers are built the same way as the hive bodies except that the sides and ends (J and K, respectively) are 6 in. wide.
Frames
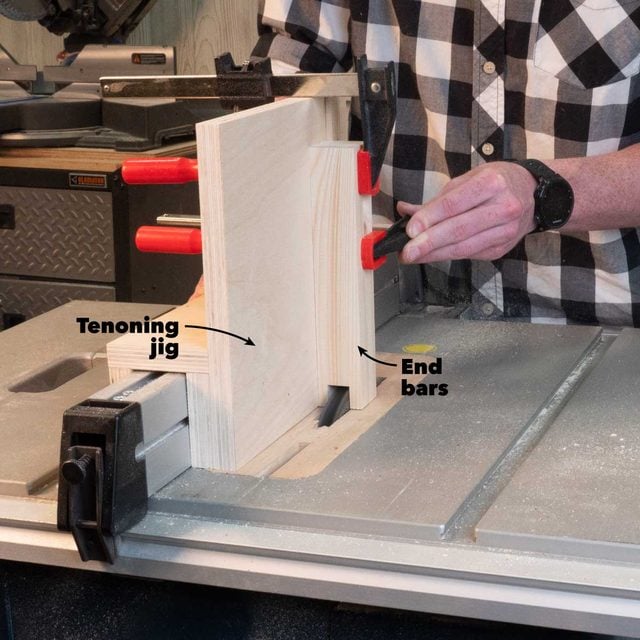
Rip a 1×2 into two 3/4 in. wide pieces on the table saw and crosscut them to 19 in. with the miter saw. Rip and crosscut a 1×2 to 1-1/4” wide x 8-1/2 in. long. Clamp the 8-1/2 in. long parts to a tenoning jig on the table saw. Cut a 3/4 in. x 3/4 in. notch into the center of each end of the boards.
A tenoning jig is a great add-on to any workshop.
Follow this video to make a tenoning jig to fit your table saw.

Cut a 1/4 in. wide x 3/8 in. groove into the center of all the parts to create the top bar, bottom bar, and end bars (M, N, P).
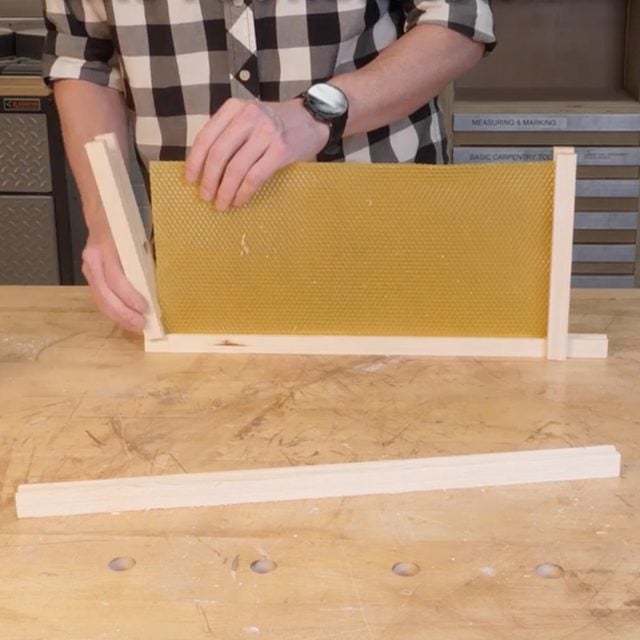
Place the beeswax foundation into the groove of the bottom bar. Glue the end bars to the bottom bar. Glue the top bar to the end bars. There should be 1 in. on either side of the end bars. Drill pilot holes through the end bars and into the top/bottom bars. Fasten with 1-1/4 in. trim head screws. Cut the excess off the bottom bar with a hand saw. Fill the screw holes with wood filler and sand to 100-grit.
Inner Cover

Crosscut the 1×2’s to length. Cut a 1/4 in. wide x 3/8 in. dado into the center of the 14-1/2 in. ends (R).
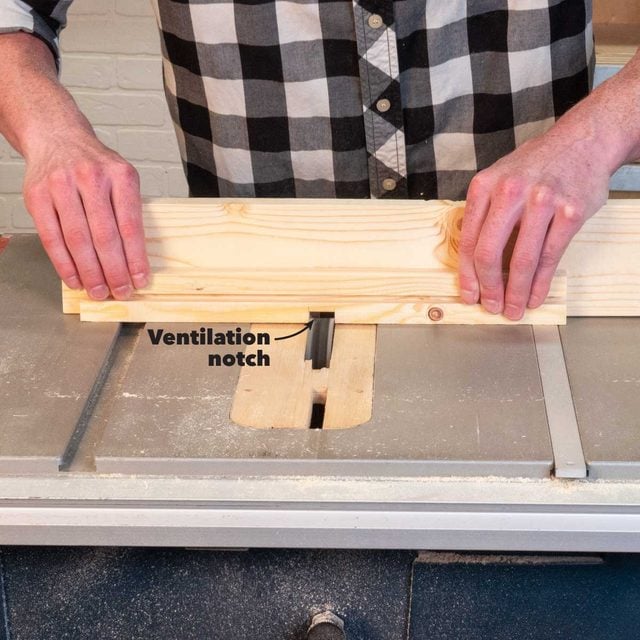
Cut a 3/4 in. wide x 3/8 in. deep notch into the center of one of the 14-1/2 in. parts using the table saw and miter gauge. Rip and crosscut the 1/4 in. plywood to size for the Center board (S) on the table saw.

Clamp a sacrificial board beneath the 1/4 in. plywood center board. Drill a hole into the center of the plywood with a 2 in. Forstner bit to create the cover (S).
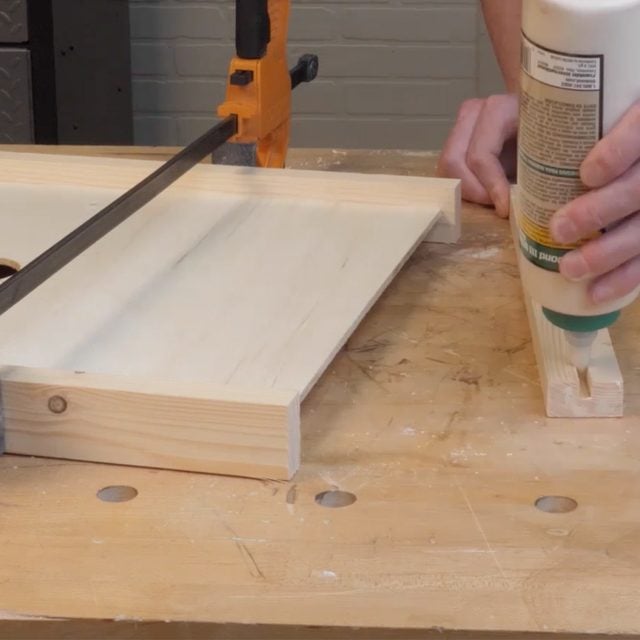
Fasten the sides to one end with glue and 2 in. screws. Spread glue into the dadoes and slide the cover into the assembly. Fasten the second end with glue and 2 in. screws. Fill the screw holes with wood filler and sand to 100-grit.
Outer Cover/Roof
Crosscut the 1×3’s to length on the miter saw. Fasten the sides to the ends with glue and 2 in. screws to create the box. Add the top parts (V, W) to the top edge of the box with glue and 1-1/2 in. screws. Fill the screw holes with wood filler and sand to 100-grit.
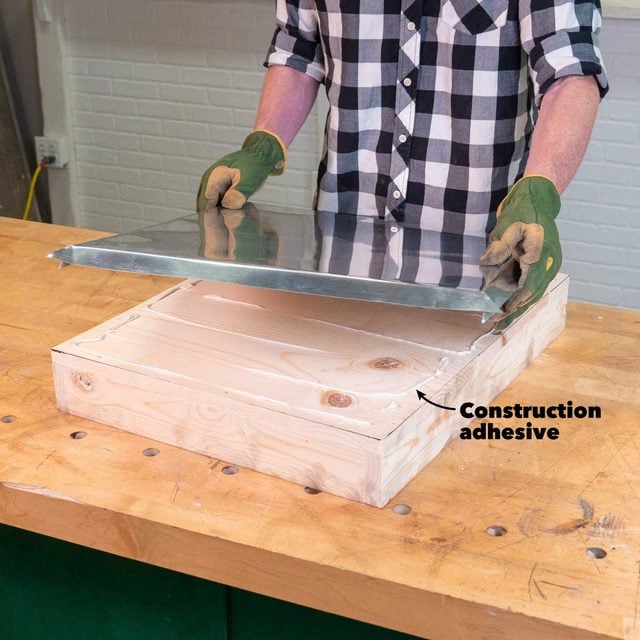
Cut the aluminum flashing with tin snips to 2 in. wider and longer than the box. Place the wood assembly in the center of the aluminum and outline the assembly with a permanent marker. Cut a relief angle in the aluminum from the corner of the flashing to the corner of the marked outline. Remove the assembly and apply construction adhesive onto the top. Lay the aluminum in place and smooth the aluminum with your hands for good adhesion.
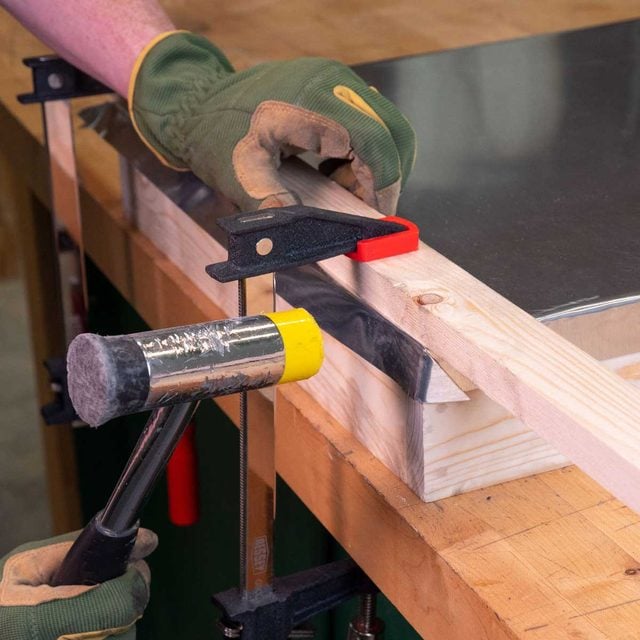
Clamp a scrap board to the corner edge of the outer cover, on top of the aluminum. Hammer the edges of the aluminum with a non-marring mallet to make a crisp corner.