


Get your boat motor ready for winter storage.
A few hours
Beginner
$20-50
Introduction
Winterizing any piece of power equipment is an important step in ensuring it is ready for the next season. Your 2-stroke outboard boat motor is not exception. It's very easy and only takes about 20 minutes to get it ready for the off season.
Tools Required
- Flat-head screwdriver
- Gloves
- Grease gun
- Hand pump
- Oil pan
Materials Required
- Fogging oil
- Marine fuel stabilizer
- Marine grade grease
- O-rings
Project step-by-step (8)
Step 1
Treat the Fuel Mix
Use a marine-grade gas stabilizer to keep the mix from going bad over the winter. 1 oz. of stabilizer treats 10 gallons.
- I dumped in roughly half an ounce for my 3-gallon tank and sloshed it around a bit to mix it up.
Note: A little more stabilizer than what is called for won’t hurt anything.
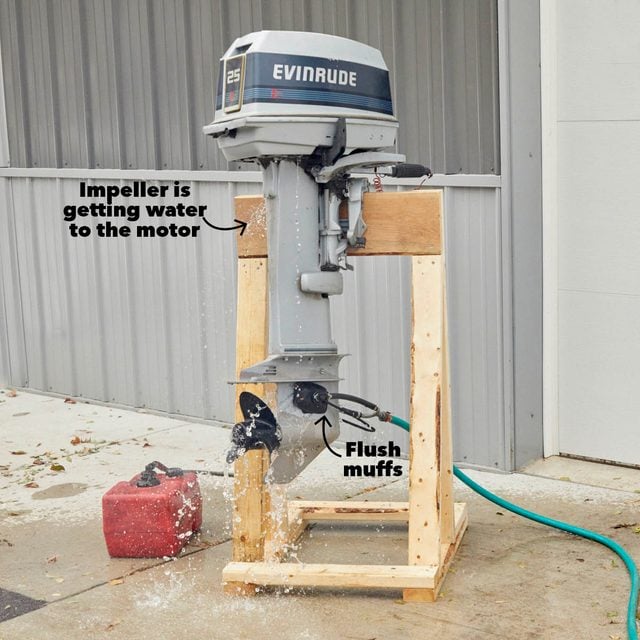
Connect Earmuffs and Warm up the Engine
- Attach a pair of ear muffs or flush muffs to the water intake ports on the lower end of the unit and connect it to a hose.
- Turn the water on and start the engine.
- Let the engine warm up for about five minutes to treat the entire engine with a stabilized gas mix.
Note: This is also a good time to check how the impeller is working. If you see the motor spitting out water the impeller is doing its job, if there is no water, you’ll need to replace it.
Step 2
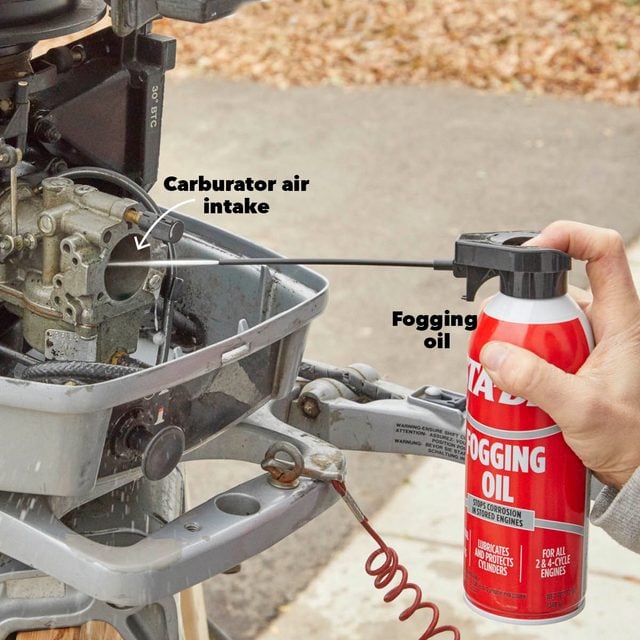
Fog the Engine
- Remove the engine cover and find the carburetor’s air intake port.
- With the engine running, spray a small amount of fogging oil into the intake.
- The engine will want to die, but keep it running by opening the throttle.
- Continue to fog the engine until it dies.
Pro Tip: If white smoke comes out of the exhaust you’re doing it right.
Step 3
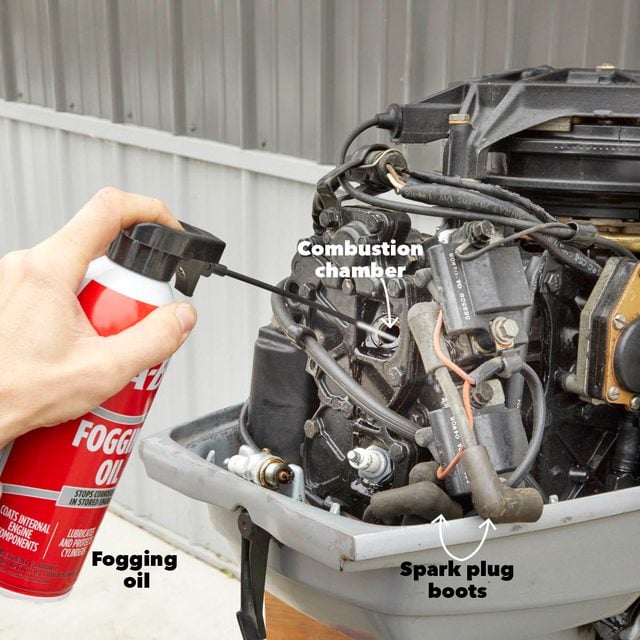
Fog the Combustion Chamber
- Pull the boots off the spark plugs and unscrew them.
- Spray some fogging oil inside the chamber and replace the spark plugs if their contacts look corroded, otherwise using the old ones is fine.
- Then with the spark plugs in place and their boots still off, pull the starting cord a few times to coat the piston and the cylinder with the fogging oil.
Step 4
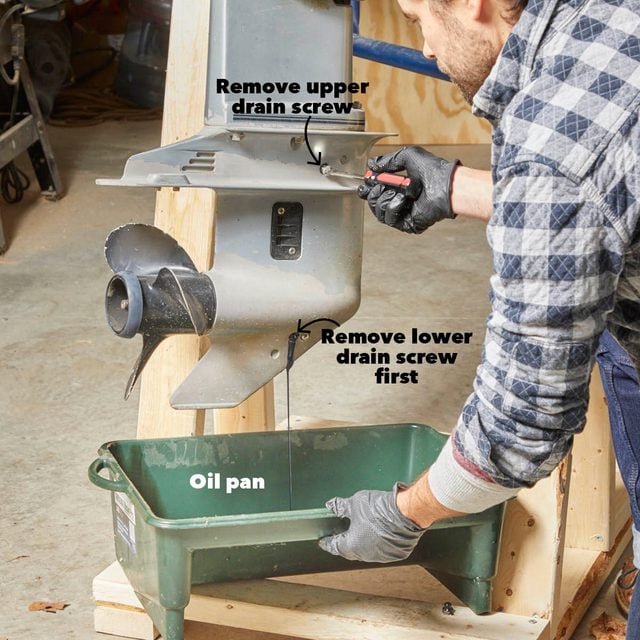
Drain the Lower End Gear Oil
- Place an oil pan under the motor then remove the lower drain cap screw followed the upper drain cap screw and let the engine oil flow out freely.
Step 5
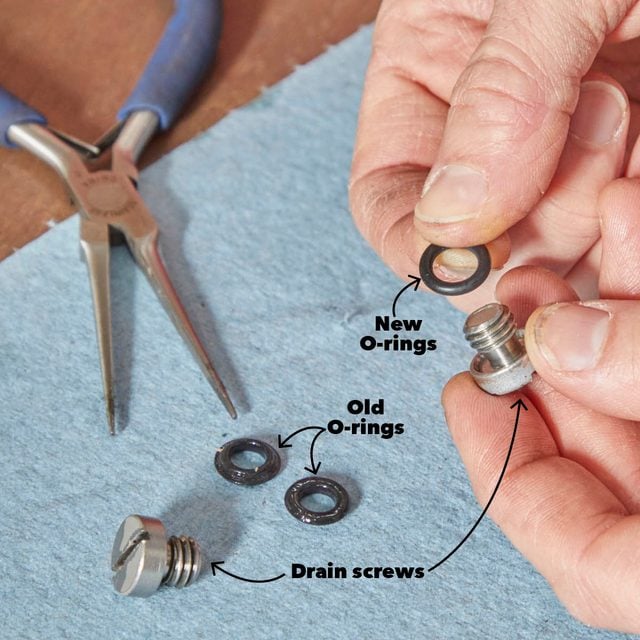
Replace Drain Screw O-Rings
- Pull the old O-rings from the drain screws and place new ones around the screw. This will ensure a good seal.
Step 6
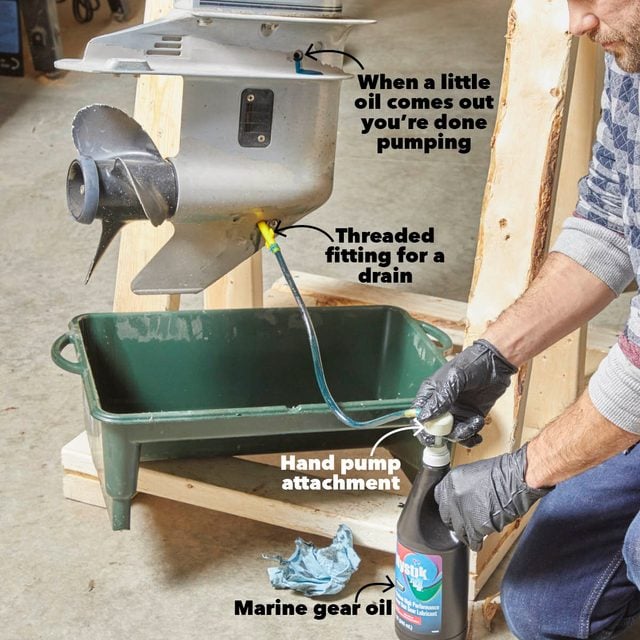
Pump in New Gear Oil
- Attach a pump handle to a quart of marine grade gear oil.
- The other end of the pump will thread into the lower drain port.
- Pump the new oil into the lower end until you see oil coming out of the upper drain port.
Step 7
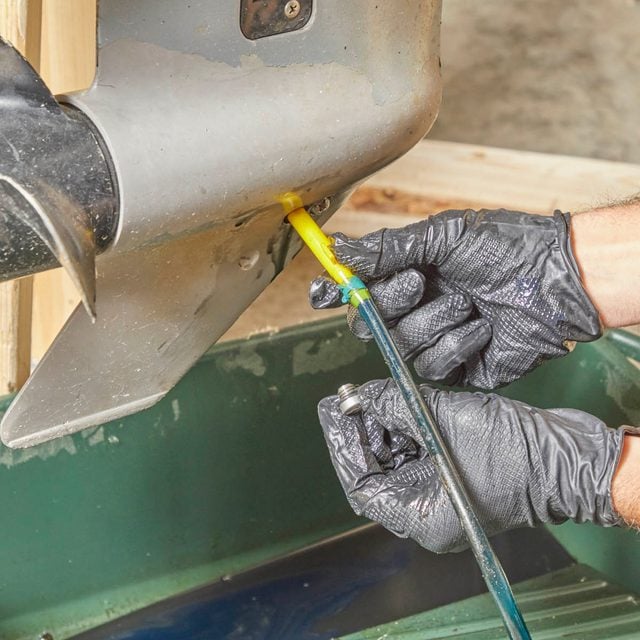
Reinstall the Drain Screws
- First, screw in the upper drain screw, this will prevent the new oil from flowing out as quickly.
- Then remove the pump from the lower drain port and quickly screw in the lower drain screw. Losing a little oil is okay.
Step 8
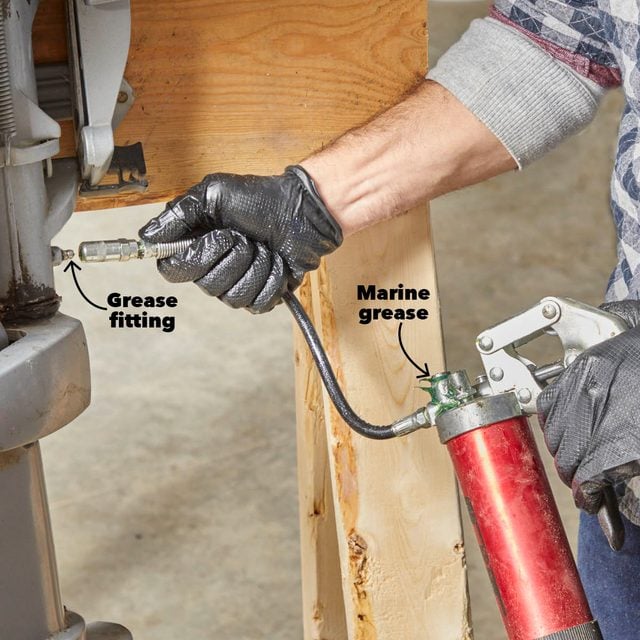
Grease the Fittings and Tuck it Away
- Grease all the fittings on the motor.
- This one had a grease nipple near the mounting bracket for the steering components and another inside the engine cover for the cover latch.
- Use marine-grade grease so it doesn’t break down in the water.
- Once it’s greased put it in a safe location until it’s ready to be used next season.
Originally Published: November 30, 2020