


Looking for that rustic farmhouse look of whitewashed wood? Try any of these simple techniques and turn drab into fab for your next project!
A few hours
Beginner
$10 - $40
Introduction
Love the look of whitewashed wood? There's more than one way to do it. Read on to learn three simple techniques for getting farmhouse-style whitewashed wood.
The vintage look is always a popular choice for design and decor, especially with older furniture or other wood accents around your home. That’s why whitewashing wood is such a great DIY project. It’s an easy way to give your stuff a distressed, well-traveled appearance, using a time-honored technique that doesn’t require a lot of expertise.
What is whitewashing wood?
Whitewash is a thinned white paint applied to wood that gives it a soft, semi-transparent white finish. It lets the grain show through, adding to the weathered, antique look.
It’s become an especially popular technique for the farmhouse style, but it’s certainly not limited to that.
And it’s really easy to do. The three methods for whitewashing wood listed below don’t require much in the way of tools and equipment, and your biggest expense is likely to be a can of white paint. Each technique works best for a different set of circumstances or a unique effect, so read on to find the best method for your project.
Watch How to Whitewash Wood: 3 Simple Techniques
Project step-by-step (4)
Step 1
How to whitewash wood with paint and water
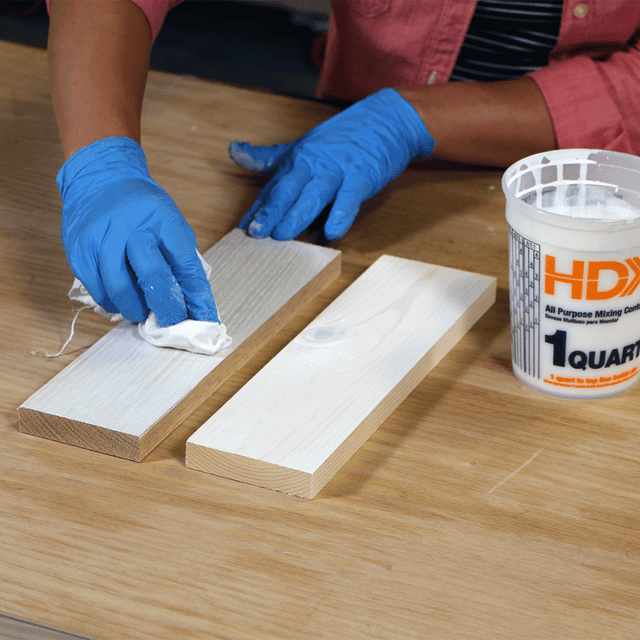
Using equal parts paint and water, the paint becomes semi-transparent and allows the wood grain to show through. This technique is best used on new lumber or smooth surfaces and creates an even and controlled modern finish.
What you’ll need:
- White paint;
- Water;
- Mixing cup;
- Rag.
Mix paint and water to desired consistency (for this example, I used equal parts).
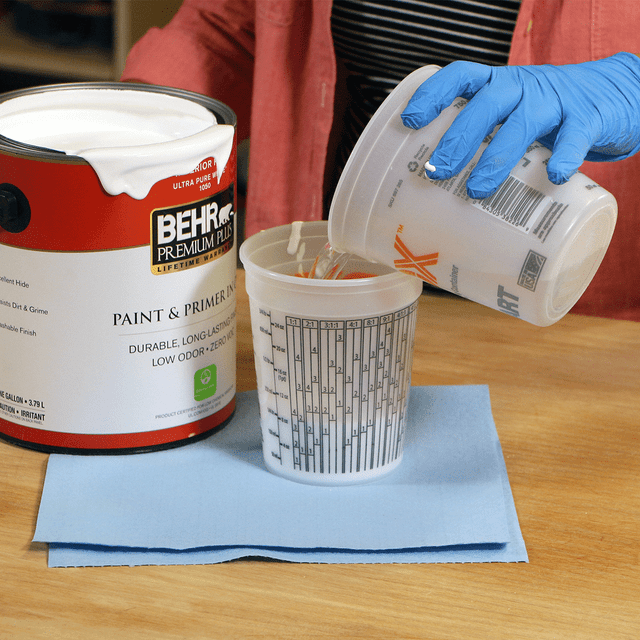
Dip the rag in the mixture and apply it liberally to the wood as you would a stain, wiping over it to evenly distribute it. Dry and repeat coats until desired opacity. Before you move ahead, get to know if you can paint over stained wood.
For large projects, it’s helpful to lay boards across a flat surface or sawhorses while painting.
Step 2
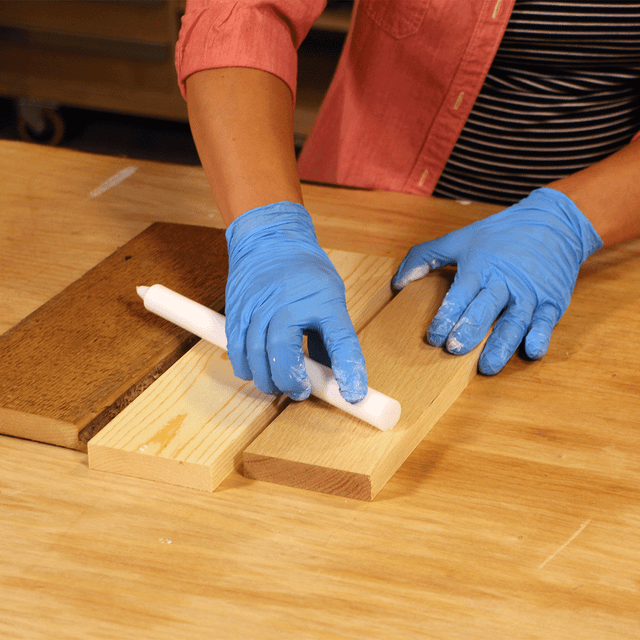
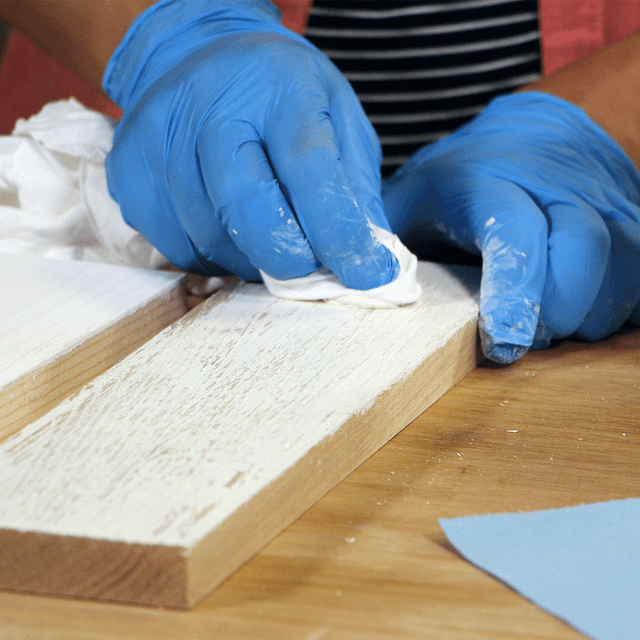
How to whitewash wood with paint and wax
With this technique, use wax to mask high points and grain in the wood’s surface before painting. This works on all types of wood, and creates a chippy, vintage look.
What you’ll need:
- White paint;
- White or clear wax candle;
- Paintbrush;
- Rag;
- Water (optional).
Using the side of the candle, roughly rub wax along the wood, working quickly and sporadically and leaving wax behind on the surface. With the right products and techniques, you can paint that looks like wood.
Paint the entire surface with white paint and let it dry until tacky, about 15 to 20 minutes.
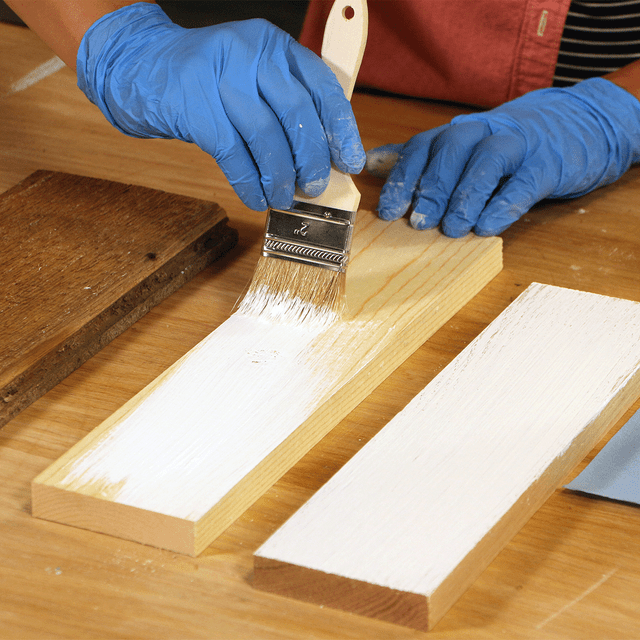
Use a rag to scrub the surface, applying pressure over the wax areas to remove paint. If desired, moisten the rag with water to remove even more paint.
A large project may take more than one day to complete.
Step 3
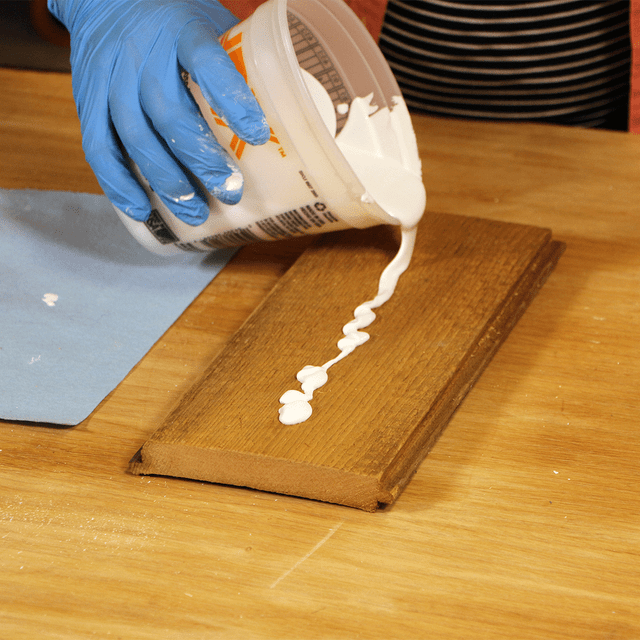
How to whitewash wood with the paint and drag method
This technique works best on surfaces with high texture, like rough or reclaimed wood. It creates a more rustic, barn wood look.
What you’ll need:
- Wood;
- White paint;
- Plastic scraper or wide putty knife.
Pour a bead of paint directly down the center of the board.
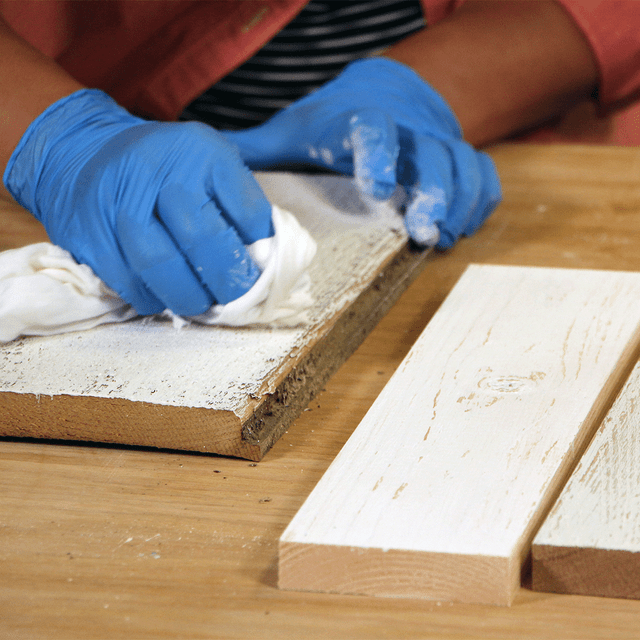
Use the scraper to drag the paint across the board and fill in the wood grain grooves.
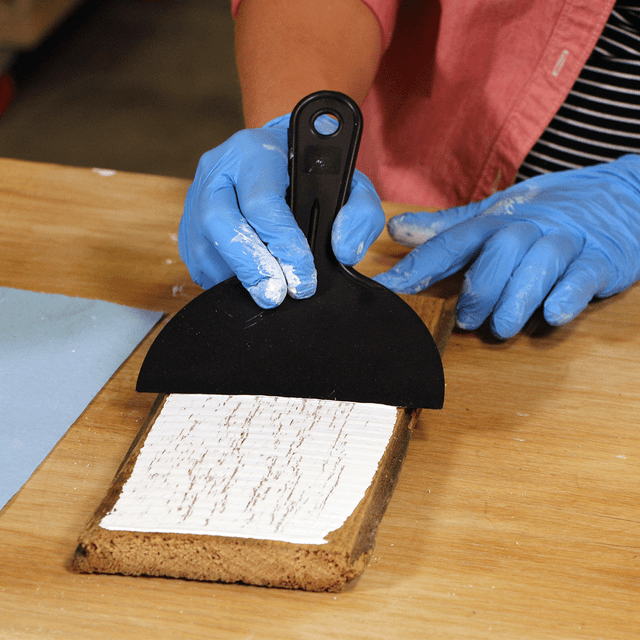
Use a rag to clean up the paint scraped off the wood surface.
Repeat in needed areas and let it dry overnight.
Step 4
Seal the whitewashed wood
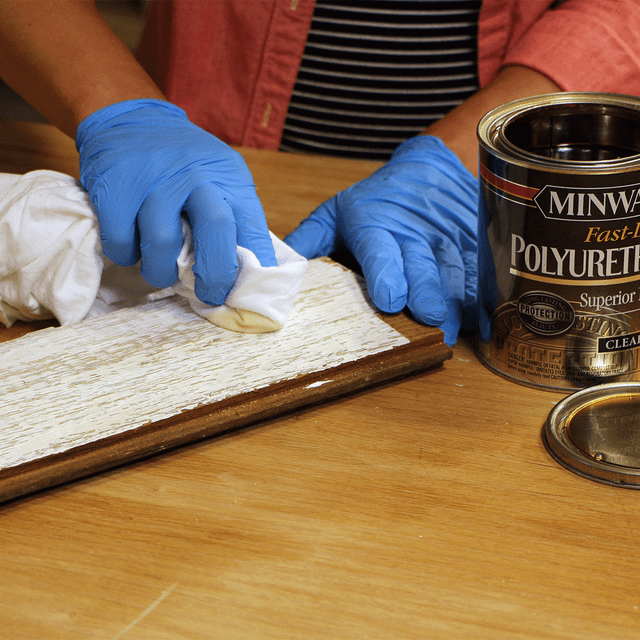
Now that you know how to whitewash wood, choose the technique that’s right for your project and desired look. For all techniques, consider finishing with a coat of polyurethane to seal in your hard work.
Frequently asked questions for whitewashing wood
Do you need to sand the wood before whitewashing it?
Maybe. We asked Andre Kazimierski, CEO of Impoovy Painters in Naperville, Illinois, about it. He says you don’t have to sand wood before applying a whitewash unless there’s an existing finish on the surface. If you’re whitewashing raw wood, you don’t need to sand it.
If you’re whitewashing IKEA furniture or any other kind of flat-pack furniture, you should definitely sand it beforehand.
How long does whitewash last on wood?
That depends on whether the whitewashed wood is indoors or outdoors. It may only last a few years outdoors because of weathering and sun exposure, according to Kazimierski. The whitewash coat, if done well, could last upwards of 20 years indoors.
Do you have to seal wood after whitewashing it?
Yes. After the whitewash dries, apply a clear, water-based polyurethane to protect it from damage. You may also want to sand it with a fine-grit sandpaper after sealing for a smooth surface.
What’s the difference between whitewash, limewash and milk paint?
A whitewash is just paint and water. Limewash is made with crushed limestone (mostly calcium carbonate), water and pigments. It’s a process that’s been used for centuries.
“Limewash is used primarily for brick and stone features,” says Tom Nolan, founder of AllStar Home. It also takes longer to dry than whitewash
Milk paint uses milk protein as its base, mixed with lime and pigments. It comes in a powder, and you mix it with water prior to painting. It offers lots of richer color possibilities than a whitewash.
Where whitewash gives wood a faded, worn appearance, milk paint is perfect for a more ornamental finish with a pop of color. Milk paint is also used to create a chipped, antique look for wood.