


Tired of the noise your bathroom fan makes? Install a new one in a few hours without ripping up the ceiling or walls.
2 to 4 hours
Intermediate
$100 - $150
Introduction
Quiet your fans and bring some peace to your bathrooms.
Have you found yourself not turning on your bathroom exhaust fan because it’s too loud? Or maybe it’s too old and just stopped running?
Bathroom fans have come a long way in efficiency, using much less energy than before. Some even claim to be noiseless. Replacing your bathroom fan isn’t complicated. It can be one-afternoon DIY project that doesn’t require extensive experience with drywall or electrical wiring.
By selecting a fan that fits the same dimensions as your old one, you won’t need to cut into the drywall, connect any ductwork in your attic or climb onto the roof to cut a hole for the air to escape.
Safety considerations
Turn off electricity at the main breaker box. Ensure you open your ladder fully and place it on stable ground. Wear safety glasses. And be ready for anything. You might be surprised what comes out of the ceiling when removing a fan that has been in place for years.
Tools Required
- Assorted drill bits
- Drill/driver
- Jab saw
- Ladder or stepladder
- Screwdriver
- Tape measure
- Voltage tester
Materials Required
- Bathroom fan
- Drywall screws
- Duct tape (optional)
- Wire nuts or wire connectors
- Zip ties (optional)
Watch How To Replace a Bathroom Exhaust Fan
Project step-by-step (9)
Step 1
What size bathroom fan do I need?
When selecting your new fan, choose one that will fit in the same size hole as your old one. Also ensure the fan generates the appropriate air flow for the size of your bathroom.
Airflow is measured by CFM (cubic feet per minute). Generally, a 50 CFM fan will work for a small bathroom; larger ones need at least 100 CFM.
To calculate CFM for your bathroom, measure the length, width and height of the bathroom. Use this formula: Length times width times height times (.13) = CFM. Round up the result to the nearest ten.
Before you begin, be sure you can fully access the ceiling fan housing.
Step 2
Remove the bathroom fan cover
Remove the old fan cover. Use an electrical tester to confirm the power is off and electricity is not live at the connection point. You’d be surprised how many breaker boxes aren’t labeled correctly.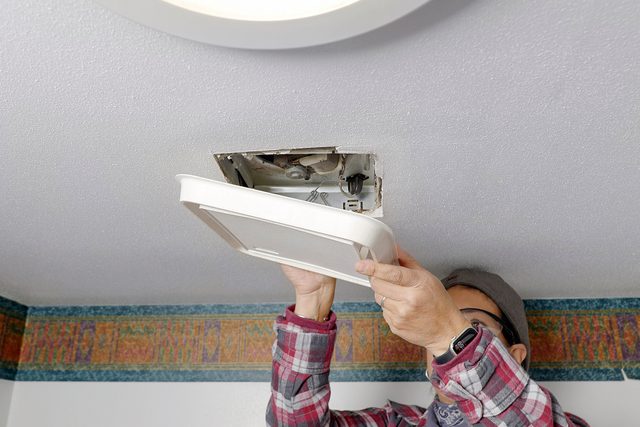
Step 3
Separate the motor from the housing and the duct from the fan
When you get the fan out of the ceiling, you’ll notice a housing protecting the motor. Locate the screws holding the housing in place, then remove them. Gently pull the motor out of the housing, being careful not to yank on the wiring. Disconnect the wiring and separate it from the motor.
You will also find a duct connected to the fan. Gently separate it. You’ll use this ducting with your new fan, so don’t damage it.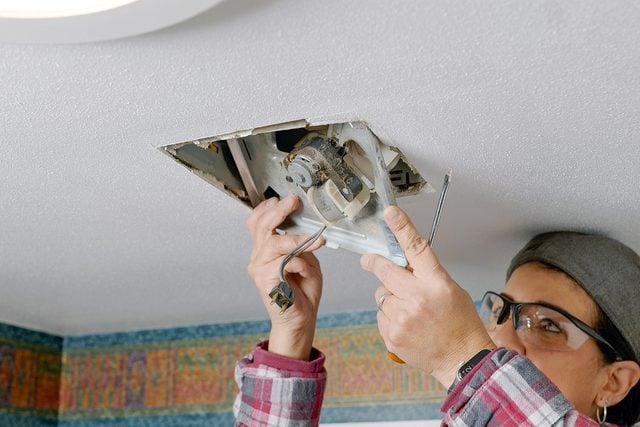
Step 4
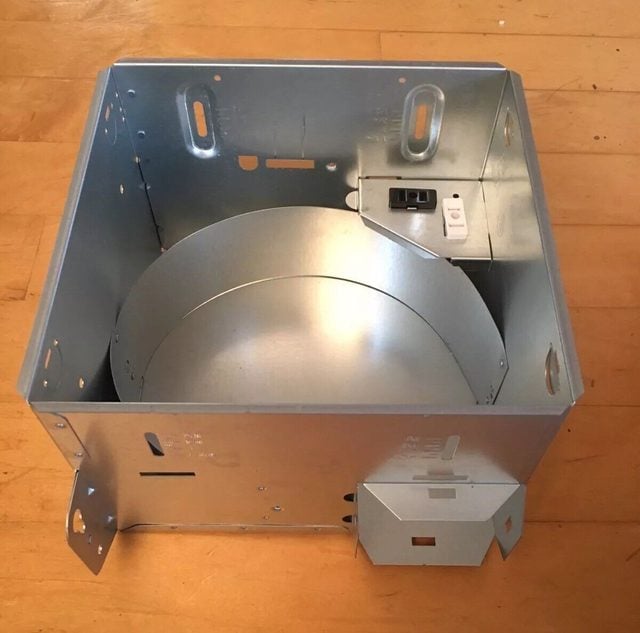
Reuse existing housing system or install new?
Determine if you can use the old housing or if you’ll have to install the housing that came with new fan. If the existing housing is the same size as the model you purchased, and the housing and duct work are free of water damage and in good working order, go ahead and use it. Just swap out the old electrical components; they should snap in and out of the old housing.
You may also need a different bracket or hanging mechanism. Follow the manufacturer’s instructions for specific details on how to attach the new fan. They’re all slightly different, yet equally simple.
If the old fan housing is attached with mounting brackets, you may have to cut out the brackets with a reciprocating or oscillating saw. Avoid cutting through any wiring, ductwork or drywall.
Install securely as directed. If not done properly, the fan will remain loose and eventually fall out.
Step 5
Connect air exhaust duct to fan
Connect the existing air exhaust duct to the new fan. If it doesn’t fit snuggly, secure with zip ties.
Step 6
Connect electric wires
When connecting the wires, follow the colors: white to white, black to black and green (ground) to green. Some new fans come with easy to connect clips, known as wire connectors. If your fan didn’t come with them, purchase them separately or use a more traditional wire nut.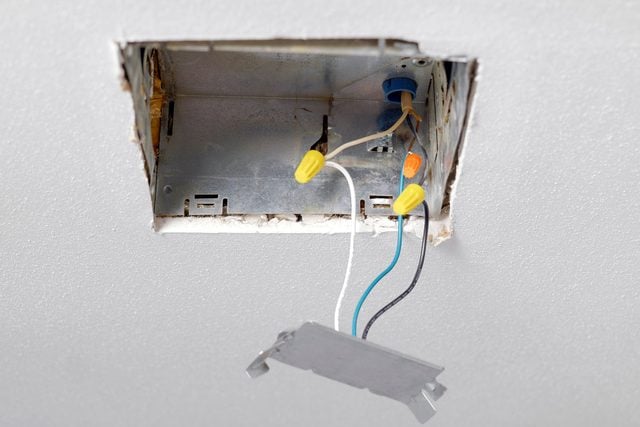
Step 7
Secure the fan
Tucking your air exhaust duct first, slip the fan into place, connecting it to the hanging system or brackets. Some fans clip into place; others require a screw.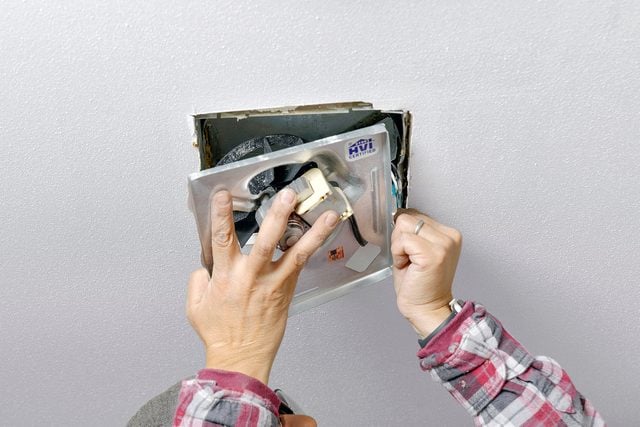
Step 8
Test the electric connection
Before you attach the cover, turn the electricity back on at the breaker and turn on the fan to ensure it works properly.
If your fan doesn’t work, be sure to turn off the power at the breaker before you start troubleshooting.
Step 9
Attach the fan cover
Attach cover, insuring it sits flush to the ceiling and perpendicular to your bathroom wall. The human eye easily picks up when something is crooked or off kilter.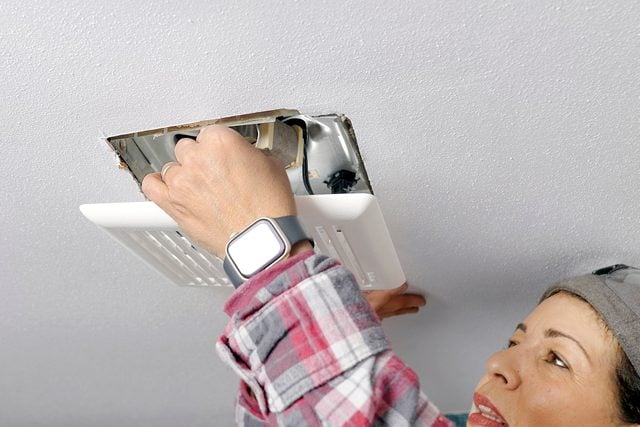
FAQs
How many years will a bathroom fan last?
Manufacturers estimate around ten years. If yours is older than that, be ready for it to go out, or replace it the next time you repaint or remodel the bathroom.
Is it bad to leave a bathroom fan on all night?
Yes. A bathroom exhaust fan can overheat if you use it excessively.
What happens if a bathroom fan isn’t powerful enough?
An exhaust fan must be strong enough to cycle fresh air into the bathroom and draw moist air out. Fans that are too small can’t properly cycle air out or remove moisture. Trapped moisture can warp cabinetry, fog mirrors and encourage black mold or mildew growth. That’s why it’s important to properly calculate the square footage of your bathroom and install a fan that’s the right size for it.
What happens if a bathroom fan is too powerful?
It can make the bathroom cold and noisy.
Originally Published: February 14, 2024