If your home or cabin has an above-ground water system, freezing is a serious risk. Here's how I keep my above-ground water system working all winter.
2 to 3 days
Intermediate
$400 to $600
Introduction
Cottages and seasonal homes are great, but often come with one major drawback — a water system that isn't winter-proof.
Many cottages and cabins sit on elevated pillars instead of basements. Some year-round homes also fall into this category. Elevating your building is great where basements aren't practical, but leaves your water and sewage pipes susceptible to freezing.
Some cottagers pump their water from nearby lakes or streams in above-ground pipes, which are also susceptible to freezing. Frozen pipes might not matter much if you only use your cottage in summer. But for year-round residents, they're a serious problem. I'm well acquainted with this challenge because for the last six years my wife and I have lived in a pier-elevated cabin in the woods.
If you've got a similar at-risk dwelling with an above-ground water system, here's how to freeze-proof your system once and for all.
Watch How To Keep Above-Ground Water Systems from Freezing
Tools Required
- Caulking gun
- Fish tape
- Hand saw
- Inkbird temperature controller
- Jigsaw
- PEX cutting tool
- Pro-PEX expander
- Shovel
Materials Required
- 1 Roof heating cable twice as long as the main sewage pipe beneath your building plus several feet
- 1-inch PEX expansion rings
- 1-inch PEX water pipe
- 2 Roof heating cables slightly longer than the distance from your home's water supply entry point to your water source
- 4-inch ABS 45-degree fittings x2
- 4-inch ABS pipe
- ABS cement
- Aluminum tape
- Construction adhesive
- Extension cord
- Outdoor caulk
- Plastic toilet flange
Project step-by-step (4)
Step 1
Connect your supply line to the water source and protect it
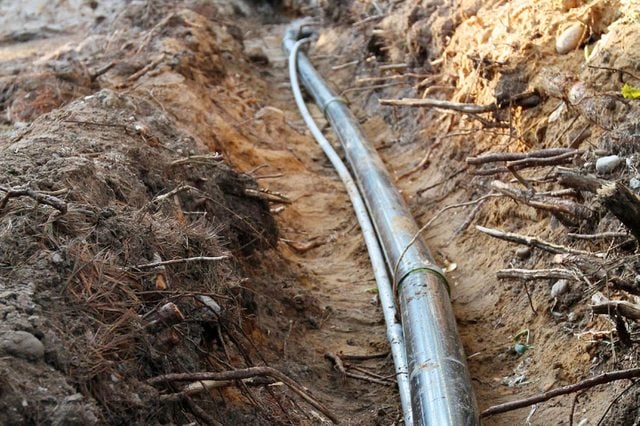
- If possible, dig a trench five to six inches wide and as deep as the soil will allow from your water source to the area under your house where you plan to route the supply line. (Some areas have enough soil to bury the line, but not enough to protect it from freezing.) Where you route water into your home depends on your floor plan and the location of your water pressure tank. I brought in my supply line into my laundry room because that’s where my pressure tank is, and where my interior water pipes branch from.
- Lay lengths of 4-in.-dia. ABS pipe end to end in the bottom of the trench, or on the ground/bedrock if you can’t dig.
- Join the ABS ends together with ABS cement. If it’s a drilled well, extend the pipe to the well casing. If it’s a cistern, go to the main outlet. And if it’s a lake, right to the water.
- Thread a one-inch water supply pipe through the ABS pipe and connect it to your water source with a PEX expansion ring and ProPEX expander tool. Be sure to use PEX pipe because it won’t burst if the system ever fails and the water freezes.
Step 2
Complete water line connection and ABS protection
- With a jigsaw, cut a 4-in.-dia. hole through your subfloor in the spot where your water supply will enter the house. Laundry rooms and utility rooms are good options, depending on your floor plan.
- Join a 45-degree elbow fitting to your ABS pipe, directing it upward toward the hole in the floor.
- Cut and install a short length of straight pipe, joining it to the elbow with ABS cement. Join a second 45-degree elbow to the short piece of pipe. The ABS should now be pointing straight up toward the hole in your floor.
- Join one more short length of straight ABS to the second elbow. Cut it with a hand saw to ensure it sticks through the floor just enough to connect with a toilet flange. Allow the flange to sit flat on the floor. Glue the flange down with construction adhesive.
- Push the PEX water supply line through the ABS until it enters your house. Cut it log enough to reach your water pressure tank, then connect it with your ProPEX expander and an expansion ring.

Step 3
Freeze-proof the water line
- Use a fish tape to thread two roof-grade heating cables, one at a time, through the ABS pipe until the non-plug end of each cable reaches your water source.
- Pull the plug-ends of both cables through the toilet flange so the heating cables themselves (not the leader cords) begin where the hole and ABS pipe start.
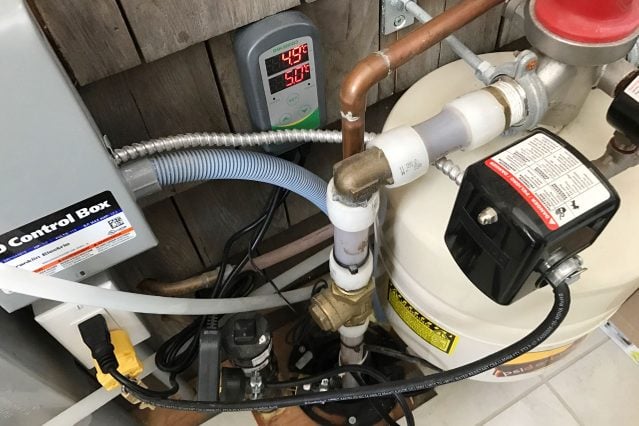
- Position an Inkbird temperature controller near your water line’s entry point. Plug the Inkbird into the nearest receptacle.
- Thread the Inkbird’s thermostat wire down the ABS pipe about two feet.
- Plug one of the heating cables into the Inkbird (the second cable is a spare). Set the Inkbird to switch on the cable at 35 degrees, and switch it off at 41 degrees. This ensures the heating cable only draws power when it’s needed.
- Crawl under your building and seal the hole around the 4-in. ABS with outdoor caulk. Your water supply is now freeze-proof.
Step 4
Freeze-proof your sewage line
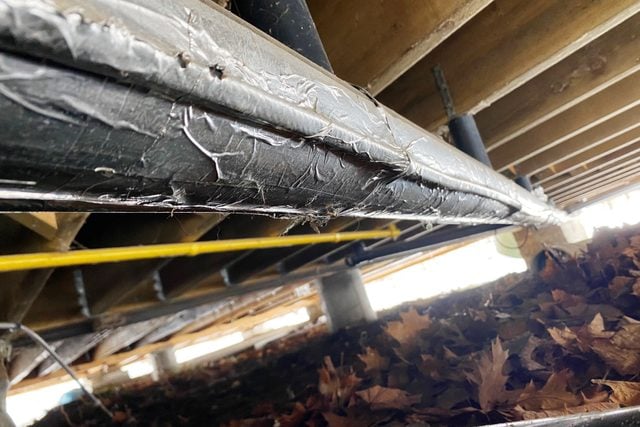
- Crawl under your building with a heating cable twice as long as your sewage pipe, plus some aluminum tape.
- Beginning at the end closest to an outdoor plug, tape the heating cable to the bottom of the sewage pipe. Use short pieces of aluminum tape, ensuring a good seal around the heating cable. Don’t let the tape bridge over the cable — tuck it in tightly.
- Continue along the full length of the sewage pipe. Route the cable up, then back down the various drain traps that connect to the main pipe as you progress.
- When you reach the end of the sewage pipe, double back with the remaining heating cable, taping it down a couple inches over from your first run.
- Continue until you’ve used all the cable. Connect the heating cable to the nearest outdoor receptacle with an extension cord. I installed an outdoor receptacle under my building specifically for this. Consider doing the same to protect the extension cord and heating cable where it plugs in. A regular, non-sheltered outdoor plug works. Your sewage line is now freeze-proof.
Note: A properly installed sewage pipe slopes, so it technically shouldn’t need freeze protection because gravity moves material through it. But blockages and freezing still happen occasionally, and that’s where this protection helps.