You've only got one chance to do it right! Here's how
A full day
Beginner
Varies
Introduction
Fiberglass batts are the cheapest, easiest way to insulate new walls. However, they're often installed poorly and even small gaps can reduce efficiency as much as 25 percent. In this article, we'll show you how to avoid those mistakes, how to cut and fit fiberglass batts and how to work around electrical outlets and cables.
The key to a quality insulating job is tight-fitting batts that completely fill the stud cavity, with no voids or gaps.
You can do top quality work with only a few basic tools. You’ll need a utility knife with a good supply of sharp blades, a tape measure and a straightedge, and a three- or four-inch putty knife for stuffing insulation around doors and windows.
Fiberglass can irritate your throat and skin, so wear protective gear. Buy a two-strap mask rated for fiberglass insulation (look for an N95 rating), and wear a hat, gloves, a long-sleeve shirt and goggles. The latter will keep fibers out of your eyes.
We’re using unfaced batt insulation sized to friction-fit into standard stud spaces (either 16-in. or 24-in. on-center studs). They’re also available precut to lengths that fit standard 8-ft. and 9-ft. walls.
Buying precut batts eliminates some work, but you’ll still have to cut some batts to length. You could measure the space and cut the batt to fit, but you’ll find a quicker method that’s just as accurate shown below. Leave an extra 1/2-in. of length for a snug fit.
Accurate cutting is essential. A batt cut too small leaves gaps, and one cut too large bunches up and leaves voids. Slightly oversized batts are best.
We’re using unfaced batts because they’re easier to cut and install. In most climates, you’ll have to staple 4-mil plastic sheeting over the batts to form a vapor barrier. Check with your local building inspector for the recommended practice in your area.
The photos show two methods of cutting batt insulation to width. If you’re having trouble getting an accurate cut with the “eyeballing” technique, measure the width of the stud space and use the straightedge method instead. Add about 1/2-in. to the width to ensure a tight fit.
It’s better to compress the batts a little than to leave gaps. Don’t worry if the batts bulge out a bit. The drywall will compress them tightly.
Tools Required
- Dust mask
- Safety glasses
- Straightedge
- Taping knife
- Utility knife
Materials Required
- Insulation to fit depth of stud cavity
Project step-by-step (7)
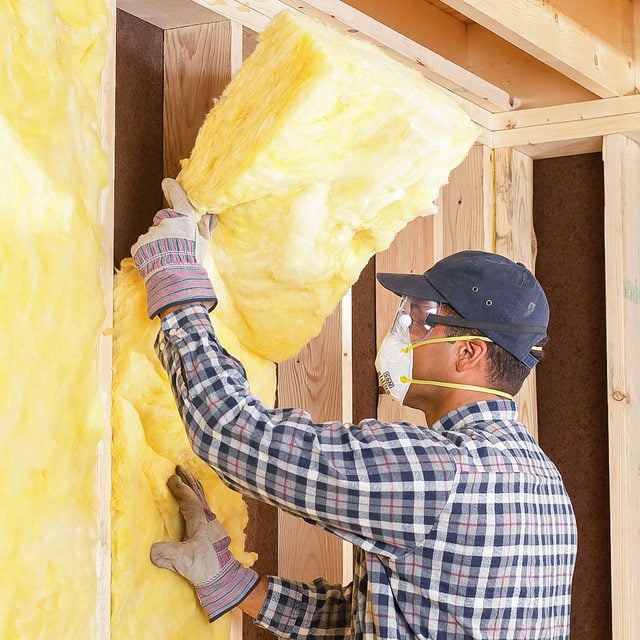
Step 1
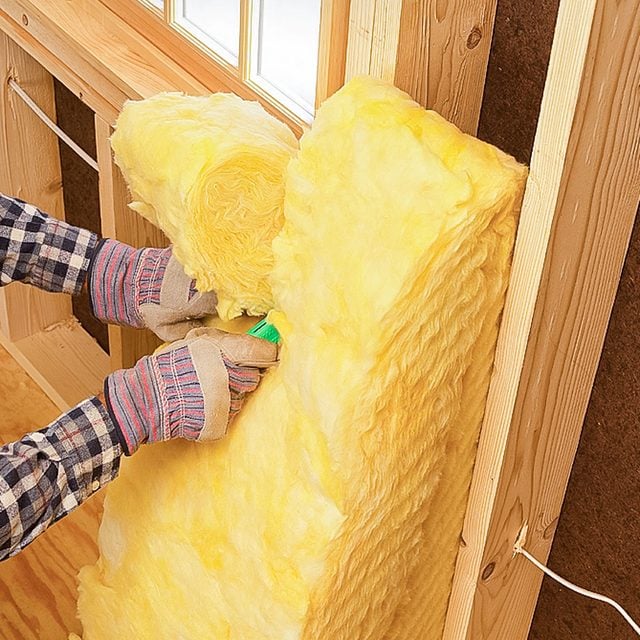
Fill the stud cavity
Push batts all the way to the back of each stud space, then pull out the front edges until they’re flush with the face of the studs.
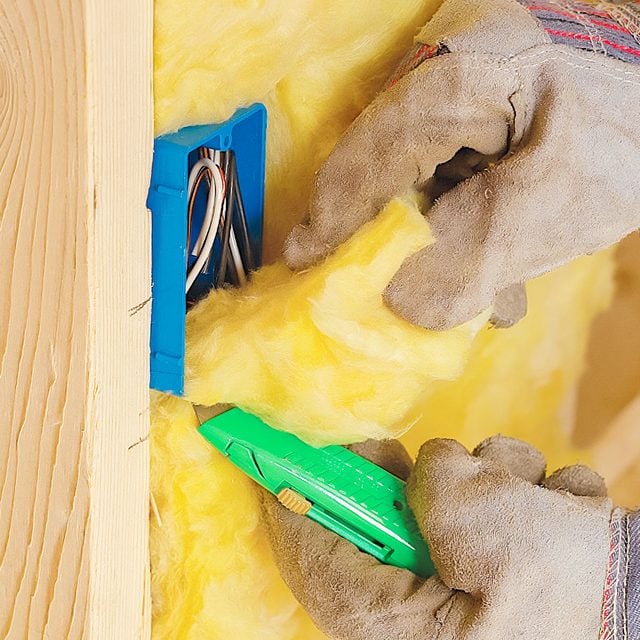
Step 2
Split batts around cables
Split batts to fit around electrical cables. Tear the batt in half, starting from the bottom. Slide one half behind the cable and lay the other half over the top.
If you have plumbing pipes on an outside wall, insulate behind them, but leave the side facing the interior uncovered to allow heat from the house to keep the pipes warm.
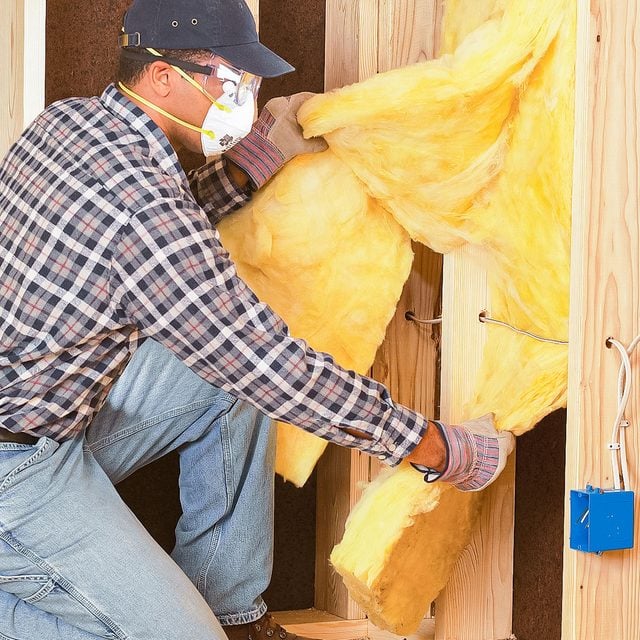
Step 3
Cut batts around boxes
Running a full batt in front of electrical cables leaves an uninsulated space behind. Avoid this by splitting the batt as shown. Then, when you come to an electrical box, trim the batt insulation to fit snugly around it. Run your knife blade against the outside of the box to guide the cut. But don’t cut too deeply or you’ll risk nicking the wires.
Step 4
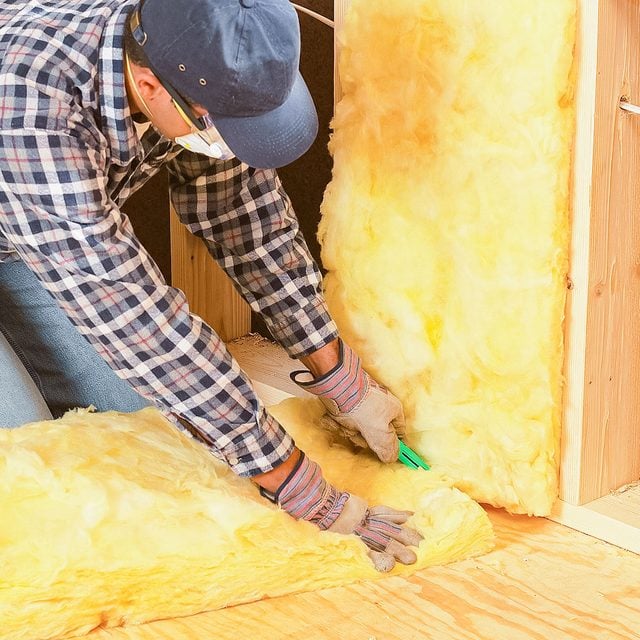
Cut batts slightly long
Cut batts to length by setting the top of the batt into the space and cutting against the bottom plate with a sharp utility knife. Leave an extra 1/2-in. of length for a tighter fit.
Step 5
Cut-in-place method
Leave the batt folded in half and hold one edge against the edge of the stud. Slice down the length while holding the top of the batt. Cut against the stud face.
Step 6
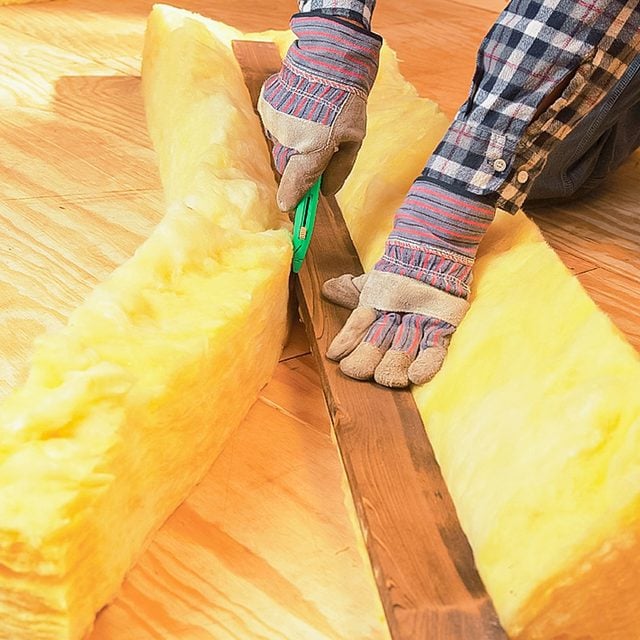
Measure-and-cut method
Alternate method: Press a straightedge down on the batt at the desired width and use it as a guide for the utility knife.
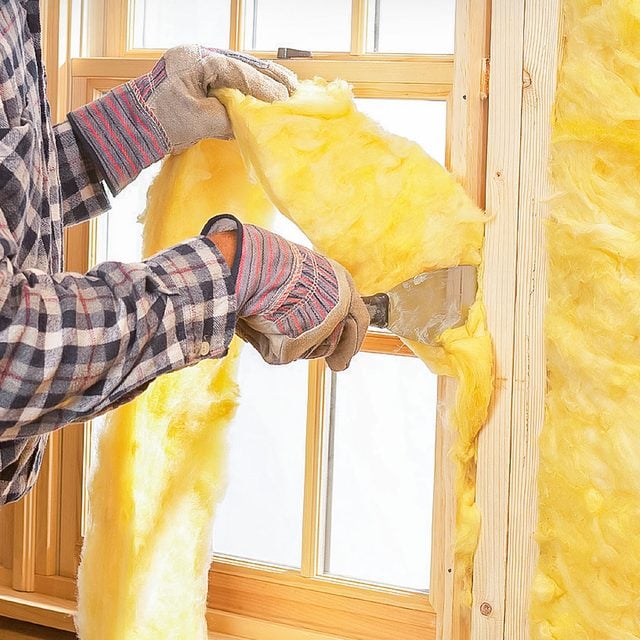
Step 7
Insulate windows and doors
The shim space around windows and doors is a prime spot for air leakage. Stop these leaks by reaching to the back of this space with the straw-type nozzle included with a can of expanding foam insulation and applying a bead around the perimeter.
Let it cure at least an hour before stuffing the remaining space with a thin strip of fiberglass and a 3-in. wide putty knife. Don’t pack the fiberglass too tight or it will bow the jambs and cause trouble with the operation of the window.