


Our experts explain how to repair the most common causes of central air conditioning service failures.
Our editors and experts handpick every product we feature. We may earn a commission from your purchases.Learn more.

Our experts explain how to repair the most common causes of central air conditioning service failures.
Our editors and experts handpick every product we feature. We may earn a commission from your purchases.Learn more.
If you central air conditioning system stops working during a brutal summer heat wave, you could be waiting days, if not weeks, for an appointment with a repair technician to fix it, and it’s probably going to cost a few hundred dollars. However, if you’re comfortable working around electricity and willing to spend less than $100 on parts, you can probably repair your air conditioner yourself in about two hours.
We talked to local HVAC repair technicians to get their best do-it-yourself AC fan repair and maintenance tips. These tips will help you with the most common “low cooling” and “no cooling” problems.
You’ll need a few basic tools: multimeter, a voltage detector, an assortment of insulated screwdrivers and a socket set.
If these AC repairs don’t work, at least you’ve covered the most common failures, and your service guy can concentrate on finding the more elusive problem. Plus, with the new parts, you’ll likely add years of breakdown-free air conditioning. Here’s how to start.
Set your thermostat to AC mode and lower the temperature setting. If the furnace fan kicks in, the problem isn’t in the furnace. If the fan doesn’t run, try resetting the furnace circuit breaker. If the fan still won’t start, call a pro — the fixes shown here won’t work.
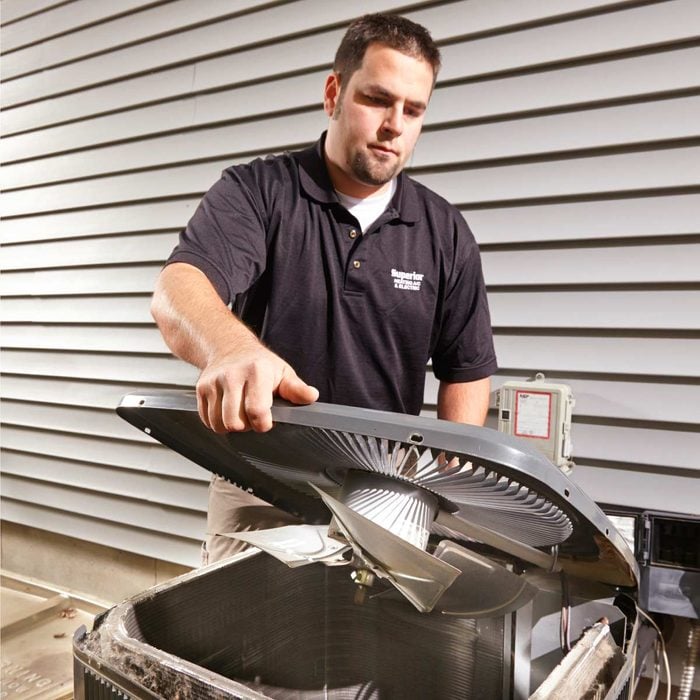
Next, check the outside condensing unit. The compressor (which sounds like a refrigerator) and fan should be running. If not, follow the troubleshooting and repair procedures shown here.
Turn off the A/C and furnace breakers in the main electrical panel before pulling the outdoor disconnect or removing the condensing unit’s access panel. Then use a voltage tester on the wires coming into the contactor to make sure the power is really off.
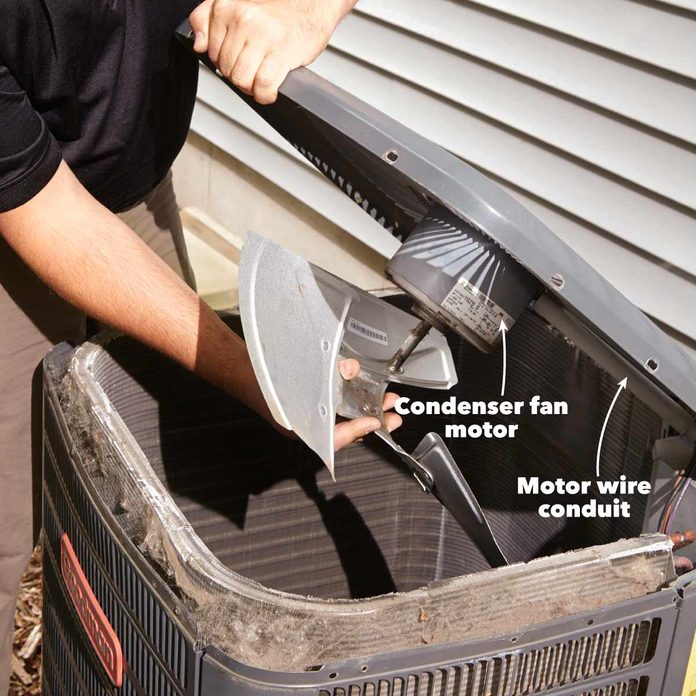
The AC contactor (relay) and start/run capacitor(s) (see illustration below) fail most often and are inexpensive. So it’s a safe bet to buy and install those parts right away, especially if your air conditioning service unit is older than five years. The condenser fan motor can also fail, but it runs about $150 — hold off buying that unless you’re sure that’s the culprit.
To buy replacement parts, find the nameplate on the condensing unit (not your furnace). Jot down the make, model and serial number (or take a photo). Get the parts at an appliance store, furnace dealer or online.
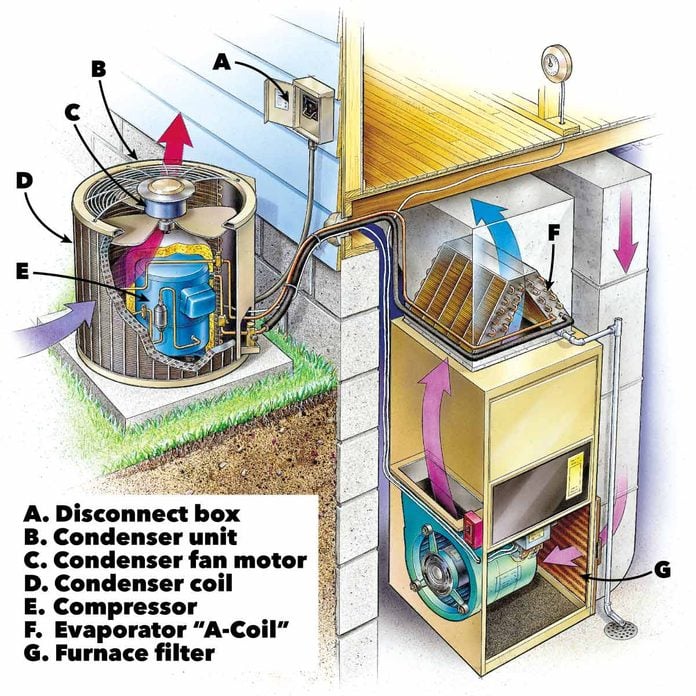
Central home air conditioner service systems consist of two major components: a condenser that sits outside your house and the evaporator coil (often referred to as an A-coil) that sits in the plenum of your furnace or air handler. The refrigerant in the A-coil picks up the heat from your home and moves it to the outdoor condensing unit. The condensing unit fan blows outside air through the condensing coil to remove the heat. The condensing unit houses the three parts replaceable by a DIYer: the AC contactor, the start/run capacitor(s) and the condenser fan motor. The condensing unit also houses the compressor, but only a pro can replace that. The A-coil has no parts that can be serviced by a DIYer.

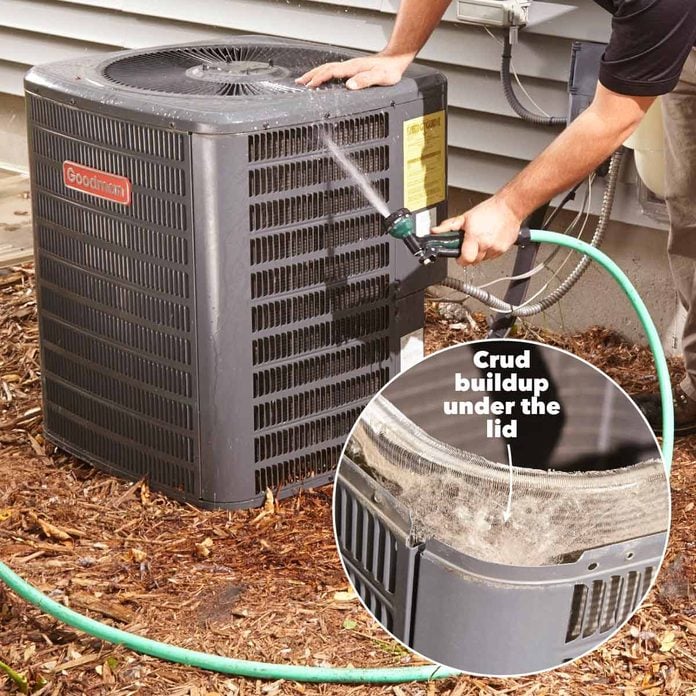
It’s really easy to clean an air conditioner condenser, and it’s one of the regular maintenance tasks that will extend the life of your unit.
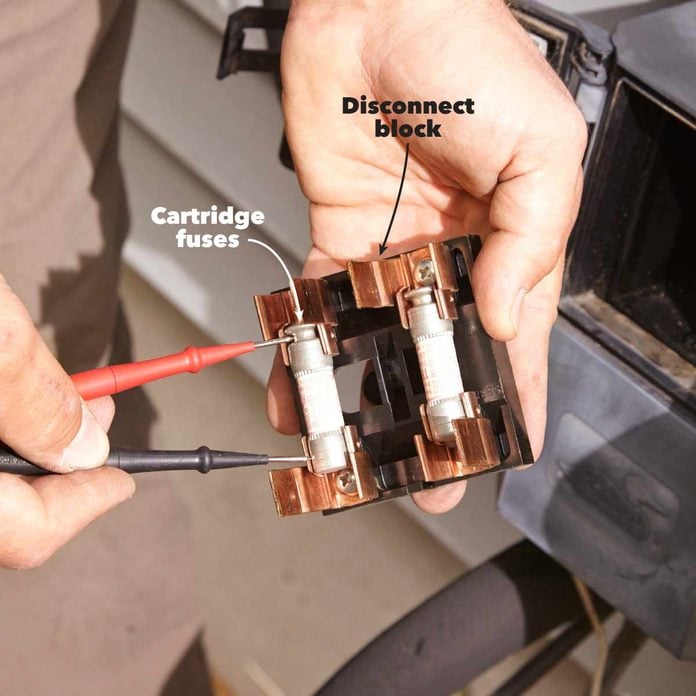
Many disconnect blocks contain two cartridge fuses. Check them before you proceed with repairs. A blown fuse is a sign of a failing part inside the condensing unit. So don’t just replace it and think you’ve solved the problem. Instead, replace the parts, install new fuses, and fire up the unit. If it blows again, call a pro—you’ve got more serious issues.
Follow the electrical conduit from the house — that’s where you’ll find the access panel. With the power off, remove and store the access-panel retaining screws and remove the panel. Before you replace any parts, check for rodents’ nests or evidence of chewing on wires and electrical connectors.
If you find broken wires or chewed insulation and can safely handle electrical repairs, discharge the capacitor first. Then repair the wires and clean out the nest. Otherwise, call a pro. Here’s what you need to know about air conditioner wiring.
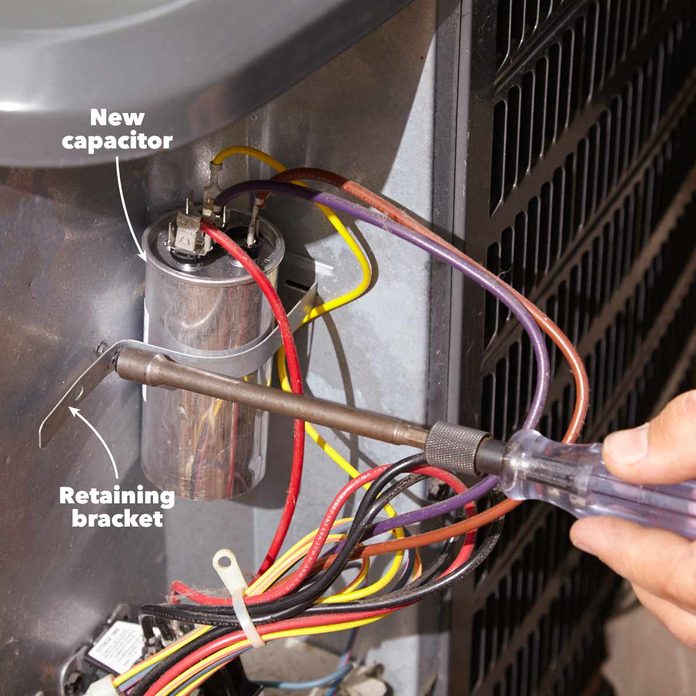
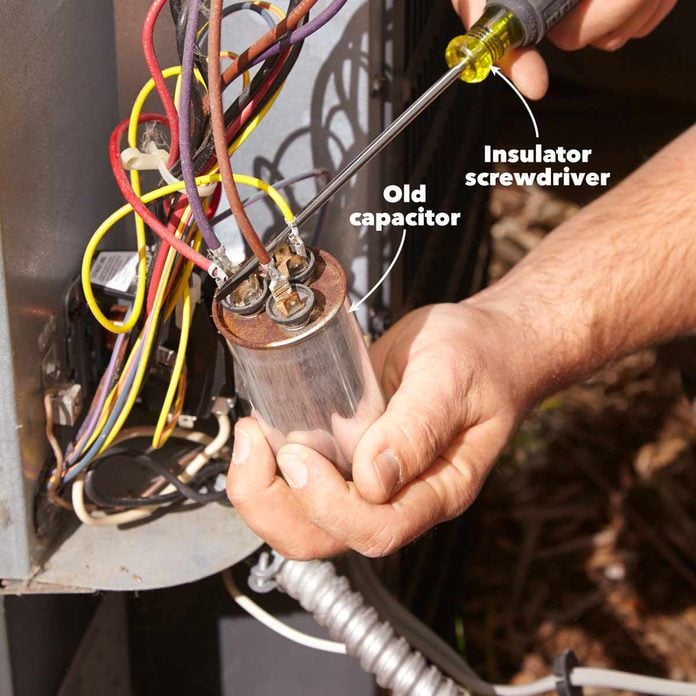
All air conditioning service units have at least one capacitor. The capacitor stores electricity and releases it during compressor and condenser fan startup to give both motors an extra jolt of power. And it smooths out voltage fluctuations to protect the compressor and condenser fan motor from damage.
Capacitors can degrade slowly, providing less startup power over time. Or they can fail in an instant. Gradual capacitor failure can go unnoticed for a long time, stressing the compressor and condenser fan motor windings, resulting in their early failure. Since capacitors are cheap, it pays to proactively replace yours about every five years.
WARNING: Discharge the capacitor before disconnecting wires or removing it from its bracket.
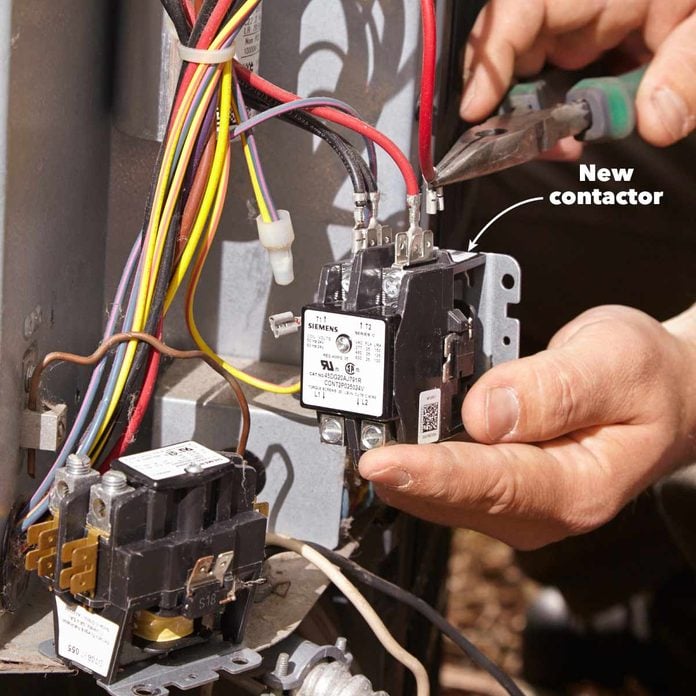
An AC contactor is a $25 mechanical relay that uses low-voltage power from the thermostat to switch 220-volt high-amperage current to the compressor and condenser fan. AC contactors can wear out and are at the top of the list of common air conditioning service failures. Even if your AC contactor is working, it pays to replace it every five years or so. Unscrew the old AC contactor before removing the wires. Then move the wires to the new unit.
AC units and thermostats have built-in delay features when they’re shut down and then repowered. The delay can be as long as 10 minutes. And, if you’ve subscribed to an energy-saving device from your local power utility, the unit can take even longer to reset. If you’ve installed the parts shown and reinstalled the disconnect block, repowered the circuit breaker, turned on the switch at the furnace, moved the thermostat to AC mode and lowered the temperature below the indoor temperature, and the unit doesn’t fire up after 30 minutes, it’s time to call a pro. Learn how to clean a central air conditioner unit.