


Here's how to transform your yard into a wildlife sanctuary, and score a nifty plaque to keep your neighbors from grumbling.

How To Certify Your Yard as a Wildlife Refuge

Updated Oct. 01, 2024
Attracting wild creatures into our outdoor spaces doesn’t just bring us joy. It also creates vital lifelines for countless species, many under increasing pressure from habitat loss and other ecological woes.
“You can make a difference by providing food and shelter for wildlife, such as bees, butterflies, birds and amphibians, both locally and as pit stops along migratory corridors,” says Mary Phillips, head of National Wildlife Federation’s Garden for Wildlife. “These garden plots are like stepping stones that help support wildlife in a badly fragmented ecosystem.”
Creating a wildlife refuge in your yard or even on your apartment patio is not as daunting as it might sound. You don’t have to strive for perfection. Just start small, break the task into bite-size pieces, and have fun as you watch the positive changes from each step unfold.
Here’s how to make your yard a certified wildlife habitat. Note that we’re focused on National Wildlife Federation’s Certified Wildlife Habitat program (see their checklist here). Other programs, like Homegrown National Park, Audubon and Monarch Waystation, feature similar steps.
On This Page
Step 1: Provide Food
Your wildlife habitat should contain three food sources. Elements like bird feeders, flowers with pollen and plants that make seeds all work.
Phillips recommends native flowers and plants with interesting foliage and colorful berries. To find optimal plants for your area, use NFW’s Native Plant Finder, the Xeres Society ’s Native Plant, Seed and Services Directory and Audubon’s Native Plant Database, which can also connect you to your local Audubon chapters and partner organizations.
Step 2: Add Water
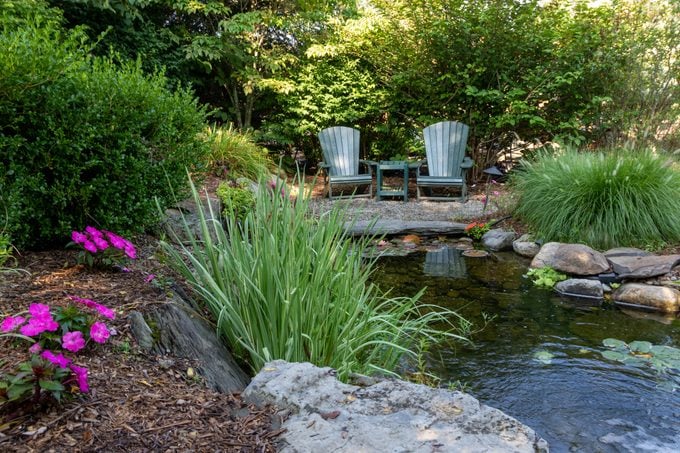
To be a certified wildlife refuge, your space needs at least one source of water to give birds, insects and other wildlife a place to drink and bathe.
If there’s no natural feature like a stream or pond, add a bird bath, fountain, hanging bird waterer or just a shallow bowl. Put a few rocks in it so bees have a place to land and drink. Plants like verbena, milkweed and yarrow around the water make it extra pollinator friendly.
Step 3: Create Cover
Provide at least two places where wild things can shelter from the elements, hunt for prey and hide from predators. Think trees, brush piles, shrubs, roosting boxes, tall grasses and fallen logs. The more diversity here, the more types of wildlife you’ll attract to your space.
Also, if you are doing this in conjunction with shrinking your lawn, Phillips recommends replacing turfgrass with a perimeter of wild grasses and shrubs.
Step 4: Allow for Places To Raise Young
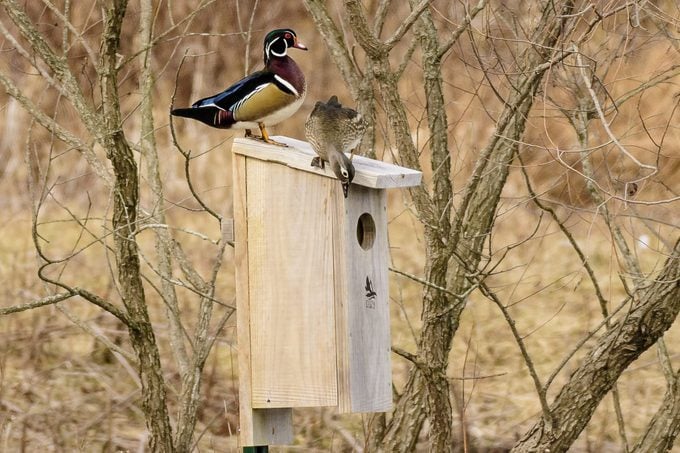
You’ll need at least two spots that allow wildlife to reproduce by offering protection and nourishment throughout all parts of their lifecycles. While these can be the same as the cover elements, they may also include host plants for caterpillars, birdhouses, bat boxes and bee tubes.
To further your success, don’t prune trees and shrubs during nesting and mating seasons. And try not to remove garden debris and leaf piles until later in spring because chrysalises overwinter there.
Decaying leaf piles are especially good for your yard’s ecosystem because they encourage lichen and fungi. They’re also home to a lot of insects and caterpillars, essential for nesting birds.
Step 5: Ditch the Chemicals
Sustainable practices are key to creating a wildlife refuge. You’ll need to do at least two of the following, but the more the merrier:
- Maintain your yard and garden with natural fertilizers like mulch and compost.
- Avoid pesticides. This keeps a healthy balance of beneficial insects.
- Conserve water by planting native plants and installing drip hoses or xeriscaping.
- Remove invasive species.
- Practice soil conservation to keep the underground ecosystem vibrant as well.
Step 6: Certification
Congrats, you’ve succeeded in creating a wildlife habitat! To make it official, register your space with one — or all — of the following organizations:
National Wildlife Federation: This costs $20, which goes directly back into wildlife conservation efforts. It comes with a paper certificate, or you can purchase an official-looking plaque, which helps neighbors feel more at ease with an unconventional yard. Plus, it encourages others to create wildlife refuges of their own. “When you create a wildlife refuge in your yard, you become an ambassador for natural landscaping,” says Phillips.
Homegrown National Park: This is free, and you can add yourself to a map of others across the country who have done the same. According to its founder, Doug Tallamy, registering is especially important to help the U.S. meet its 30 by 30 conservation goals. “Seventy-eight percent of the country is privately owned, so if we don’t do conservation like this on private property, we’re going to fail. And we can’t fail,” he says. “Our only viable path forward is for humans and nature to coexist.”
National Audubon Society: Some state and regional offices offer wildlife habitat certifications, like Audubon Rockies’ Habitat Hero program. They evaluate yards and award bronze, silver and gold wildscape certifications, depending on the level of conservation. It costs $30.
Some states and local entities also offer certifications. Check with your local university extension office or garden club about some in your area.
Can One Yard Really Make a Difference?
Yes! A proper habitat can boost wildlife by 50% in just one season.
“I get it that everybody is not a gardener, and you don’t have to be,” says Tallamy. “This is something you can do and feel good about. And there is payback. You get to see the results and the species that come to your yard.”
If you want to get even more involved:
- Turn your yard into a Monarch Waystation.
- Motivate kids by joining NWF’s Schoolyard Habitat.
- Find inspiration at a Certified Wildlife Garden.
- Get the community involved with NWF’s Community Wildlife Habitat.
- Join the habitat conservation and biodiversity efforts of 30 by 30 and America the Beautiful.
Find more resources for creating habitat at:
Originally Published: March 02, 2023