


Learn how to plant bulbs in the fall so you're sure to enjoy their colorful blooms in the spring. We'll show you how, step-by-step.
10 Tips for Planting Bulbs

Updated Jul. 21, 2023
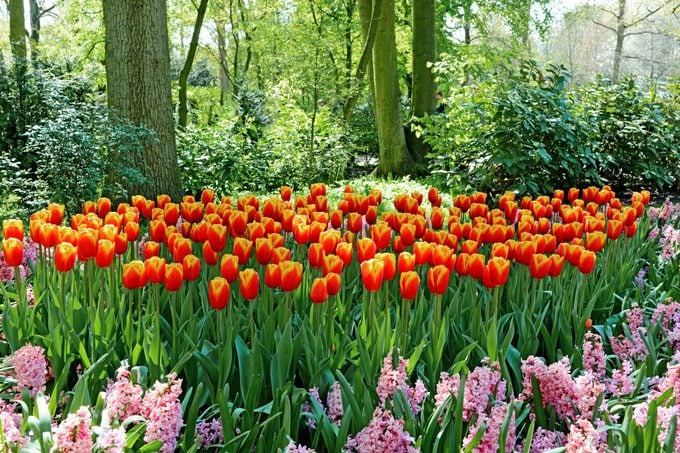
Tulip Time is my town’s largest festival of the year. Thousands of people flock to see more than four million tulip bulbs in bloom in our public parks, lining the city streets and at our local tulip farms. Thanks to the efforts of a team of horticulturists and volunteers who plant the bulbs each fall, we all get to enjoy a dazzling show of color each spring.
Planting bulbs looks easy, but there are a few key things I’ll show you that are imperative to your success. Don’t be like my friend Jim who planted 500 tulips as a surprise for his wife. He asked me after he finished whether it was correct to plant them pointy side down. Sadly, only a few dozen came up and bloomed the following spring.
On This Page
Decide What and Where to Plant
Before you purchase bulbs, assess your growing conditions and available space. Most bulbs prefer six or more hours of sun per day in somewhat dry soil in the summertime while they’re dormant. If your spot is somewhat shady, purchase more shade-tolerant bulbs like snowdrops, crocus, scilla and fritillaria.
Keep in mind your garden is sunniest in the spring before the trees leaf out. The spot where you plant bulbs needs to stay sunny for at least 10 weeks after they bloom so bulbs can build up enough energy to flower again the next year. Planting them away from shade cast by large, deciduous trees is a good idea.
A garden bed constantly irrigated to keep hydrangeas and other moisture-loving plants happy is not a good spot to plant spring-blooming bulbs. Bulbs that sit in moist soil while dormant tend to rot.
Spring bulbs can also be planted in containers. Many of the tips you’ll find below work whether you are planting in the ground or in pots, although it’s much easier to avoid critter damage when you plant in pots.
Order Bulbs Early
You’ll find common varieties of spring blooming bulbs for sale at garden centers and hardware stores in the fall. But if you want something more unique, try mail order sources.
Bulb catalogs start arriving in early summer, and if you wait to order, the best varieties will be sold out. It’s tough to think of fall planting when it’s warm and sunny outside, but you’ll be glad you did.
If you need to buy pre-chilled bulbs because you live in a warm climate, order those early as well.
Time Your Planting Right
Spring blooming bulbs are best planted in autumn when the nighttime temperatures consistently drop to the 40- or low 50 degree range. This coincides with leaves beginning to fall, around six to eight weeks before the ground freezes.
In Northern states, bulbs are typically planted in September and October, or as long as the soil can be worked. Southerners wait until November or December to plant.
My parents’ house always had the prettiest spring bulb display on the block — a true accomplishment given the voracious squirrels in the neighborhood. My mother’s trick: Planting her bulbs each year around Thanksgiving, right before the ground froze, to make it harder for the squirrels to dig them up. It worked like a charm!
Gather Bulb Planting Supplies
In addition to the bulbs, other supplies you need for planting include:
- A planting tool, such as a long-handled shovel, bulb planter or auger. Which tool you choose depends on your strength and ability to dig.
- A long-handled shovel involves leg strength It’s good for planting larger groupings of bulbs.
- A bulb planter requires good arm and core strength. It’s used to plant one bulb one at a time.
- An auger that attaches to a drill is the easiest tool for planting bulbs and requires the least strength. It drills one hole at a time, but it’s easy to drill many quickly.
- Animal repellent, such as Plantskydd. Squirrels, voles, chipmunks and other critters will be happy to eat your newly planted bulbs unless you protect them with animal repellent. Before planting my bulbs, I spray them all with Plantskydd. You may also need to apply animal repellent in the spring, as soon as the bulbs break ground and their flowering stems elongate. Deer, squirrels and rabbits all enjoy fresh bulb foliage and flower buds.
- Chicken wire, if needed. If you’ve found critters eating your bulbs, plant them in chicken wire cages or mesh baskets. If squirrels dig up your bulbs, laying a piece of chicken wire on the soil topped with leaves or mulch will help deter them.
- A ruler or other tool with measurements. We’ll cover how deep to plant your bulbs below, but it’s important to get that depth right or your bulbs will not bloom the way you’d hoped. If your planting tool lacks measurements, measure the depth with a ruler until you get a good feel for it.
- Bulb food, such as Bulb-tone by Espoma. Mixing bulb food into the soil at the bottom of your planting hole will ensure your bulbs get off to a strong start in the spring. Bulb food is easy to find at garden centers and hardware stores in the fall — it’s sold alongside the bulbs.
Plant Bulbs Correctly
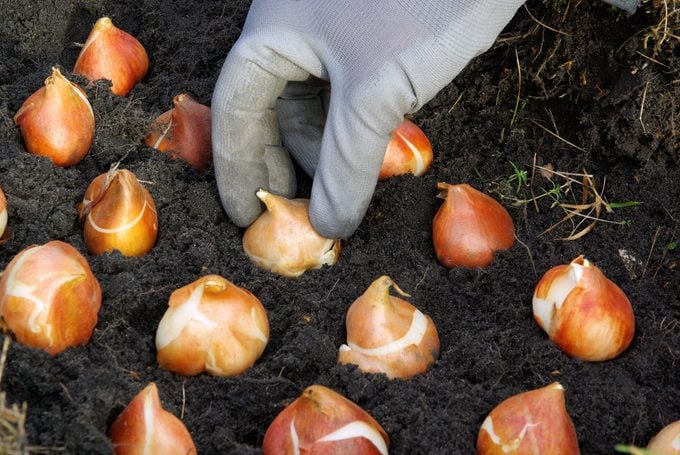
Bulbs should be planted with the pointy side up and the flatter side down. The stem and leaves will emerge from the top and the roots will grow from the bottom. This is easy to identify on most bulbs, but if you’re unsure, plant the bulb on its side. That way, the stem will still find its way up.
The correct planting depth should be printed on the bulb packaging. If you can’t find it on the package, a quick Google search will help you find the answer. Generally, but not always, bulbs should be planted twice as deep as the bulb is tall. So if your bulb is two inches tall, plant it four inches deep.
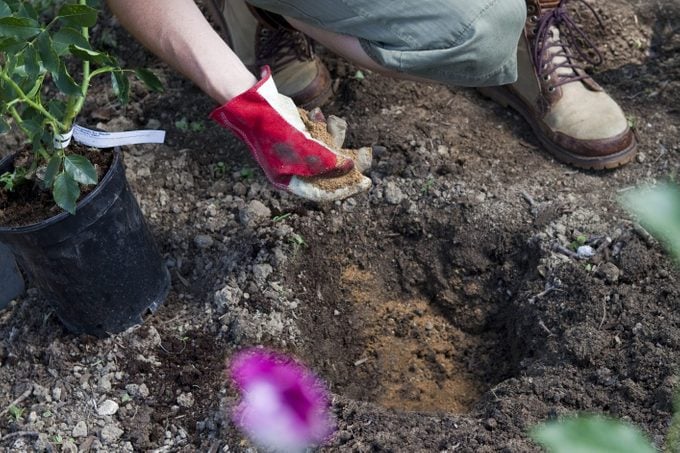
When you dig, be sure to watch for utility lines, sprinkler lines, underground fence cables and large tree roots. If you’re working in an area with lots of obstacles like this, digging single holes will be easier than digging larger ones for planting groups of bulbs together.
It’s always a good idea to go to Call811 to have your utility lines marked.
Feed Your Bulbs
Like most plants, bulbs thrive when essential nutrients are present. Sprinkle bulb food into the bottom of each hole, following package instructions for amounts, and mix it into the soil. Because phosphorus (a key ingredient in bulb food) doesn’t travel in the soil, you’ll need to put it where the roots can reach it.
If your soil lacks nutrients or is really dense, mix in some organic matter, like compost or humus, with the soil you dug out of the hole. Then backfill the hole with that mixture after planting.
Hide the Evidence
After filling the planting holes, make sure none of the bulb sheaths are lying on top of the soil. Squirrels, chipmunks and other animals can smell them and know there’s something good to eat nearby. Spread fallen leaves or mulch over your planting to cover your tracks. You might feel silly trying to outsmart the animals, but it really works!
Mark the Spot
Fortunately, animals can’t read, so it’s a good idea to add a plant marker indicating where the bulbs are. This way you don’t accidentally dig up the bulbs during spring planting. If this isn’t a concern, you can skip this step.
Water the Bulbs
Where I live in the Midwest, we usually receive abundant rainfall in autumn, so I skip the step of watering bulbs after I plant them. But if your area isn’t as fortunate, be sure to water your bulbs after planting and every couple of weeks afterward until the ground freezes.
The process of planting spring flowering bulbs in the fall may seem lengthy when you first start out. Once you learn the key steps and find out what works best in your garden, bulb planting can become a fun fall ritual for you and your family. A little effort in autumn brings so much joy in the spring.
Pro tip: If you purchase or receive potted bulbs in the spring, don’t throw them away when the flowers fade. Some nursery-potted bulbs will bloom again next spring if you plant them in the ground.
Originally Published: September 08, 2022