
Build an Infinity Table
Updated: Jul. 24, 2019Expand your mind with this back-to-the-70s light table

Turn on the lights inside this table and you'll be staring into infinity. This woodworking project is easy to build, but makes a dramatic impact when the lights inside it go on.
- Time
- Complexity
- Cost
- A full day
- Intermediate
- $101–250
Overview
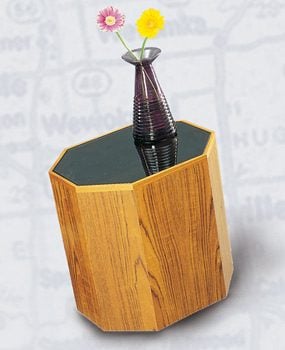
Take a day to build this cool ’70s-era light table. With tape lighting, an ordinary mirror below and a tempered two-way mirror on top, you create the optical illusion of an endless lighted tunnel. The lights are powered by a 12-volt sealed rechargeable battery. A battery with charger is available from electronics and hobby stores.
Constructing the table
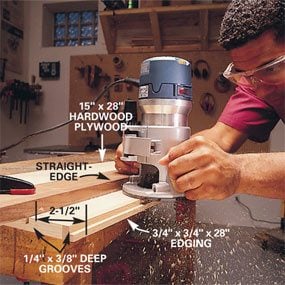

- Start by cutting two 3/4-in. thick hardwood plywood panels measuring 15 x 28 in. The grain direction should be parallel to the 15-in. measurement.
- From matching solid hardwood, cut two pieces of edging measuring 3/4 x 3/4 x 28 in. Glue the edging to one edge of each plywood panel.
- Use a router or table saw to cut two grooves into each panel. The first groove is 1/4 in. wide x 3/8 in. deep for the shelf that holds the bottom mirror (Fig. A). To hold the top mirror, cut a 1/4-in. x 3/8-in. deep groove into the hardwood edging (Photo 1).
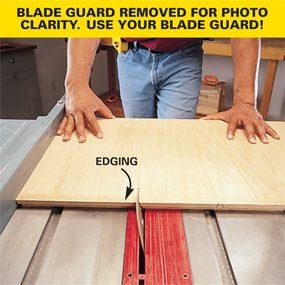
- Rip the sides of your table on a table saw with the blade set at 22-1/2 degrees (Photo 2). The two wide sides are 8-3/8 in. on their long side, and the six narrow sides are 5-1/2 in. on their long side.
- Chisel out a 1/4-in. notch in one side for the lighting wire (Fig. A).
- Make a shelf for the bottom mirror from a 12-3/8 in. x 15-1/4 in. piece of 1/4-in. hardboard (Fig. A). Center a 7-7/8-in. side on each long side and a 5-1/8-in. side along each short side and cut off the corners. Notch the shelf at the wire location.
- Lay the sides out with the inner side face down. Tape the pieces together with masking tape. Then flip the sides over all at once and test-fit the hardboard shelf by rolling the sides around it (Photo 3).
- Unroll the sides, squeeze wood glue onto the edge joints, and roll the sides around the shelf. Clamp the whole thing together with at least three band clamps (Photo 3). Let the glue dry overnight.
- Take the assembled table to a mirror and glass store and have two mirrors made to fit.
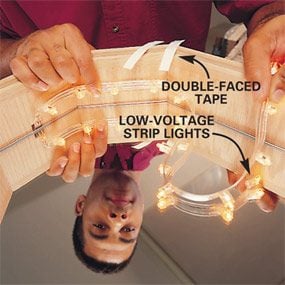
- Install the tape lighting in the center of the space above the mirror shelf. Attach the lights with strong double-faced carpet tape.
Figure A: Light Table Details
Cut and assemble the parts. Power the lights with a battery or by connecting them directly to a transformer and switched outlet.
Required Tools for this Project
Have the necessary tools for this DIY project lined up before you start—you’ll save time and frustration.
- Miter saw
- Router
- Safety glasses
- Table saw
- Tape measure
- Wood chisel
Required Materials for this Project
Avoid last-minute shopping trips by having all your materials ready ahead of time. Here’s a list.
- 1/4-in. hardboard
- 12-volt battery and recharger
- 3/4-in. hardwood
- 4 ft. of single-channel tape lighting or LED strip lighting.
- Low-voltage wiring
- Ordinary 1/4-in. mirror (cut to fit)
- Painter's tape
- Two-way 1/4-in. tempered mirror (cut to fit)
- Wood glue
Originally Published: June 20, 2017
