
DIY Table Saw Table
Updated: Jun. 29, 2022
Build this take-down table saw table to make the perfect work station for a DIYer with limited garage space.
Multiple Days
Intermediate
$101–250
Introduction
This DIY table saw table is the perfect solution for cutting long boards or big sheets of plywood. It's also a handy workbench with storage trays. When finished, a DIYer can quickly dismantle the table saw table and store it flat against a wall, saving valuable garage space.Tools Required
- 3/8-in. round-over router bit
- Belt sander
- Brad nail gun
- Circular saw
- Corded drill
- File
- Hammer
- Hole saw kit
- Jigsaw
- One-handed bar clamps
- Router
- Table saw
- Tape measure
- Wood chisel
Materials Required
- 3/4-in. plywood
- Polyurethane
- Sandpaper
- Wood glue
Project step-by-step (11)
DIY Table Saw Table Overview: A Knockdown System Without Fasteners
Portable table saws are great for garage workshops. When the project is done, they fold up and tuck away so you can park the car. But when it comes to capacity, they’re a bit limited.
That’s what led to this knockdown table saw system. It has a great outfeed table; you also gain extra width to rip larger pieces of plywood, and the outfeed table works great for an assembly workbench. The project also has some nifty add-on trays: one to hold your table saw safety equipment (hearing and vision protection and push sticks) and another to hold all your hand tools and hardware so you can keep the top clutter-free. This project is perfect for a small workspace because it sets up in minutes without fasteners, and at the end of the day, you can have it back on the wall and the car in the garage.
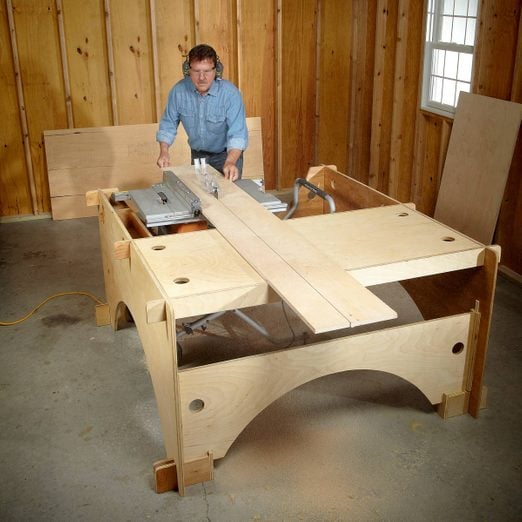
DIY Table Saw Table

This DIY table saw table is a workshop on a wall. In less than five minutes of setup time, you’re ready to cut big sheets or work on the assembly table.
With these jigs and accessories, you can make safer, more accurate rips, crosscuts, dados, rabbets cuts and more.
Gather Materials and Begin Cutting the Table Saw Table Parts
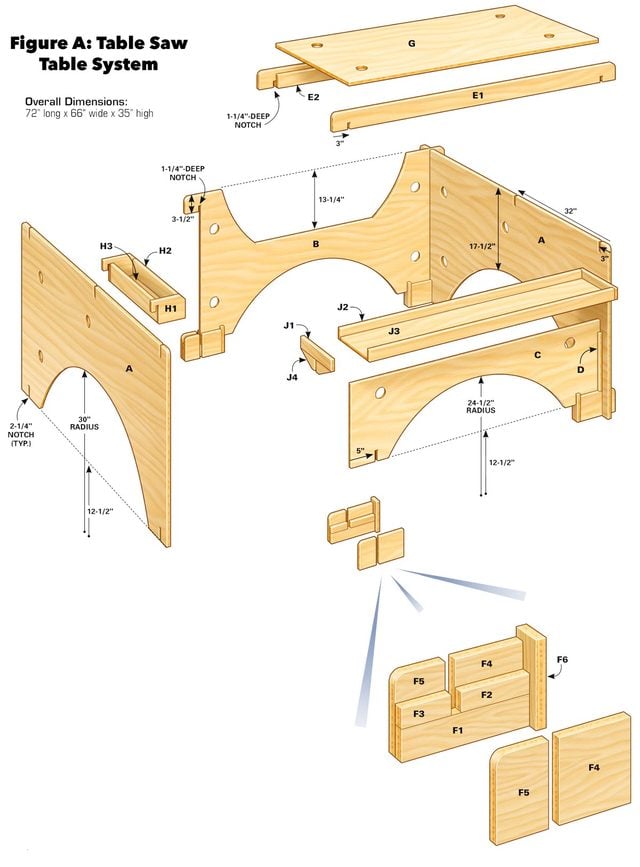
This project requires four sheets of 3/4- in. plywood. The side panels (A) and end panels (B and C) are each cut from a separate sheet of plywood. It’s best to cut the outfeed top (G) from the same sheet as the outfeed end panel (C). From the leftovers, you’ll have more than enough scrap to cut the struts, supports and feet, plus any trays you choose to build.
We used hardwood plywood (oak). Stay away from construction-grade plywood (it’s usually labeled “A-C”, “B-C” or “C-D”). Construction plywood is cheaper and tends to warp and is difficult to cut cleanly.
If you’re building this project for a portable saw with its own cart, set up the saw and measure the height of the saw top down to the floor. Subtract 3/16 in. from this measurement and make parts A this height. Part B, the front panel, should be 3-1/4 in. shorter than A. The back, part C, can remain the same as in our plan. It’s important to have the top of the surround just slightly lower than the table of your saw to ensure the workpieces don’t get caught on an edge as you cut. If you’re fussy about setup, you can shim under each foot to dial in the exact height.
After adapting parts A and B, you can use the Cutting List found in “Additional Information” below to cut the other parts. Check the two sides of your plywood before cutting. One side may be darker than the other. We planned our cuts so all the lighter sides would face out. This not only looks good but makes assembly easier.
Cut the Notches

This project assembles with interlocking notches, so cutting the slots accurately is a must. You want the notches to be about 1/32 in. wider than your plywood. This “play” in the notch makes for easy setup and knockdown and still gives sufficient rigidity. The depth of each notch needs to be exact so that the tops of all the parts line up and give you a flat work surface.
Before cutting notches, set your saw depth and make a test cut to check the depth. Screw a block to a sawhorse and clamp the sides (A) precisely together to hold the parts upright and cut. For each notch, make several cuts no more than 1/8 in. apart. Cut out thin strips of plywood with a sharp chisel and smooth the bottom of the notch with a file.
Cut and Assemble the Sides
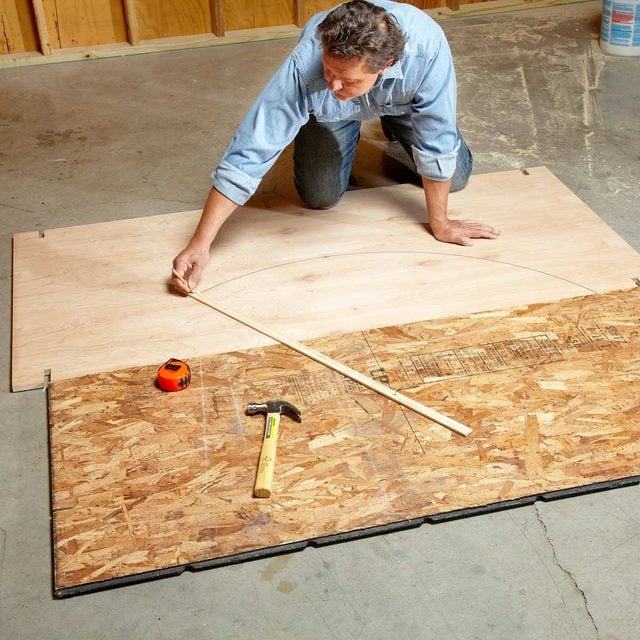
Nail a strip of wood to a scrap of plywood or OSB, 12-1/2 in. from the edge of the scrap. Next, trace and cut the arches in the bottoms of parts A, B and C. Parts A are 30-in. radius and parts B and C are 24-1/2-in. radiuses. Cut the arches with a jigsaw. The curves add to the overall appearance of the project and also make the parts lighter and easier to handle. To complete the sides (A), glue and nail the 3/4-in. x 3/4-in. cleats (D) above the rear notches.
Cut and notch the struts (E) for the outfeed table. Then glue and nail the supports (E2) to the inner sides of the struts.
Assemble the Feet
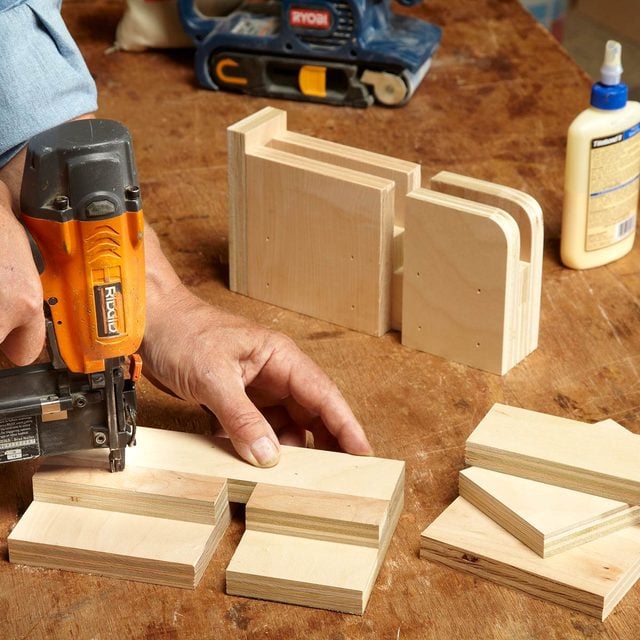
Cut the small plywood parts (F1 – F6) as shown in Figure A. For strength, use glue plus nails or screws, making sure the edges align and sit flat. After assembly, round over the outer corners with a belt sander or jigsaw. Be sure to remove any oozing glue.
Build the Outfeed Table
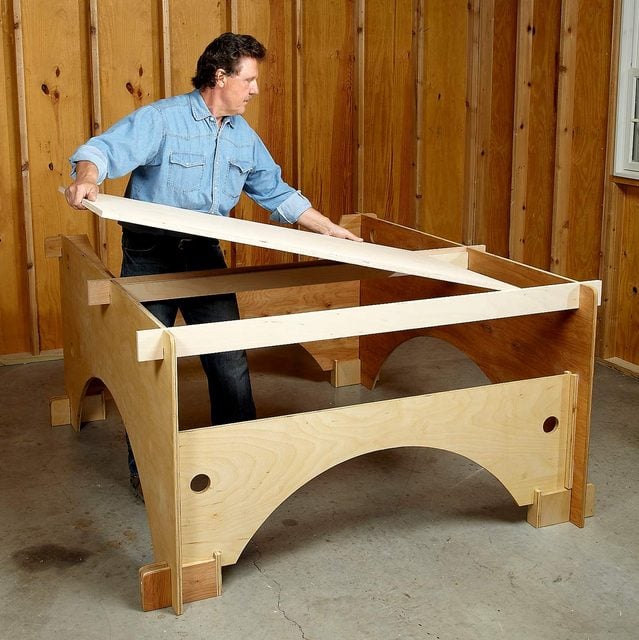
With the feet supporting the sides and the front and rear panels, lay in the struts of the outfeed table. Waiting to glue and nail the plywood top (G) until now will ensure that the struts will be in just the right spot and won’t bind during setup and knockdown. Glue and nail the top to the strut supports.
Check the interlocking joints to make sure they all meet at the right height and that no part of the outfeed table is proud or short of the sides. Also, make sure the front panel (B) is flush with the sides. If any of the notches fit too tightly, widen them with a file. If any are too deep, glue a thin shim into the base of the notch.
Now you’re ready to drill holes, some for trays and others for hanging the parts on the wall. I drilled 2-1/2-in. holes 16 in. on center to align with wall studs and drove 1/2-in. lag screws into the studs. Drill the holes with a hole saw. To get clean holes, start the holes from one side, then, as soon as the pilot bit emerges through the opposite side, remove the drill and finish the hole from the other side.
With the whole project complete, I rounded the edges of the parts with a 3/8-in. round-over router bit. This makes the whole project look better and reduces splintering on the edges, but it’s not mandatory. Then I sanded the plywood with 150-grit sandpaper, vacuumed, and applied two coats of Minwax Wipe-On Poly to all the parts. The finish will reduce warping as the humidity changes. Plus, it makes the whole project look great.
This DIY Table Saw Table Works With Benchtop Saws, Too
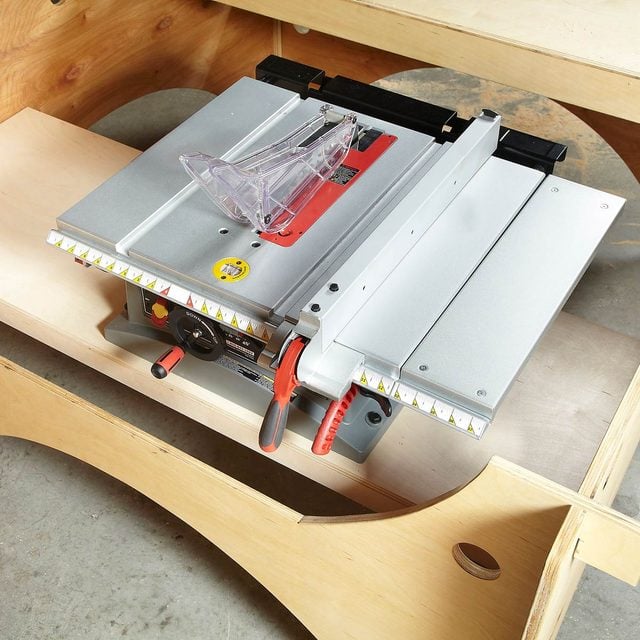
If your saw doesn’t have a stand, just glue and screw 1×2 cleats to the side panels. Drop in a shelf and you’ve got the perfect platform for a benchtop saw. The shelf is simply a slab of 3/4-in. plywood with 1×2 stiffeners glued to the front and back edges.
Additional Table Saw Table Features
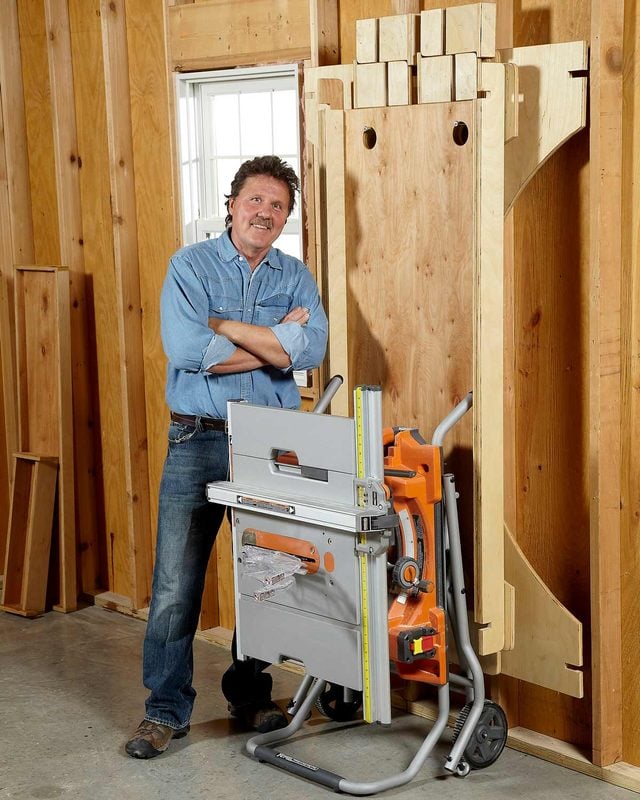
When done, simply dismantle it and hang it flat on the wall, and you’ll still have plenty of space to park the car.
Outfeed Table and Side Support
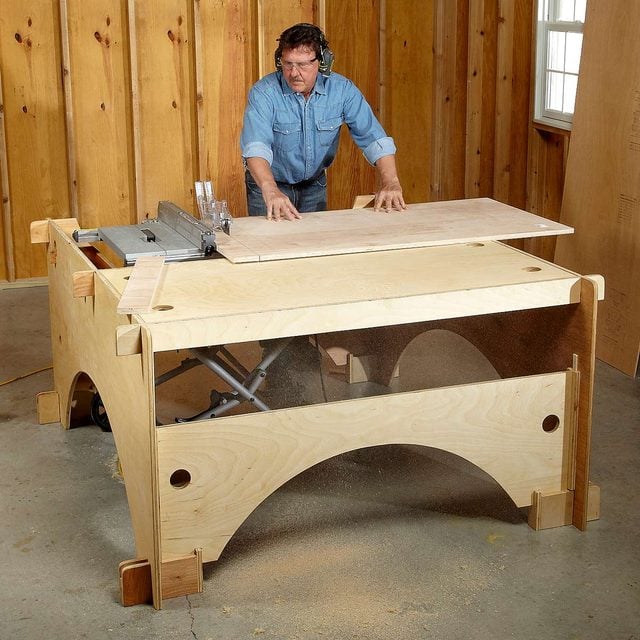
Rip or crosscut large parts—even full sheets of plywood—without a helper.
Assembly Table
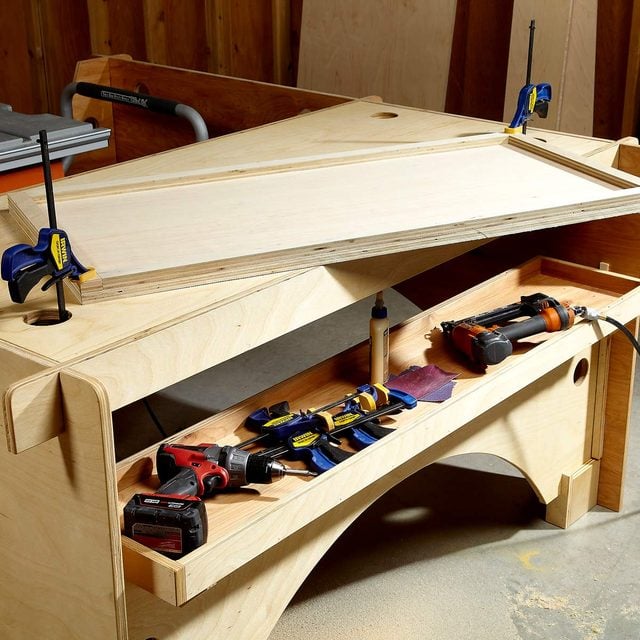
The outfeed table doubles as a large work surface. Plus, there’s a tool tray below.
Tool Trays Galore

Build as many as you need and hang them anywhere you like.
Our team of experts reviews seven portable table saws that are ideal for DIY home use. We’ll help you choose the best table saw for your individual needs.
Additional Information