How To Save a Pet-Stained Hardwood Floor

Updated: Feb. 07, 2024
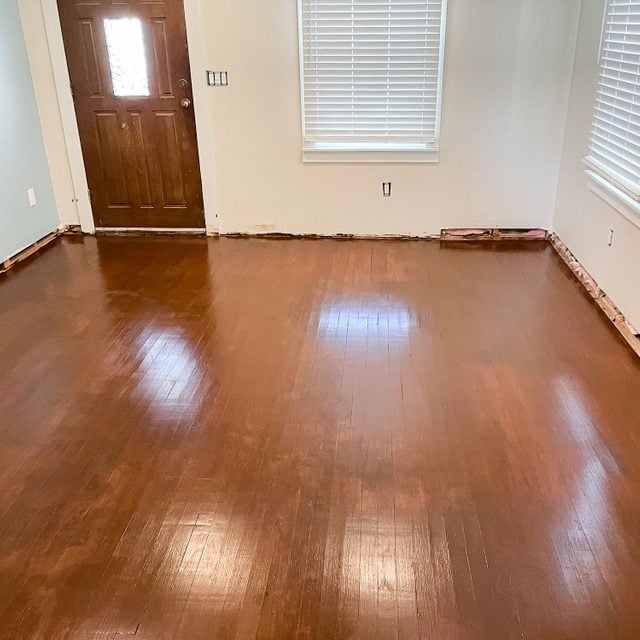
We brought a floor with 100 years of pet pee stains back to life, even though the pros said it was a lost cause. Here's how we did it.
2 to 3 days
Intermediate
$200
Introduction
We were nearing the end of a total house renovation when we finally got to the wood floor in the living room. We were excited about redoing this one, the only original floor left in this 100-year-old house.
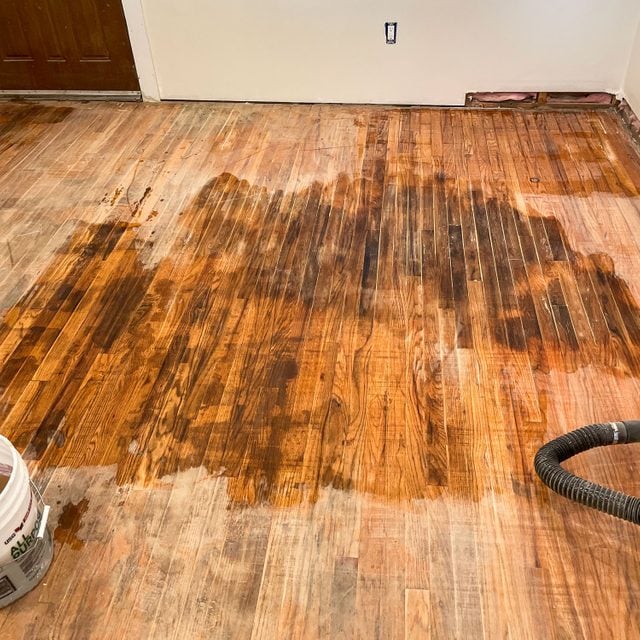
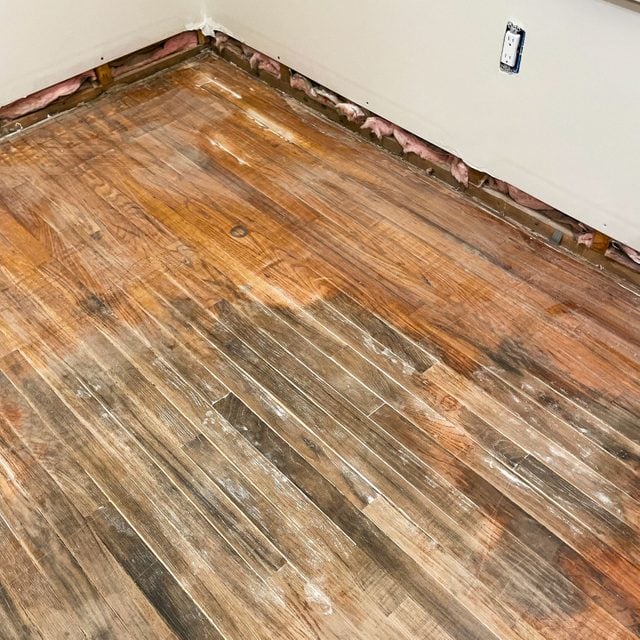
But once we took a sander to it, we came to a grim realization: It was riddled with pet pee stains. We spent days researching solutions. Unfortunately, we learned once pet urine permeates the protective finish, it gets absorbed into the grain, living forever as a dark stain.
A few miracle products claim to remove these stains, and a few YouTubers suggest using peroxide to lighten them or a dark stain to conceal them. But after enough research, it became clear that none of these "solutions" would work. And every pro we talked to said the same thing: You have to replace the stained boards.
Yet, we were stubborn. We weren't ready to give up and install laminate flooring. We wanted people to enjoy this historic wood floor for years to come.
Eventually, we came up with a finish that made the floor acceptable. It appears old, with character, but not grossly stained.
Here's what we did to revive our hardwood floor.
Note: If you're seeking a perfect hardwood floor, this recipe is not for you. Instead, you'll need to remove and replace any pet-stained boards.
Tools Required
- 1-in.-wide putty knife (optional)
- 2-in. paintbrush
- 5-gallon bucket
- Applicator extension handle
- Floor sander (belt style or not drum!)
- Mop
- Polyurethane applicator sponge or pad
Materials Required
- 1-gal. clean or empty paint can (per 300 square feet)
- Box of lint-free rags
- Mineral spirits
- Paint tray with disposable insert
- Painter's tape (optional)
- Polyurethane designed for wood floors
- Strong cleaner like Simple Green
- Tack cloths
- Universal colorants
- Vinegar and baking soda (optional)
- Wood putty (optional)
- Wood stain
Project step-by-step (6)
Clean the floor
- Prior to sanding, thoroughly clean the floor to remove any polish, wax and contaminants. This will probably involve mopping it several times. It’s fine to use soap at first, but apply clean water only on the last couple of passes. The pet stains will become more apparent once the floor is wet.
- If the pet stains are fresh and creating odors, apply white vinegar to the affected areas and let it soak for a few hours. Then apply baking soda, which will absorb moisture left in the boards and help with the smell.
Fill in any cracks
- If you have boards that are separating, use a high-quality, stainable wood putty to fill in the cracks.
- Let dry according to the manufacturer’s recommendations.
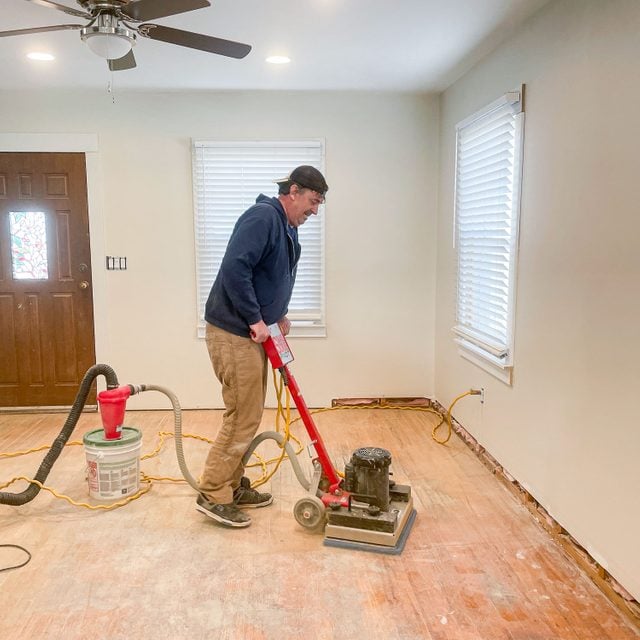
Sand and re-clean the floor
- Sand the floor, complying with any instructions provided by the sander rental company.
- Don’t concentrate on pet stains, just make sure you get all the old finish off the entire floor. In our case, we had to use an orbital floor sander because it was the only tool available from our rental store. It didn’t strip the floor completely, but did remove all traces of the protective coating. It ultimately ended up doing what we needed, but made the next step — applying the stain — more difficult than it needed to be.
- Wipe up the sanding dust with tack cloths.
- Wipe the floor with mineral spirits, which will dry out the surface and remove any lingering contaminants.
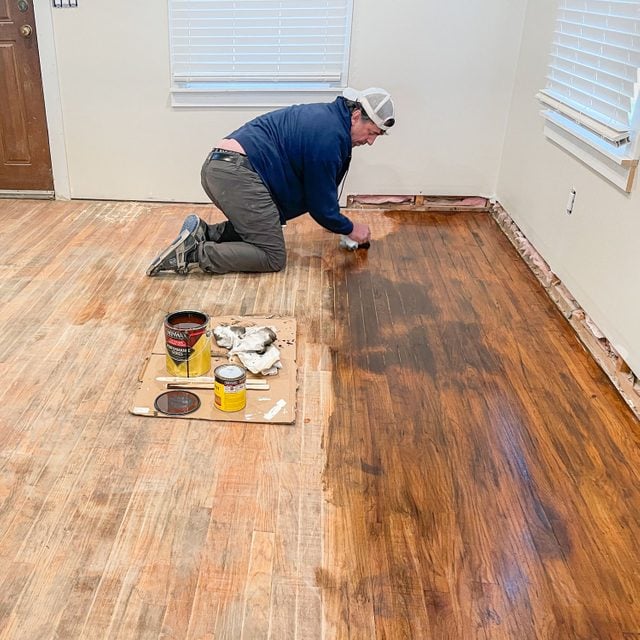
Wood stain the floor
Wipe wood stain into the floor, using the lint-free rags. A dark-colored stain will work best for muting out the edges of the pet stains.
Prepare the coating concoction
Typically, when refinishing a hardwood floor, you’d apply several coats of clear polyurethane to protect the new finish. If we had followed this procedure, the pet stains would have stood out. Instead, we opted to try to conceal the stains under the finish coat. To do this, we stained (tinted) the polyurethane.
- Fill an empty paint can three-quarters of the way with a polyurethane coating specifically for hardwood floors. (We used a water-based Duraseal.) You can get a clean, empty paint can from your local paint store.
- Slowly add universal colorants to the polyurethane until it reaches the desired color. You’ll need to get these ingredients from your paint store, and you’ll likely have to ask them to put some in containers for you, because they’re not sold commercially prepackaged. Make sure to ask them for a colorant that will not react adversely with the polyurethane you selected.
- Mix it well, then test it on a small corner area to make sure you’re happy with the color.
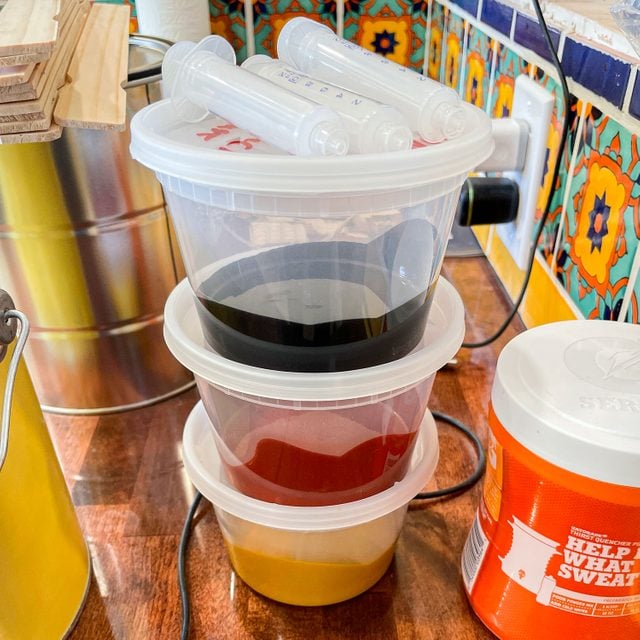
Pro tip: It may be difficult to match this color again. So make a large enough batch to do the entire floor, plus enough left over for future touch-ups and repairs.
Apply the coating
- If you have baseboards that need to be protected from the polyurethane, cover them with painter’s tape.
- Using a two-inch paintbrush, coat the perimeter of the floor. This is so you won’t hit the walls when you’re using the larger polyurethane pad.
- Pour the polyurethane-stain combo into a paint tray.
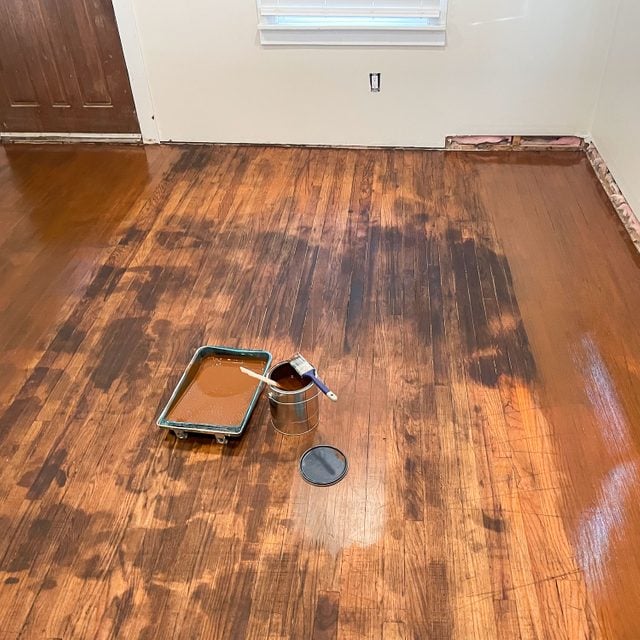
- Use the application pad with the extension handle to spread the coating across the floor. Apply it longways down the planks, taking care to smooth out any buildups along the edges from each previous pass.
- After completing the first pass, touch up any areas that need it.
- Let that coat dry per the manufacturer’s instructions before adding the second coat. In our case, we waited two hours.
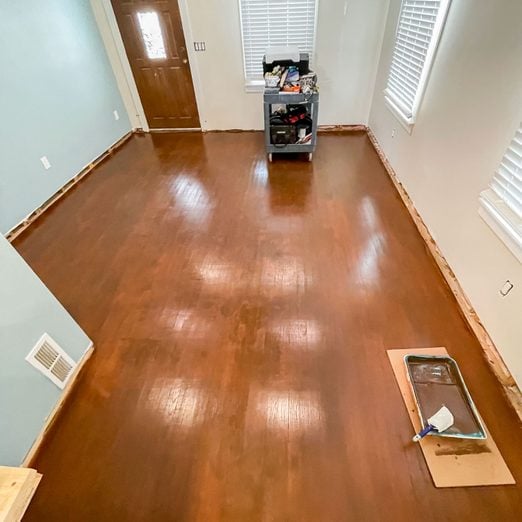
- Coat the floor again. At this point, we could barely see the outlines of the stains through the finish.
- Let that coat dry completely, per the manufacturer’s instructions. In our case, that was 24 hours.
- Coat the floor again, this time with clear polyurethane. This finish adds depth to the floor’s aesthetics. Again, let it dry per the manufacturer’s instructions for curing time.
- Enjoy your revived hardwood floor!