
Outdoor Pond Ideas: Above-Ground Pond
Updated: Jan. 03, 2024
Multiple Days
Intermediate
$501-1000
Introduction
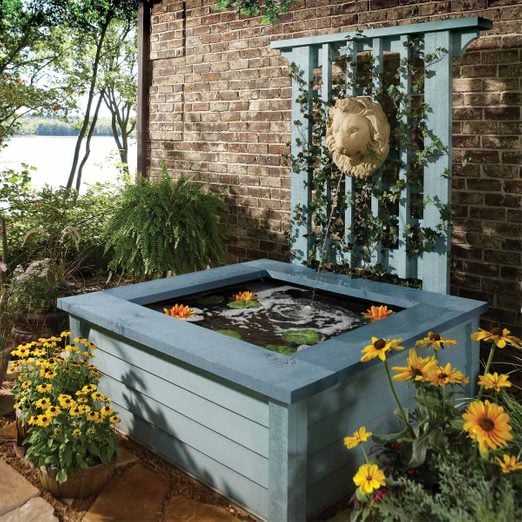
Build this simple, above-ground pond in a weekend. It features a fountain and a trellis. It's attractive, yet you avoid the tough digging chore. Plus it's less of a hazard than in-ground ponds.Tools Required
- Chalk line
- Circular saw
- Drill/driver - cordless
- Framing square
- Gloves
- Hammer
- Jigsaw
- Level
- Miter saw
- Safety glasses
- Scissors
- Shovel
- Speed square
- Staple gun
- Tape measure
Project step-by-step (8)
Pond Design and Costs
Ponds don’t necessarily have to be in the ground. By adopting some of the techniques and materials used in the wood foundation industry, you can build a pond above ground a whole lot faster and easier. An above-ground design may be safer, too, but always supervise small children around any type of pond.
In this story, we’ll show you all the steps you’ll need to build your own version. We built the above-ground pond with treated wood for longevity and used rough-sawn cedar for the trim and the trellis. But if cedar isn’t available, you can use any weather-resistant material including treated wood, cement board siding, vinyl, composite wood or any mix of these in your area. You can make your pond longer or wider (stay under 6 ft. long on either wall), but don’t make it any deeper or the walls may bow. You’ll only need a circular saw to build your pond plus the usual carpentry hand tools, but a miter saw makes faster, more accurate cuts. You’ll need a jigsaw to cut the curved trellis parts.
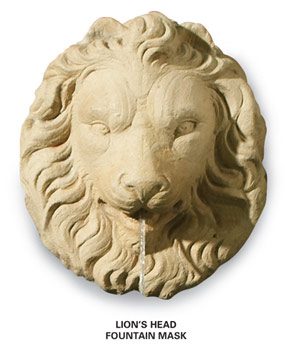
Expect to spend about $300 for the box and trellis materials, $80 for the liner and another $75 for the pump. Fountain “masks” can range in cost from $25 for small plastic ones to $1,500 for elaborate bronze or lead casts. The fiberglass lion’s head shown cost about $120. You can also find above ground pond kits at home improvement stores.
If this above-ground pond doesn’t pique your interest, check out all of our backyard pond designs.
Special Above-Ground Pond Advantages
NO-DIG: With this design, there’s practically none of the worst part of pond building—gut-busting digging. And that also means there’s no huge pile of dirt to get rid of.
FAST: Talk about instant gratification! Build the walls and trellis in the morning and assemble the pond in the afternoon. Add the trim the next day and go buy goldfish!
SAFER: Traditional in-ground ponds can be a drowning hazard for toddlers and pets. With this above-ground design, the risk is reduced.
Pick a spot and buy the materials
You can position your pond just about anywhere you want, including on a slope. Of course, that’ll mean extra digging. If you nest it into a hill, just backfill against the walls after the pond is filled. Sunny areas will promote algae growth, so site your pond in the shade if you want to reduce cleaning chores. We didn’t include a filter, but consider adding one if you’d like consistently clear water. If you want a water-spewing fountain mask, you’ll need a pump and a power supply. So locating your pond as close as possible to a power source will eliminate a lot of trenching and running underground cable, and you won’t have to add a waterproof outlet. (For more information type “underground wiring” into the search box above.) If you’re placing the pond against a wall, keep it at least 2 ft. away so you can access the back for hookups and maintenance.
Buying the materials
You’ll find everything you need at any home center (see Materials List, available for download using the button above). If there isn’t a dedicated section for pond supplies, go to a garden center for those materials. Pond liner is sold in precut boxed kits or cut from 12-ft.-wide bulk rolls, which generally costs less. Get a 10-ft. length or an equivalent-sized kit. Also buy the same length of pond cushion. That protects the liner from punctures. To save money, you can substitute a few layers of landscaping fabric for the pad like we did (the home center was out of liner pad) or even use old carpeting. If you’d like a fountain mask, you can prowl garden centers that have well-stocked pond departments. Or go online and do a search for “pond fountain head mask”—you’ll find dozens to choose from. Choosing a fiberglass mask makes the most sense. They’re light and easy to mount. Because masks of cast metal or concrete are very heavy, they cost more to ship and are difficult to mount. Masks may or may not have mounting holes or hardware. So be prepared to drill your own holes and figure out how to fasten it to the arbor. We drilled two holes in a few mane crevices and used deck screws to hold ours in place. You’ll also need a pump and 10 ft. of water line and whatever hardware is necessary to connect it at both ends.
Construct the Walls and Trellis
First cut the footing plates to length and then cut the parts and build the walls (Figure A). Be sure to choose nails that are rated for treated wood or your pond won’t last more than a few years. Leave out the corner backer boards for now so you can screw the walls to the footing plates at the corners once the walls are installed (Photo 4). Don’t forget to screw two 2×4 trellis ledgers to the rear wall with GRK screws (or substitute 3-in. deck screws).
Build the trellis next (Photo 1). It’s up to you which way the trellis faces; it has two distinct sides. (If you look closely, you’ll see we changed our mind halfway through and flipped it around.) To cut the arched rail, first cut the 2×6 to length and then mark the measurements we show on Figure A. For the end curves, line a 5-gallon bucket up with the marks and trace around it. For the center curve, bend a thin flexible board or steel rule to the marks and have someone trace along it while you hold it. Cut the three curves with a jigsaw.
Assemble the Walls
Lay the footing plates on the ground to finalize the pond’s location and then lay out the footings. Mark the ground 6 in. on both sides of the plates with marking paint and dig a 4-in.-deep trench on all four sides. Keep the bottoms reasonably level, but don’t beat yourself up over it. Try to stay within an inch or so of level.
Spread about 3 in. of gravel at the trench corners and set the steppingstones, again using the footing plates in their final positions to help with exact placement. Adjust them until they’re all level with one another. Use a straight footing plate to extend your level wherever you need it (Photo 2). Finish filling between the stepping-stones so the gravel is level with the tops. Last, reset the footing plates and toe-screw them together (Photo 3).
Note that the walls overlap the footing plates. The water pressure inside the walls is no small force, so it’s important that everything be tied together. Screw together the wall corners and check to make sure the pond is square before screwing the corners to the footing plates (Photo 4). Then screw or nail the corner backer boards in place. Overlap the top plates to tie the wall corners together.
Install the Pond Liner
Rip 45-degree corner blocks and tack them to the inside corners to help protect the pond liner. Spread a 2-in. layer of sand on the bottom of the pond to protect the liner and mound up sand against the walls to eliminate any sharp corners (Photo 5). Both of these steps prevent stress on the liner. Staple the liner pad to the walls (Photo 6). Be sure to set all the staples or pull mis-set ones so none of them will poke holes in the liner. Trim off the liner even with the top with a scissors.
Lay and center the liner inside the walls, pleating the corners to avoid creating a thick lump of fabric. Then begin filling the pond. As water runs in, it’ll force the liner against the walls and the bottom to eliminate voids. As the pond fills, continually work on the pleats and smooth out the sides to keep the liner as wrinkle free as possible (Photo 7). It’ll get harder and harder to work the liner as the pond fills, so keep at it throughout the fill. When you’re satisfied, cut and install the 1×4 liner clamp board. Screw, rather than nail, the clamp board to make it easier to replace the liner later. Leave a small gap in front of the trellis to feed the water line and cord through (Figure A). Then trim off the excess liner with a utility knife.
Add Trim, Side Walls and a Finish
Cut the backfill boards to fit, then rest them on the footing plate and nail them to each stud. Cap them with Z-flashing to divert water. Add the cedar corner boards. It looks best to rip one side of each corner so the total width will be the same on each side. Add the 2×2 frieze board between the corner boards at the top of the walls and then nail on the siding (Photo 8). Lay out the siding so the exposure is equal on all the pieces. Lastly, add the 2×10 top caps. Before cutting them to length, test-fit the pieces to make sure the overhangs will be equal everywhere. The top cap against the trellis won’t be exactly centered; it’ll extend a bit farther over the pond. But that won’t be noticeable. Don’t miter the top cap corners; instead, use butt joints as we did. Miters will open up in a very short time.
After going through the tedious process of staining the finished product with a latex-based exterior wood stain, we recommend prefinishing instead, especially if you plan on a two-color finish. Finish all the exposed wood (especially the trellis pieces) before assembly. You’ll save tons of time and wind up with a crisper paint job.
Construct the Walls and Trellis
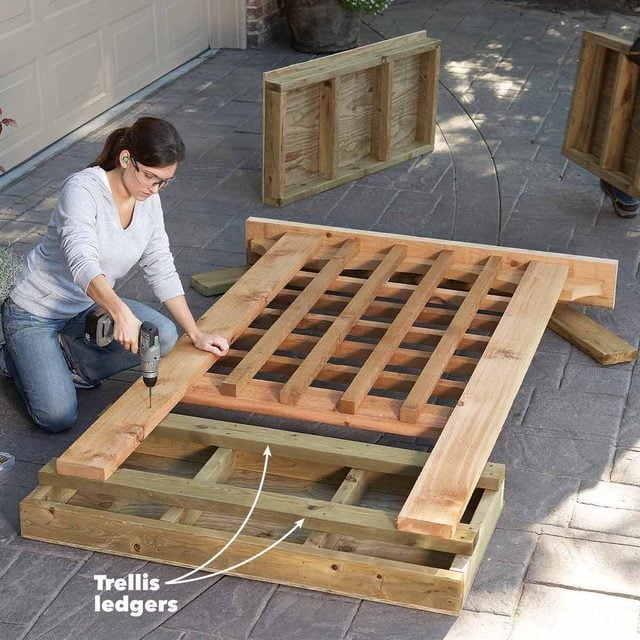
Build the walls and trellis on a big, flat work surface like your driveway. Mount the trellis on the back wall before moving it to the pond site. If you’re looking for more pond ideas, then you must check out our collection of backyard koi pond ideas.
Level the Footings
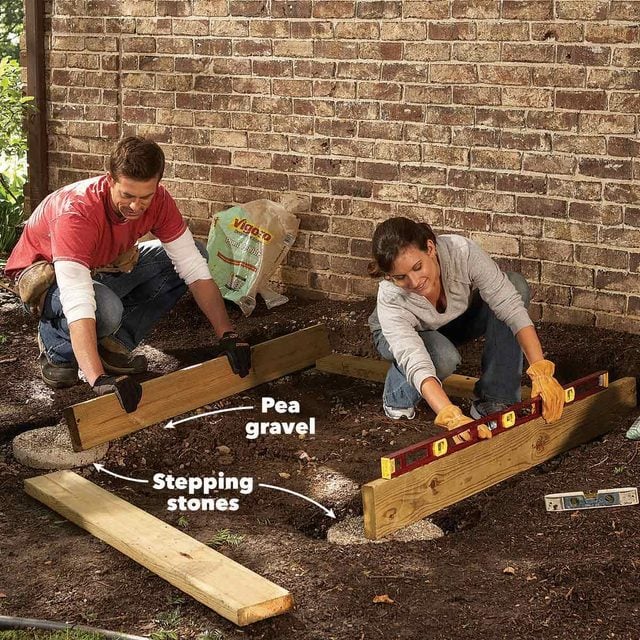
Level the concrete pads that support the pond box corners. Fill the trenches between the pads with gravel.
Set the Footing Plates
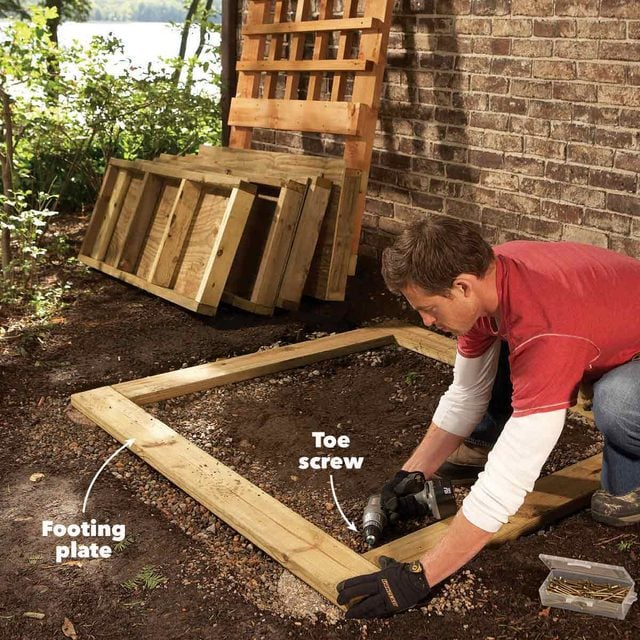
Toe-screw the footing plate together at the corners to form a level platform for the walls.
Erect the Walls

Lock the walls together by screwing them to each other and then to the footing plates. Add overlapping tie plates for rock-solid corners.
Eliminate Sharp Corners
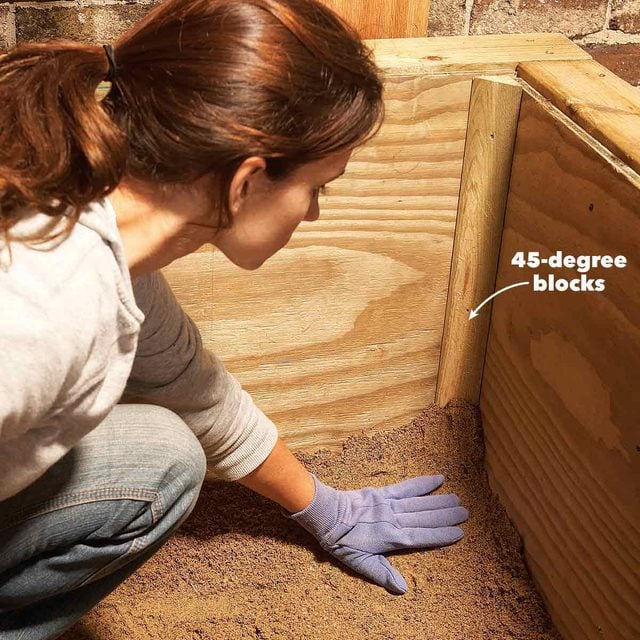
Eliminate sharp corners inside the box to prevent stress on the liner. Fill inside corners with 45-degree strips and slope sand up against the walls.
Add a liner pad
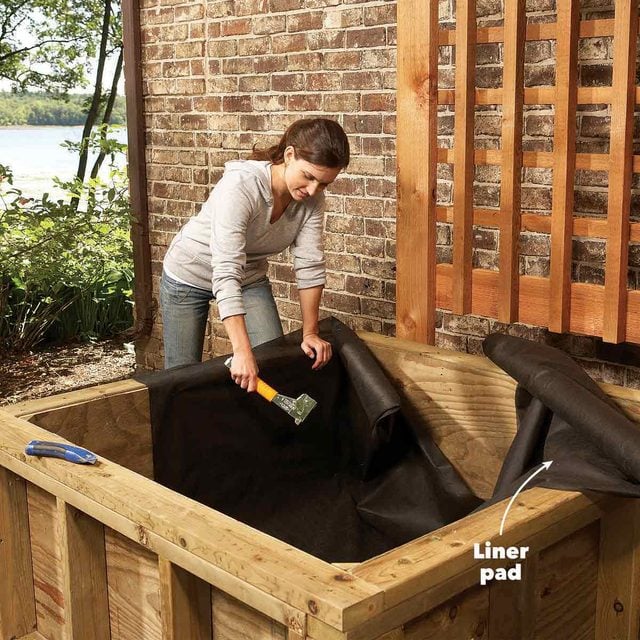
Line the box with padding to protect the liner. Pull any protruding staples with a hammer to prevent punctures.
Install the Liner

Work on the pleats and smooth creases in the liner as you fill the pond. Add the liner clamp boards and trim off the excess liner.
Nail on Trim and Siding
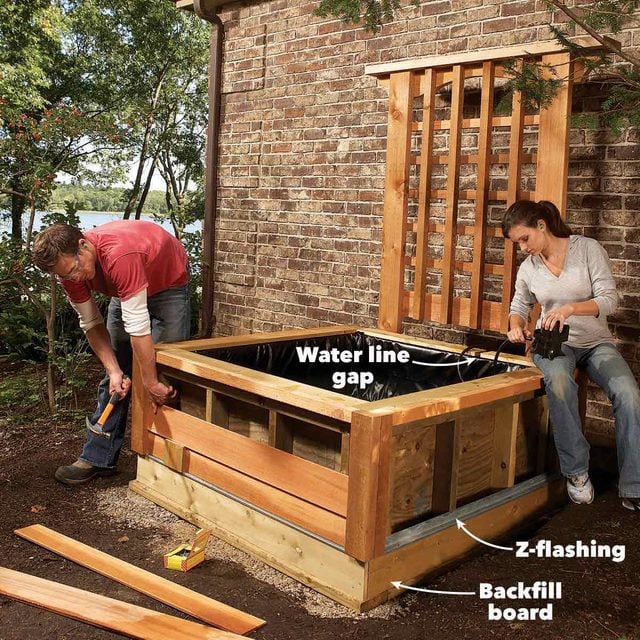
Nail on the backfill boards and cap them with Z-flashing. Then add the corner boards, frieze boards, and finally the siding and top caps.