
How to Reupholster a Chair

Updated: Apr. 22, 2024
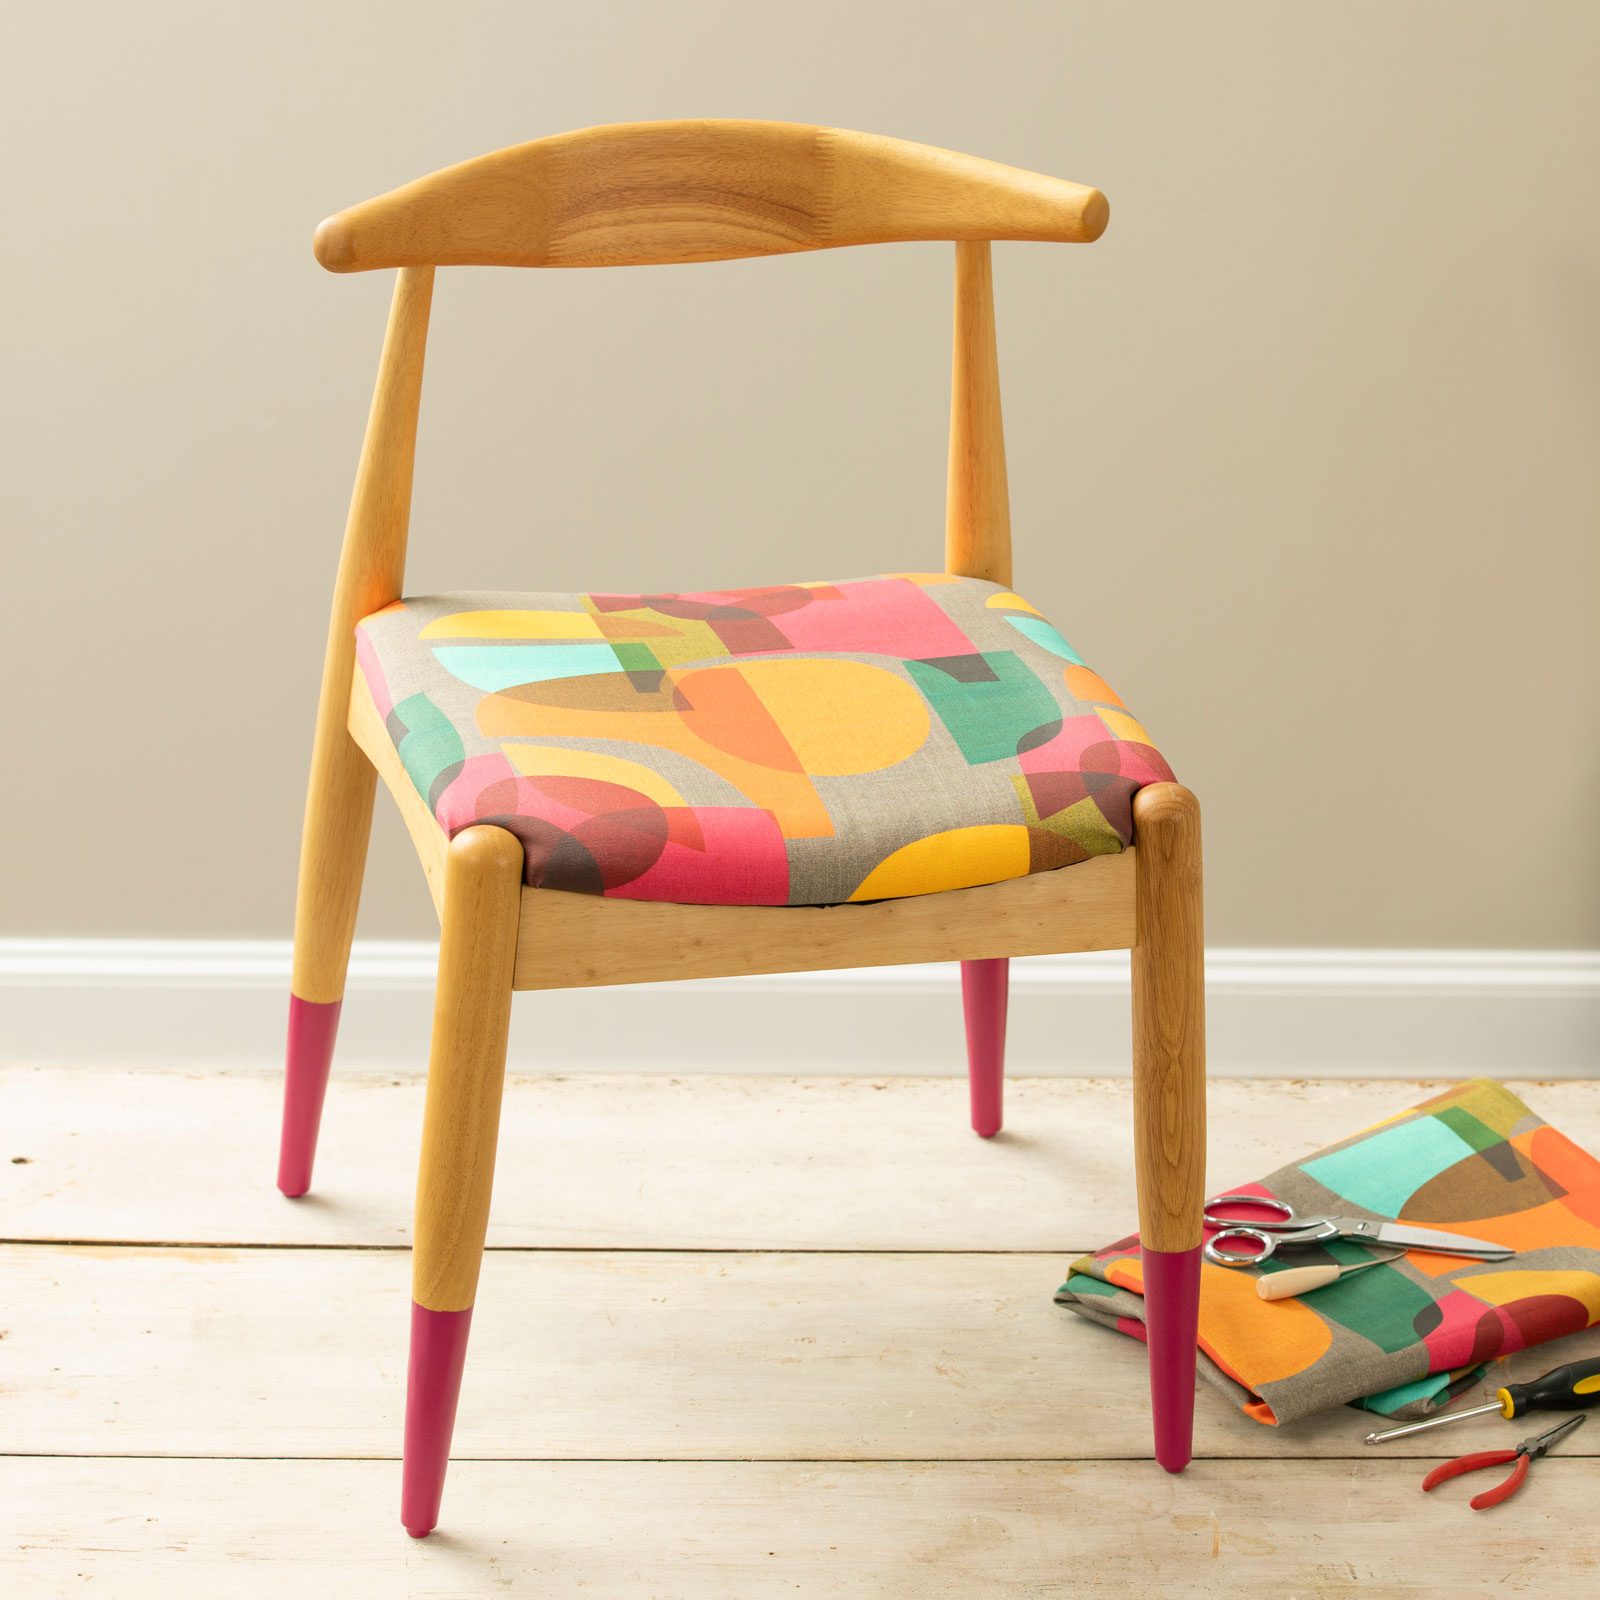
Anyone can make a nasty seat nice in just a couple of hours. Here are some tips for successfully reupholstering chairs.
A half day
Beginner
$51–100
Introduction
If you have battered chair seats, you can easily re-cover them. Make a mistake? No problem. Just pull a few staples and start over. Reupholstering is a great way to bring old furniture like chairs, benches or stools back to life. The materials are relatively inexpensive, the tools are simple and it's a project almost anyone can tackle with success.
Tools Required
- Electric serrated knife (Optional)
- Fabric scissors
- Pencil / Marker
- Small screwdriver or staple remover
- Small Tack hammer
- Staple gun (preferably electric)
Materials Required
- 1” – 3” Thick upholstery foam (Optional)
- 3/8” Serrated staples
- Cambric dust cover fabric
- Spray adhesive
- Upholstery batting
- Upholstery Fabric
If I were to say to someone, “I am going to reupholster a chair,” I might as well have said that I’m taking up rocket science. Thanks to some common misconceptions, many people consider reupholstering furniture a very specialized and difficult task. It’s as if the word upholstery heightens the level of DIY intimidation. But it is safe to say that reupholstering a chair is among the easiest DIY projects and yields some of the greatest before-and-after results.
I have been reupholstering furniture for what seems like an eternity. I learned early on that reupholstering is an inexpensive and easy way to revive a chair, impacting a whole room for pennies on the dollar. After you’ve done it once, you will see how simple it is, opening your eyes to all kinds of upholstery repairs, from sewing ripped seams to closing holes in fabric.
Invest in that expensive piece of fabric, make the chair look just the way you imagined it would, and do the job yourself. Win, win! Save, save!
Project step-by-step (7)
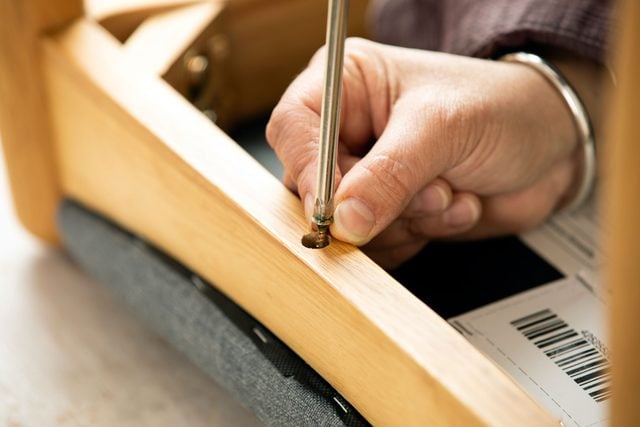
Remove seat from chair
Remove the screws that secure the seat to the base of the chair or bench. Set the chair base aside while you work on the seat. Save the screws that came with the chair, as they will be used again to put the chair back together.
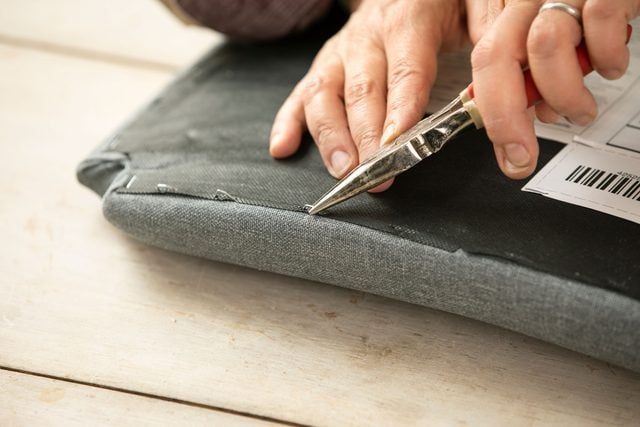
Remove staples
With the seat bottom facing up, carefully work your way around the edge removing the staples to release the cambric dust fabric and old upholstery fabric. Try to keep the dust cover material intact as you may want to use it again. If the cambric fabric tears, you can replace it. Pull apart the fabric from the seat.
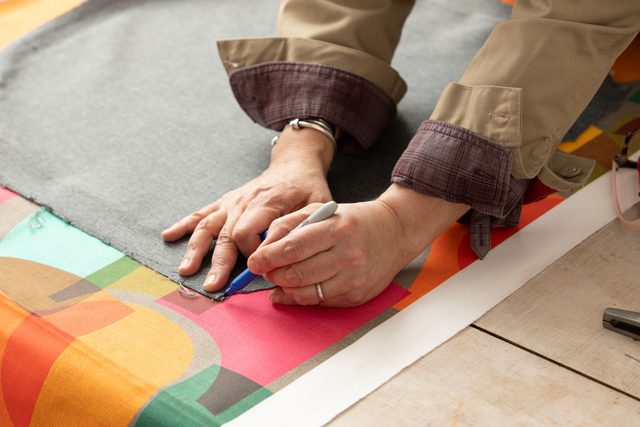
Cut new fabric
Cut the new fabric to size using the original upholstery material as a template.
If your fabric has a large repetitive pattern, be conscious of choosing how you want it to look once the chair is right-side up. Also, be aware of the differences between the front and back orientation of the chair. Some chairs are not symmetrical, making it easy to lose track of the layout. Mark the front and back to help keep the pattern in the direction you prefer.
- Pro tip: At this point, take a good look at the foam. If the foam in the old furniture is worn and matted down, you may want to replace the foam and add new batting. The original foam is often reused when reupholstering, but changing out the foam is always an option to consider.
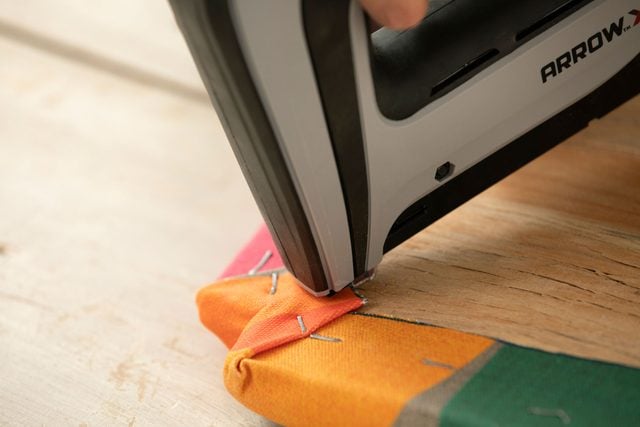
Position new fabric and staple
Position and center the new fabric on the seat, allowing approximately two inches to fold over and cover the seat completely. Make sure the fabric is pulled taught around the edges of the chair while you staple. Work carefully, avoiding wrinkles and not overlapping the fabric.
- Position the fabric where you want it and pull it tightly on the seat.
- Place one staple in the middle of each side of the chair – this will prevent the fabric from shifting as you work your way around with the rest of the staples.
- Focus on one side at a time, gradually working your way around the chair.
- Use a small tack hammer to deeply seed the staples into the fabric and wood seat.
- Pro tip: Apply some spray mount adhesive along the edges, catching the wood seat and the fabric so the edges stick and don’t shift around as you staple.
Important:
- DO NOT staple fabric in the corners until all four sides are stapled in place.
- Cut away fabric to expose screw holes for the frame and seat to come together. This will help you find the old screw holes easily and prevent the fabric from twisting when installing the screws.

Upholstering chair corners
Corners are the trickiest because the fabric folds are bulky and hard to work with. These bulky folds may prevent the seat from sitting flatly against the frame when you attach it back onto the chair. Feel free to cut away fabric as you fold the corners.
The most important part of this upholstery repair project is to ensure that the fabric covers the seat completely and extends beyond where the frame will sit. Think of the corners as wrapping a gift — the fabric can be trimmed as needed. Use as many staples as it takes to get the fabric to lay flat and secure.
Replace the cambric dust cover
Reposition the cambric dust cover and staple it in place. Avoid placing staples in the previous holes as the fabric is weakened and may come apart easily. If needed, use a tack hammer to sink staples deeper.

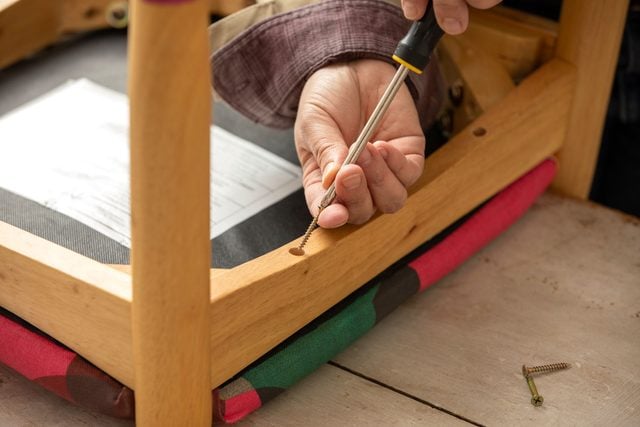
Re-install upholstered seat
With the fabric fully secured, reposition the chair seat onto the frame and make sure it sits flat. Using the same screws, join the seat back into place. Be sure to enter the same holes so the seat is positioned correctly.
- Tip: If the screw holes are stripped, fill the holes with small pieces of toothpicks and a dab of wood glue. Then screw it in.
Paint an added feature: To really dress up the chair and add another pop of color, I picked a color complementary to the fabric and painted the lower third of the chair. This is called a “paint dip.”
FAQs
Will any fabric work to reupholster a chair?
Yes and no. When selecting a fabric to upholster a cushion or seat, you want to check quality and durability. Go to a fabric store and look at recommended uses and fabric grades A through F. Fabric grades will reflect the price and quality of the fabric. An “A” grade is less expensive, with “F Grade” being the most expensive because it has a more complex weave and typically incorporates more natural materials.
Another way to determine the quality of a fabric is called a double rub. It is a test to determine how often a fabric can be rubbed before it wears out. One pass back and forth accounts for one “double rub.” Domestic fabrics are usually rated at 25,000 double-rubs. If you are purchasing one that is over 50,000 for a high-use chair, you will be making a good fabric choice. Industry standards set commercial-grade fabrics as wearing out after 100,000 to 250,000 double-rubs. Take your time to look at the differences before you make your final selection.
If the wood seat to my chair is made of particle board and falling apart, can I change it?
Yes. There are two important factors to adhere to when changing out the wood in a chair seat: First, try to keep the same shape as the original. The chair frame was designed for this seat to bear and distribute weight. Changing the shape of the seat may make the chair unsafe to sit in. Second, always use at least 3/4-in. thick stock. Anything less may bow and buckle, further compromising the chair.
How do I know if my chair is worthy of being reupholstered?
Before you go through the process of reviving a chair by reupholstering the seat, be sure the chair is a viable candidate by checking these few things.
- Solid Frame: Make sure the frame of your chair is solid. That means no creaking when you shift it back and forth and no obvious cracks in the wood.
- No cracks in the gussets: When you look under the chair, you’ll find four smaller pieces of wood, one in each corner angled at 45 degrees. These pieces are often called gussets and keep your chair square and together. If one is cracked or missing, your chair won’t last long, and it is not worth the effort of trying to revive it.
- Unions where the chair frame meets the seat must be solid: If there is a gap where the seat frame meets the chair seat, your chair will have a high likelihood of falling apart. A quick nail or screw will probably be unsightly and won’t keep the chair together for an extended period of time. All of these factors make the chair not worth a reupholstery job.
Originally Published: September 16, 2019