
Upholstery Repair: How to Sew a Ripped Seam

Updated: Apr. 11, 2024
How to fix a ripped couch seam the right way.
1 hour
Beginner
Less than $20
Introduction
Learn how to sew a ripped seam, a vital DIY upholstery repair that will keep your furniture looking beautiful for years to come.
Tools Required
- Needle nosed pliers / thimble
- Scissors
- Upholstery Needle
Materials Required
- Upholstery Thread
The most common upholstery repair is fixing a frayed or pulled-apart seam. Frayed seam damage usually occurs over time due to natural wear and tear. We usually only think of fixing torn upholstery after we are tired of looking at it. The good news for DIYers is that you can fix frayed or pulled-apart seams without taking apart the piece of furniture.
No one in their right mind would throw away an expensive piece of furniture with a frayed edge or seam on an upholstered cushion. But upholsterers want a pretty penny for a repair, which can make the task seem intimidating.
The truth is that taking on this repair job will ultimately cost you more in time than money. It is not a complicated fix, but it does require patience and attention to detail. Upholstery repair is not a project you want to take on while feeling rushed or if you’re having a hard time focusing. But if you have the patience, I truly believe anyone willing to wield a needle and thread can be successful with this DIY fix.
Project step-by-step (8)
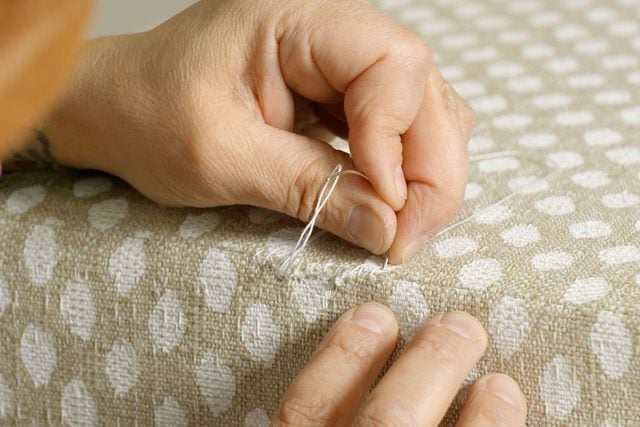
Prep the seam
Thread the needle and tie a knot at the end. Prep the rip by doing a back stitch on one side of the open seam, going all the way from one end of the damage to the other. This will prevent the seam from fraying further and strengthen the repair. Prepping the seam is particularly helpful when you have a wide weave with threads that easily come apart.
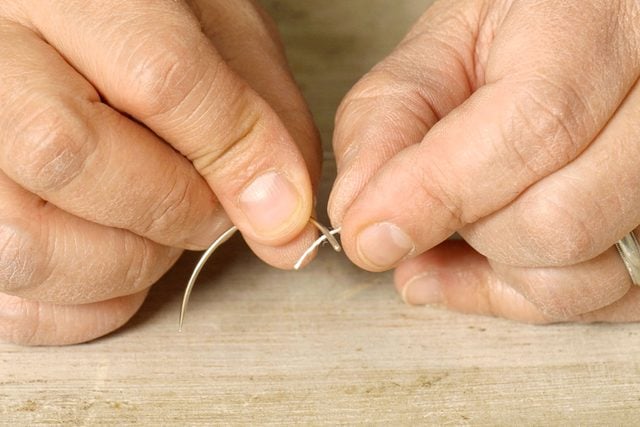
Thread the needle
Professional upholsterers use curved needles for this repair, which are inexpensive and highly efficient. Thread a curved needle and place a knot at the end. Do not double up the thread as it tends to knot up and will be difficult to cut out if you need to re-do any sections. This is also why I specifically use upholstery thread.
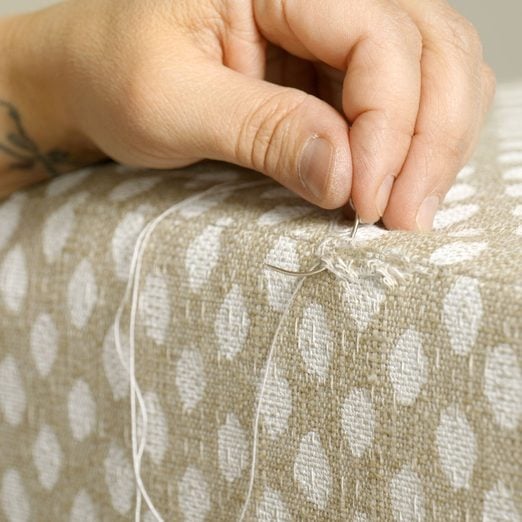
Start the ladder stitch
Insert the needle through the ripped seam and bury the knot inside it about a 1/2 inch from where it’s starting to open. If possible, come up through an existing stitch hole in the seam where the thread is still intact. This may be easier to see in a thicker, stiffer material.
If the stitch holes are not visible, try to space your stitching the same distance as the original. If the material is too stiff, you may need to use needle nose pliers or a thimble to help push the needle through. Avoid forcing the needle so it doesn’t break below the surface of the fabric.
Stitch to the other side of the seam
Direct your needle across the seam, threading into the part that has already been backstitched. Try to push the needle directly into the stitch hole opposite the one you started with. Guide the needle parallel along the seam and up through the next stitch hole.
Jump back across to the other side of the seam and again push through the next stitch holes, leaving the thread loose. Be sure not to pull or cinch the stitch too tightly.
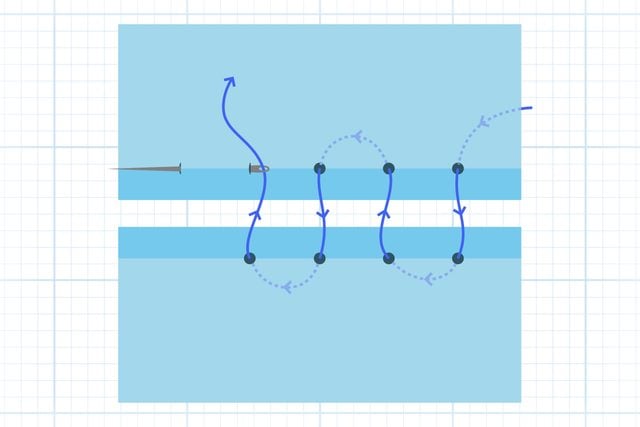
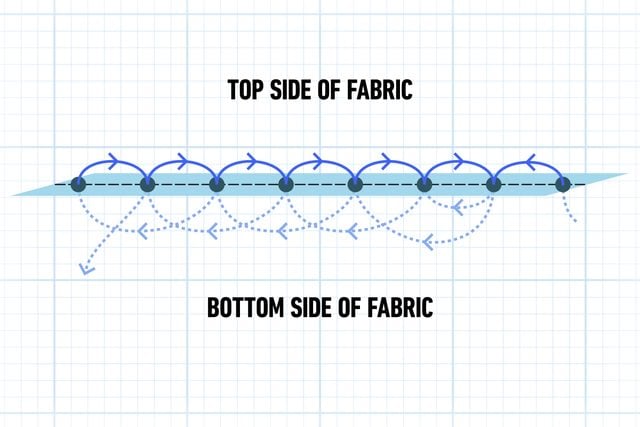
Repeat the stitch back and forth
Repeat stitching back and forth in a zig-zag pattern across the seam. Go a few stitches beyond the fray and end with the thread hanging out to ensure the new stitches are locked into the original seam and don’t pull out or separate again.
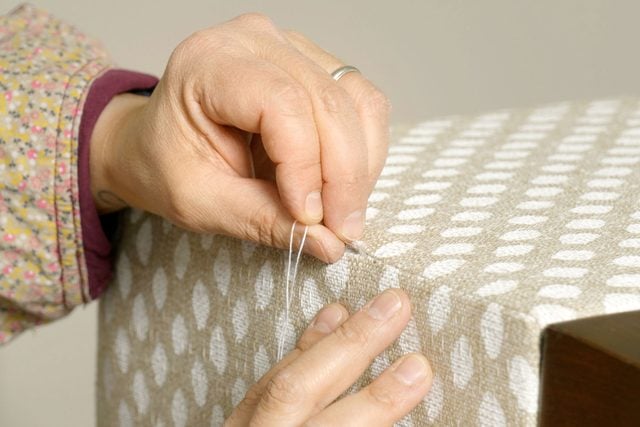
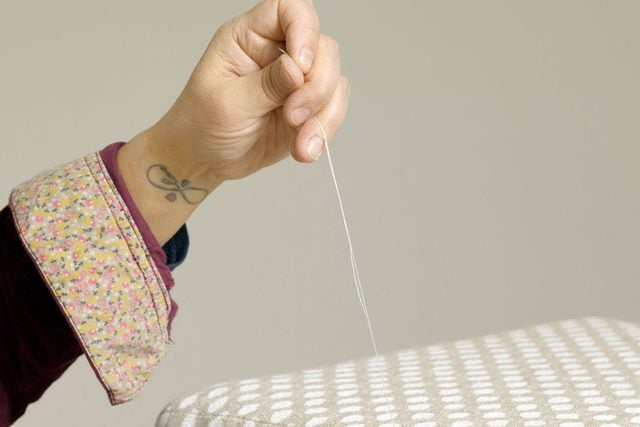
Cinch the thread
Cinch or pull the thread from the starting point. This will require a gentle touch and may take a few tugs to until it is tight enough to make the seam come together and have the thread disappear.
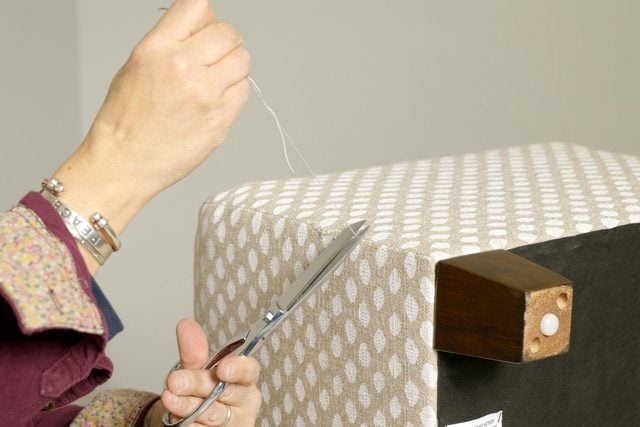
Knot the end of your stitch
Once the seam is fully stitched and the seam has been cinched together, tie a knot in your thread and cut. Re-thread your needle into the knot pulling it back into the seam and stitch to hide the knot. Bring your needle back out of the seam further down so it doesn’t easily find its way out and is a bit separated from the knot. The whole trick to this stitch is to hide the work. This includes the knot and the very end of the thread.
FAQs
Do I need a curved upholstery needle to repair a seam in furniture?
Not necessarily. A curved needle will make the process easier, though — especially if it is a thicker material such as leather. However, the task of repairing a seam in old furniture can be accomplished with a straight needle. I would strongly recommend using an upholstery needle as it is thicker and less likely to break, making it safer to manage.
What is in an upholstery repair kit?
The contents of these kits vary. However, you will find the following furniture reupholstery items in most kits:
- Variety of colored upholstery thread cord (thicker than common thread);
- Thicker and longer straight sewing needles;
- Thicker curved sewing needles;
- A sewing awl;
- A hook awl;
- A fabric tape measure;
- A sewing thimble;
- A needle bottle to house straight needles;
- A seam ripper.
Q: Does the same upholstery repair technique work for leather and fabric? Cars, chairs and sofas?
The combination of a back stitch and ladder stitch should work for most seams in upholstery. Take into consideration the weave of the material, how flexible is the material and if you care about hiding the stitch or allowing it to be seen. Do a test run if you can, and be prepared to cut your stitches out and start again if you aren’t happy with the finished product. The beautiful thing about fabric is you can undo the work and try again.
Originally Published: April 11, 2024