
How to Repair a Dishwasher That’s Not Cleaning Dishes
Updated: Jun. 12, 2020
Simply cleaning the spray arm, filter and float can solve your problems.
Introduction
When your dishwasher doesn't clean well, fix it yourself following these simple steps and avoid the expensive professional service call.Tools Required
- Nut driver
- Pliers
- Shop vacuum
If your dishwasher is running but the dishes aren’t getting clean, one of a few simple fixes could solve your problem. Start by consulting your manual to be sure you’re using the right detergent, loading the dishes correctly and maintaining the right hot water temperature. If none of that changes anything, dive into these dishwasher repair steps.
Watch this video to learn how to troubleshoot a dishwasher that isn’t working properly:
Project step-by-step (6)
Step 1
Before you start any work on the dishwasher, unplug it or turn off the power at the shutoff switch or main circuit panel. Test to see if the power is off by turning on the dishwasher and making sure it doesn’t run. You’ll also have to shut off the water before removing the inlet switch. Usually you’ll find a shutoff valve under the kitchen sink or in the basement or crawl space under the dishwasher. Otherwise, close the main water valve.
Step 2
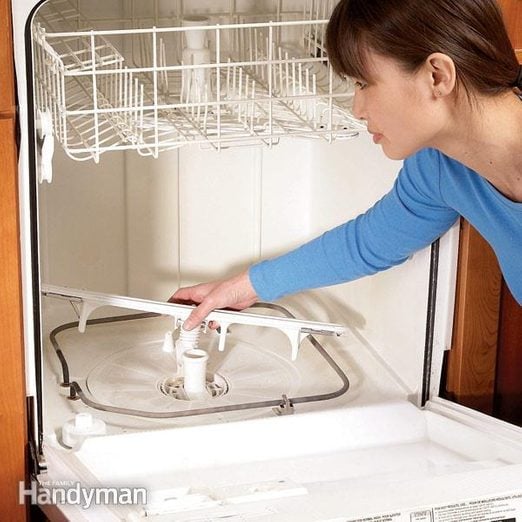
Clean the Spray Arm
- Remove the dishwasher spray arm and clean out the holes. This also allows access to the dishwasher filter for cleaning.
- Pro tip: Spray arms like the one we show simply snap off. Others require you to unscrew a cap on top.

Step 3
Clean Dishwasher Filter
- Clean the dishwasher filter.
- Remove the filter screen if possible. Otherwise, use a wet/dry vacuum to suck out the debris to clean the dishwasher filter.

Step 4
Clean the Float
- Make sure the dishwasher float moves up and down freely.
- If the float on your dishwasher is removable, take the float apart and clean it.

Step 5
Remove the Dishwasher Inlet Valve
- Remove the dishwasher inlet valve to clean the screen or replace the valve.
- Unscrew the nut that connects the water line and remove the water line.
- Remove the screws that connect the valve bracket to the dishwasher frame and lower the valve.
- Pinch the hose clamp to remove the rubber hose.
- Unplug the wires.

Step 6
Clean the Dishwasher Filter Screen
- Check to see if the screen is plugged.
- Unscrew the water line fitting from the valve. Then unscrew the four screws that connect the valve to the bracket.
- Reassemble and reinstall the valve in the reverse order.
- Wrap Teflon tape around the fitting threads before screwing the fitting back into the valve.
