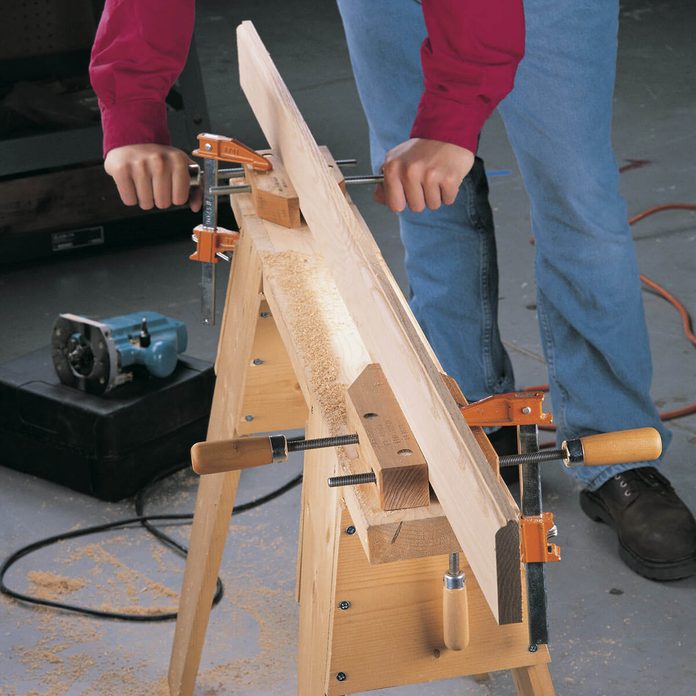
Stabilize Longer Boards
Here’s a great way to hold boards for routing and planing with ne’er a worry that they’ll slide around or flop over as you work. Clamp two handscrews to a sawhorse or tabletop so their jaws are lined up. Slide the workpiece into the jaws and tighten the handscrews.
Medium-size handscrews have 5/8 in. of usable jaw surface above the screws, so they grip the board like two long-jawed vises. This tip is especially useful when routing molding profiles on narrow boards. You can also screw the handscrews to a piece of 3/4-in plywood on your shop floor and use them to hold doors for edge-planing.
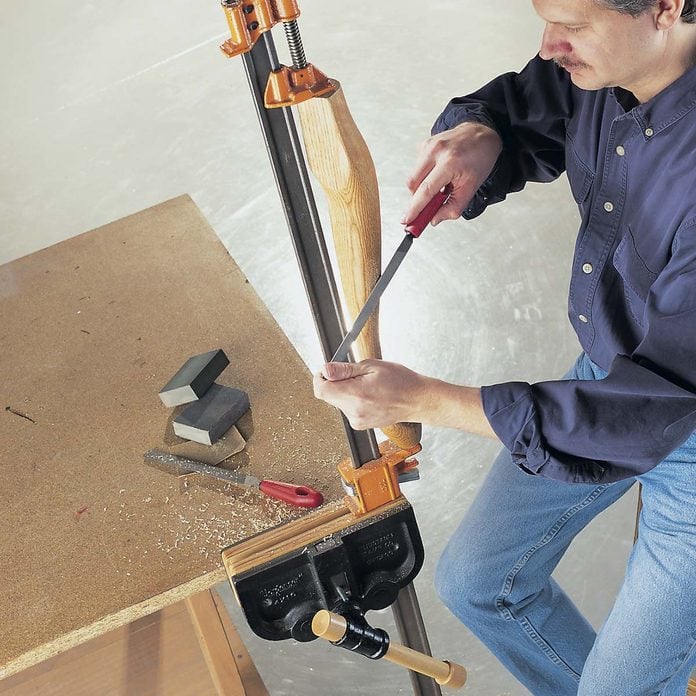
Woodworking Bar Clamps Vise
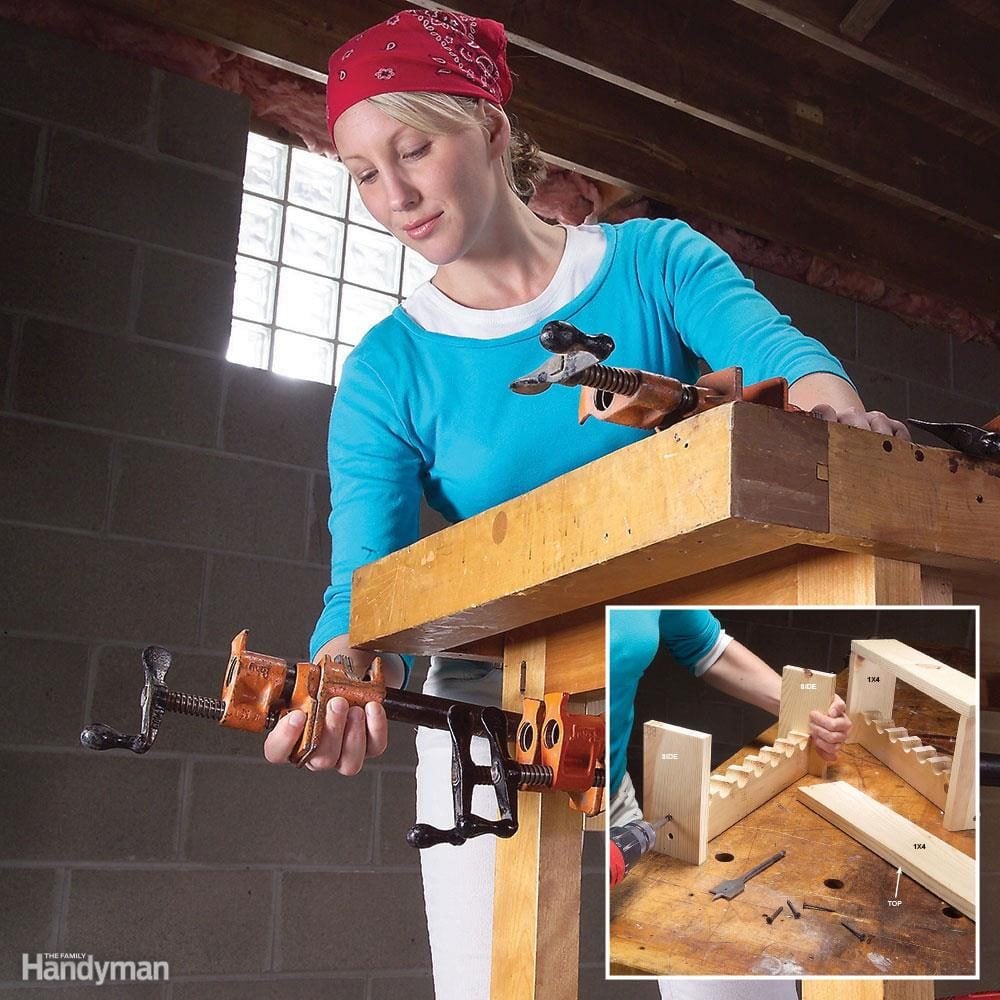
Slender, curvy workpieces tend to slip and slide in regular woodworking vises, so try Richard Chowin’s great alternative. Clamp a bar or pipe clamp in your bench vise, then tighten the clamp to grip the workpiece at each end. Your future masterpiece won’t move a smidgen while you work, and you’ll have access to all the curves and recesses along its length. This vise also works great for holding more delicate projects for sanding or finishing.
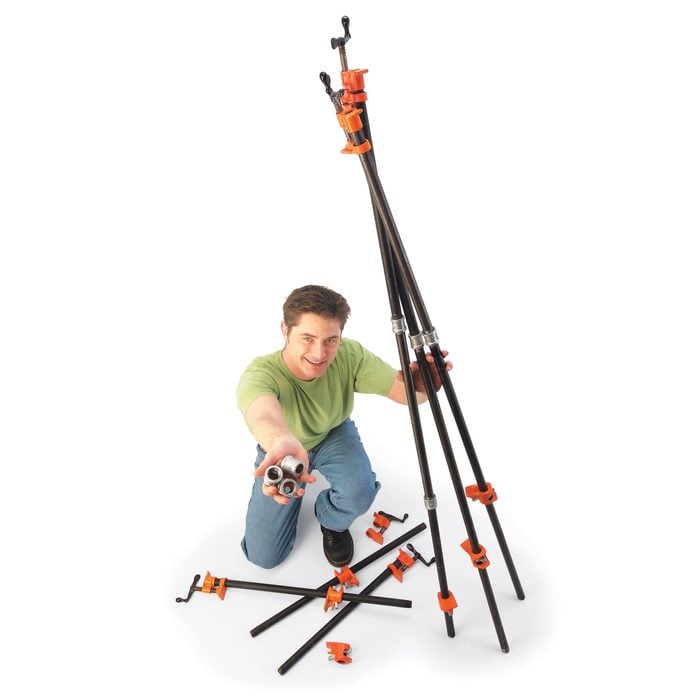
Simple Pipe Clamps Hack
Moaning again that your pipe clamps aren’t long enough to assemble your new “monsterpiece?” Pipe down and quit whining! A few extra 2- and 4-ft. pipe segments plus a handful of pipe couplings are all you need for the extra-long or extra-wide job. Screw couplings and extra pipes to those too short pipes to create the needed lengths. If the pipe clamps are under the wood, add spacers slightly higher than the couplings perpendicular to the pipes. When you’re finished, unscrew and store the extra pipes with couplings and you’ll be ready for the next jumbo project that comes down the pipeline. A big thanks to Jeff Poirier for tipping us off to this great idea.
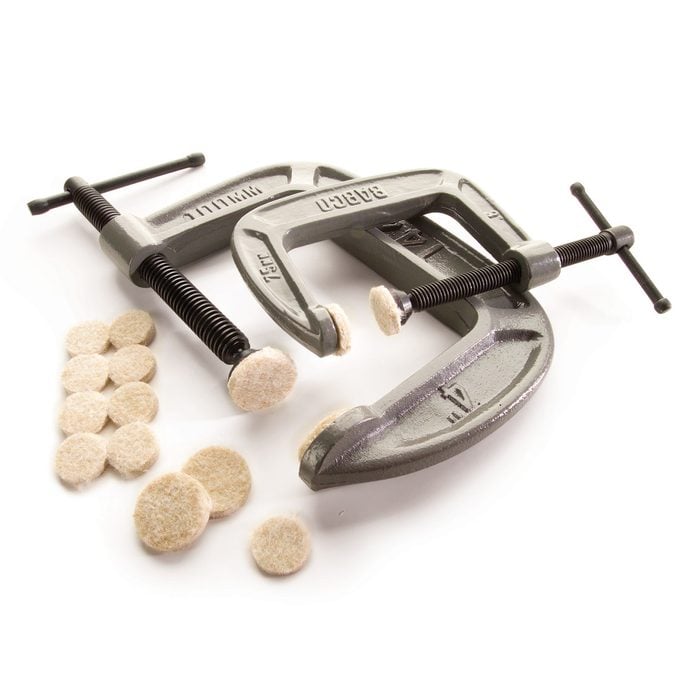
Gentle Jaws
Are your C-clamp jaws leaving dents in projects or the furniture you’re repairing? Press adhesive-backed felt pads for table and chair legs on the jaw faces (you’ll get a better bond if you lightly sand the faces with fine sandpaper). Look for larger precut rectangular shapes that you can trim to fit your woodworking bar clamps faces as well. Gripping thanks to Kurt Lawton for this nifty tip.
Plus: Check out these clamp storage ideas for your workshop.

Spring Clamp Tray
Serve up your spring clamps on a tray—a slotted piece of 3/4-in. plywood with 1/4-in. plywood fins glued in the slots. A clamp tray defies the natural tendency of tools to create clutter. Just pull the tray off a peg, takes a few clamps off the fins, stick them back on the fins when you’re done, and hang up the tray.
Plus: How to build the ultimate clamp rack.
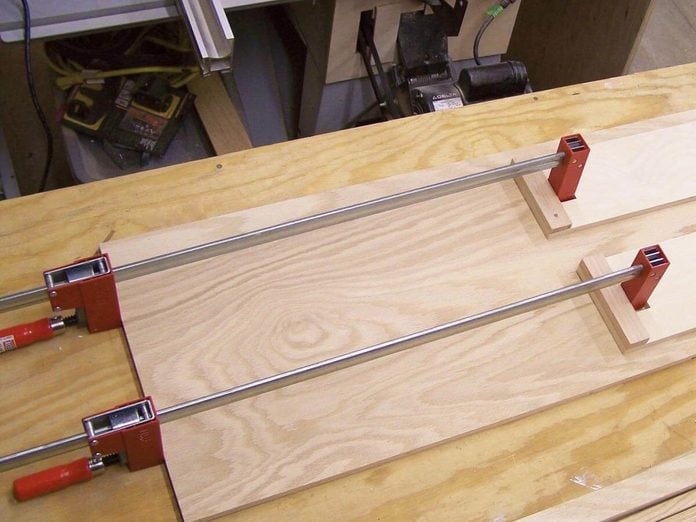
Extend Your Woodworking Bar Clamps
Doug Casper sent in this gem of a tip. He built some clever plywood clamp extenders to use when his bar clamps are too short to do the job. I think it’s brilliant. And it sure beats the old trick of joining two bar clamps in the middle. Click here to learn how to build these clamp extenders.
Pipe clamps cradle
Tape Works, Too
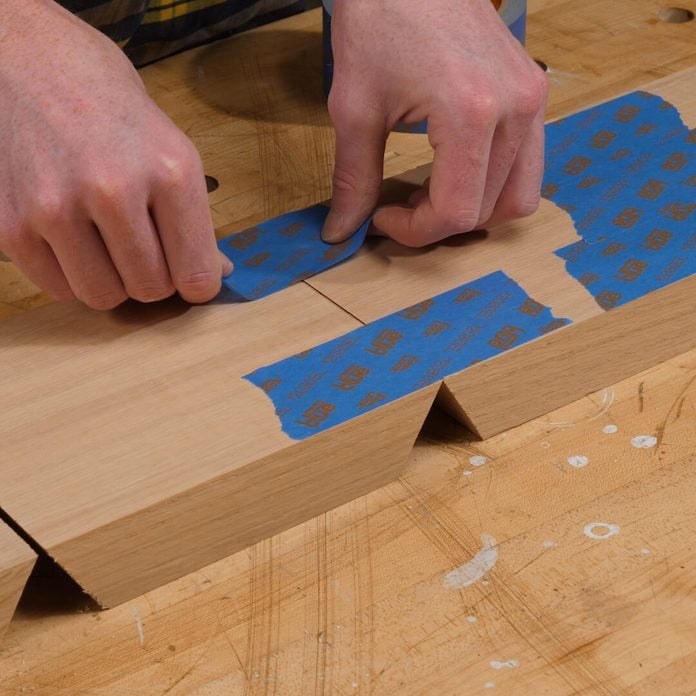
Clamping mitered edges can be a real hassle because they never seems to line up correctly. The easiest way that I’ve found to get around this process is to use painter’s tape as clamps. First set the pieces so that the outer edges are facing up and tape them edge-to-edge. The flip the pieces over so the beveled edges are facing up and glue them together. Complete the process by taping the last two edges together and let sit until completed. The tape removes easily and the glue won’t attach to the tape, making sanding and finishing very simple.

Corner Clamping Gadgets
Corner clamping blocks for assembling picture frames aren’t a new idea: woodworking magazines have shown variations for years. But these are among the best I’ve seen. The holes span the corner, keeping the clamps from stick to the frames when the glue squeezes out. — Travis Larson
Plus: Clamping table basics.
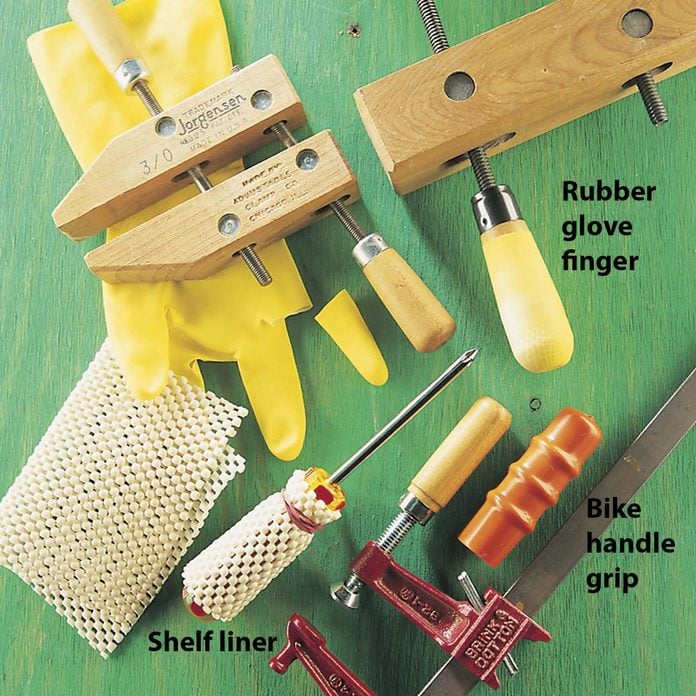
3 Ways to Get a Grip
- When driving screws by hand, use a piece of rubber shelf liner to cushion your hand and increase torque on the screwdriver handle.
- Slide bicycle handlebar grips on bar clamp handles.
- Cut the fingers off old rubber dishwashing gloves and stretch them over handles of handscrews.
Thanks to reader Brad Snyder for offering these tips!
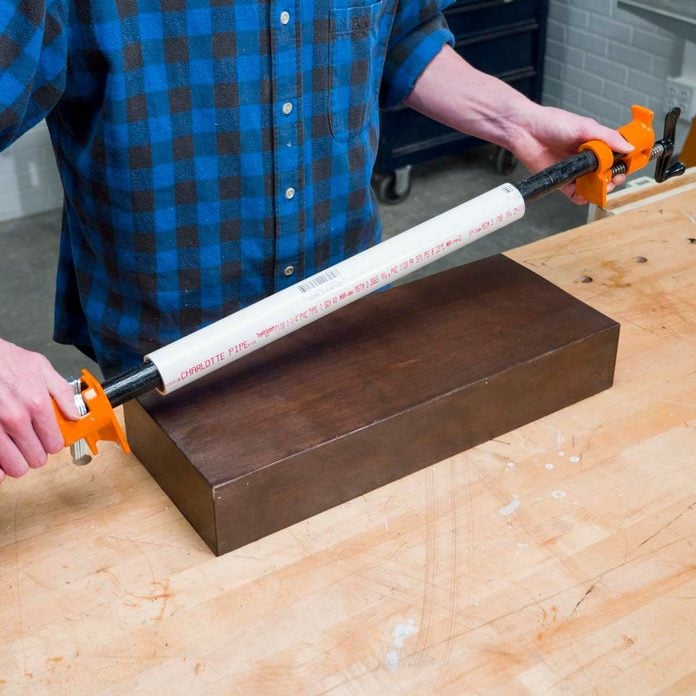
Brilliant Bar Clamp Cover
Iron pipe clamps can easily mar softer woods or react with the glue to stain the wood. My solution is to cut a section of plastic PVC pipe to size and place it around the pipe. If you have several short lengths, you can space them strategically to accommodate different widths of stock wood. — Tim Johnson
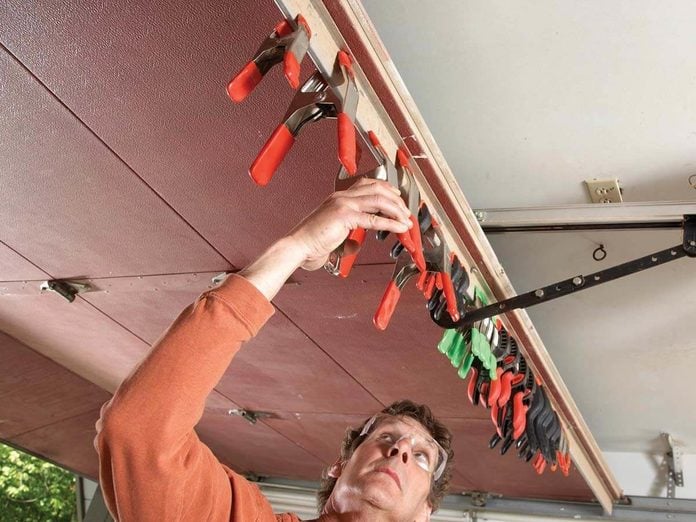
Overhead Spring Clamp Storage
If you have a shop in the garage, try this tip from reader Dan Amstutz. Clip all of your spring clamps on the top garage door brace. The clamps are always right at hand whether you’re working with the door shut or al fresco (that’s with the door open, for those of you who don’t speak Garage Italiano).
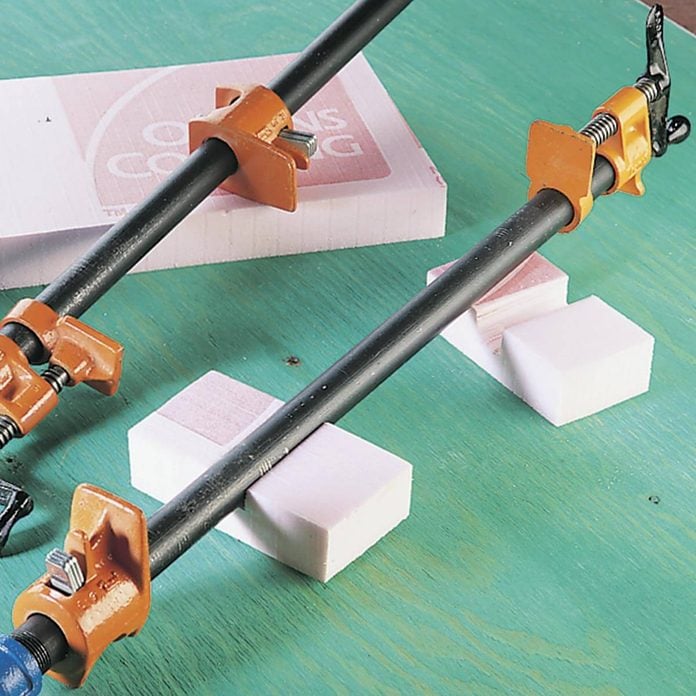
Foam Stabilizers
Do your pipe and bar clamps flop over during gluing jobs—and cause you to come unglued along with the boards? Make supports for your clamps from 1-1/2 in. thick rigid foam insulation. Use a utility knife or saw to cut friction-fit slots for the pipes or bars. Now the clamps—and you—will remain stable during gluing jobs.
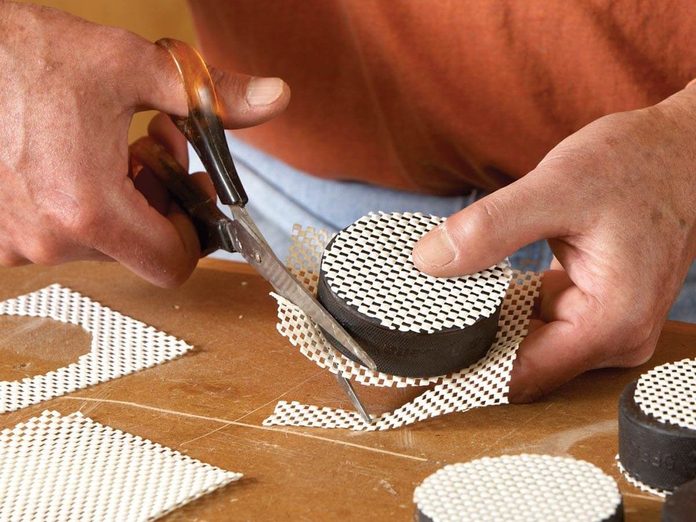
Bench Pucks
Rockler sells ingenious little things called Bench Cookies (rockler.com). They’re very useful when you need to space projects above the workbench for clamping, finishing or routing. But if you need lots of them, or you love saving a few bucks, you can buy hockey pucks for about $1.25 each and stick shelf liner on both sides with spray adhesive. Rob Rowe suggested this tip. I’m guessing he’s a bored NHL player/woodworker with a mountain of old pucks. — Travis Larson

Screw Clamps Work Like a Charm
You don’t always need clamps. Cut your workpiece a little long, fit the parts, then drill holes near the ends. Glue up the pieces and screw them together; they’ll line up perfectly. Add clamps in the middle if no glue is squeezing out there. Then just cut off the ends when the glue dries.

Perfect Pads
Now you can clamp up projects without sticking bumper boards between the clamps and the wood. Buy a pack of 3M Surface Gard medium duty felt pads ($3 a pack at home centers, or call 800-3M-HELPS), and cut out pieces to cover the clamp faces (scuff the jaw surfaces with sandpaper first). The sticky-backed side of the pad tightly adheres to the jaws so the pad can’t slide when you crank up the pressure. Thanks to reader Harry Lohr for simplifying our glue-up tasks.
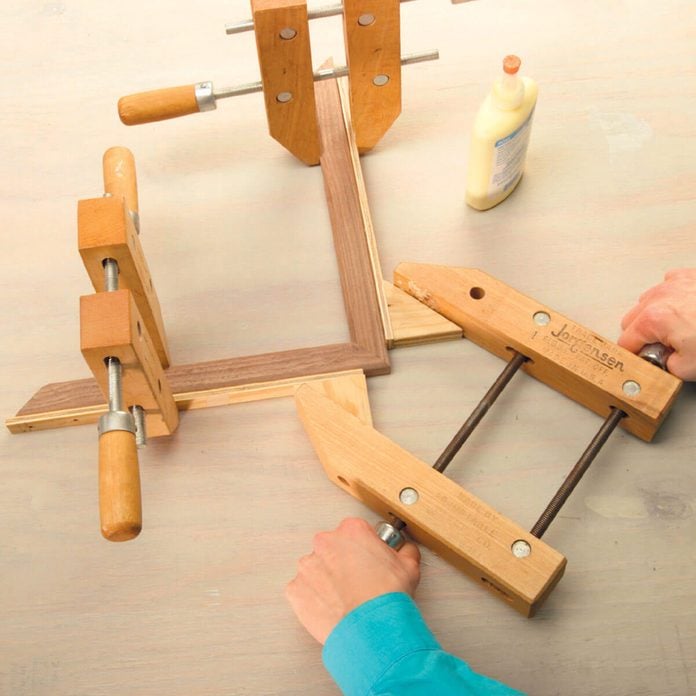
Home-Made Miter Clamps
Don’t spend money on store-bought miter clamps—make your own! Cut a couple of 8-in. x 3/4-in. x 1/8-in. strips of hardwood and screw a couple 2″x 2″ plywood triangles on the ends. Place the mitered pieces on a flat surface and attach your home-made clamps to the outside edge of each, aligning the long side of the triangle parallel with the miter joint. Apply glue to the joint faces and clamp the joint. Hand screws work best because they grip tighter and won’t scratch the workpieces. Many thanks to reader David Swanson for this picture-perfect tip. Learn how to build these homemade miter clamps here.
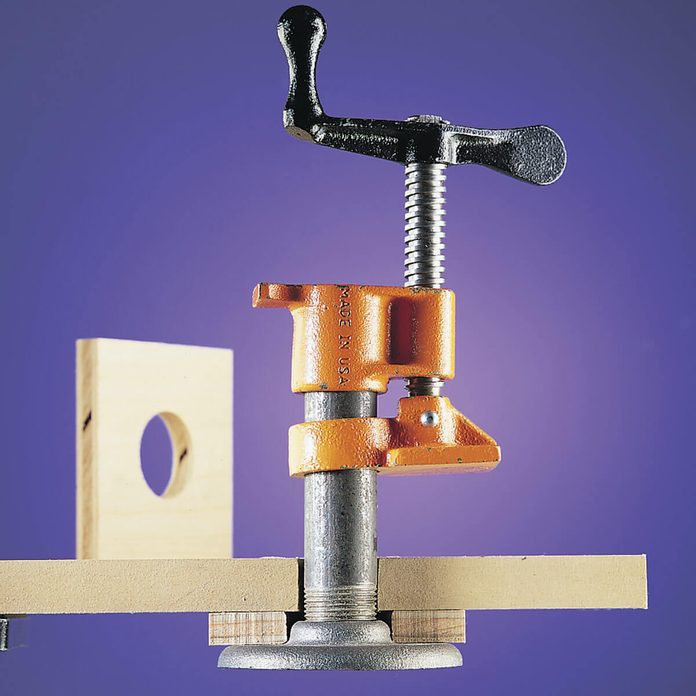
On-Board Hold-Down
This easy-to-build hold-down clamp adds great clamping versatility to any workbench and is quick to install. Our thanks to reader Tom Peniston for a great design.
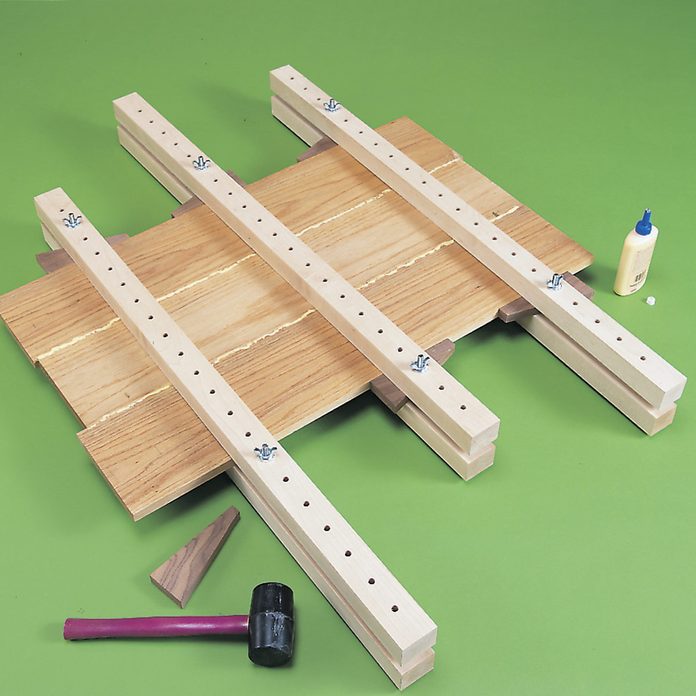
Edge-Gluing Made Easy
For about $30, you can fortify your bar clamp arsenal with these mighty tools. These clamps apply pressure horizontally as well as vertically, so the joint edges are wedged tightly together and stay level. Here’s how to make edge-gluing clamps.

Studly clamp storage
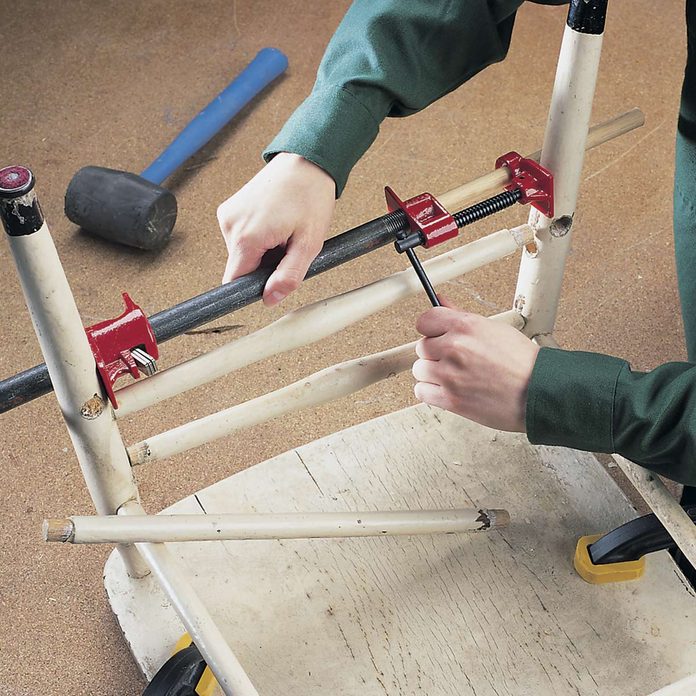
How to Un-Clamp with a Clamp
Convert a pipe clamp—the type with a sliding crank handle—into a handy aid for disassembling old furniture. Unscrew the fixed jaw that has the crank and screw it on backward—so the jaw faces away from the pipe. Now reverse the direction of the sliding jaw and use the clamp to gently break apart the joints you’ll be repair-ing. When the handle hits the pipe, just slide it to its opposite end and give it another half crank.
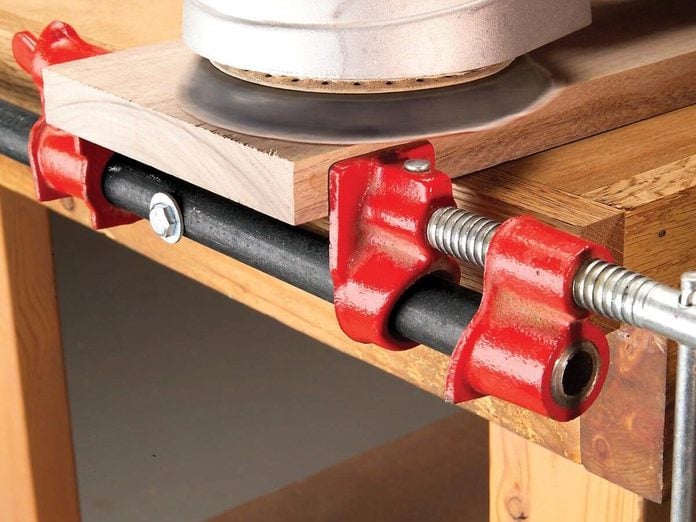
Low-Profile Bench Vise
Increase your workshop’s vise-atility with 1/2-in. pipe clamps screwed to one end of your workbench. It works like a third hand for all kinds of jobs and only takes a half hour to install.
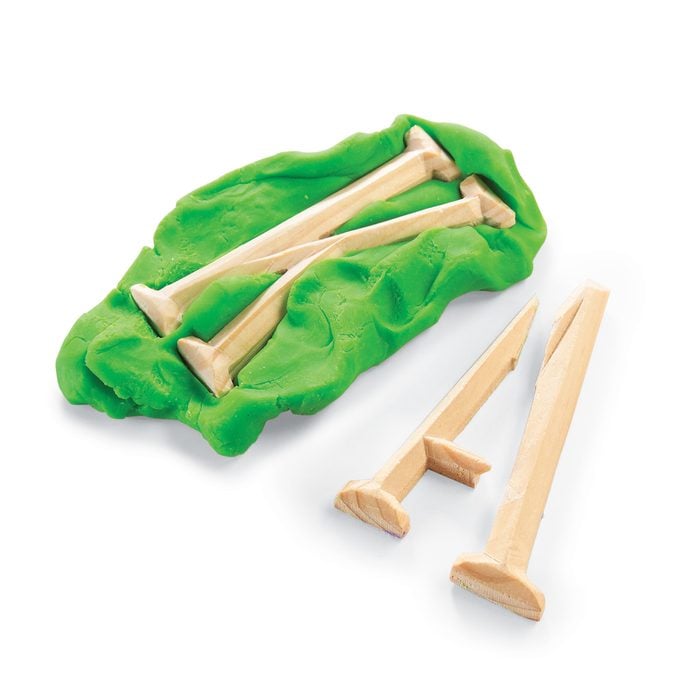
Irregular Object? No Problem
Reader Robert Cramer showed us a cushy way to make glue repairs on small or delicate objects without having to hold them together by hand until the glue dries. Flatten out a ball of Play-Doh modeling compound ($2 for a four-pack), then apply glue to the edges of the object you’re repairing and press the pieces into the clay. The clay will hold the pieces together while the glue dries, and then you can peel it right off.
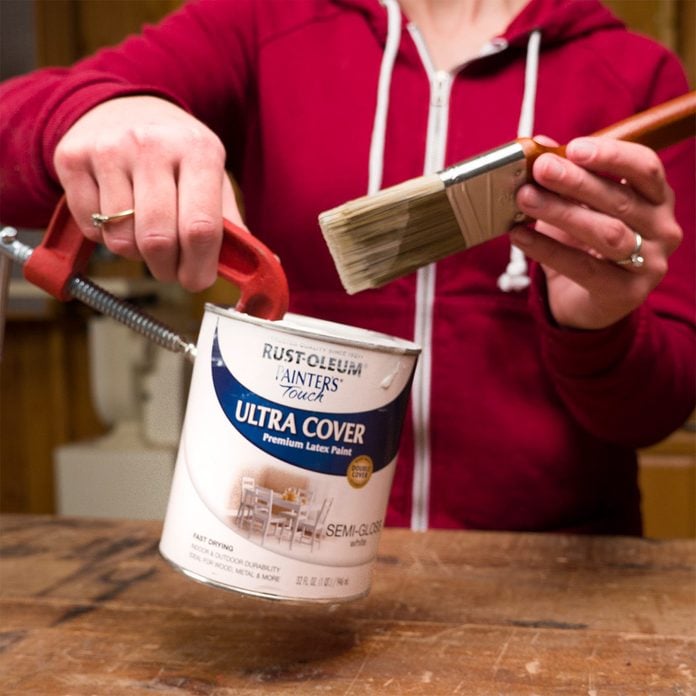
Quick Paint Can Handle
When I needed to touch up a paint job that required very little paint, it didn’t make sense to decant some paint from the quart-size can into a different container just for the sake of having a convenient handle. So I improvised. Instead of dirtying a new paint container, I created a handle for the can using a C-clamp. Yes, it may get some paint on the clamp, but does that matter? Not to me! — Mike Watt
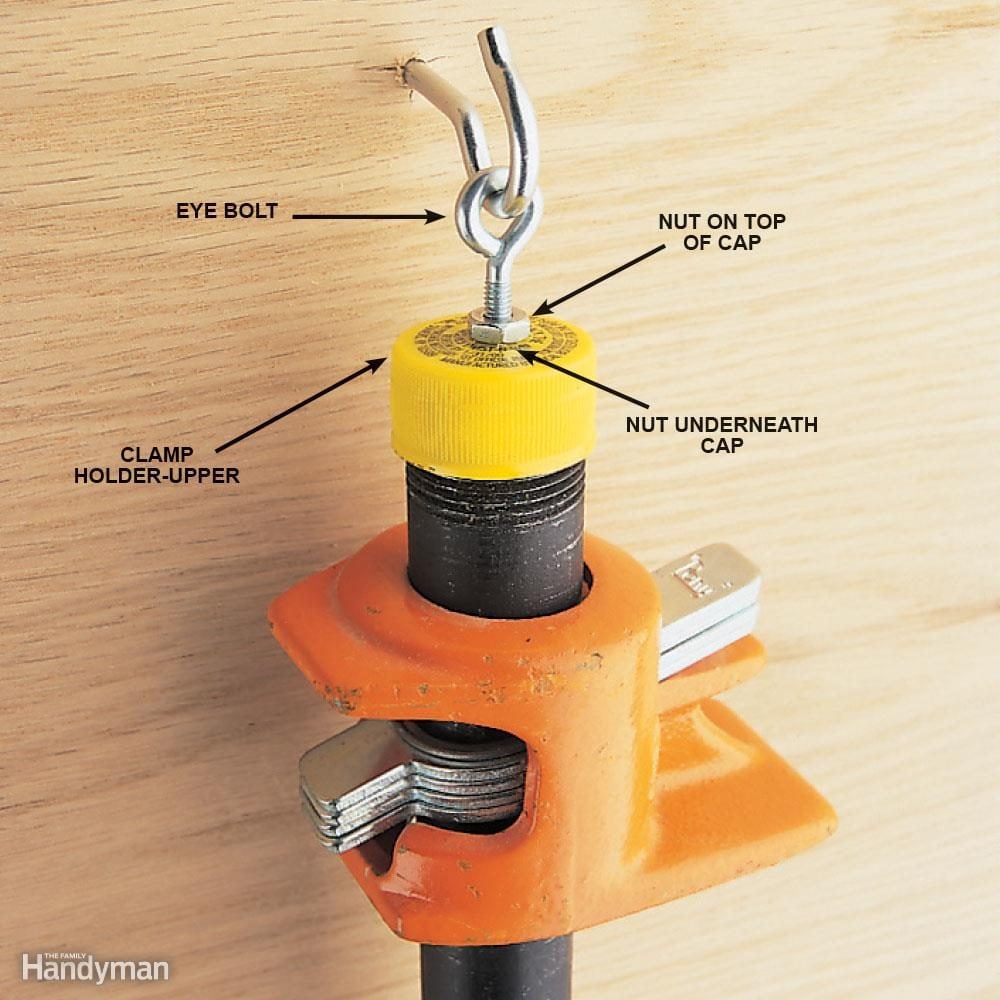
Pipe clamp hanger
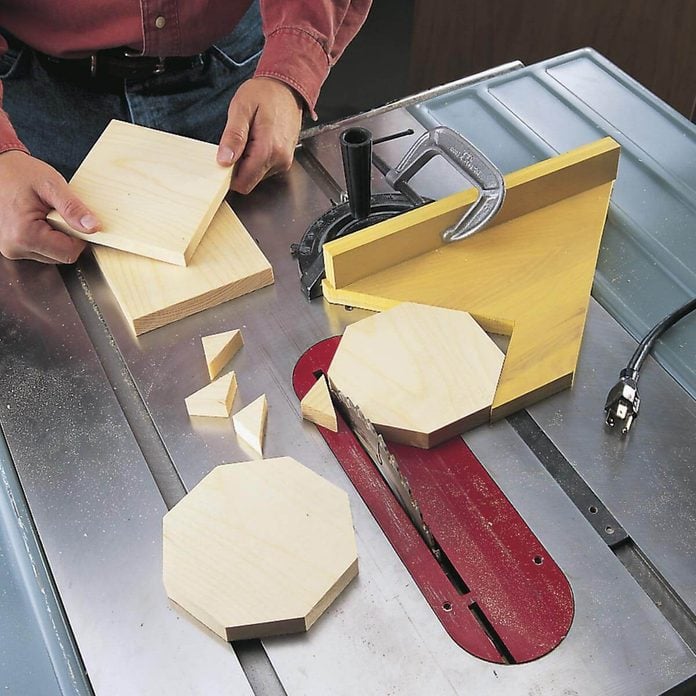
Right-On Octagons
If you’ve ever cut an octagonal piece for a project, you probably “snuck up on it.” You drew the shape, shaved off the corners with a jig-saw, and sanded to the line. Next time, clamp this plywood holder to your table saw’s miter gauge and you’ll be able to cut perfect octagons of various sizes in seconds. Cut a square corner in the plywood and, adjust-ing the miter gauge, set it 45 degrees to the saw blade. (Screw a strip of wood to the jig so it’s easy to clamp to the miter gauge.) Hold the square workpiece firmly in the corner cutout and push it through the blade to snip off a corner. Rotate a quarter turn and push it through again to clip off the next corner. If you start with truly square workpieces, this jig will cut perfect octagons every time. Cut a few extra squares to practice on! Our thanks to reader Walter Andrews for this cool tip.
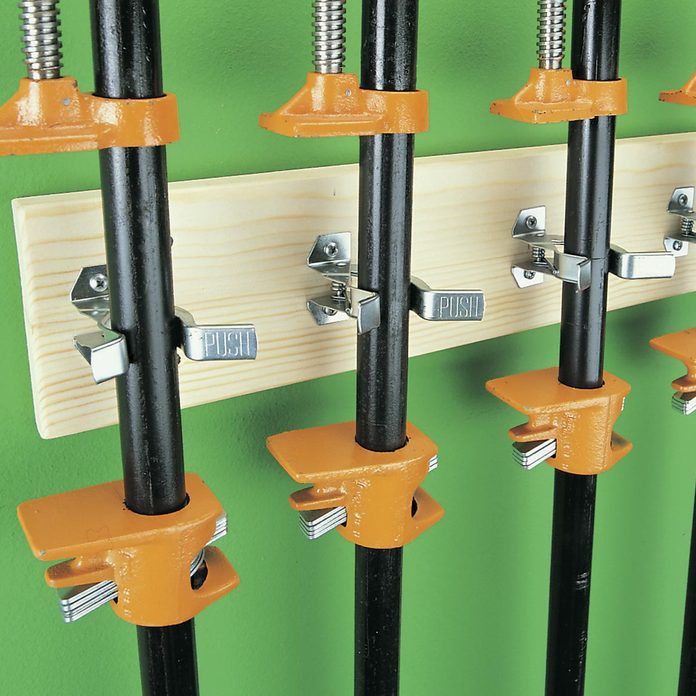
Spring Grip Storage
Or buy these spring grip organizers, available at home centers, then screw them to a board. Position the board just high enough to hold the pipe near the crank end while the other end rests on the floor.

Spring Clamp Stop Block
Here’s a stop block that’ll work great on every fence in your shop. Make an L-shaped block (the red piece in the photo) to ride upside down on the fence on your miter gauge. To make the L-block, cut a short 1-1/2 in. wide strip of 1/2-in. thick board, then cut a 1/2-in. piece off the end and glue it at a right angle to the end of the longer one. Screw the L-block to a strong spring clamp by drilling a screw hole in the tip of one clamp jaw, then screw the block inside the clamp with a fairly loose fit. When you snap the block in place on the fence, it’ll snug up tight to both edges. Put adhesive-backed sandpaper on the fence side of the L-block to make it grip extra tight.
Thanks again to Joe Nelson for this tip that we pulled from our best-of collection. Watch this video to learn how to set up a stop block for your miter saw.
