
12 Ideas to Upgrade Your Utility Trailer
Updated: Aug. 30, 2023
Upgrade taillights, tow balls and connections, tie-downs and more.

Trailer Problems and Solutions
Most utility trailers come from the factory with just enough features to satisfy local safety regulations (if any) and your wallet. Sure, they work, but they’re not very user-friendly. They rarely have factory tiedowns or loading ramps. Factory taillights usually have incandescent bulbs, which need constant replacement.
We informally canvassed about 30 trailer owners to find out what drives them nuts. Top of the list? Malfunctioning trailer lights! Followed by rusted-in-place nuts that make it impossible to change ball sizes, seized ball mounts and tough-to-tie-down trailer loads. And just about everyone wished there were an easier way to back up and line up a trailer coupler with the hitch on the first try, especially in the dark. So we did some sleuthing and came up with five cool new products that promise to eliminate these hassles.
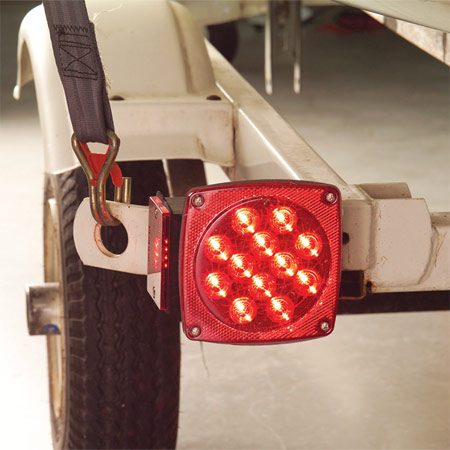
Installed LED lights
Taillights get bounced around, dunked in the lake and soaked with road salt. So it’s no surprise that bulb filaments break and sockets corrode, causing a lot of lighting malfunctions. Sealed LED trailer lights are a brilliant solution.
This pair of submersible LED trailer lights, which come with a wiring harness and a license plate bracket, fit right into the existing mounting holes. Before you remove your old lights, write down the wiring scheme. Then swap in the new lights and follow our wiring photos for making watertight connections.
Wiring the lights
When you install your new lights, don’t use the cheap crimp connectors to splice the wires. The crimp connectors will cause you plenty of aggravation when they start corroding a few years from now. Do the job right the first time—solder all electrical connections and seal each one with a piece of small-diameter heat-shrinkable tubing.
Then seal the bundle of wires with a section of larger-diameter shrinkable tubing. Coat the ends of the larger tubes with liquid electrical tape to complete the watertight seal. Heat-shrinkable tubing assortments and liquid electrical tape are available at most auto parts stores.
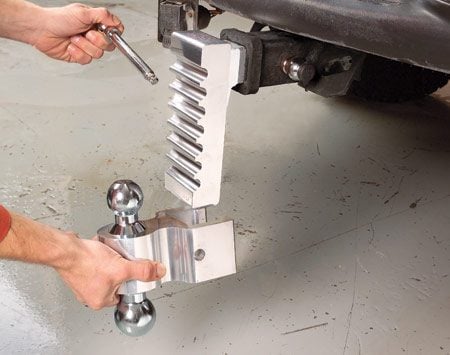
Adjustable Ball Mount
If you own several trailers with different tongue heights or towing ball sizes, you know how hard it is to find a replacement for a rusted/seized ball or ball mount that will fit them all. This is where an adjustable ball mount comes in handy. To install a new one, just remove the old ball mount and slide this one into its place.
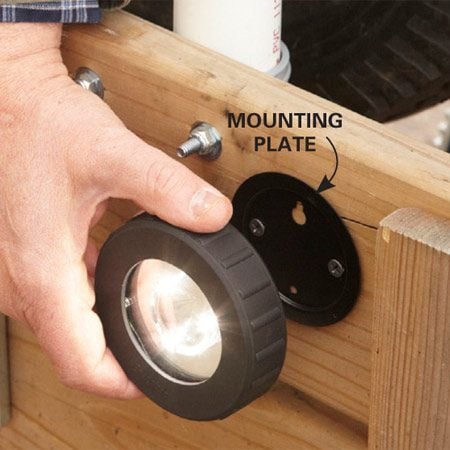
Trailer Hitch Light
It’s a given—you never have a working flashlight when you need one. If you’ve ever loaded a trailer or hooked one to the hitch in the dark, you know it’s not fun. These magnetic LED tap lights are removable so they won’t get wrecked. Just mount the backing plate where you’ll get the best illumination for loading and hitching, then slap the light onto the plate.
These babies are weatherproof, unlike most tap lights. But stow them before you take off. The magnets might not hold them on rough roads.
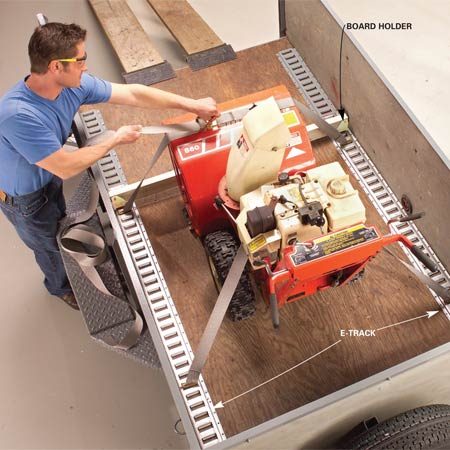
Handy Tie-Down System
No matter what you load into your trailer, it seems you’re always searching for secure spots to anchor your tie-down straps. The E-Track system eliminates that problem. Bolt the track to the trailer floor. Then snap in a variety of ratchet straps or rope anchor fittings. We especially liked the wood beam socket.
Place the socket anywhere along the track and insert a board to prevent your cargo from shifting. E-Tracks are also available for mounting tie-downs to the sides of your trailer, but use them only if the sides of your trailer are metal reinforced and rock solid.
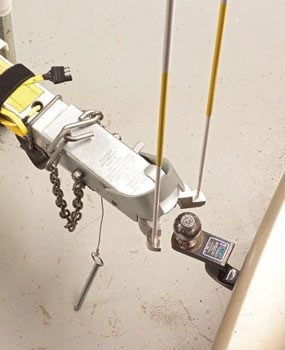
Coupler in Open Position
Moving an empty trailer to the towing ball is a piece of cake. But heavy trailers require you to back the truck up to the trailer. You know how tricky it is to jockey the unseen hitch into the trailer’s “capture zone.” We found a new-style coupler that has “auto-capture jaws” and alignment rods that make it a lot easier to back your vehicle up to the trailer.
Simply extend the collapsible alignment rods and sight them through your back window. If you’re within 5 in. of the coupler, its jaws will automatically “capture” the ball and snap the latch mechanism closed. But make sure you get out and install the locking pin before you take the trailer out on the road.
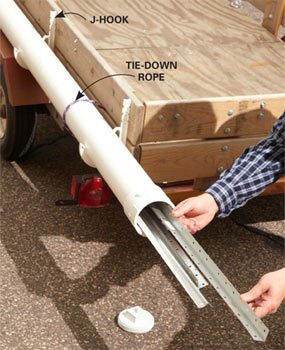
The Plumber’s Trick
Ever tried to transport long or fragile items like pipe, drywall corner beads or drip edge? First you have to tie them in a bundle. Then you have to secure the bundle to the trailer. Forget that! Instead, build the same kind of rig a plumber uses. Then just slide in the long items, screw on the cap, secure a red flag and you’re good to go.
Buy a 10-ft. length of 4-in. PVC pipe, an end cap, a cleanout adapter, PVC cleaner and adhesive, and four J-hooks. Prime and glue the end cap and clean out adapter. Take advantage of the wasted space on the side of your trailer and mount the tube there. Secure the four J-hooks to the side of the trailer and snap the tube into place. Tie the rig with rope for added security.
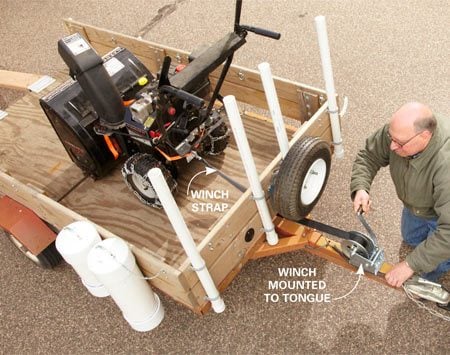
Add a Winch
Boat owners use a winch to pull their boat onto the trailer. You can install one on a utility trailer, too. It’ll save your back and eliminate the need for a helper. Just wrap the strap around the heavy object and crank it up the ramp toward the front of the trailer. Bolt it to the trailer A-frame or tongue.
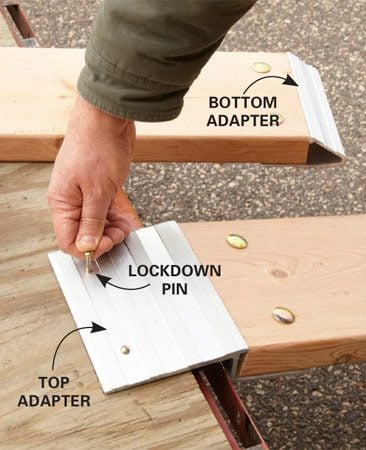
Save Your Back With Ramps
Why lift heavy items when you can wheel them up? Build this ramp using an aluminum ramp kit and a 2×8. Just measure the height of the trailer deck and cut the 2×8 to the recommended length. Mount the aluminum top and bottom pieces to each board. Then space the ramps to fit the equipment you haul most often. Install the locking pins, lock the ramps in place and load ‘er up.
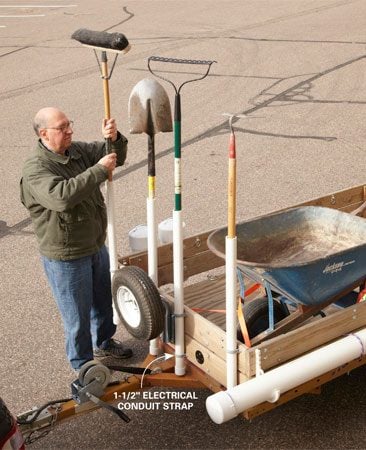
Yard Tool Holder
Landscapers and lawn care guys always haul around rakes, shovels, brooms and other implements by mounting vertical tubes on the front of their trailers. Here’s our version.
Cut 36-in. lengths of 1-1/2-in. PVC pipe and glue on an end cap. Then drill a hole in each end cap to provide drainage. Attach the tubes using PVC electrical conduit straps and nuts. If you plan to use the tubes in winter, secure them with metal straps—PVC gets brittle in cold weather and can shatter. For added security, hook a bungee strap to each implement.
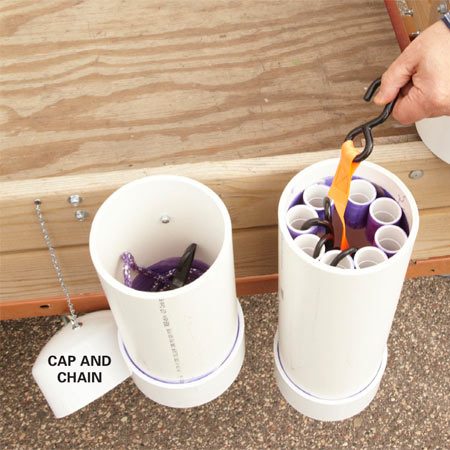
Vertical Storage Bins
Here’s a great way to store your ratchet straps and bungee cords with the trailer, where they belong. Build vertical storage bins from 6-in. PVC pipe. Glue a cap on the bottom and drill a hole in it to overcome the suction when you pull off the lid. Then mount a handle on the top cap and attach a chain. Perfect dry storage for whatever will fit inside.
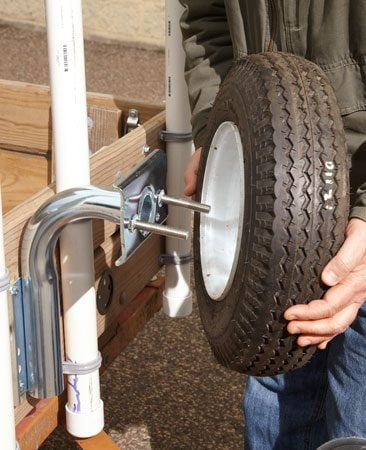
Spare Tire Carrier
Flat tires are the No. 1 cause of trailer breakdowns. If you’re not carrying a spare tire when you get a flat, you’re in a heap of trouble. But where do you keep it? In the trailer bed where it’s in the way? A spare tire carrier doesn’t require assembly and can be mounted easily to the trailer rails. To lock the tire in place, simply run a bicycle locking cable down the tube and snap it shut.
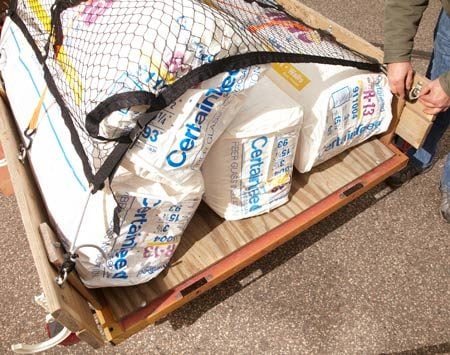
Cargo Net and D-Rings
At highway speeds, light items can fly right out of your trailer. Even if they’re tied down, they can break loose and take off. So you need one final mode of protection. We recommend a cargo net DIY enclosed trailer hack.
Install D-rings every 18 in. along the top rails. You may be tempted to screw them into place. Don’t. As the wood rails age, the screws can pull out. Instead, secure the D-rings with nuts and bolts. When you’re finished loading, just throw the net over the trailer and clip the snaps to the rings.