


How To Make the Most Common Microwave Repair

Updated: Nov. 08, 2022
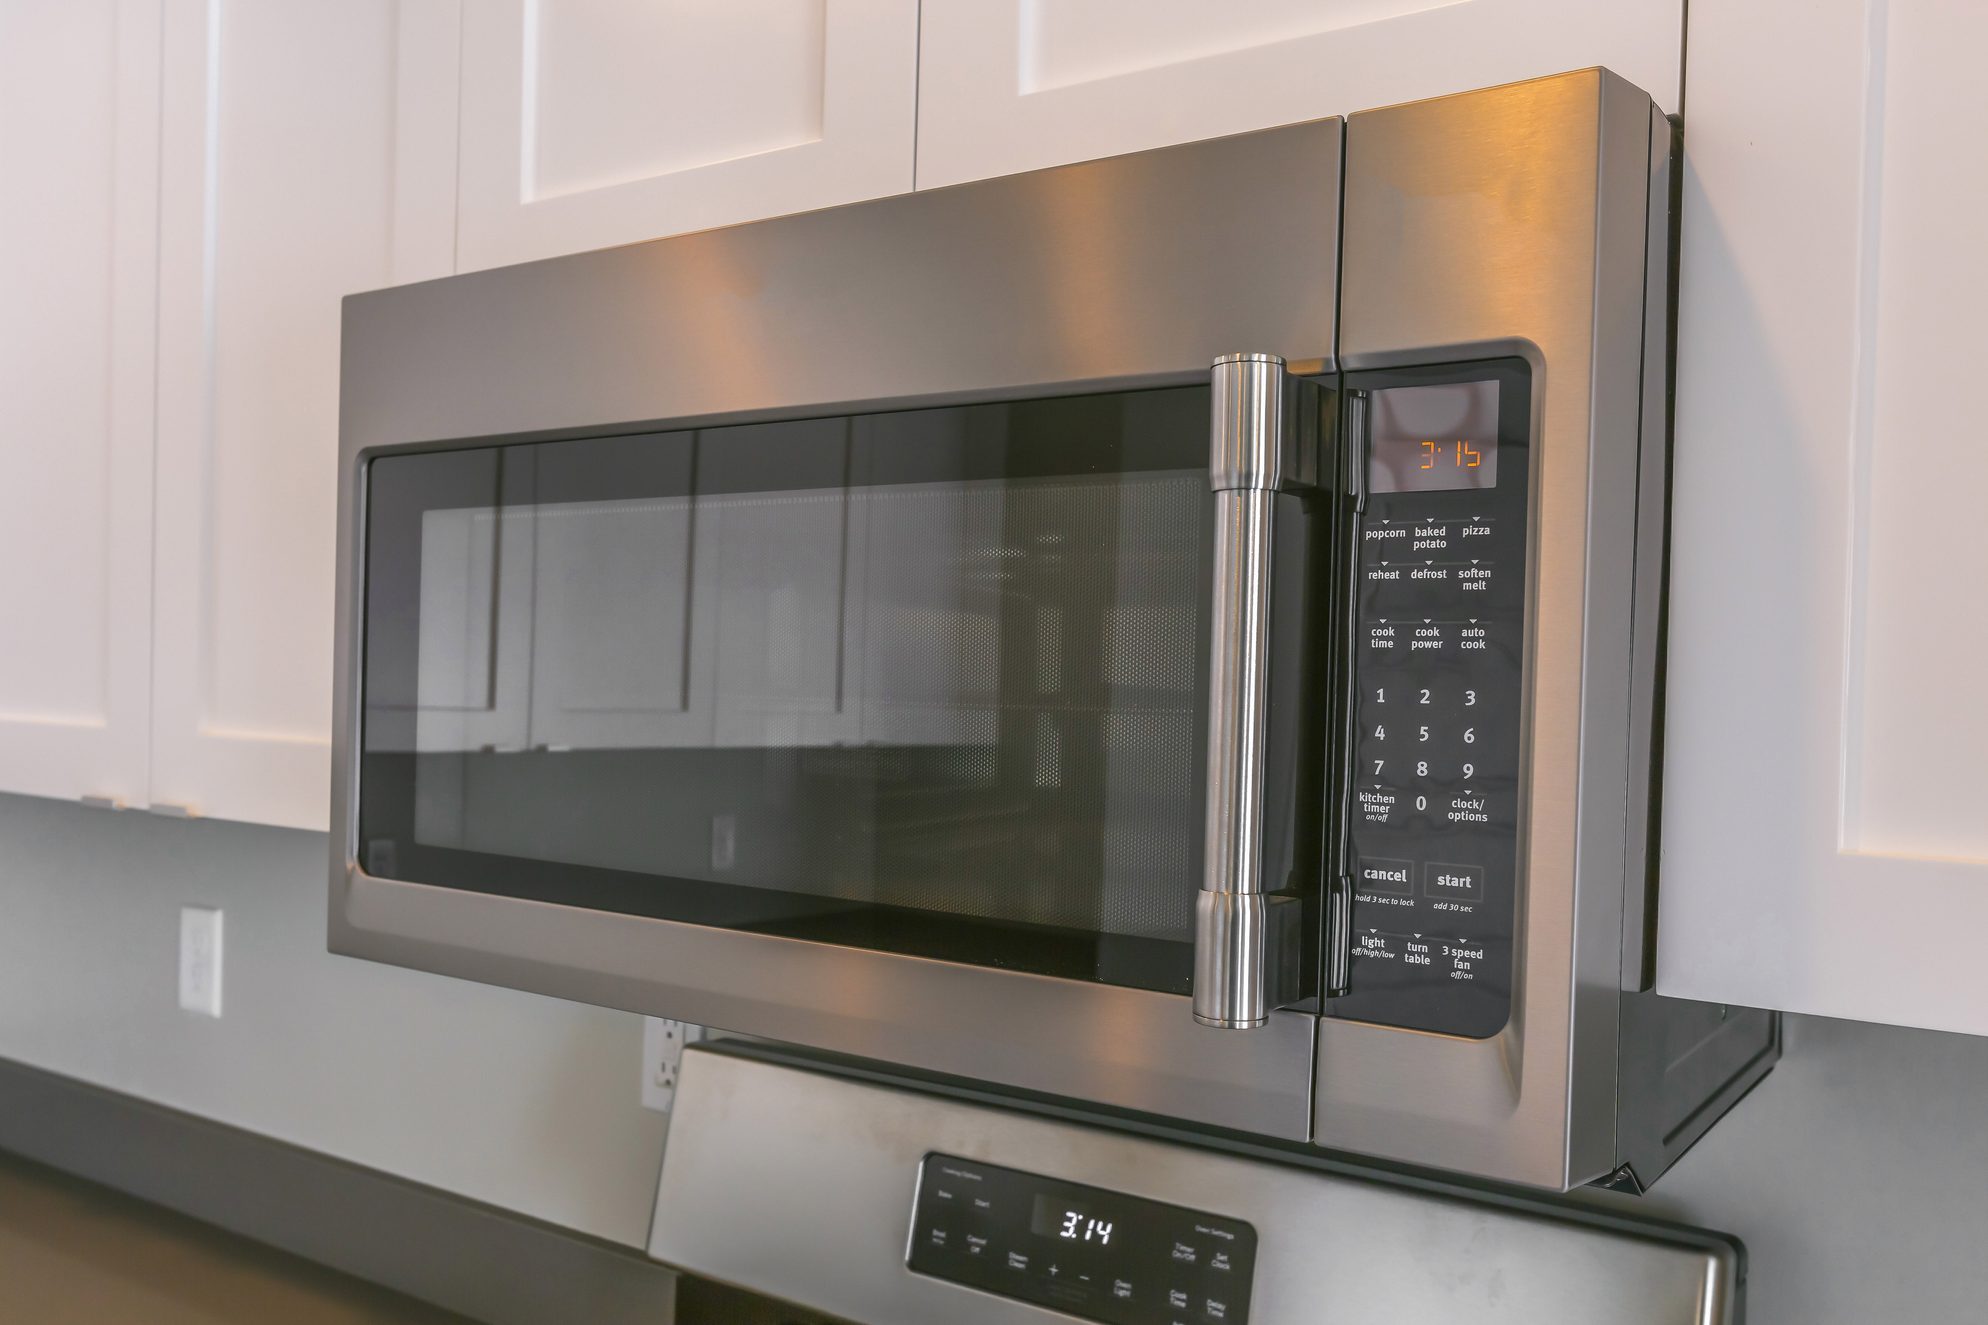
Your microwave starts but won't heat. Don't toss it; you can fix this yourself. Learn how to replace the door switch, a common microwave repair.
Less than 30 minutes
Beginner
$5–10
Introduction
Fixing one of the most common microwave issues can be fairly simple— if you know what you're doing.Tools Required
- Phillips-head screwdriver
- Small flat-blade screwdriver
- Step Stool
- Torx 10 Driver
Materials Required
- Microwave door switch
What To Know About Microwave Repairs
At our home, we use our microwave ovens to heat beverages and cook around 20 times per day. For many families, the microwave is the primary cooking device.
When you go to heat your coffee, and after one minute of microwaving it’s still ice-cold, it’s time to replace the door switch — an inexpensive, easy DIY repair.
I’ve seen this problem hundreds of times in my 30 years repairing appliances. It happens a lot: The cheaply-made door switch breaks, so when you close the door it never sends power to the heating system.
I would say there are thousands of perfectly good microwaves thrown into landfills that simply need the door switch replaced.
If your microwave starts doing the following, it needs a new door switch:
- Microwave starts.
- Light comes on.
- Turntable turns.
- Display counts down.
- No heat.
Project step-by-step (9)
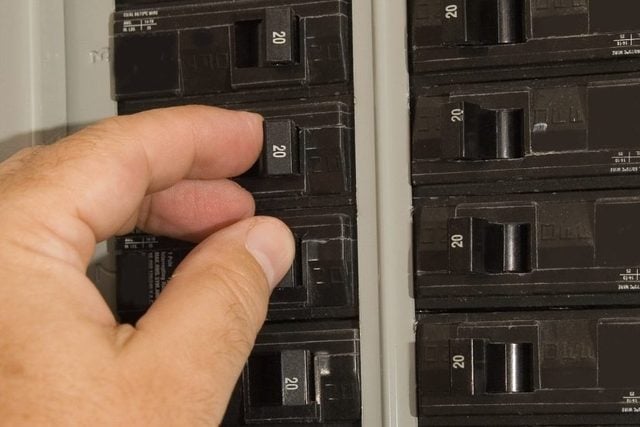
Turn off the power
- Unplug the microwave, or turn off the circuit breaker at the electrical panel.
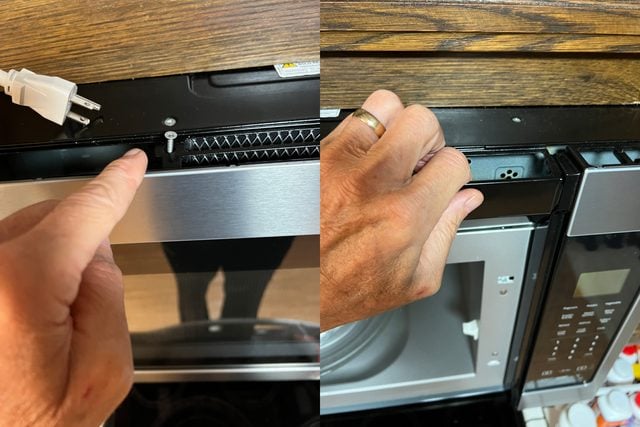
Remove upper plastic vent, if necessary
- Stand on step stool high enough to see the two Phillips head screws above the door of your microwave.
- Remove the screws from the plastic vent.
- Open the door and lift the vent up and away.
Note: On some microwaves, you don’t need to remove the plastic vent because it doesn’t cover the screw holding the control panel in place.
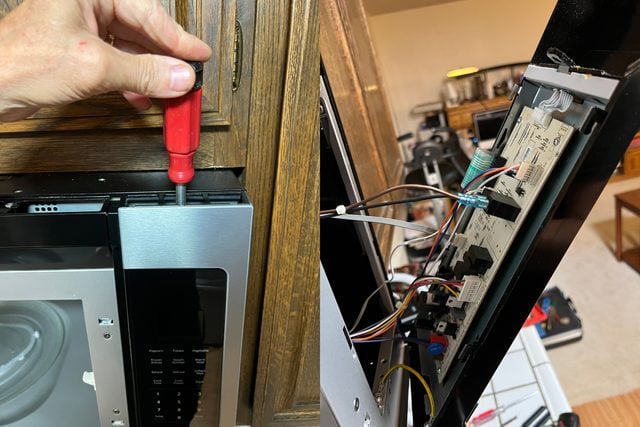
Remove the control panel
- Standing again on the step stool, find another Phillips head screw at the top of the control panel to the right of the door.
- Remove that screw.
- Grab the sides of the control panel. Slowly lift it up and back.
- You’ll notice some wires going from the microwave to the control panel.
- Take a photo of those wires to help during reassembly.
- Pinch in on the wire connectors to remove them from the control panel.
- Lift the control panel up and away. There will be a green wire at the bottom of the control panel. Leave the wire connected and let the control panel dangle by that wire.
Remove control panel backing, if necessary
- Remove the two Phillips head screws holding the plastic backing to the metal frame.
- Pull out the backing from the frame.
- Dislodge the wires connected to the backing and set the backing down.
Note: Many microwaves don’t have this backing piece. Once you remove the control panel, you’ll have good access to the upper door switch.
Remove the door switch
- Unscrew the Torx 10 screw positioned where the door closes. Remove the door switch on your right. There may be a door switch on each side of the housing.
- Use your small flat-blade screwdriver to push into the rectangular slot above the Torx screw. That releases the door switch housing.
- With that same screwdriver, gently pry up from underneath the small door switch to release it from its plastic housing.
- Remove the two wires from the door switch.


Install the new door switch
- Push the two wires onto the new door switch.
- Align the two plastic pins on the door switch housing with the two holes in the door switch.
- Push down onto the new door switch until you hear it click into place.
- Align the door switch housing with the screw hole in the microwave face and tighten the Torx 10 screw.
- On microwaves with plastic backing, put it back on and add screws to hold it.

Reattach the control panel
- Reconnect all the wires going to the control panel. Make sure they’re secure.
- Push the control panel in against the microwave frame. With two hands, push until it locks into place. The top of the control panel will be parallel with the top of the microwave.
- Reinstall the Phillips head screw into the top of the control panel.
Note: On some microwaves, you’ll need to reinstall the plastic vent on the left side of the control panel and add the two Phillips-head screws to hold it in place.

Restore power
- Plug in your microwave or turn the circuit breaker back on.
- Type in the current time on the digital keypad and press the start button to reset the display.
Finishing up
- Test your microwave by trying to heat a glass of water for one minute.
- More than 90 percent of the time, the problem will be corrected and you’re good to go.
- If not, it’s time to call a pro to replace the diode or the magnetron.