
How to Stop a Plumbing Leak
Updated: Jun. 14, 2023Here are several options for fixing leaks with basic DIY plumbing skills.
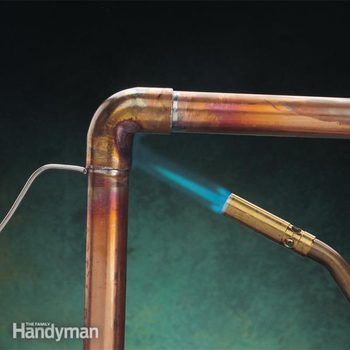
Drain the water, then solder
Shut off the water at the main valve in your home and open up nearby faucets to completely drain the pipe with the leaky elbow. Dry the outside of the elbow and sand (120-grit paper or cloth) around the leaking joint to remove all surface corrosion. Apply soldering flux around the whole joint and apply heat with a torch until the old solder melts. Add new solder until a shiny ring of solder shows all around the joint. Let the pipe cool for five minutes, then turn the water back on and cross your fingers that you stopped the leak.
If the leak continues . . .
Turn off the water again, open faucets to drain the line and cut out the entire elbow. Then solder in new fittings.
A last ditch effort . . .
Sometimes you can’t solder in the new fittings because there’s a continuous slow trickle of water. If you don’t want to wait for the water to completely drain, try this trick. Replace the elbow with a tee with a threaded fitting soldered on one end. This open end allows any moisture to escape as steam so you can heat the joint enough to melt the solder. When the pipe has cooled, screw in a threaded plug. Be sure to use Teflon tape or pipe compound on the threads.
Required Tools for this Project
Have the necessary tools for this DIY project lined up before you start—you’ll save time and frustration.
- Plumbers tape
- Rags
- Slip joint pliers
- Soldering torch
- Tube cutter
Required Materials for this Project
Avoid last-minute shopping trips by having all your materials ready ahead of time. Here’s a list.
- Cloth sandpaper
- Copper fittings
- Copper pipe
- Flux
- Lead-free solder
