
How To Paint the Exterior of a House

Updated: Apr. 10, 2024
Anyone can paint the exterior of a house. Here's how.

2 to 3 days
Beginner
Varies
Introduction
Give your home's exterior a fresh look, enhancing its curb appeal and protecting it from the elements.
Tools Required
- carbide scraper
- Masking machine
- Paint gun
- Pressure washer
Materials Required
- Masking tape
- Paint
- Plastic masking
- Primer
Painting a whole house is a huge task, but the work isn’t hard. Anyone can paint. That’s why I don’t hire it out. Instead, I tackle it one wall at a time every summer. Depending on the size of the wall, you can complete the painting in two or three days. As long as you’re not changing colors, this is a great option.
If you’re changing paint colors, you’ll have to be OK with your house being different colors until all the walls are done, four years down the road. My wall took a little extra time because of my cedar shakes. To make the job easier, I invested in an airless paint gun. Here’s how I went about it.
Project step-by-step (8)
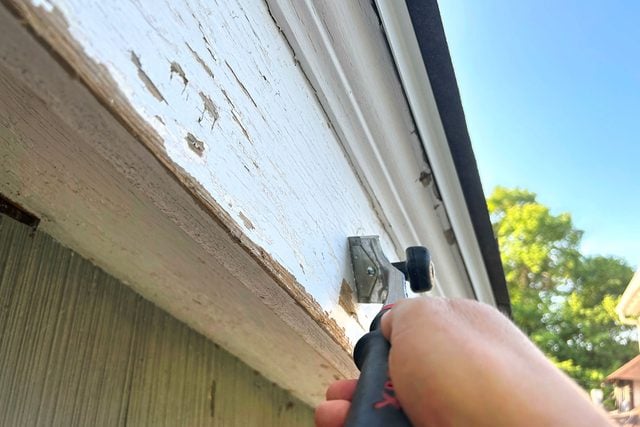
Scrape loose paint
After pressure washing all the surfaces, I let everything dry for 24 hours. Then I scraped all the peeling paint off the flat surfaces using a carbide scraper. If you don’t remove all loose paint, your new paint won’t adhere well and will peel off much sooner. I didn’t bother scraping the cedar shakes.
Remove bad shakes
Not everyone has cedar shakes like this, obviously. But if you do, don’t bother scraping them. These type of cedar shakes are deeply grooved and impossible to scrape sufficiently.
I’ve done it in the past, and while painting the scraped shakes certainly protects them, the aesthetic appeal leaves something to be desired. You can see the results on the adjacent wall. So for this job, I decided to replace any shakes with badly peeling paint.
To remove them, I had to cut some nails using an oscillating multitool. Then it’s just a matter of pulling them out.

Install new shakes
Slide the new shakes into place. Affix them with siding nails through the top and galvanized finish nails at the bottom. These shakes are doubled up, so the visible shakes slide up underneath the base layer shakes.

Install new corners
To trim out the corners, I bought aluminum corners made specifically for this type of siding. You can find them at most home centers. These corners hook around the bottom of the shake, and get nailed on at the top. Prime and paint them along with the wall.

Mask off
Because I’m spraying the whole job, there was plenty of paint prep that needed to be done. I spent some time masking adjacent surfaces using a 3M Masking Machine and masking film. The machine applies tape and film at the same time.
When I’m working on a ladder, it’s difficult to put up the film in one piece. In this case, I tear off smaller pieces I can apply in reachable sections before moving the ladder.

Prime surfaces
Next, I primed the soffit, fascia and wall. I used Peel Stop Triple Thick Primer from Zinsser. It’s perfect for painting wood siding where you’re not scraping and sanding down to bare wood. It fills some gaps, hiding imperfect surfaces.
I’m using a Graco TrueCoat 360 Single Speed Airless Sprayer. It’s definitely an expense, but the time cut off the job is worth it, especially on a surface like these shakes. I’ve done them by hand before, and the sprayer cuts the time by about 80 percent.

Paint the wall
After letting the primer dry, I applied color on the wall with the airless sprayer. Instead of masking off the soffit, I just shielded it from the spray using an old cedar shake.
When you’re spraying, make sure to air the nozzle perpendicular to the surface you’re spraying. Start the painting stroke before squeezing the trigger, and let the trigger off before stopping the stroke. Learn how to spray paint your house’s exterior.

Paint the soffit
I painted the soffit last, because it was easier to mask the wall than mask the soffit to paint the wall. Again, the sprayer saved a lot of time here. What would have taken me an hour with a paintbrush was done in five minutes.
Spraying overhead like this makes it more difficult to keep the nozzle perpendicular to the surface, so apply the paint in a light coat to avoid drips and runs. And don’t wear your good glasses!

Originally Published: October 05, 2023