


How to Paint Concrete Floors

Updated: Mar. 08, 2024
Transform your concrete basement or garage floor with a fresh coat of paint.
Our editors and experts handpick every product we feature. We may earn a commission from your purchases.Learn more.
A full day
Beginner
$50 -120
Introduction
Painting concrete doesn’t have to be overwhelming — it’s easier than you think. We'll walk you through the steps to transform your cold, gray concrete floor into a warm, inviting living space.Tools Required
- Wire brush
- Vacuum (with brush attachment)
- Paint scraper
- Paintbrush
- Paint roller
- Paint tray or bucket and screen
- Putty knife
Materials Required
- Concrete crack sealer
- Paint for concrete
- Painter's tape
Project step-by-step (7)
Step 1
Choosing a Paint
- There are many options for concrete floor paint on the market today. Whether you’re painting your garage floor, basement floor or even your front stoop, it’s good to know what paint to buy.
- Drylok Concrete Floor Paint works well for basement floors. This latex-based paint is durable enough for high-traffic areas. There’s no need for a primer coat, and you can paint over previously painted floors. This paint dries fast with low odor and cleans up with soap and water. Available in various colors and white base for custom tinting. Learn how to clean concrete floors in the basement.
- Rust-Oleum’s Epoxy Shield Basement Floor Coating Kit can help change your basement into a living space. This two-part water-based epoxy applies in one coat with no primer needed. The kit includes two cans (one quart activator and one gallon base paint) with decorative chips for texture. Here find out all about epoxy basement flooring.
- Kilz Concrete & Garage Floor Paint is a one-part interior/exterior water-based floor paint. Suitable for high traffic areas like sidewalks and garage floors, it applies in one coat to concrete, masonry, stone and brick. Dries to touch in two hours. Recoat in four hours.

Step 2
Prep Painting Area
- Clear the painting area completely, removing any obstacles.
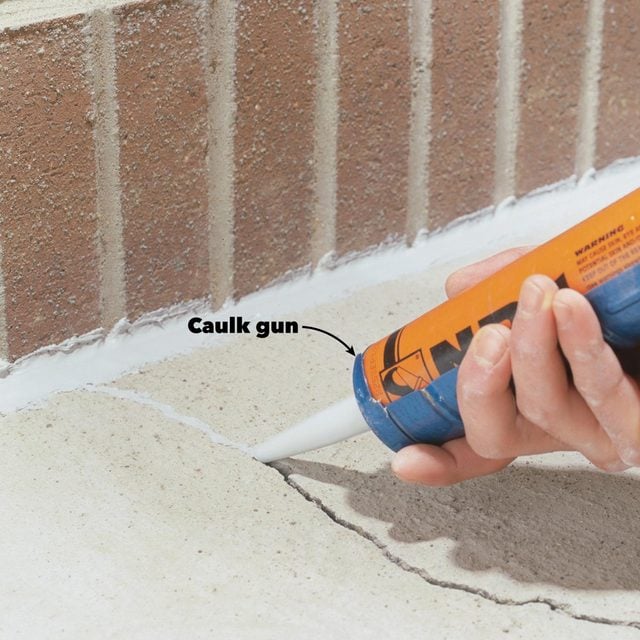
- Inspect the concrete for cracks, structural damage and loose chipping paint, as well as dirt, water and grease.
- Fill any crack with a concrete crack sealer and fix any structural damage with hydraulic cement or quick-setting cement. Be sure the cement is fully cured before painting.
- If the floor has been painted several times, you may want to remove old paint with a wire brush or a side grinder with a wire wheel attachment.
- Thoroughly sweep and vacuum the painting area.

Step 3
Tape Off
- Use painter’s tape to mask off the walls and baseboard around the perimeter of the room. Mask off any moldings, banisters and baseboard heaters you want to keep free of paint.

Step 4
Primer coat
- It may be necessary to apply a coat of primer at this point. Some floor paints don’t require a primer. Check the application instructions on the paint can and do what the manufacturer recommends.
- DryLoc floor paint recommends the first coat should be thinned with one pint of water per gallon of paint. Let the first coat dry a minimum of four hours between coats.

Step 5
Cutting In
- Before you start, open a few windows for ventilation.
- Pour a manageable amount of paint into a small container you can hold in one hand. Paint the edge of the floor along the perimeter of the whole room, using a 2-1/2-in. angled paintbrush. (This is called “cutting in.”)

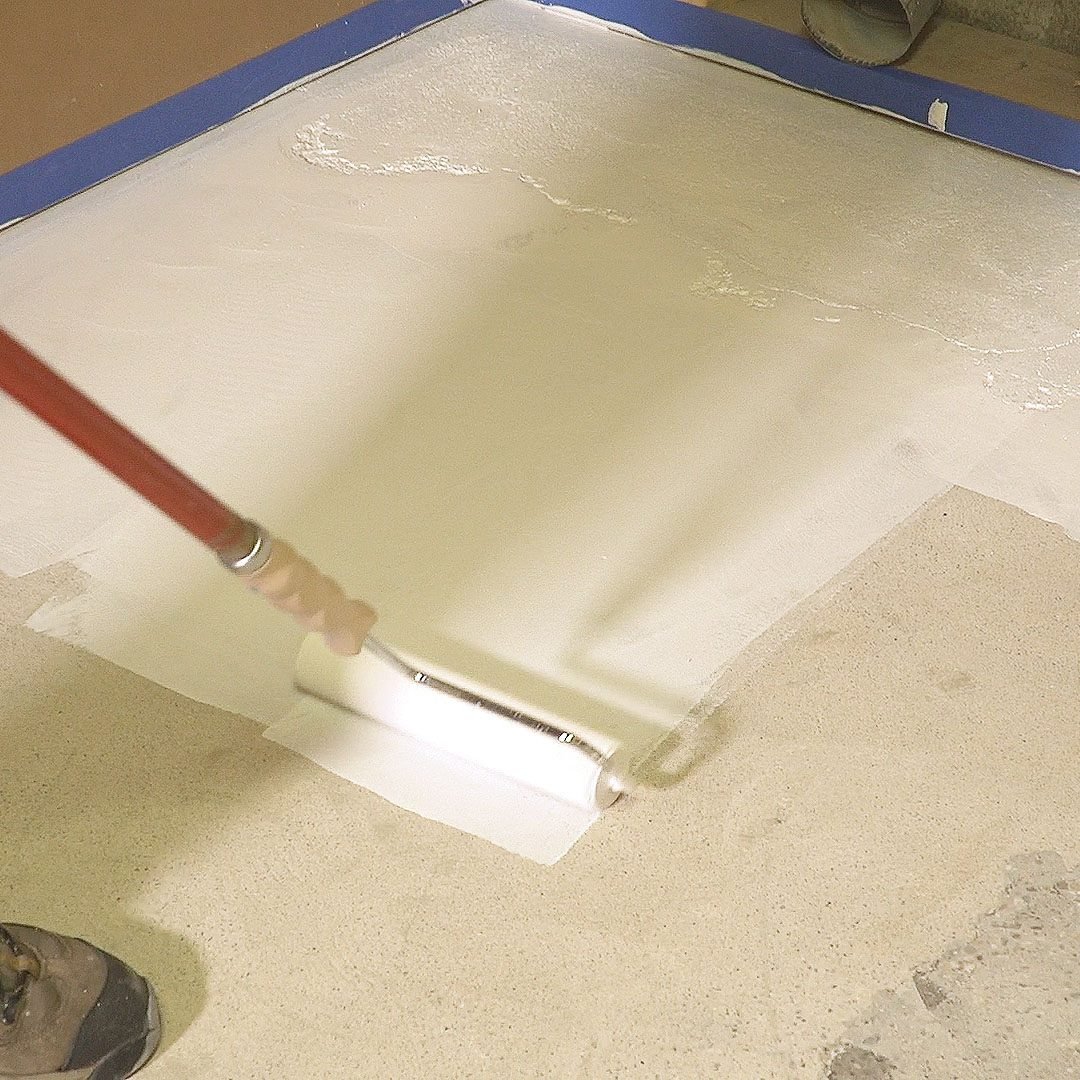
Step 6
Roller Painting
- Be sure to stir the paint with a paint stick before you begin.
- Start in the corner of the room farthest from the door. Work your way out as you paint in three- to four-foot sections. Be sure not to paint yourself in a corner.
- Fill the roller tray a little over half-full with paint. Too much paint in the tray may spill over.
- Load the roller with paint from the paint tray and roll paint on the floor. Roll straight back over the paint without reloading the roller to ensure the floor is covered evenly.
- Again, load the roller with paint and start a new row overlapping the previous one. The edges of the roller tend to leave paint build-up lines. Roll back over the lines and blend them in with the rest of the paint.

Step 7
Clean Up
- Wash your paintbrush with hot water and dish soap immediately after you’ve finished.
- Wash your roller with hot water and dish soap (or dispose of it) immediately after you’ve finished.
- Allow the paint to dry completely (minimum four hours).
- While slowly peeling away the tape you applied, use a putty knife to score along the edge where it meets the floor to prevent the new paint from peeling up.


Originally Published: March 23, 2021