


If your dishes aren't clean and the soap hasn't dissolved, don't make a service call just yet. Here's how to fix the problem yourself.
An hour or less
Beginner
$20-50
Introduction
If your dishwasher isn't cleaning the dishes and soap won't dissolve, let's fix it! Three things that can prevent dishwasher soap from doing its job:
- A blown hi-limit safety fuse for the heating circuit. (Hire a pro to fix this.)
- Not enough water coming into the dishwasher during the fill cycle. (Also hire a pro to fix this.)
- A worn out heating element. (You can replace this yourself.)
Read on to learn how to test the heating components and replace the most common component to fail — the heating element.
Tools Required
- Flashlight
- Mirror
- Multi-tester
- Nut driver
- Phillips screwdriver
- Pliers
Materials Required
- Heating element (if needed)
Project step-by-step (10)
Step 1
Test the Heating Circuit
- Run a normal dishwashing cycle for 20 minutes.
- Open the door. A big plume of steam should come out of your dishwasher and the water should be hot to the touch.
- If it’s hot, go to Step 2.
- If not, the heating circuit is faulty. The heating circuit includes the controller and the hi-limit and the heating element. Go to Step 3 to see if the hi-limit fuse is blown.

Step 2
Test the Water Level
- Start another normal dishwashing cycle.
- After it drains, you’ll hear your dishwasher fill with water. Then it will circulate the water. You’ll hear the water sloshing around inside.
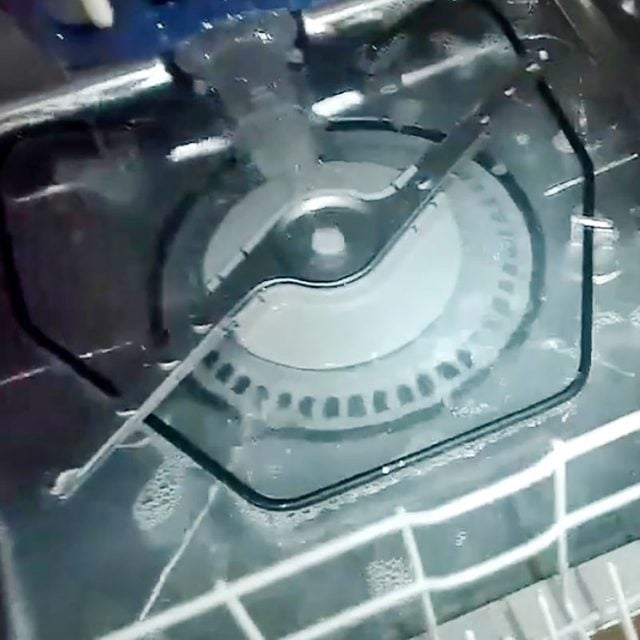
- When you hear it circulating, open the door carefully and confirm the water is high enough to touch the metal heating element. (The heating element is the round metal piece that surrounds the lower spray arm.)
- If the water doesn’t reach the heating element, it won’t heat properly. The fill valve isn’t letting in enough water and may need to be replaced. That’s a job for a pro.
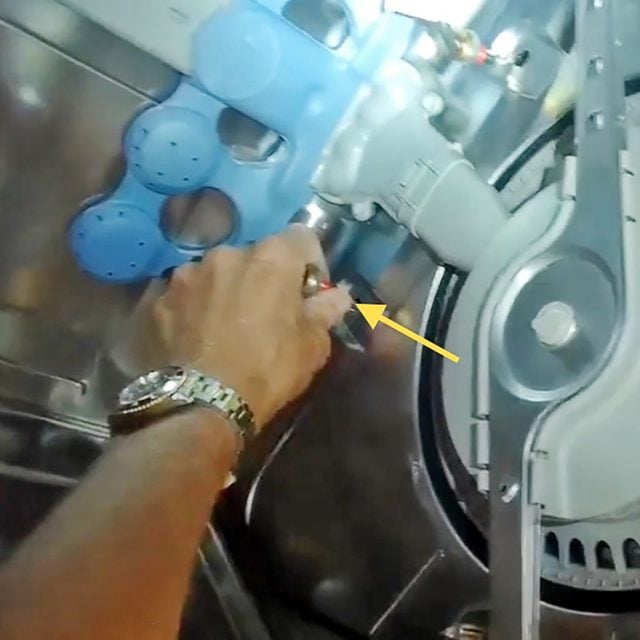
Step 3
Test the Hi-Limit Fuse
- Unplug your dishwasher from under your sink. Confirm the power is off by trying to start your dishwasher. There should be no lights or noises.
- Locate your dishwasher’s hi-limit fuse.
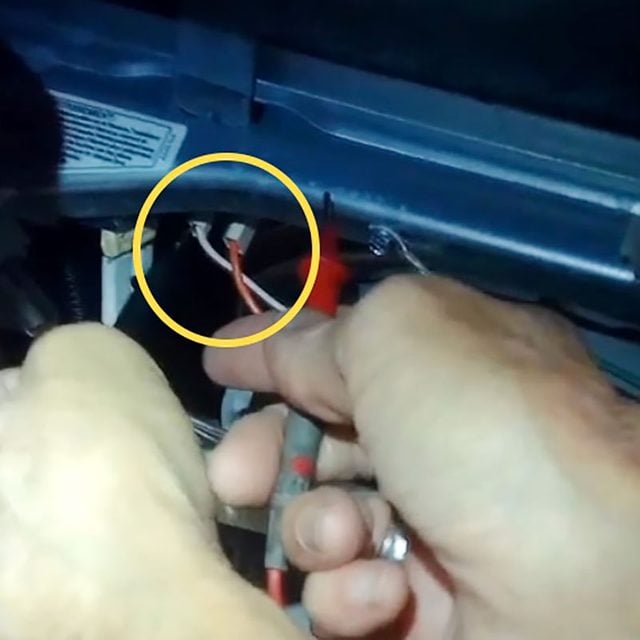
- Remove the lower panel below your dishwasher door; there should be two screws. Look under the dishwasher tub at the left front. The hi-limit is a round metal piece about the circumference of a nickel with two wires connected to it. Point a mirror up toward the tub to help you see it.
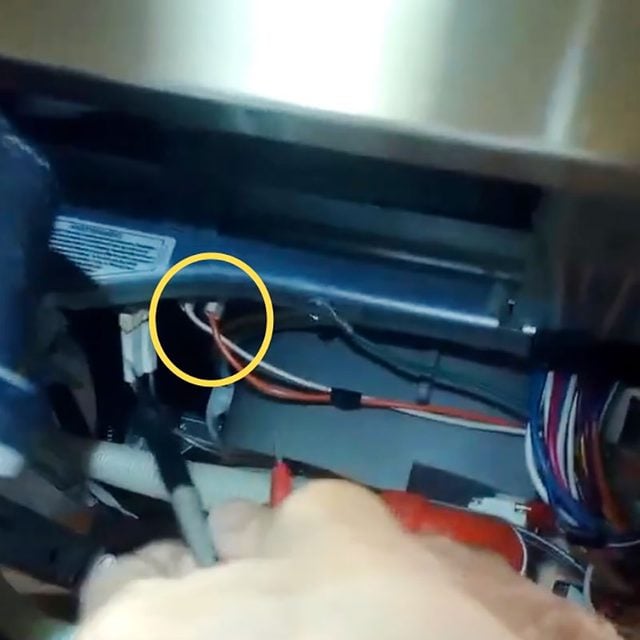
- Pull off the two wires connected to the hi-limit.
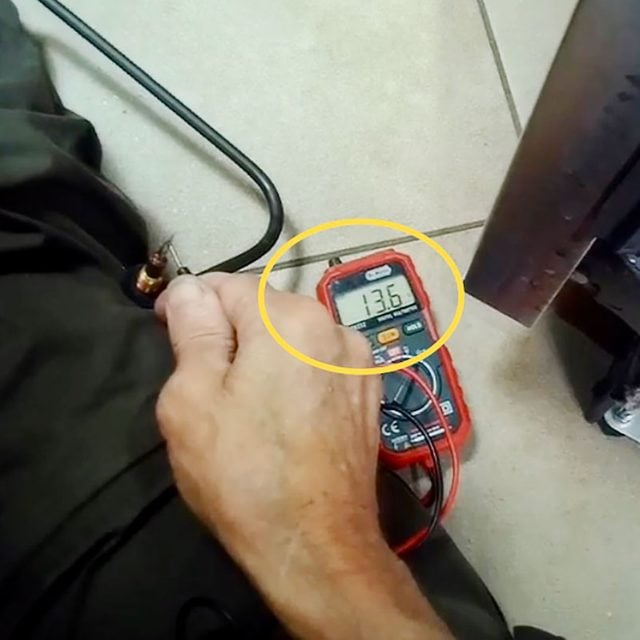
- Set your multi-tester for a continuity test.
- Put the probes of your multi-tester on the two terminals of your hi-limit fuse where the wires were connected. Your meter should show continuity.
- If there is no continuity, have your hi-limit replaced by a pro.
- If the hi-limit has continuity, then your heating element probably needs to be replaced. Keep reading to learn how!
- Put the two wires back on the hi-limit fuse.
Step 4
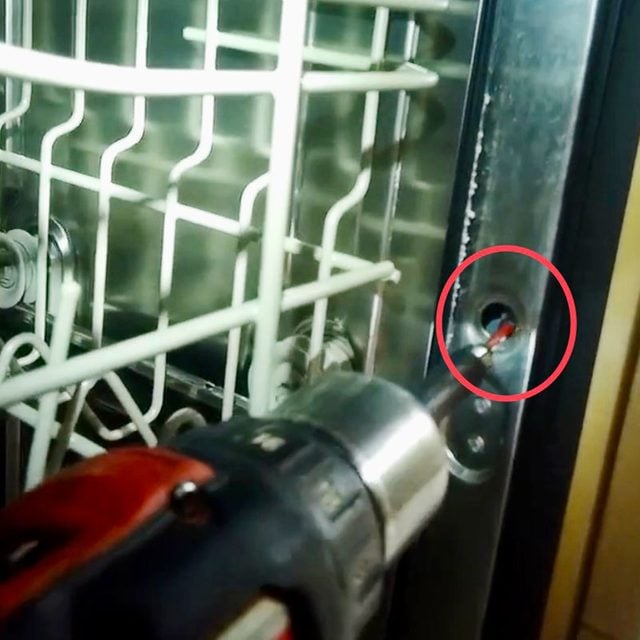
Remove Your Dishwasher from the Cabinet
- Turn off the water to your dishwasher under your sink and remove the dishwasher fill line from the faucet.
- Disconnect the dishwasher drain hose under your sink by loosening the nut with pliers.
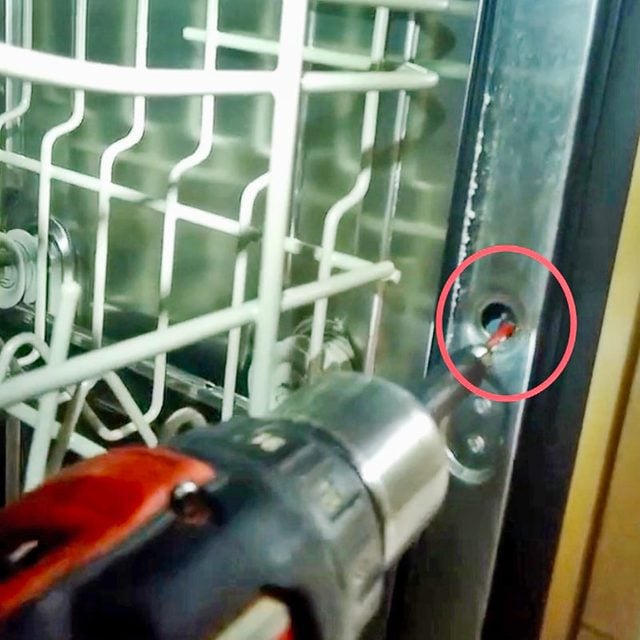
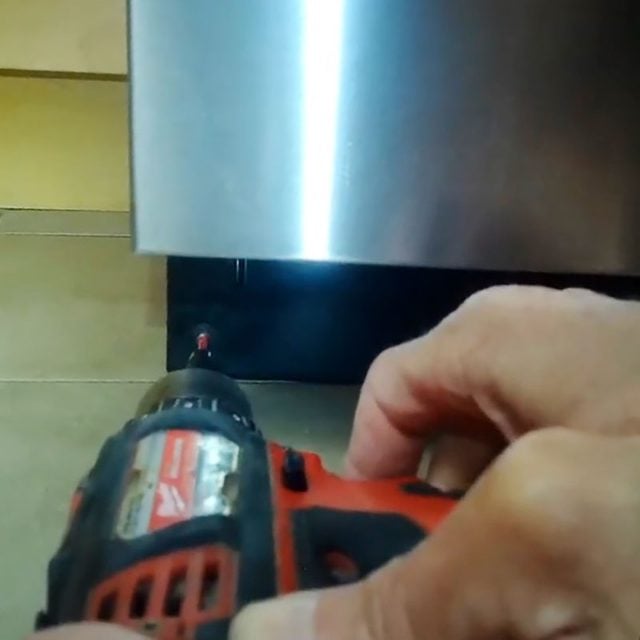
- Remove the screws holding the dishwasher in the cabinet from the top and sides of your dishwasher door frame.
- Remove the panel below the dishwasher door (you’ll need a screwdriver). Turn the two front feet to your right to slightly lower the front of your dishwasher.
- Wiggle your dishwasher forward to remove it from the cabinet.
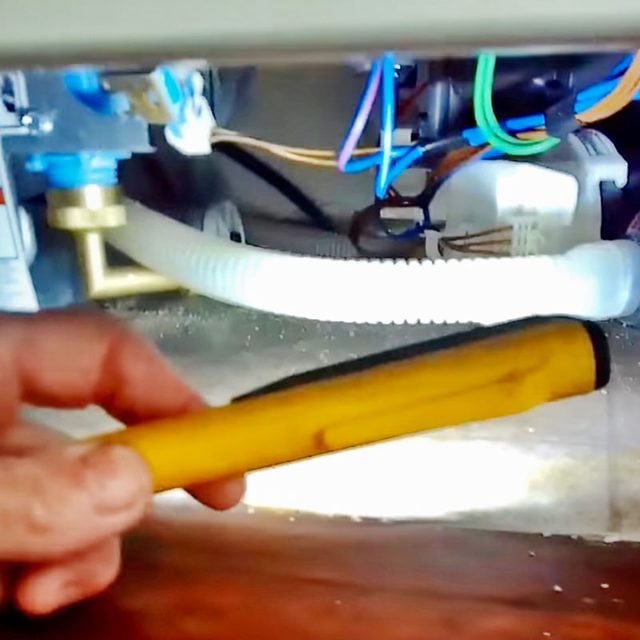
Step 5
Test the Dishwasher Heating Element
- Set your multi-tester for a continuity reading.
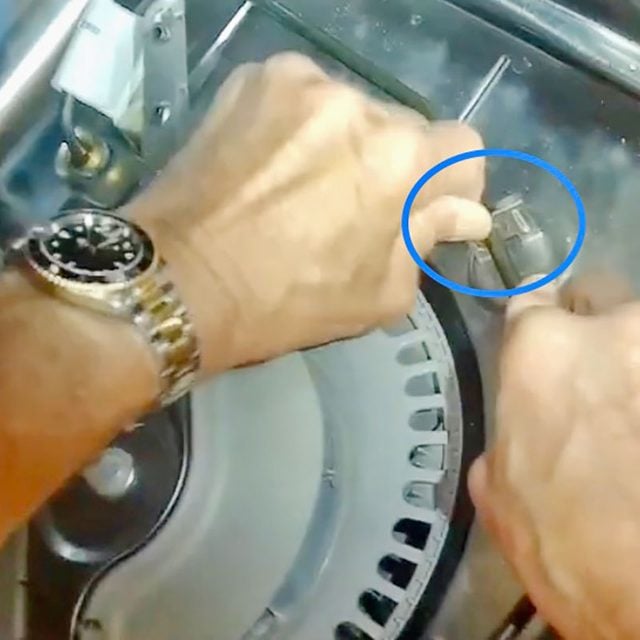
- Locate the two plastic nuts at the back of your dishwasher that secure the heating element to the dishwasher.
- Wiggle out the two wires that go up to the element through the plastic nuts.
- Put your multi-tester on the terminals that the wires connected to and see if you get a continuity reading. Look for between 11 and 20 ohms.
- Zero ohms means the heating element is broken.
- Higher than 20 ohms means the heating element is worn out and should be replaced, because it won’t make the water hot enough.
If your heating element and hi-limit fuse pass the continuity test and your dishwasher also passed the water level test, then your water isn’t heating because of a failed controller. A new controller costs around $200. However, it may make more sense to replace the dishwasher because if the controller failed, it’s likely other components are worn out as well.

Step 6
Buy a New Dishwasher Heating Element
- Google your dishwasher model number along with the term “heating element.” A heating element typically costs around $40.
Step 7
Remove the Old Heating Element
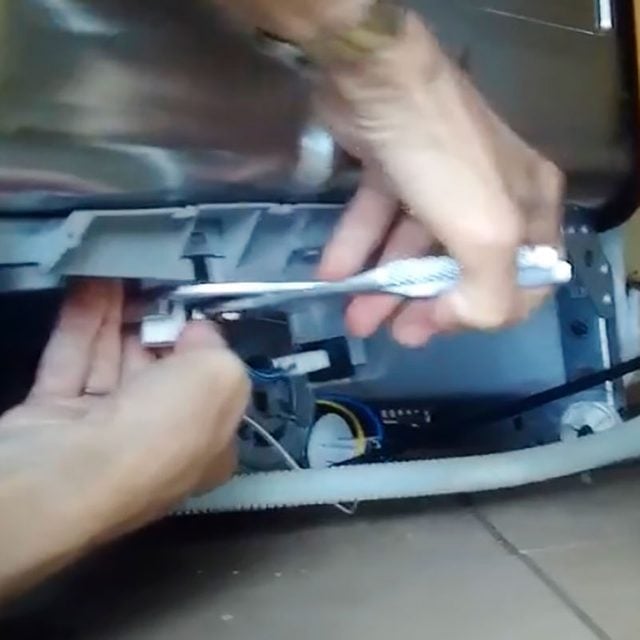
- Bend the metal tabs securing the old heating element to the inside of the tub 90 degrees.
- Pull off the wires connected to the bottom of the heating element, located behind your dishwasher.
- Use pliers to unscrew the plastic nuts securing the heating element to the tub.
- From inside the dishwasher, lift up the old heating element and wiggle it free.
Step 8
Install the New Heating Element
- Push the ends of your new heating element down into the two holes in your dishwasher tub.
- Tighten the two plastic nuts from behind your dishwasher — first by hand, then using pliers.
- Don’t make them too tight! Just until they feel snug.
- Push the wire connectors back onto the heating element from behind your dishwasher until they are secure.
- Bend the metal tabs back over the new heating element.
Step 9
Test for Leaks
- Connect the fill line under your sink and tighten with pliers.
- Connect the drain hose under the sink and tighten the hose clamp that holds it.
- Turn on the dishwasher water valve under the sink.
- Plug in your dishwasher and start a cycle.
- Look under your dishwasher for leaks near the back where the new element was installed.
- If you see a leak, unplug your power cord, disconnect your dishwasher drain line and the water fill line and pull your dishwasher back out.
- With pliers, tighten the plastic nuts slightly tighter than before. That should do the trick!
Step 10
Finish Reinstalling the Dishwasher
- Push your dishwasher all the way into the cabinet.
- Turn the front feet to your left to raise the dishwasher back up, so the top of your dishwasher touches the underside of the kitchen counter.
- Secure the screws that hold your dishwasher to the cabinet.
- Reinstall the lower panel below the dishwasher door and tighten the two screws.
- Your dishwasher should now heat the water and dissolve the soap.
Originally Published: March 04, 2022