How To Clean Moss Off the Roof

Updated: Feb. 01, 2024

I had moss and lichen growing on my roof, so I got rid of it before it caused any damage. Here's how to do it.

Next Project
Time

A half day

Complexity

Intermediate

Cost

$100 - $200

Introduction

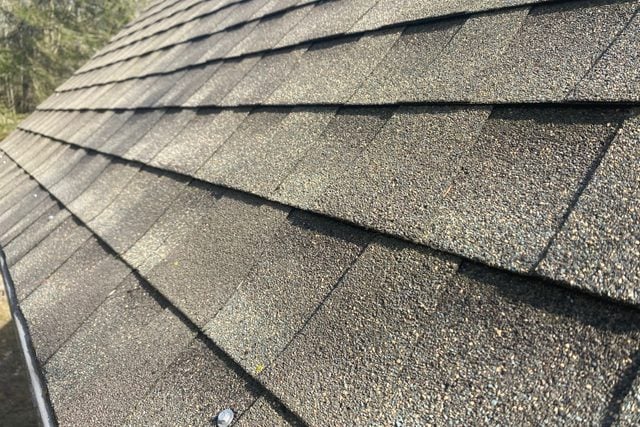
When my wife and I decided to build our home in the woods of Northern Ontario, Canada back in 2014, we tried to prepare ourselves for the extra difficulties that came with forest life. One challenge we didn't see coming was copious amounts of moss and lichen growing on our roof, particularly on the north side, where lots of shade keeps things cool and damp.

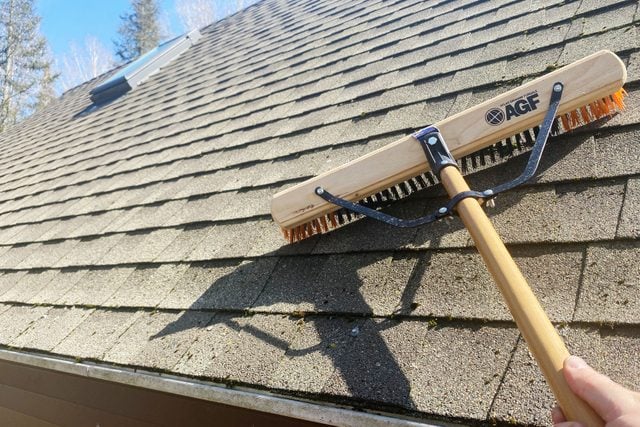
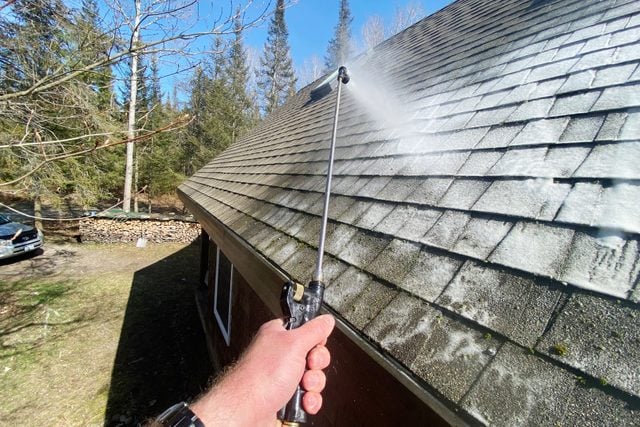
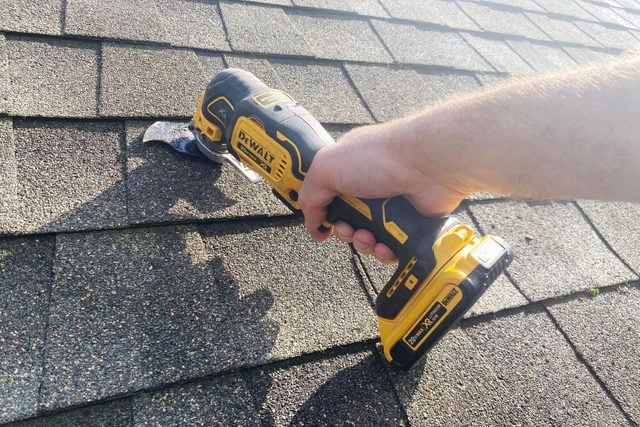
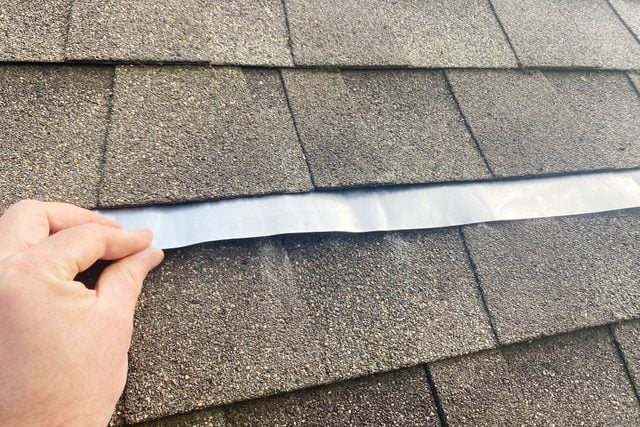
I started noticing green clumps on our asphalt shingles five years ago, and have since made it my business to keep this unwanted vegetation at bay. Moss and lichen can degrade asphalt shingles over time. In extreme cases, it can even lift them enough to let moisture seep between the layers and reach the roof sheathing. This can compromise structural integrity.

So if you've got some moss or lichen on your roof, get rid of it before it gets worse. Here's the plan of attack that works for me.

Tools Required

  • Backpack sprayer or pump-style weed sprayer
  • Caulk gun
  • Climbing boots
  • Climbing harness rope and shunt
  • Extension ladder
  • Long-handled push broom
  • Multi-tool with non-serrated attachment
  • Tin snips
  • Tool belt

Materials Required

  • Liquid or granular moss killer
  • Rolls of zinc roof strips
  • Tubes of caulk (any kind)
  • Water (optional)

Project step-by-step (5)

Step 1

Brush off the loose stuff

  • First, decide if you feel comfortable climbing on your roof with a harness, rope, carabiner and shunt. If this sounds like too much of a production, that’s OK — hire a roofing professional to remove your moss. Otherwise, proceed as follows. Pro tip: Enlist a helper nearby on the ground who can keep an eye on you and call for help if needed.
  • Choose a ladder tall enough to reach your roof comfortably, and set it up correctly and safely. If your home is single-story, or you’ve only got moss near your eaves, a tall painter’s ladder may be sufficient. A taller roof will require the gear mentioned above — a climbing harness with a rope securely tied to something solid on the ground, opposite the side of the roof you’re working on. I usually tie my rope around the base of a stout tree.
  • Use a long-handled push broom to carefully brush off any loose chunks of moss and lichen. Don’t be too aggressive or you could damage the shingles.
  • Relocate the ladder as needed to reach different areas of your roof, or use your rope and harness to walk/climb to different spots as needed.

1 Brush Off Loose Moss Robert MaxwellRobert Maxwell for Family Handyman

Step 2

Spray the roof with moss killer

  • Fill a backpack sprayer or pump-style weed sprayer with moss and lichen killer. If using a granular product, mix it with water according to the manufacturer’s instructions.
  • Carefully climb the ladder with a sprayer in hand, or on your back.
  • Thoroughly spray as many mossy areas as you can reach.
    • Be sure there’s no rain in the forecast for the next 24 hours. This gives the moss remover time to soak in and do its work. If not, hold off.
  • Climb onto your roof with your harness to reach higher areas as needed.
  • Move the ladder to an unsprayed section of the roof and repeat the procedure.
  • Let the moss remover soak in for a full day and begin doing its job.

2 Apply Moss Remover Robert MaxwellRobert Maxwell for Family Handyman

Step 3

Separate the cap shingles

  • Using your ladder and harness, climb high enough to reach the cap shingles at the peak of your roof.
  • Use a multi-tool with a non-serrated blade attachment to carefully cut the seal between the underside of the cap shingles and the top surface of the next shingle layer. You want to lift the cap shingles away from the roof (they’ll stay anchored) to access the space beneath them.
  • Climb back down the roof, all the way to the ground.
  • Move your ladder over and repeat the procedure on a fresh section of the roof. Continue separating the cap shingle adhesive from the shingles below. Keep working until the bottoms of the cap shingles are free along the entire length of your roof.
  • Climb down when finished.

3 Separate Shingles Robert MaxwellRobert Maxwell for Family Handyman

Step 4

Install zinc strips

  • Load your tool belt with a roll of zinc roof stripping, a caulk gun with a fresh tube, and tin snips.
  • Put on your climbing harness and go up on the roof at one end. Climb high enough to reach the cap shingles.
  • Use tin snips to cut a two to three foot length of zinc strip.
  • Lean on the shunt of your harness so you can stand or kneel on your roof with your hands free. Lift the cap shingles, then dispense a large bead of caulking on the underlying shingle layer about one inch up from the edge. Match the length of the caulk to the length of your zinc strip.
  • Press the length of the zinc strip down on the caulk, positioning it so at least half its width will stick below the bottom edge of the cap shingles.
  • Dispense another medium-sized bead of caulk along the top face of the zinc strip, if necessary. (Sometimes enough of the first bead squeezes out to re-bond the shingles.) Then press the cap shingles down on top.
  • Repeat the process across the entire length of your roof.
    • Install additional rows on zinc strips at lower points if your moss problem is particularly bad.

4b Install Zinc Strip Robert MaxwellRobert Maxwell for Family Handyman

Step 5

Wait for moss to fall off

  • Keep an eye on the moss situation for the next couple of weeks. You should see it start to brown and gradually fall off on its own.
  • If you don’t see the moss dead or dying within two weeks, apply more moss remover.
  • If the dried dead moss doesn’t fall off on its own, set up your ladder again and give the roof a gentle brushing with your push broom.

5 Wait For Moss To Fall Off Robert MaxwellRobert Maxwell for Family Handyman