


Learn how to clean your outdoor deep fryer so it's in prime condition the next time you want to fry fish, potatoes or a turkey in the great outdoors!
Introduction
Many people love deep-fried food and outdoor deep fryers make it easy to enjoy these delicacies at home. Trouble is, deep frying can leave quite a mess behind on the equipment involved. That's where proper cleaning comes in. If you like outdoor deep frying, but find the idea of cleaning your fryer intimidating, keep reading. This step-by-step guide lays out exactly how to clean your deep fryer fast and well, so you can get ready for your next frying session as soon as possible.
Tools Required
- Food-grade container for oil
- Garden hose
- Heavy-duty dish sponge
- Plastic bristled scrub brush
- Small diameter bottle brush (for fryers with drain valve)
Materials Required
- Degreasing dish soap
- Hot water
Project step-by-step (7)
Step 1
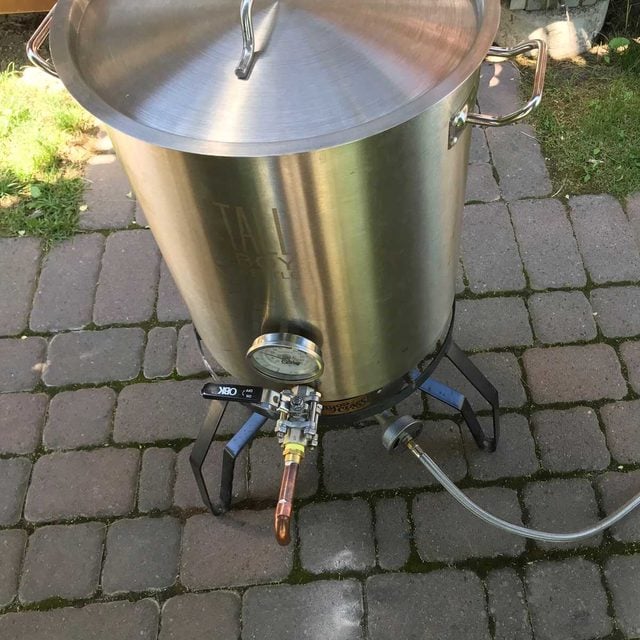
Shut Down the Fryer
- Shut off the gas supply to your outdoor deep fryer, then allow the oil to cool completely.
- Trying to drain the oil while it’s still hot is unnecessarily dangerous. It can take hours for the fryer and oil to cool, so be patient.
- Prepare a clean, empty jug or pail to collect the used oil. The container the oil came in works best.
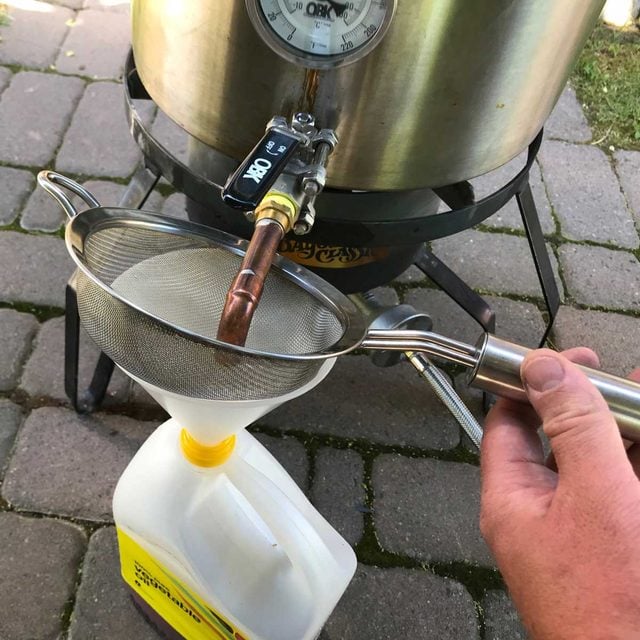
Step 2
Drain the Oil
- Position the oil container under the drain valve of your fryer, if your model of fryer has one. Place a food-grade funnel into the neck of the container, then hold a stainless steel strainer above it, just under the drain valve.
- Open the drain valve all the way and allow the oil to drain completely into the jug or bucket. Make sure the container you’re using has enough space for the oil. Use multiple containers, if necessary. Close the drain valve.
- If your fryer doesn’t have a drain valve, tip the fryer toward the funnel to empty the oil.
- Store the container of oil for future use. Replace the oil after three to five uses.
Step 3
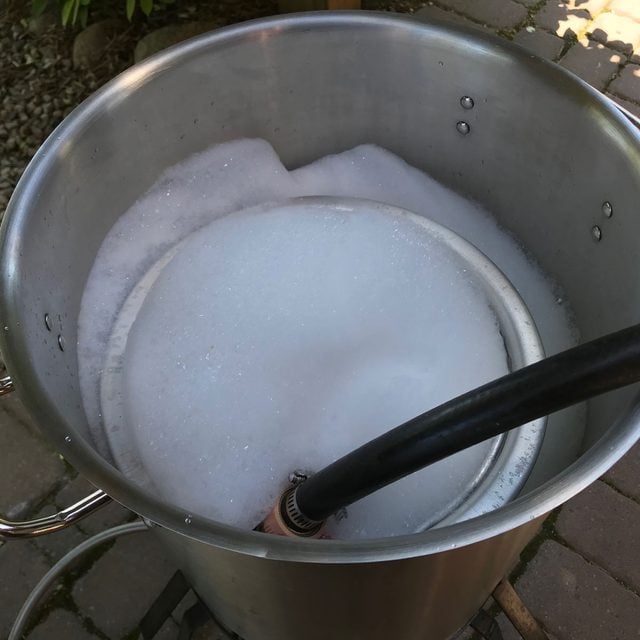
Add Dish Soap and Water
- After the oil is completely drained, add a small pool (roughly the size of two quarters) of degreasing dish soap to your fryer.
- Fill the fryer with hot water, making sure the frying basket is fully submerged. If you don’t have access to hot running water, put cold water in the fryer then heat it before adding the soap.
- Let the water and soap sit and begin dissolving the grease for five to 10 minutes.
Step 4
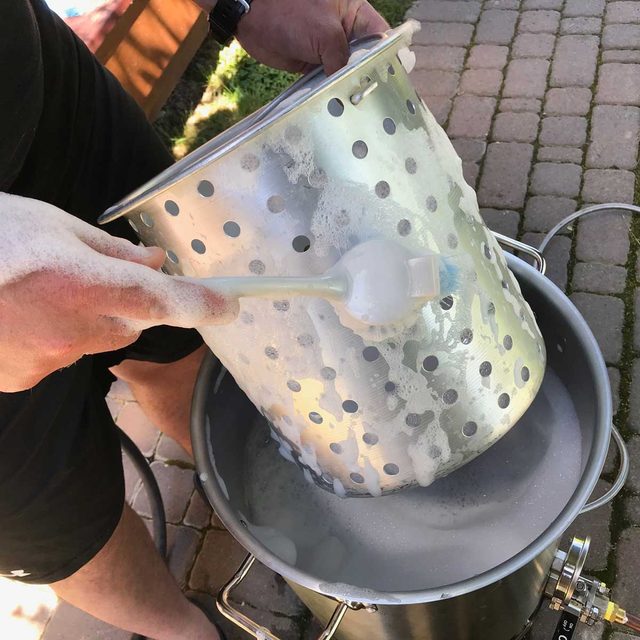
Scrub with a Bristle Brush
- Use a dish cleaning brush with firm plastic bristles to scrub the grease and food debris from the frying basket.
- Pay special attention to the holes in the basket, particularly if it’s a fine mesh design. Do several scrubbing treatments if necessary to remove all oil and food residue.
- Continue with the brush on the inside of the frying pot, making sure to dislodge any bits of stuck-on food.
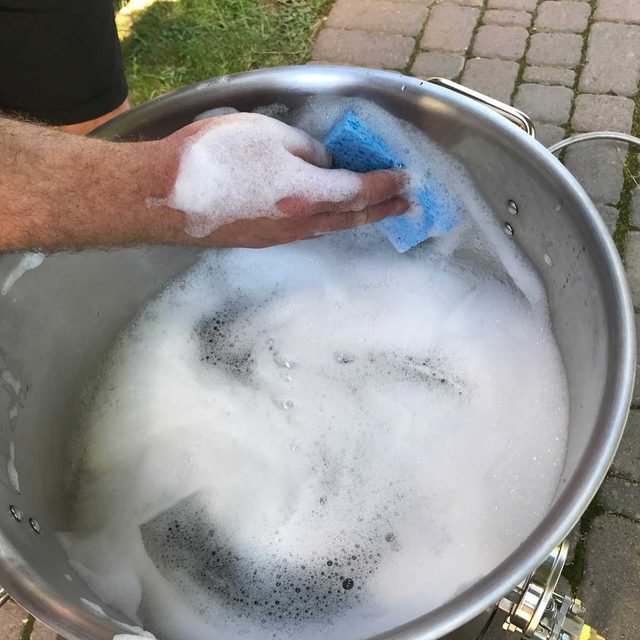
Step 5
Scrub with a Dish Sponge
- Scrub the inside and outside of the frying pot and basket thoroughly with a heavy-duty dish sponge.
- Check all surfaces with your fingers after scrubbing. If they still feel greasy, squirt some dish washing liquid on your sponge and scrub everything again.
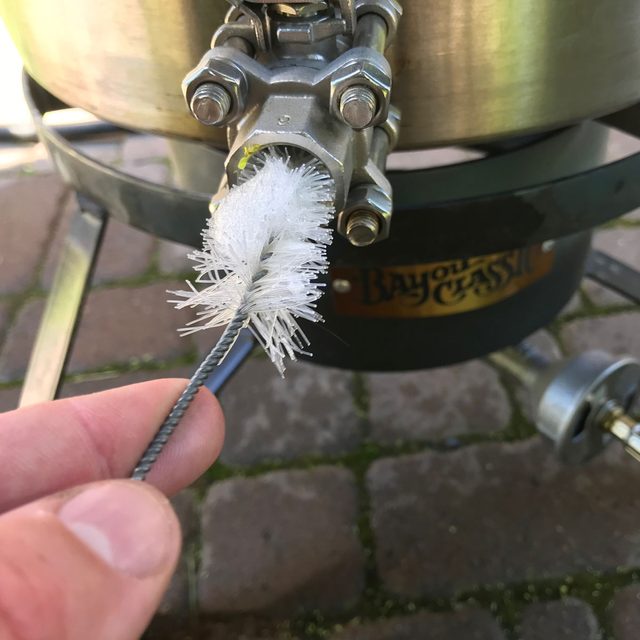
Step 6
Dump the Water and Clean the Drain Valve
- Open your fryer’s drain valve (if it has one) while the soapy water is still inside, allowing some of it to flow through the valve, dislodging any food particles trapped there.
- Empty all the water from your fryer.
- Use a small-diameter bottle brush with a little dish soap to clean the inside surface of the drain valve and the extension pipe, if you have one.
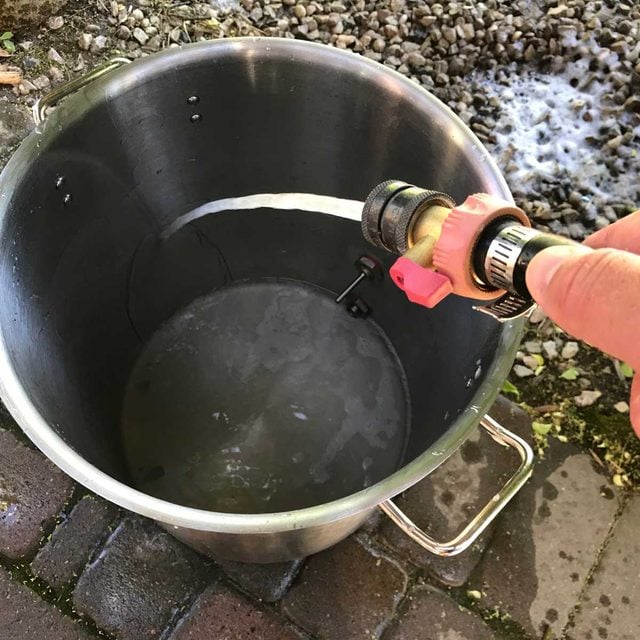
Step 7
Rinse, Dry and Store
- Use a garden hose to rinse all the soap from your fryer while the drain valve is still open.
- Do a final inspection of all surfaces, making sure they’re completely free of grease and soap.
- When your fryer’s fully clean, allow all parts to air-dry thoroughly, then store them for future use.
Originally Published: July 03, 2020