
How to Build a Shoe Rack

Updated: May 04, 2023
Is your entryway piled high with shoes? Get rid of the clutter with this easy-to-build wall mounted shoe rack.
A few hours
Beginner
Less than $100
Introduction
Is your entryway piled high with shoes? Get rid of the clutter with this easy-to-build wall-mounted shoe rack.Tools Required
- 5/8-in. Forstner bit
- Basic woodworking tools
- Drill press
- Drill/driver
- Jigsaw
- Miter or circular saw
- Pocket hole jig
Materials Required
- 1-1/2" brad nails
- 1-1/2" pocket hole screws
- 4- 3/4”x 5-1/2” x 48” Board (any species)
- 6 – 5/8” dia. x 48” Hardwood round dowel
Introduction
You can make this simple shoe storage rack with basic woodworking tools and standard lumber right from the home center. It will only take you a few hours to build and install, and you can organize all those pairs of shoes you’re constantly tripping over.
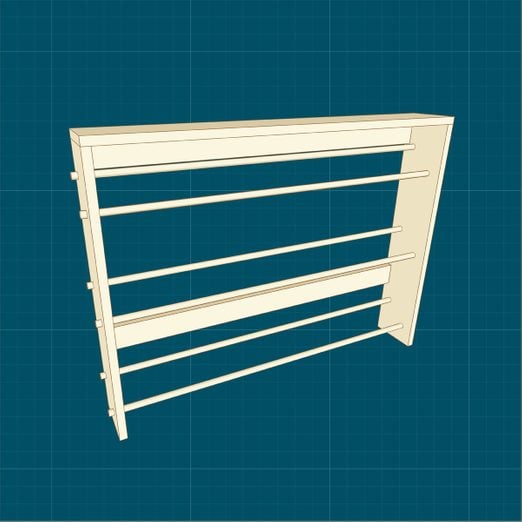
Project Overview
Cutting List
| KEY | QTY. | DIMENSIONS | PART |
| A | 2 | 3/4” x 5-1/2” x 28” | Sides |
| B | 1 | 3/4” x 5-1/2” x 37-1/2” | Top |
| C | 2 | 3/4” x 2-1/2” x 36” | Cross member |
| D | 6 | 5/8” diameter x 48” | Round dowel rods |
Project step-by-step (7)
Lay Out the Sides
Cut the side parts (A) to length, then use a Speed Square to draw three lines at a 45-degree angle. Make the first line 1-1/2-in. from the top and the next two lines 9-3/4-in. apart.
After marking the lines, take the Speed Square’s ruler and make intersecting marks on the angled lines at 1-1/2-in. and 4-1/4-in. from the front edge.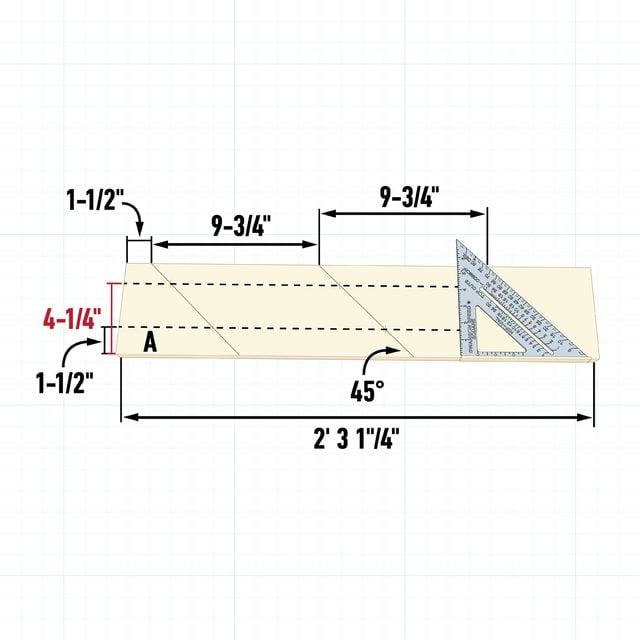
Cut a Notch to Fit the Baseboard
This shoe rack goes onto the wall, but it won’t sit flat if the baseboard is in the way. Instead of modifying the baseboard, cut a notch in the sides of the rack (A) to fit around it.
Measure the height and thickness of the baseboard, and use a jigsaw to cut out a notch that matches those dimensions. A sharp, “clean cutting” wood jigsaw blade limits tear out.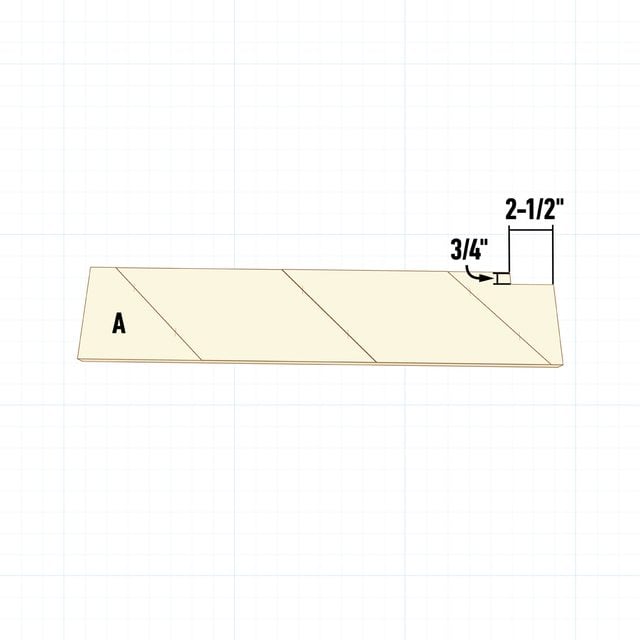
Drill the Holes
Mirror the hole location markings on the second side (A). Then, using a 5/8-in. Forstner bit, make a hole at each mark with a drill press. When drilling these holes through the boards, place a piece of scrap wood underneath your material to ensure a clean cut.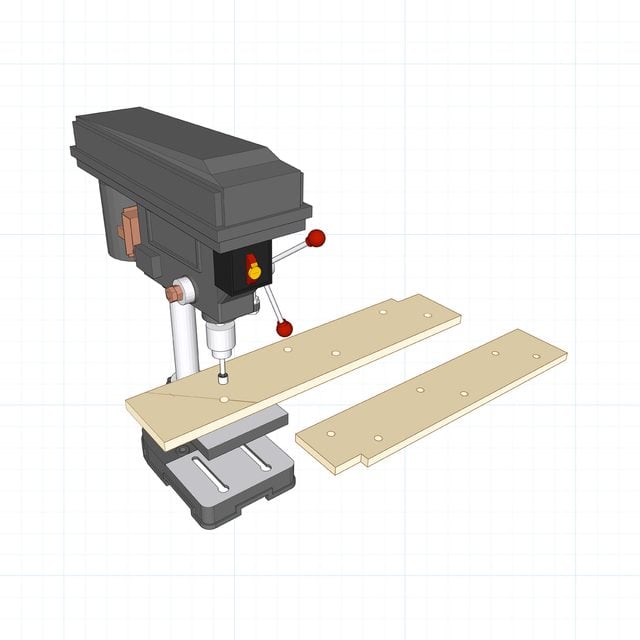
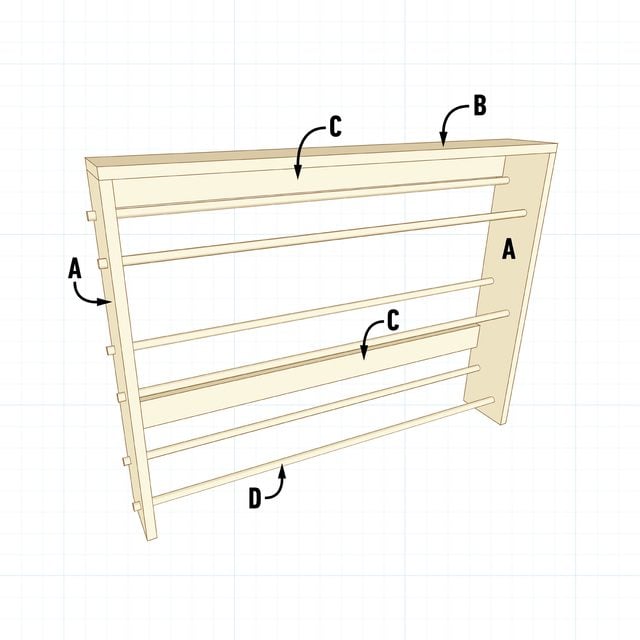
Attach the Top
Cut a board for the top (B) of the rack and fasten it to the top of the side pieces (A) with a few brad nails. Make sure the side parts (A) are mirrored and your drilled holes line up.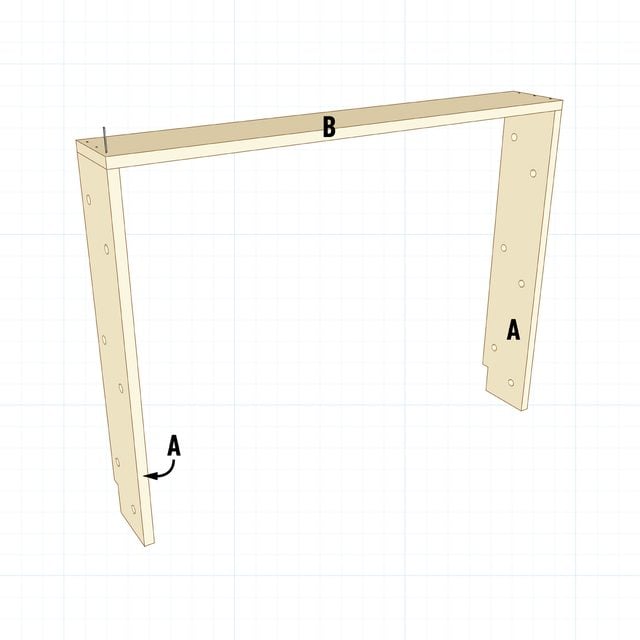
Fasten Cross Members
Cut two cross members (C) to fit between the side parts. Drill two pocket holes on both sides of the boards and fasten them to the sides (A) flush with the back of the rack. Fasten one so it’s pressed against the top (B), and the other eight inches from the bottom.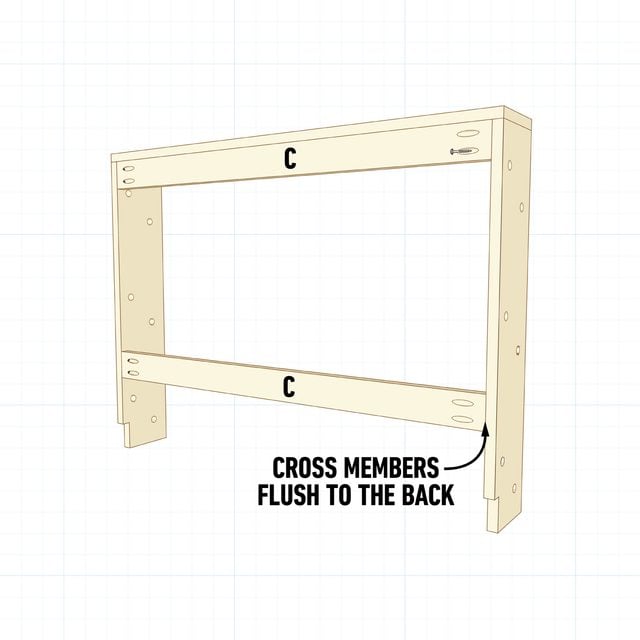
Slide In the Wood Dowels
After attaching the cross members, cut six 4-ft. long by 5/8-in. dowels (D) one inch longer than the shoe rack is wide. Then slide the dowels through the holes, leaving about 1/2-in. of the dowel hanging out both ends.
If the dowels don’t easily spin in the holes, there’s no need to secure them. If they do spin, drive brad nails through the dowels into the side boards (A).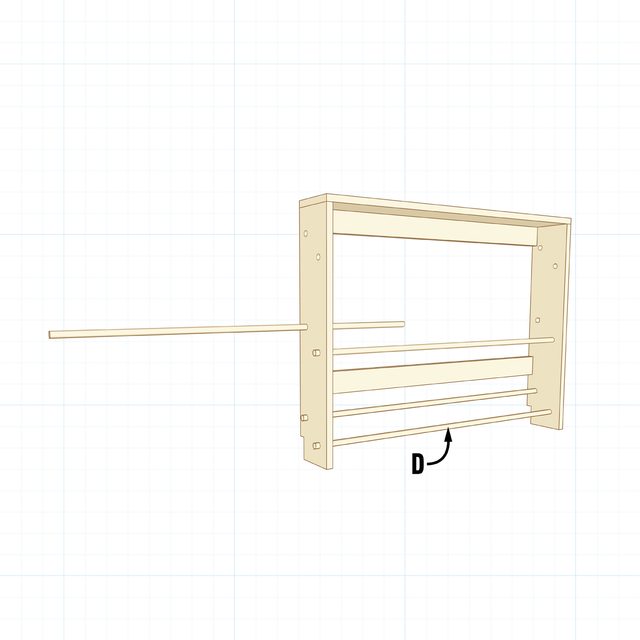
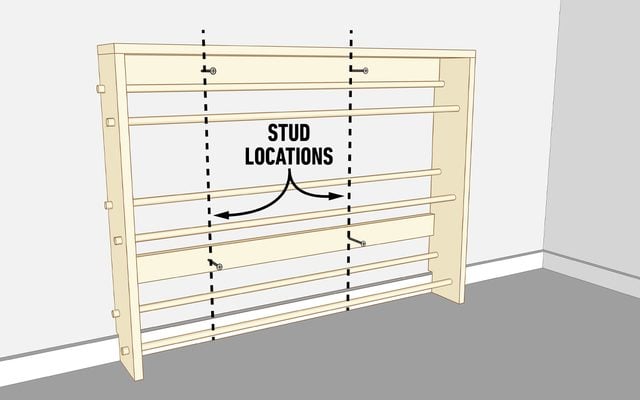
Attach the Rack to the Wall
Finish the shoe rack by painting, or apply a stain and polyurethane. Then find the wall studs where you’re installing the shoe rack. Move the rack into position, then drive a few screws through the cross members and into the wall stud.
Originally Published: April 03, 2023