
How to Build a Simple, Stunning Garden Arch
Updated: Jul. 14, 2023
A small project that makes a big impression in your backyard
A full day
Beginner
$101–250
Introduction
This classic garden arch has just six parts and can be built in less than a day. Create a gateway, frame a walkway in a hedge, or make it part of a trellis or pergola.Tools Required
- Circular saw
- Combination square
- Cordless drill
- Framing square
- Handsaw
- Jigsaw
- Level
- Orbital sander
- Posthole digger
- Safety glasses
- Spade
- Speed square
- Tape measure
- Wheelbarrow
Materials Required
- 2x 8 x 8' (2 for headers)
- 2x10 x 8' (brackets)
- 2x4 x 8' (3 for stretcher
- 3-1/2-in. deck screws
- 3-in. deck screws
- 6x6 x 10' (posts)
- braces)
- Concrete mix (3 – 60 lb. bags)
- Stakes
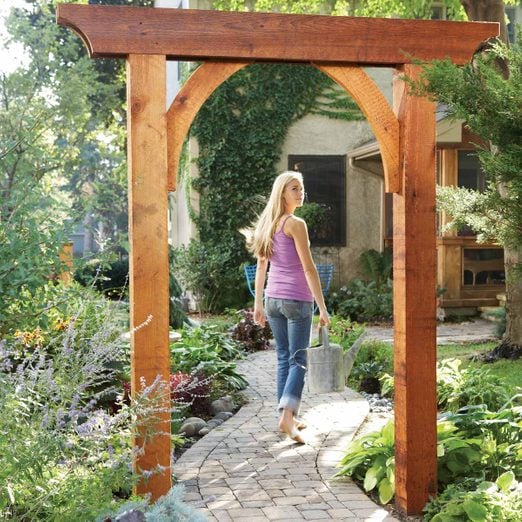
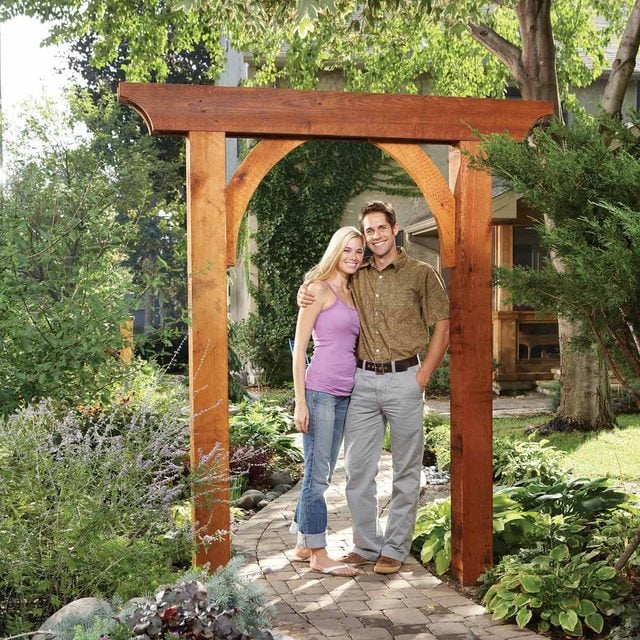
A garden arch, sometimes called a garden arbor, is a simple way to make a big statement in your backyard. Arches add a lovely decorative element to your space. You can use them along pathways, or as a kind of entrance to set off a certain area of the garden. Arches can also serve as a support for climbing plants, helping provide an extra element of shade to your space.
This arch is an affordable landscaping update that’s easier to make than most other arches out there. Made from just six parts, it can be built in less than a day – even if you’re a rookie carpenter. The design is versatile, and you can stain it for a rustic look or paint it for a more formal look.
Money and Materials
The arch in this article was built from rough-sawn cedar, but it can also be built from pressure-treated lumber for about half the cost. Depending on where you live, you may have other choices of rot-resistant lumber available, such as cypress or redwood. If you choose treated lumber, you’ll find everything you need for this project at home centers. If you choose another wood species, you may have to special-order lumber or visit a traditional lumberyard.
There are also options available for a metal garden archway, if you’re not comfortable with woodworking or just looking for a simple structure for vines and other plants to cover entirely.
For this garden arch, you’ll need only standard tools like a drill, a circular saw and a jigsaw. Make sure your framing square is a standard model (16 x 24 in., with a longer leg that’s 2 in. wide). If yours is an oddball, buy a standard version so you can easily mark out the brackets. A few days before you dig the postholes, call 811 to have underground utility lines marked.
An Arch Made From Six Parts
Project step-by-step (7)
Figure A: Garden Arch
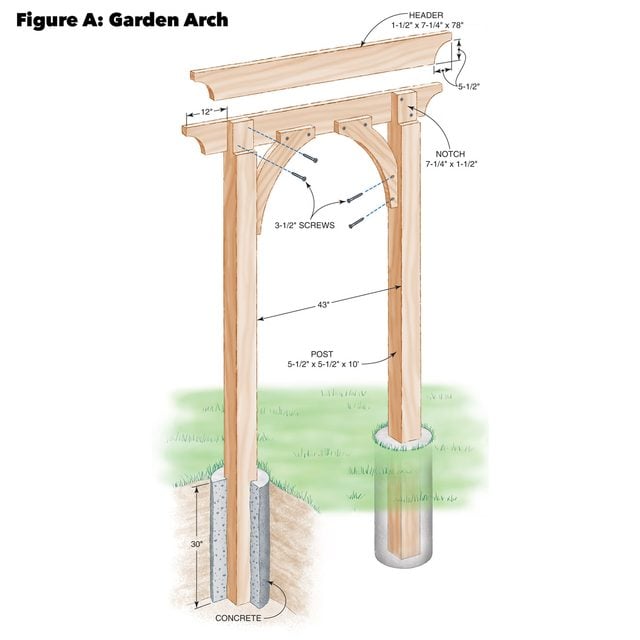
Cut the pieces to these dimensions to create the arch. All measurements given on Figure A are for standard “surfaced” lumber. If you choose “rough-sawn” lumber as we did, some measurements will change slightly because rough-sawn lumber dimensions vary.
Notch the Beams
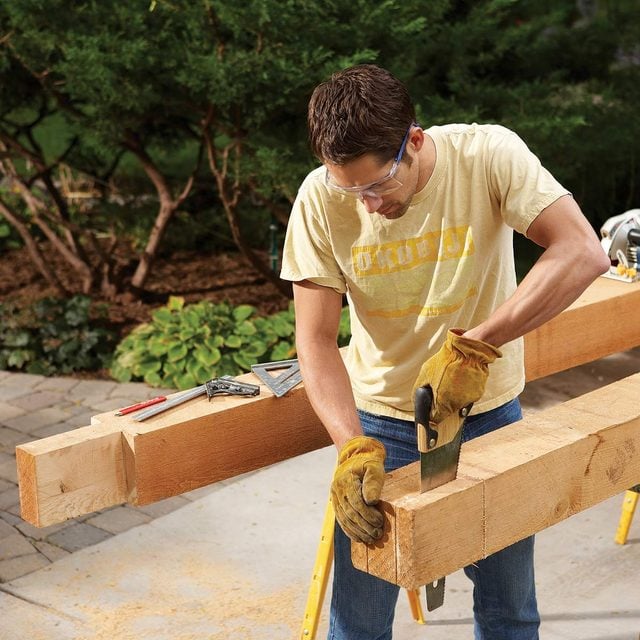
To get started, cut notches in the tops of the beams. If you’re using “rough-sawn” lumber as we did, you may have to change the length and depth of these notches to suit your 2×8 headers. (The dimensions of rough-sawn lumber vary.) Set the cutting depth of your circular saw to 1-1/2 in. to make the crosscuts for the notches. Then set your circular saw to full depth to make the other cuts. Then finish the cuts with a handsaw.
Mark the Brackets
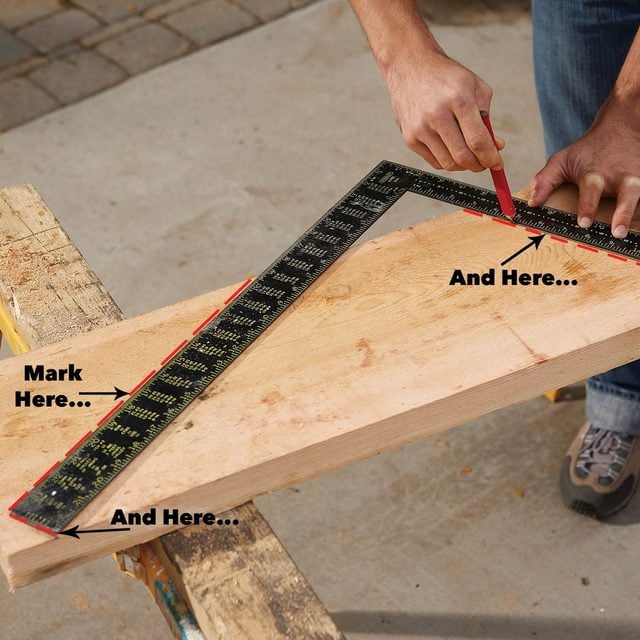
Next, mark out the brackets without fussy measurements or geometry – just align a framing square with the edges of a 2×10, make three marks and cut the 2×8 headers to length. Mark arcs at the ends as shown in Figure A. To mark the curves, use the bottom of a 5-gallon bucket or any circle that’s 10 to 11 in. in diameter. Cut the curves with a jigsaw.
Draw the Arcs

The curved brackets may look complicated, but they’re easy to mark out since they’re based on a standard framing square. After marking with the square, set a nail in your sawhorse 20 in. from the edge of the board. Carefully adjust the position of the board until both corner marks of the bracket are 24 in. from the nail. Then, holding your pencil at the 24-in. mark on the tape, draw an arc.
To draw the second arc, move your pencil to the 29-in. mark on the tape. Cut the straight edges of the brackets with a circular saw and the arcs with a jigsaw. If the curves turn out a bit wavy, smooth them with an orbital or belt sander. Don’t be too fussy, though. Nobody will notice small imperfections. Use this bracket as a pattern for the other bracket.
Figure B: Bracket Detail
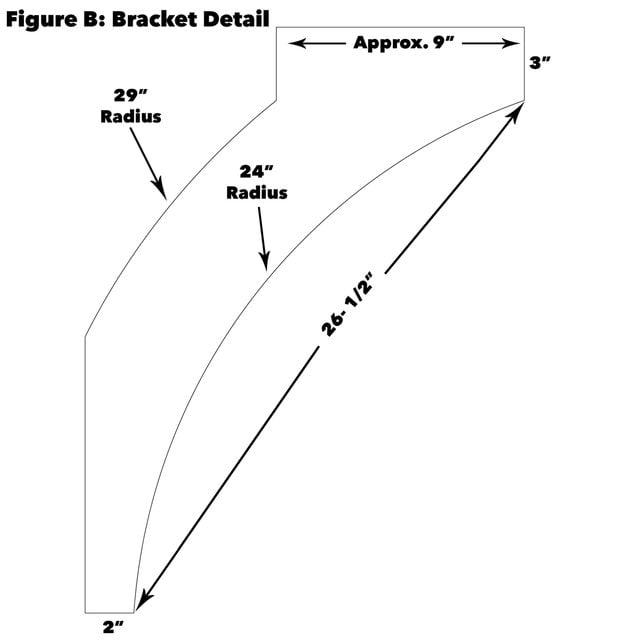
Create an appealing bracket by combining 24-in. and 29-in. radius curves.
Fasten the Parts Together
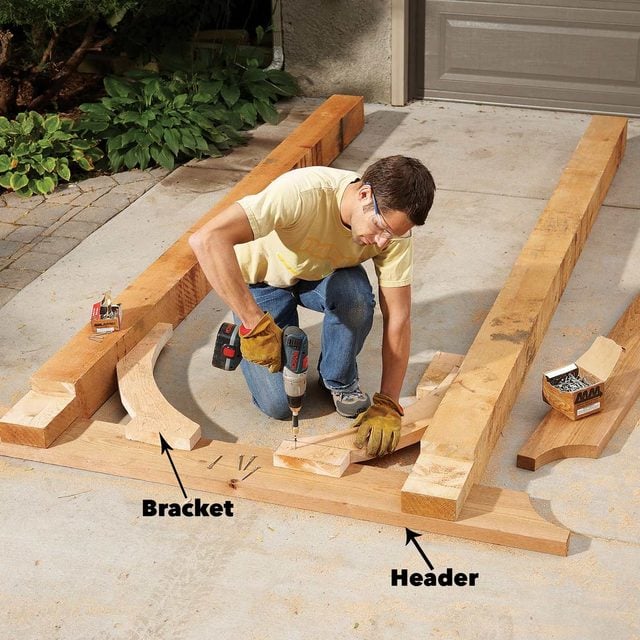
Mark one header 12 in. from both ends and lay out the posts, aligned with the marks. Take measurements at the other end to make sure the posts are perfectly parallel. Drive 3-1/2-in. screws through the posts and into the header. At the tops of the brackets, drive 3-in. screws at a slight angle so they won’t poke through the face of the header. Set 1-1/2-in.-thick blocks under the other ends of the brackets. Then drive screws at an angle through the sides of the brackets and into the posts. Be sure to drill 1/8-in. pilot holes so you don’t split the brackets. Set the second header in place and screw it to the posts.
Note: The brackets are not centered on the posts, so there’s a 1-in. gap between the second header and the brackets.
Set It Up
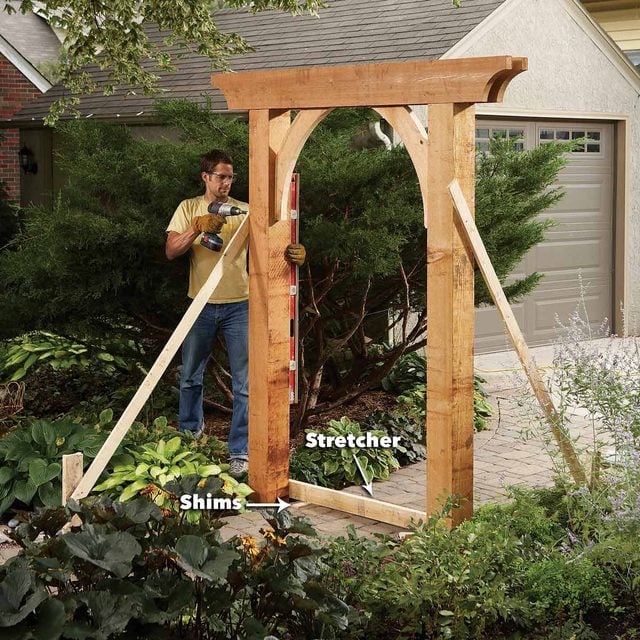
You’ll set the arch posts into 10-in.-diameter holes 30 in. deep. But before you move the arch into place, screw on a temporary 2×4 “stretcher” 30 in. from the post bottoms. Wedge shims under the stretcher until the header is level, then plumb and brace the posts. Then round up a helper or two and set the posts into the holes. Patiently level and plumb the arch, using stakes and 2x4s to brace it. Be careful not to nudge the posts out of position as you fill the holes with concrete. Let the concrete harden for at least four hours before you finish the wood. We brushed on two coats of clear penetrating wood finish to deepen the color of the wood and repel moisture.