
These popcorn ceiling removal tips will help you update your living space while staying safe and clean.
12 Tips on How to Remove a Popcorn Ceiling
1
/
12
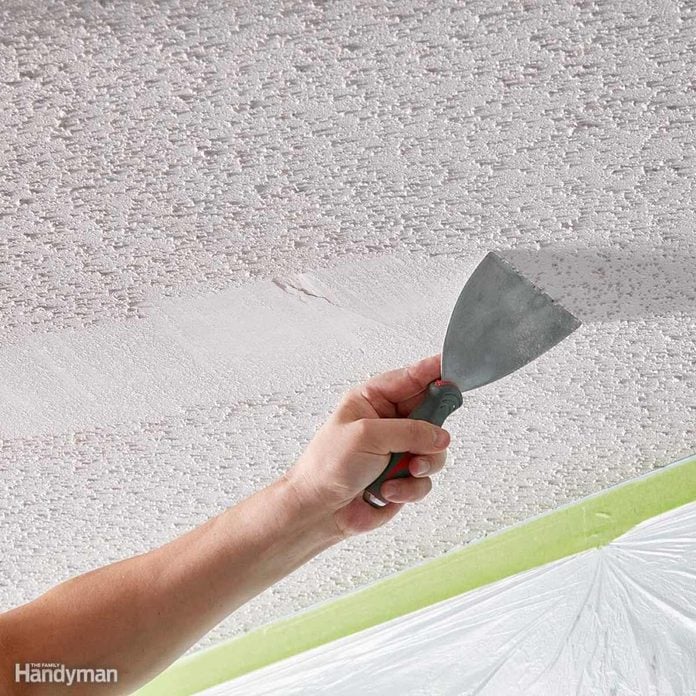
Do a Scrape Test
When learning how to remove popcorn ceilings, scrape a small test area first before committing to all the trouble of prepping the room. Try it dry first, then dampen it with water and try again. Some texture comes off easily without water, but in most cases wetting it is most effective. In the event that the water does not soak into the texture and soften it, the ceiling has probably been painted or paint has been added to the texture mix. In that case, wetting the ceiling may not help. You’ll have to decide whether you want to tackle a difficult scraping job or choose another way to hide your popcorn ceiling.
2
/
12
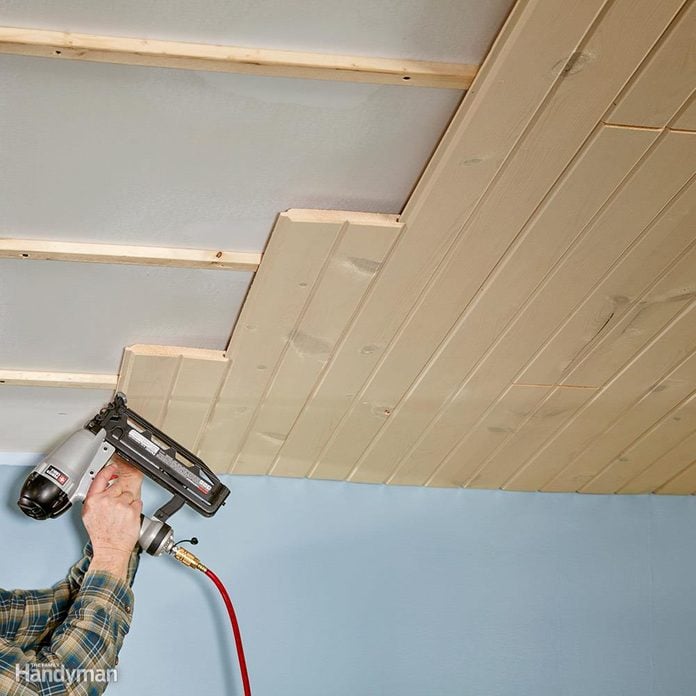
Test for Asbestos
If you have a popcorn ceiling installed before 1980, it is likely to contain asbestos, which is a known cause of lung cancer. Before removing any popcorn ceiling texture, contact your local health department and ask about getting a sample tested. If the test comes back positive, cover the popcorn with new drywall or tongue-and-groove planks, or hire an asbestos abatement contractor to help with removing the popcorn ceiling.
3
/
12

Prep for a Big Mess
Cover your floors and walls with plastic drop cloths as you begin the popcorn ceiling removal process. It is not recommended to use canvas drop cloths because water can soak through them. Using plastic drop cloths also makes cleanup easier, since they can be rolled up and thrown in the trash once your project is finished. After the popcorn ceiling texture has been removed, leave the plastic in place to catch any mess you’ll make repairing and sanding it later.
4
/
12

Get the Furniture Out
If possible, remove all furniture from the room you’ll be working in. As you remove the popcorn ceiling, you will not want furniture to be in your way when moving the ladder. If moving everything out of the room is not possible, arrange it in a cluster and cover it with drop cloths.
5
/
12

Remove Ceiling Fixtures and Fans
Shut off the breaker to any fixtures and remove them. Leaving lighting and ceiling fans in place may seem easier, but they will only get in your way and get covered with wet popcorn scrapings. Plus, you do not want to accidentally spray water into electrical fixtures.
6
/
12

Protect Can Lights From Water Spray
For recessed “can” lights, stuff newspaper or rosin paper inside them to ensure that they remain dry when water is sprayed around them.
7
/
12

Cover Electrical Boxes
Shut off the power to any electrical boxes in the ceiling and cover them with painter’s tape. This will keep the wiring dry when spraying water on the textured ceiling. Overlap the sides of the junction box with tape, and then trim the perimeter with a utility knife, taking care not to nick the wires.
8
/
12
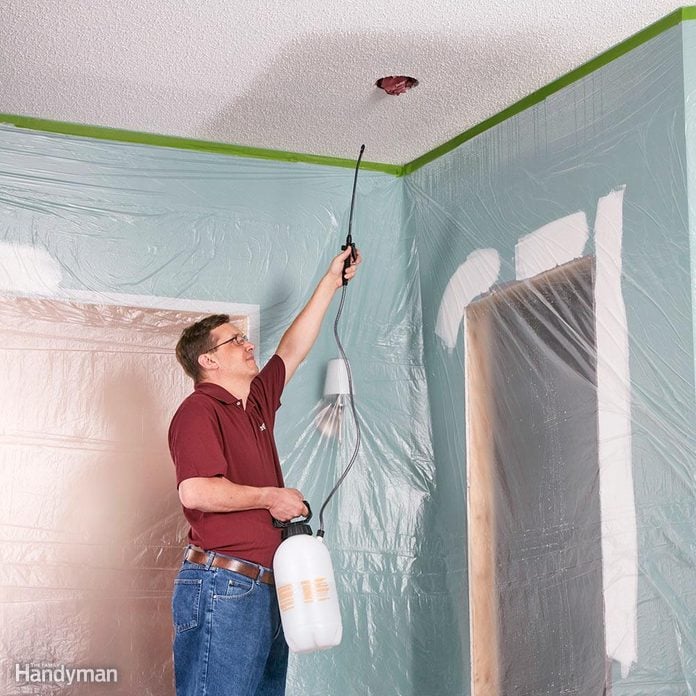
Wet it With a Pump Sprayer
For easier scraping and practically no dust during popcorn ceiling removal, use a garden pump sprayer to mist the ceiling. Let it soak for about 15 minutes before scraping. Give it only a light misting – too much water could damage the drywall or cause the joint tape to loosen. If the texture hasn’t softened after 15 minutes, spray it again and wait another 10 to 15 minutes.
If the texture still hasn’t softened, it might have been painted, or paint might have been mixed into the texture before application. In either case, water won’t easily penetrate it. If the texture is painted, you may be able to dry scrape it first to reveal some of the unpainted texture, and then wet scrape the surface. If the texture contains paint, you may have to dry-scrape the entire ceiling or abandon the project and cover it with drywall or T&G boards.
9
/
12

Work in Small Sections
Spray and scrape only a small area at a time-about four square feet. If you work on too large an area at once, the popcorn might dry before you have time to scrape it off. If that happens, repeat spraying the area and wait another 10 to 15 minutes before scraping.
10
/
12

Tame the Mess With a Mud Pan
Use a mud pan—the kind used for joint compound—to catch the wet popcorn before it hits the floor. That way, you’re not tracking it all over the place when you walk and move the ladder around. You may also use the edge of the pan to clean your scraper when it becomes loaded up with wet popcorn.
11
/
12

Prevent Gouging
Round off the corners of your popcorn scraper—whether it’s a wide putty knife or drywall taping knife—so it won’t gouge the ceiling and leave you with dozens of ceiling wounds to repair. Use a file, a sander or an electric grinder to do this.
12
/
12

Smooth After Scraping
Scraping alone won’t leave you with a paint-ready ceiling. It’s likely you’ll have some small dings and gouges to fix. At a minimum, you’ll have to sand the ceiling to get it perfectly smooth before painting.