
A Pro Carpenter’s Guide to Framing Basement Walls

Updated: May 19, 2024
A poor framing job can bring a whole mess of problems, so we asked a professional framing carpenter how to build basement walls. These were their expert tips for framing basement walls.
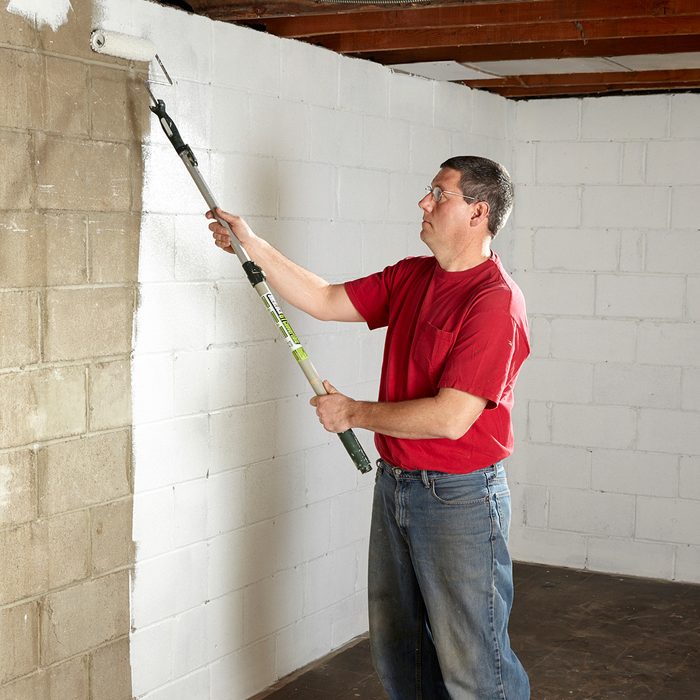
Seal the Wall
Start by rolling on a masonry waterproofing product. This step is only to help prevent water that naturally migrates through concrete through a capillary effect, not a permanent solution to a bulk water infiltration problem. If the walls are damp from condensation, dry them out with a humidifier before using the product. Are you looking for more options? Check out our guide to waterproofing basement walls.
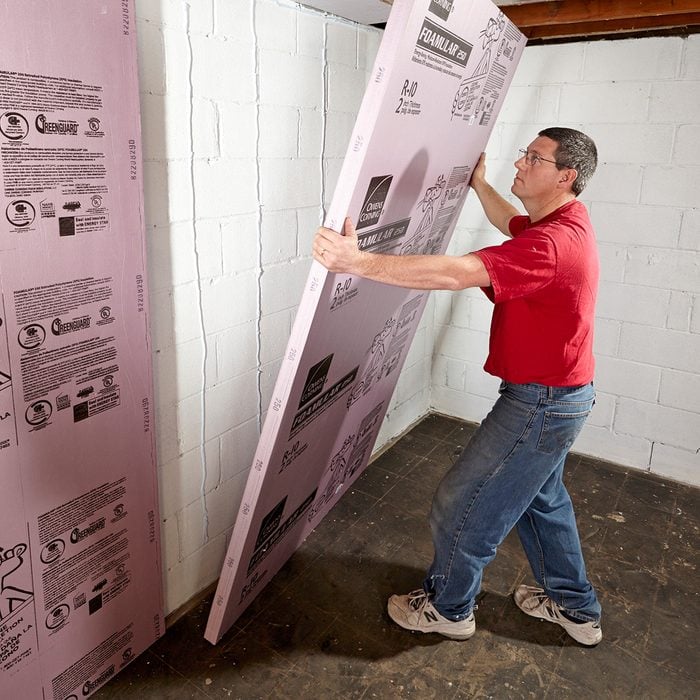
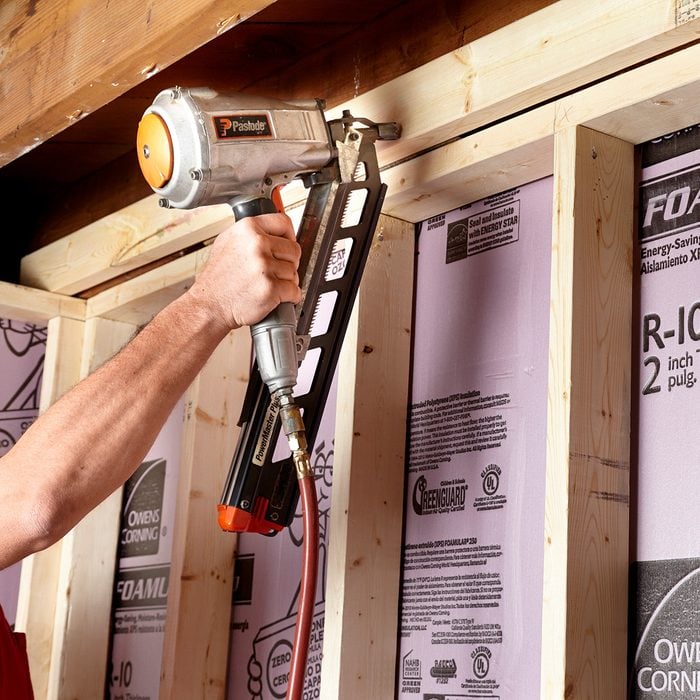
Install Foam Board
After your waterproofing has dried, install 2-in. extruded polystyrene (XPS) foam board insulation. Be sure you use XPS—other types of foam board are not as moisture resistant. Stick the foam board to the wall with a construction adhesive that’s specifically designed for foam—regular construction adhesives will melt the foam.
Apply the adhesive in vertical strips in the middle of the wall. If some water does get behind the foam, adhesive applied horizontally could cause the water to pool up and lengthen the time it takes to dry up. Run a continuous bead of adhesive at the top and bottom of the wall, and tape all the seams. This will help keep warm air in the room from getting behind the foam and condensing on the cool concrete walls. To ensure a good seal, caulk the bottom after the foam is installed.

Install Blocking Between Joists
When the floor joists run parallel to the wall you’re building, you’ll need to install blocking for attaching the top wall plate. Screw or nail one side of the block through the joist, and secure the other side to the sill plate. Use treated lumber if the brace will come in direct contact with bare concrete. It may be easier to install the braces before you install the foam board on the walls and insulate your rim joist. It’s a smart idea to places blocks 2-ft. apart so they work as drywall backers down the line.
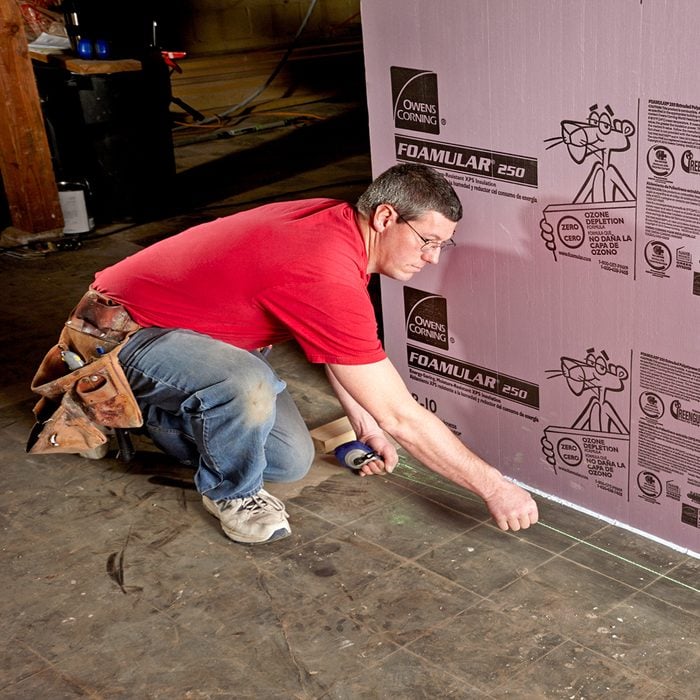
Snap Lines on the Floor
Snap a line on the floor 4-in. away from the foam as a guide for the bottom plate. This will leave a 1/2-in. gap between the bottom of the new wall and the foam. That’ll allow a bit of wiggle room if the foundation walls aren’t perfectly plumb or straight.
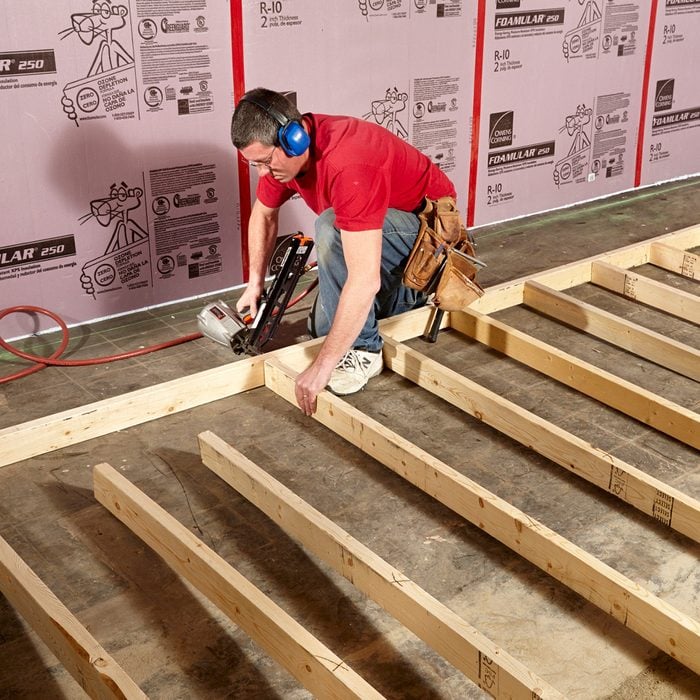
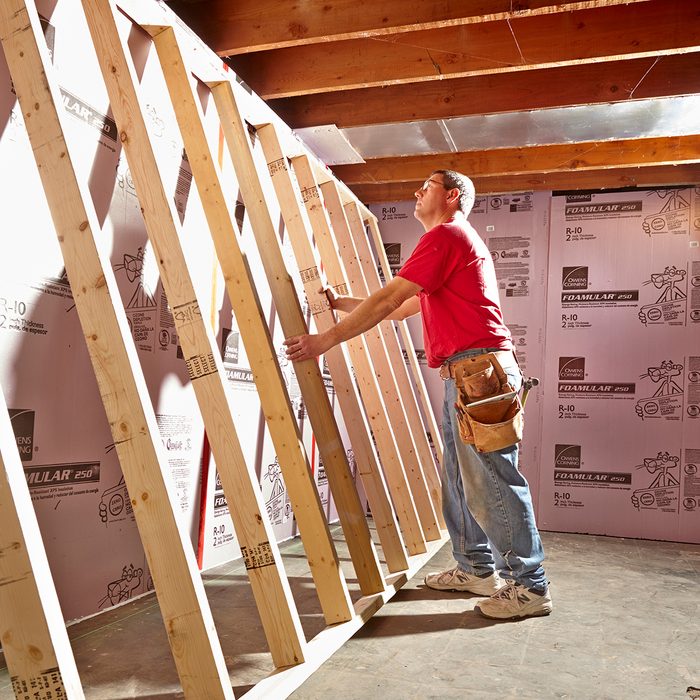
Assemble the Wall on the Ground
If you have the space for it, it’s much faster and easier to assemble a wall on the ground. Sight every stud for a “crown” (a slight curve on the narrow side of the board), and mark an “X” on the crown. Have all the crowns face the same direction. If you don’t, you’ll end up with a wavy wall.
It’s easier to assemble your wall with the crowns up; that way both ends of the studs are solidly on the ground when you attach the top and bottom plates, instead of acting like rockers on a rocking chair. Build the wall so it can be tipped right up; there’s usually not enough room to swing the whole wall around if you don’t.
Tip the Walls Up
It’s usually easier to tip a wall up with the bottom plate against the wall, but if the floor joists are sagging or there’s ductwork in the way, you may have to lift the top of the wall in first and slide the bottom plate into place. If you’re working alone, don’t build a wall that’s too heavy to lift. Save your back by building smaller sections and tying them together after you set them in place.
Build the Walls Short
If you need to pound the walls into place with a sledgehammer, you’ve built your walls too tall. There’s no reason that the top plate has to be tight against the joists—that’s what shims are for. Measure the distance from the floor to the joists at several locations and build your wall at least 1/4-in. shorter than the shortest measurement. Trying to force a wall into place can raise the joists, which could wreak havoc with drywall joints and flooring on the rooms above.

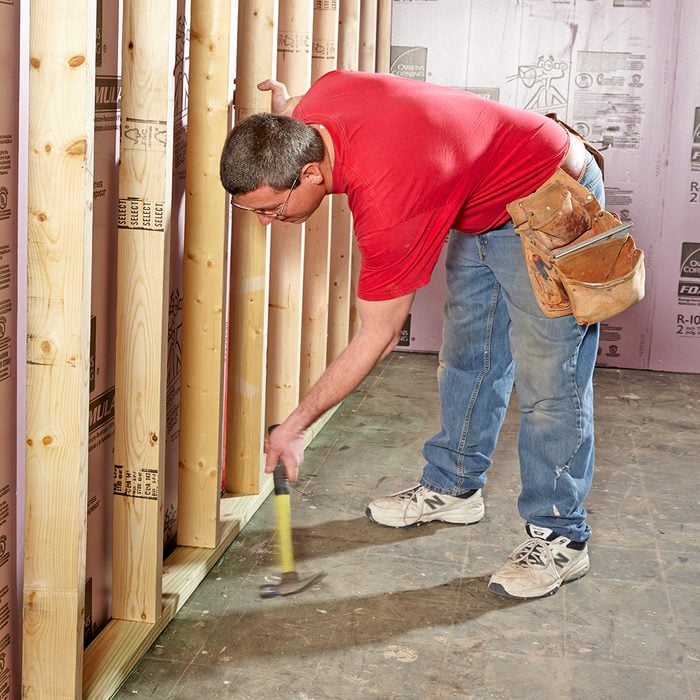
Fasten the Bottom Plate
Fasten the walls to the floor with construction adhesive and a powder-actuated tool (PAT). Space fasteners every 6-ft. and within 6-in. of each end. Wear safety glasses and hearing protection because PAT’s are usually very loud. Tapcon screws work great as well.

Plumb and Secure the Top Plate
Instead of snapping a line for the top plate, plumb the wall about every 4-ft. using an adjustable level that reaches from the bottom plate up to the top. If you don’t own a $300 plate level, use at least a 4-ft. level, and try to find the straightest studs to use as a guide. You need shims only about every third joist, but nail the top plate to every joist. It’s not necessary to align the studs directly under floor joists, but it’s a good idea if you plan to run ductwork or plumbing in the walls.

Build In Place When Necessary
If your floor is horribly out of level, or if you’re framing around a window, it may be best to “stick frame”— nailing one stud at a time instead of building the wall on the floor. Start by fastening your bottom plate, and then use a straight stud and a level to plumb up to find the location for your top plate. After you snap a line and fasten your top plate, plumb up again and mark the location of your first stud on both plates. Mark the rest of the stud locations on the plates using those marks. Toenail each stud into place with two nails on one side of the stud and one on the other.
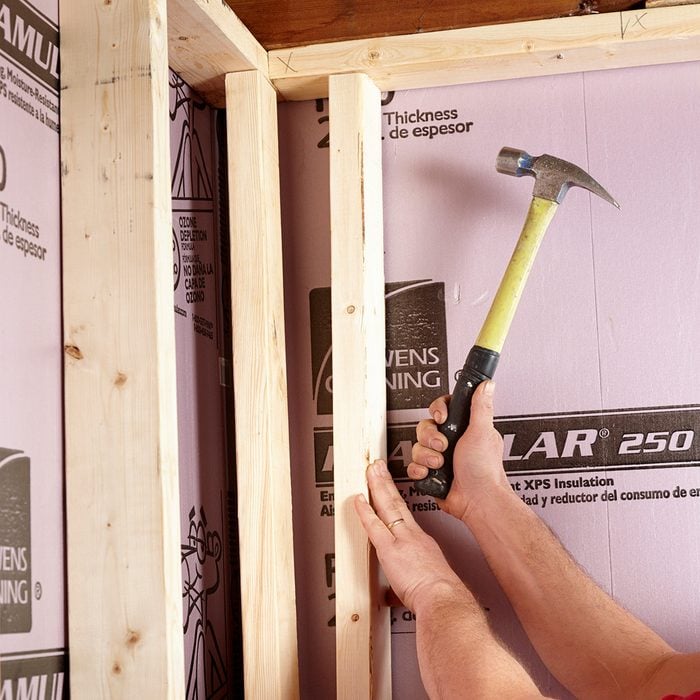
Inside Corners
When framing inside corners, turn the last board on the first wall sideways and overlap it about halfway past the connecting wall. This way you can fasten the two walls together and still have a surface for attaching the drywall.
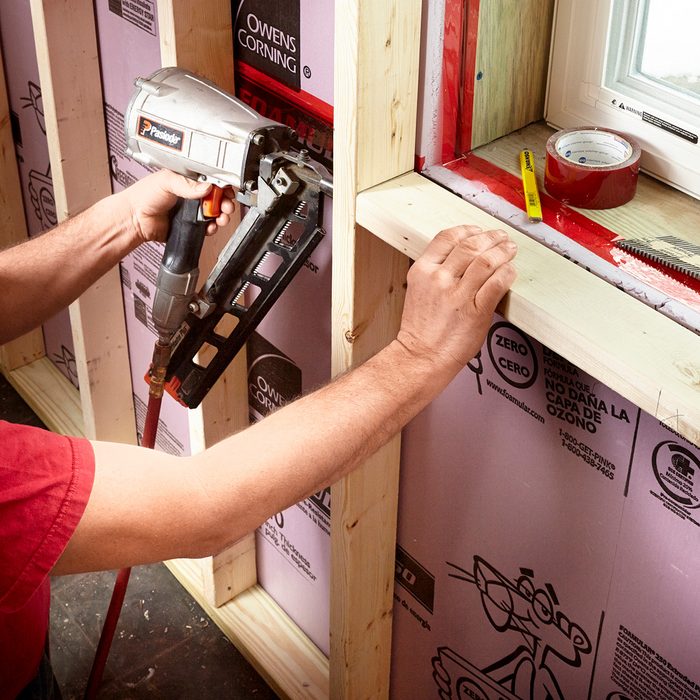
Build Out Around Windows
Windows set in a block or concrete wall will need wood around them in order to attach the drywall or jamb extensions. If there’s room, use foam under the boards, and tape the seams to the foam you’ve installed on the wall. If there’s no room for foam, make sure to use treated lumber, but still tape the seams. Construction adhesive and concrete screws work best to attach these boards. Install the wood around the window before you build your wall. That way you’ll know exactly where the new wall framing needs to be.
Don’t Forget Drywall Backers
It’s a lot easier to add drywall backers while you still have all your framing tools out and before you fill the wall cavities. So before you pack it up, walk around the entire work area and make sure the ceiling and all walls have a sufficient nailing surface for the drywall. The top of outside corners, perpendicular intersections, and walls that run parallel to the joists are three of the most common areas where you’ll need to add backers.
Originally Published: October 23, 2020