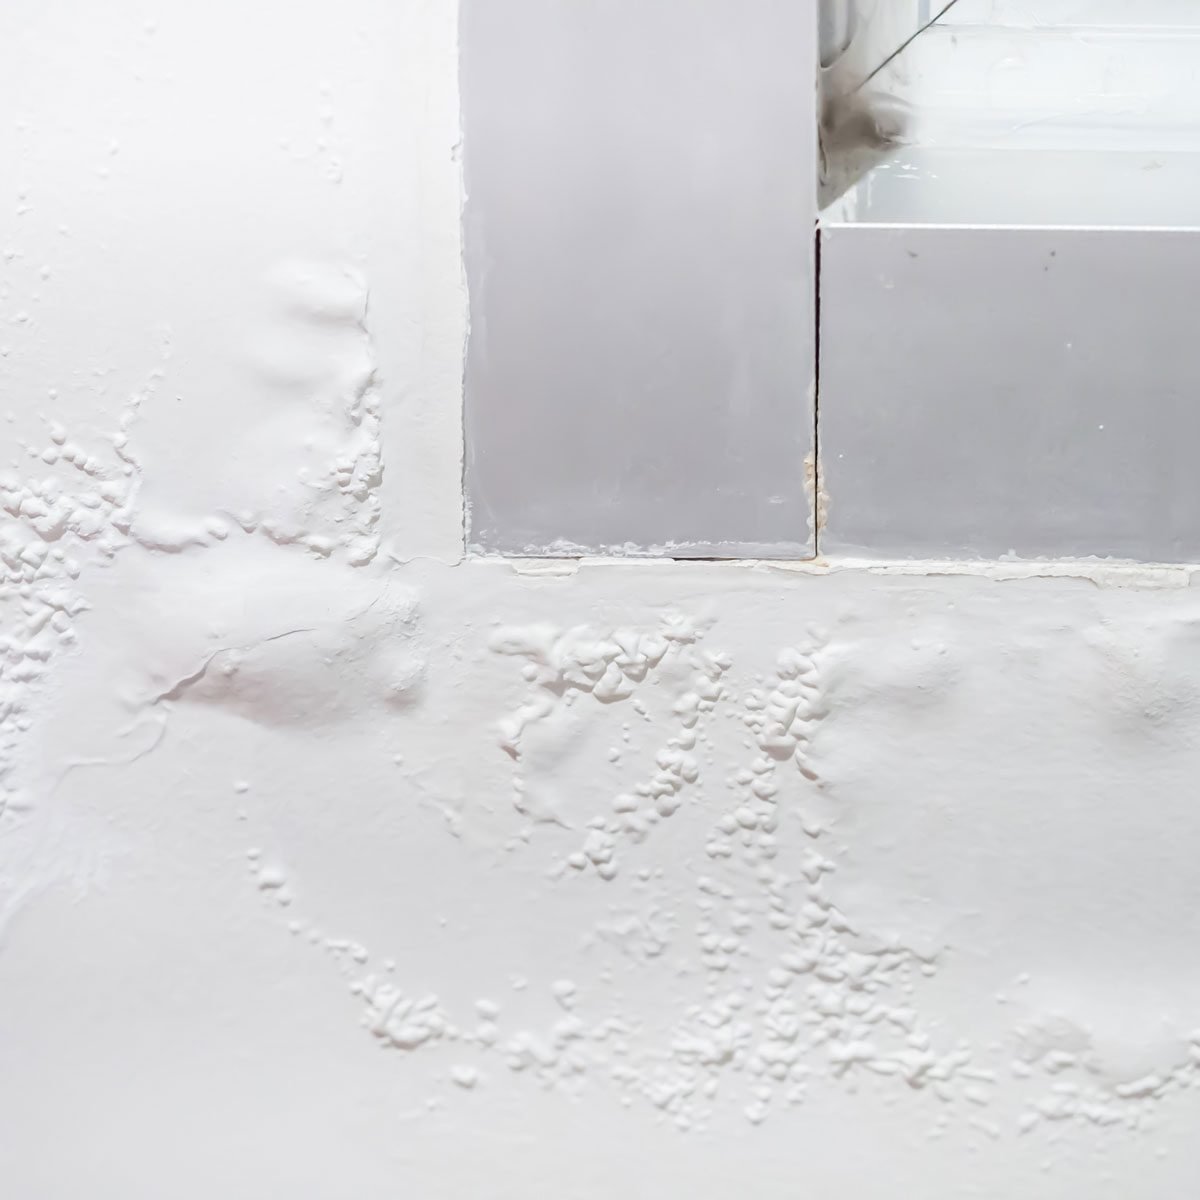
This unsightly flaw can ruin interior and exterior paint jobs. Learn about the most common causes of paint bubbling and how to remedy them.

Why Is My Paint Bubbling and How Do I Fix It?

Nothing is as disheartening as packing up after a seemingly perfect paint job only to find the walls covered with bubbles and blisters a few hours — or even a few months — later.
“Paint bubbles are a common issue and are largely due to the condition of the underlying surface when the paint was applied,” says Mike Mundwiller, field implementation manager at Benjamin Moore. “It can be corrected, but the root of the problem must be addressed or it will reoccur down the line.”
Read on to understand what may be causing your paint to bubble or blister, how to fix the problem, and the steps to take to avoid the same trouble in future DIY painting projects.
What Causes Bubbling or Blistering Paint?
Blisters or bubbles appear when a layer of paint does not adhere perfectly to its underlying surface, known as the substrate.
As the new film of paint dries and pulls away, pockets of air or water form underneath. Some of these deflate or pop on their own, making the uneven surface less noticeable — though the blistered areas may never fully reattach to the substrate and later begin to peel. Other bubbles or blisters harden in place as the paint dries, resulting in a blemished surface that you’ll need to fix.
The most common factors that prevent paint from fully adhering are dirt, moisture, extreme heat and an inadequately prepared surface.
“For interior and exterior painting projects, the most common and biggest mistake I see is lack of preparation,” says Rick Watson, director of product information and technical services at Sherwin-Williams. “Most people just want to start painting, but everything needs to be washed and cleaned first. Even before you start taping off areas, you must always make sure the area to be painted is clean, dry, dull and sound.” You can also prepare by using an exterior paint calculator.
How To Fix Paint Bubbling/Blistering
There are three steps to repair bubbled or blistered paint: removing the damaged paint, preparing the surface for a new coat, and repainting the entire surface or the affected area. First, however, you need to eliminate the underlying causes to avoid another bubbled paint job the second time around.
“A coating is only as good as the surface it will be applied to,” warns Watson. “In fact, about 80 percent of coating failures happen because of improper preparation.”
Sponge off surfaces with soapy water and dry thoroughly with a rag. Use a suitable primer to cover stains or prepare porous substrates like new drywall or plaster. And ensure that the ambient temperature is between 50 and 85 degrees F, or the range recommended by the paint manufacturer. Check out the best temperature to paint outside.
Bubbling caused by moisture can take some sleuthing to resolve. You may have a plumbing leak or water infiltration that needs to be addressed, or simply excess humidity in rooms like the kitchen, bathroom or basement.
You can keep humidity in check with a dehumidifier or fan while the paint dries. If water-filled bubbles appear on a painted exterior surface, Mundwiller suggests waiting it out a bit. “Bubbling and blistering can be caused by rain if the paint hasn’t had enough time to dry before a storm moves in, but in many cases once the sun comes out the bubbles disappear,” he says.
If your bubbling paint can’t be traced to any of these factors, the culprit may be your roller cover. Using the wrong roller material or nap length for the type of surface you’re working on can lead to subpar paint adherence and bubbling. Choose a foam or a short nap roller cover for smooth or semi-smooth surfaces, a medium nap roller cover for slightly rough surfaces, and a long nap roller cover for particularly rough surfaces.
Once you’ve figured out why your paint didn’t fully adhere to the substrate and taken care of the problem, you can move on to fixing the bubbled or blistered areas. Spread drop cloths below your work area to catch the falling paint flakes, put on a dust mask and goggles and follow these steps:
-
Remove the damaged paint. Use a putty knife to gently scrape away the paint that has lifted from the surface using long vertical and horizontal strokes. If you just have a bubble or two, you don’t necessarily need to retouch the whole area. “Some bubbles can be sanded out,” advises Watson.
-
Prepare the surface. Clean your putty knife and use it to fill any holes or indentations in the substrate with a thin layer of patching compound. Let the compound dry completely, then sand the patched areas smooth with a fine-grit sandpaper. Clean and dry the surface and apply a suitable primer, if needed.
-
Repaint. After the coat of primer has dried completely, repaint the surface using the correct brush or roller. Stir the paint slowly to avoid the formation of bubbles and brush or roll at a moderate speed. Keep in mind that oil-based paint cannot be used directly over water-based latex paint, as the two layers won’t adhere and bubbles or blisters will form.
Also, keep in mind that if you’re preparing a surface that is covered in old paint, you need to take the proper precautions.
“Removal of old paint by sanding, scraping or other means may generate dust or fumes that contain lead,” warns Watson. “Controlling exposure to lead or other hazardous substances requires the use of proper protective equipment, such as a properly fitted respirator (NIOSH approved) and proper containment and cleanup.”
For more information, Watson recommends calling the National Lead Information Center at 1-800-424-LEAD (in the U.S.) or contacting your local health authority. You can also visit epa.gov/lead.
Next: Learn how to paint exterior trim.


