
Edge Banding With Iron-On Veneer Edging
Updated: Mar. 20, 2024Cover raw plywood edges quickly and easily with wood veneer and an iron.
Video: How to Apply Edge Banding
Gary Wentz, an editor for The Family Handyman, will show you how to apply iron-on edge banding. It’s the easiest way to cover plywood edges, and it makes inexpensive plywood look like solid wood.
Overview: Benefits and edge banding materials
With a roll of wood veneer edge banding and a few simple tools, you can cover raw plywood edges so the plywood is nearly indistinguishable from solid wood. Iron-on edge banding is wood veneer with hot-melt adhesive preapplied to the back. You simply hold the edge banding in place, run over it with a household iron to heat the adhesive, let it cool and trim the edges flush. We’ll show you how to do it and share some tips for getting perfect results every time.
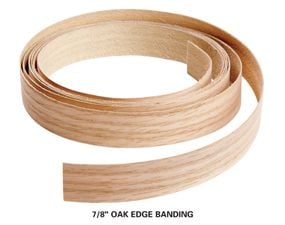
You’ll find edge banding in common species like birch, oak and cherry at home centers and lumberyards. For exotic species and a greater variety of widths, search online or visit a specialty woodworking store like Rockler or Woodcraft. Rolls of edge banding come in lengths of 8 ft. to 250 ft. and widths of 13/16 in. to 2 in. For typical 3/4-in. plywood, buy 13/16- or 7/8-in.-wide edge banding.
Tip 1: Clean up the edges
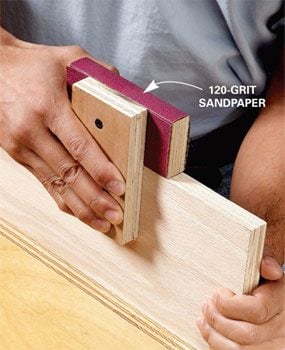
Saw marks or other roughness will prevent a strong bond between the edge banding and the plywood. To avoid loose edge banding, sand the edges of the plywood smooth before you apply it. To keep from rounding edges while you sand, wrap a quarter sheet of 120-grit sandpaper around a small block of 3/4-in. plywood and screw another scrap to it as a guide. When the sandpaper starts showing signs of wear, remove the screw and reposition the sandpaper. After sanding, vacuum the edge to remove any dust.
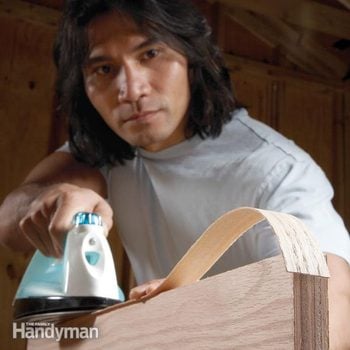
Tip 2: Iron on the edge banding
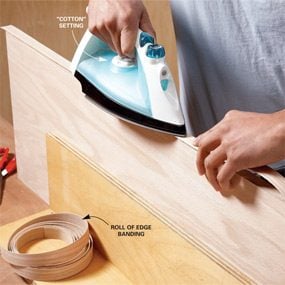
Use your regular clothes iron if you wish, but be aware that you may get adhesive on the soleplate. To be safe, buy a cheap iron from a thrift store or discount retailer. Empty the water out to avoid any steam and move the heat setting to “cotton.” Use scissors to cut a length of edge banding about 1 in. longer than the edge you’re covering. Starting at one end, center the edge banding with equal overhangs on each side and set the preheated iron at that end. Move the iron along the surface, keeping the edge banding centered with your other hand. Move the iron along at a rate of about 2 in. per second. The goal is to melt the adhesive without scorching the wood.
Don’t sweat it if you scorch or misalign the banding during application. Just run the iron over it again to soften the glue so you can peel the banding away. Cut yourself a new piece and start over.
Tip 3: Press it while it’s hot
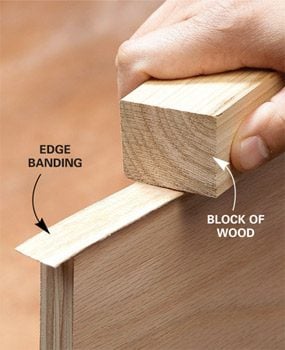
Make sure the edge banding is fully adhered by pressing it down with a block of wood while it’s still hot. Go back and forth over the edge a few times while the glue is cooling. Look for any areas that are raised. Heat those spots again and press them again with the block.
Tip 4: Slice off the ends
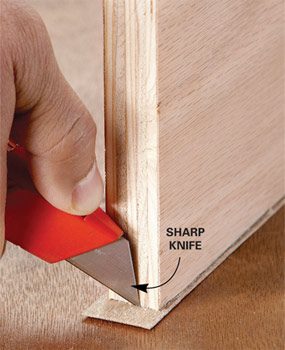
The easiest way to remove the overhanging ends is to simply slice them off with a utility knife. Place the edge banding on a work surface and lightly score it a couple of times. Don’t worry about cutting all the way through. Just lift the plywood and bend up the banding to snap it off.
Tip 5: Use a trimmer on edges
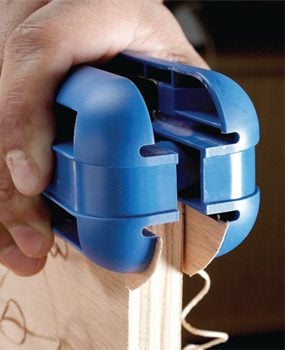
Photo 1: Make a shallow pass first
Trim with the shimmed side first. Since less veneer is being removed with this side of the trimmer, the likelihood of runaway splits is greatly reduced. Start at one end and squeeze the trimmer until the shims are against the plywood. Then press down and slide the trimmer along the edge. Thin strips of veneer will peel away from both edges.
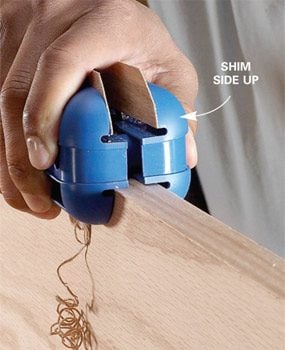
Photo 2: Flip the trimmer for a final pass
Flip the trimmer over and use the unshimmed side for a final trimming. When you’re through, the edge banding should be almost perfectly flush with the plywood. If you missed any spots, just make another pass or two with the trimmer. The final sanding will remove the sharp edge and any remaining overhang.
The quickest and easiest way to trim the edge banding flush to the plywood is with a special edge banding tool, such as the FastCap trimmer shown here (available at Woodcraft and other stores and online).
Tip 6: Modify your trimmer
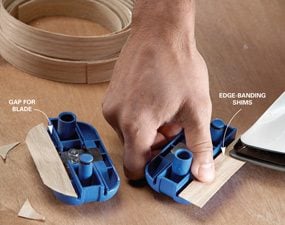
Trimming the overhanging edges flush to the plywood without damaging the edge banding can be tricky. If the trimming blade catches in the wood grain, it can split the thin veneer and you’d have to start over. Prevent that headache by shimming one side of the trimmer with strips of edge banding so that it doesn’t cut as deep. Just “tack” the shims on with the iron, making sure to leave a gap where the blades are. Since this trimmer has two cutting sides, you can leave the shims on one side to make the initial pass, and then just flip it over to make the final pass.
Tip 7: Don’t leave a splice where it’ll show
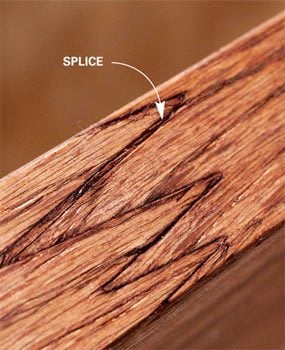
Splices can be hard to see on raw edge banding, but they may be highly visible after stain is applied. Inspect the edge banding before you cut it to length so you can cut around splices and avoid surprises later. Avoid waste by using spliced pieces in less visible areas.
Tip 8: Touch up with a sanding block
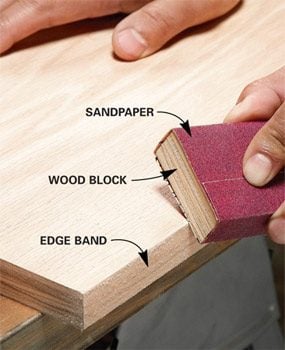
After you trim them, the edges will be sharp. Ease them with 150-grit sandpaper on a sanding block. Hold the sanding block at a slight angle and smooth out the edge. Sand gently and inspect the edge often to avoid sanding through the thin veneer.
Required Tools for this Project
Have the necessary tools for this DIY project lined up before you start—you’ll save time and frustration.
- Utility knife
Required Materials for this Project
Avoid last-minute shopping trips by having all your materials ready ahead of time. Here’s a list.
- 120-grit sandpaper
- 150-grit sandpaper
- Edge banding veneer
