
Circular Saw Tips and Techniques
Updated: Oct. 09, 2023Brush up on the basics with this collection of circular saw do's and don'ts

Don’t set the blade too deep

Proper blade depth
Setting the blade too deep causes a few problems. First, it’s more dangerous than a correctly set blade because more blade is exposed while cutting. In addition, the saw is more likely to bind and kick back if the blade is too deep. Safety issues aside, blades cut more efficiently when properly set.
Set the blade depth before cutting

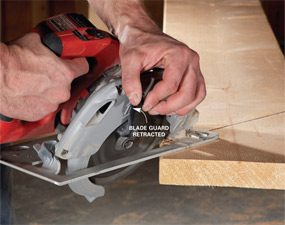
Before you pull the trigger
Determine the blade depth by unplugging the saw and holding it alongside your board with the blade guard retracted. Then loosen the depth-adjusting lever or knob and pivot the saw’s base until the blade extends about 1/4 to 1/2 in. below the board. Tighten the lever or knob and you’re ready to saw.
Allow the cutoff to fall away freely
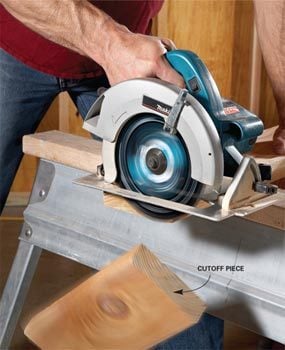
Avoid binding
Always make sure the end of the board you’re cutting is free to fall or move away. For rough cuts in framing lumber, let the cut end fall. Be aware, though, that the falling piece can take a sliver of wood with it as the cut nears completion. To avoid this splintering when you’re cutting boards for nicer projects, support the board continuously. But don’t clamp, hold or otherwise restrict the cutoff piece.
Support plywood for cutting
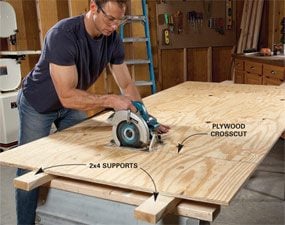
Don’t cut wood that’s supported on both ends
Kickback problem
It’s sort of like cutting off the tree limb you’re standing on—a guaranteed disaster. The reason is that as the cut nears completion, the board bows downward, which pinches the blade in the cut and causes the saw and/or board to buck. This is dangerous and usually makes a mess of the board, too.
Secure the board for rip cuts
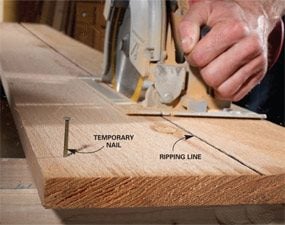
Rip cut trick
In most cases, a table saw is a better choice for ripping lumber than a circular saw. But if you don’t have a table saw handy, and the rip cut doesn’t have to be precise, then a circular saw works fine. The trick is to hold the board in place while you rip it. Unless the board you’re ripping is very wide, clamps will get in the way. So a good alternative to clamping is to tack the board down to your sawhorses. We let the nails protrude here because they don’t interfere with the saw bed. But you can drive the nails (or screws) flush and still easily pull the board off when you’re done. To reduce damage to better-quality boards, use finish nails, and pull them through the back side when you’re done.
Hold the blade guard up to start angled cuts
Angle cut technique
Some newer saws have blade guards that are designed to retract even when you’re sawing at an angle. But even with these newer designs, it’s easier to get an angled cut started if you first retract the blade guard. Once you’re a few inches into the cut, slowly release the blade guard so it rests on the board. If you try to start an angled cut without retracting the blade guard, the guard can catch on the wood and cause the saw blade to bind or the cut to wander off course.
Start over if the saw wanders from the line
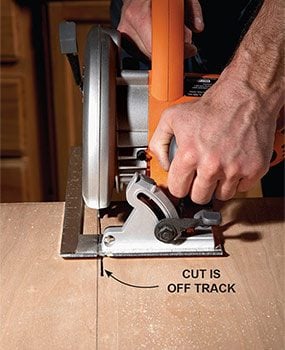
Redo mistakes
Cutting along a straight line is a skill saws that takes practice. Once the saw blade is aligned and cutting along the line, it doesn’t take much effort to keep the blade on track. But if you get off to a crooked start, it’s difficult to guide the saw back to the line. Don’t try to steer the blade back onto the line. Instead, stop and let the blade stop spinning. Then withdraw the saw from the cut, sight along the line and start again. With practice, you’ll be cutting straight every time.
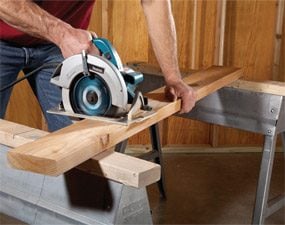
Cut heavy boards without sawhorses
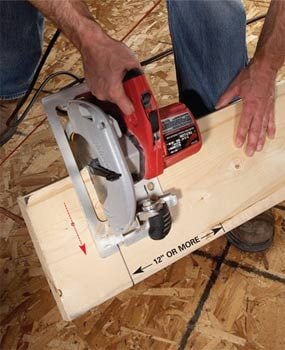
Framing carpenters’ trick
When you’re cutting joists or other heavy pieces of lumber, it’s often easier to cut them where they lie rather than hoist them onto sawhorses. An easy way to do this is to simply rest the board on your toe and lean it against your shin. Then align the saw with your mark and let gravity help pull the saw through the cut. Do be careful to keep the saw cut at least 12 in. from your toe.
Guide rip cuts with your finger
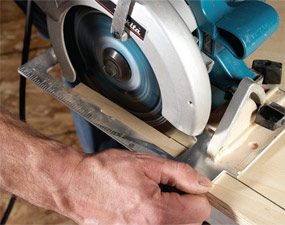
Handy rip guide
Making long narrow rip cuts with a circular saw is easy if you use your index finger as a guide. Align the blade with the line. Then pinch the saw base between your thumb and index finger and let your finger ride along the edge of the board to guide the cut. This technique is safe as long as you grip the saw before turning it on and don’t release it until the blade stops.
Required Tools for this Project
Have the necessary tools for this DIY project lined up before you start—you’ll save time and frustration.
- Circular saw
- Safety glasses
- Sawhorses
Required Materials for this Project
Avoid last-minute shopping trips by having all your materials ready ahead of time. Here’s a list.
- 2x4s
- Finish nails
