
How To Stain Furniture

Updated: Feb. 29, 2024
Transform furniture with stain and protect it for the long haul.

Varies
Beginner
$50-100
Introduction
Staining is by far my favorite way to convert plain wood into a conversation piece. I've finished and refinished furniture for more than a decade using paint, stain and oils. For this project I also consulted with Corey Kreps, a wood finisher at my favorite hardwoods store, for insider tips to share with you here.
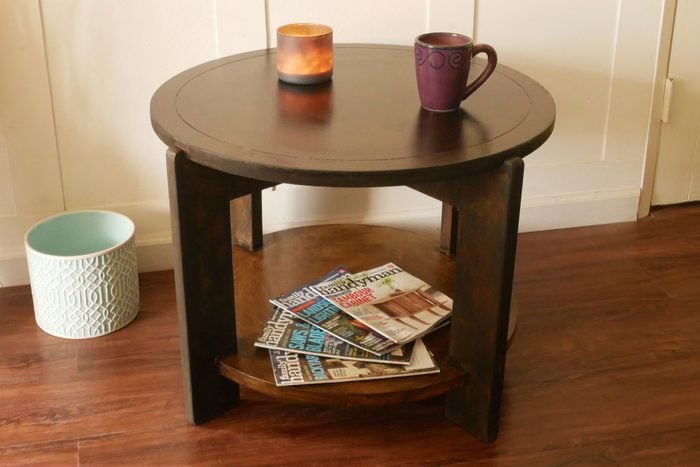
See how I finished this solid wood table and learn how you can stain furniture, too.
Tools Required
- High Volume Low Pressure (HVLP) sprayer (optional)
- Paintbrush
- Sander
- Screwdriver
- Shop vacuum
- Sponge brush
Materials Required
- 90- or 120- or 220- or 280- or 320-grit sandpaper
- Disposable gloves
- Mineral spirits
- Rags
- Shop towels
- Stain of choice
- Tack cloth
- Topcoat of choice
Project step-by-step (12)
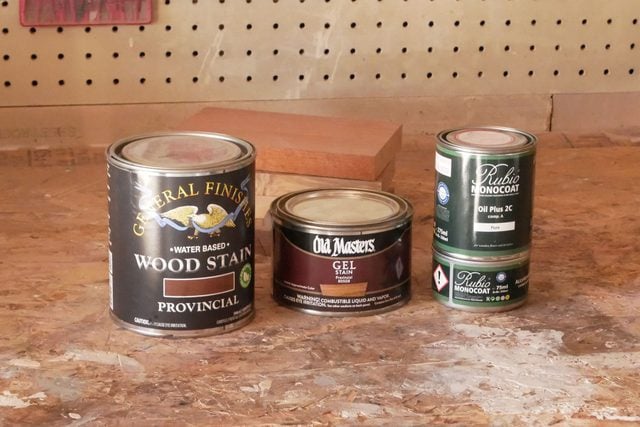
Choose a stain
You have four general options for staining furniture, each with certain benefits:
- Water-based stain: This kind is beginner-friendly because it cleans up easily with water, dries in two to four hours and creates fewer fumes. Consider this for low-traffic pieces (i.e., things that won’t be touched a lot).
- Oil-based stain: Best for high-traffic areas, like table tops and cabinet fronts, because it offers thicker, stronger coverage. It requires mineral spirits for clean-up and takes four to six hours to dry.
- Oil-based gel stain: This is an intensely pigmented stain, recommended for hard-to-stain woods like maple, poplar and veneers. Requires mineral spirits for clean-up and six to eight hours of dry time.
- Hard wax oil stain: A new, slightly higher-priced stain that allows the wood to more fully absorb the finish in just one coat, with no topcoat required. Kreps swears by it, Rubio Monocoat in particular. It’s best on finer woods like walnut and mahogany to let the natural beauty of the wood show through. Mineral spirits clean-up with a 24-hour dry time.
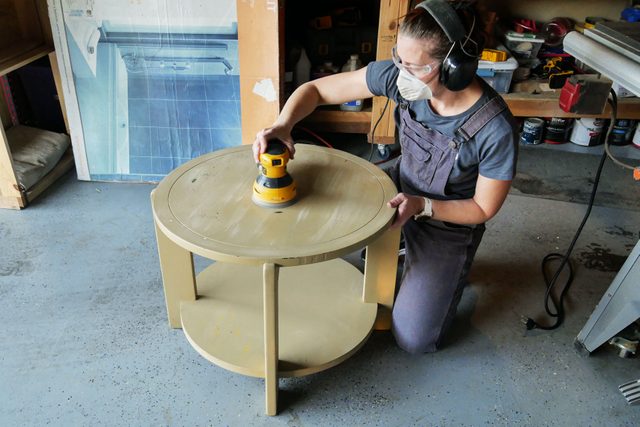
Prep the piece
Stain needs to penetrate the wood surface. No matter which stain you choose, proper preparation leads to the best finish.
- Disassemble the components as best you can.
- Remove drawers, if the piece has them, and place masking tape over drawer slides.
- Sand to smoothness using graduated grits of sandpaper.
- Start at 90-grit, then 120, then 220.
- Take care if your piece includes a veneer top. It’s easy to sand clear through the surface to the plywood or chipboard below.
- Refinishing? Consider first using a paint remover, like Citri-Strip, to reduce sanding time. Gel stain is thick enough to cover a previous finish with only a scuff-sand needed.
- Using a water-based stain? Mist the surface with water to raise the grain, let it dry, then sand once more with 220-grit.
- This ensures the water-based stain doesn’t raise the grain and introduce an irregular finish.
- Using oil-based or Monocoat? Dampen the wood surface with mineral spirits to aid in a smoother application.
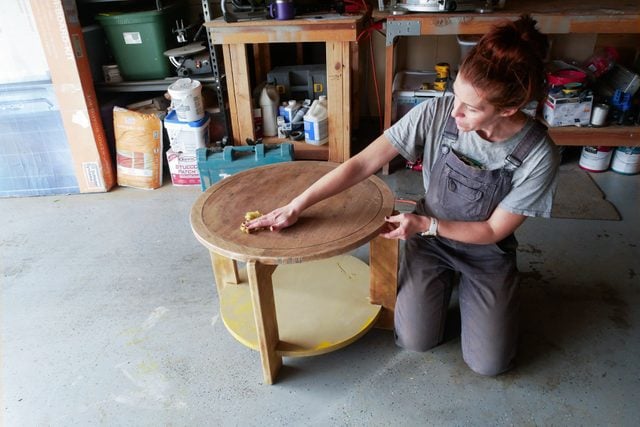
Clean your work area and piece
This prevents foreign particles from contaminating your finish.
- Wipe furniture with a cloth lightly dampened with mineral oil, or use a tack cloth.
- Clean your work area with a shop vacuum to remove sawdust and debris.
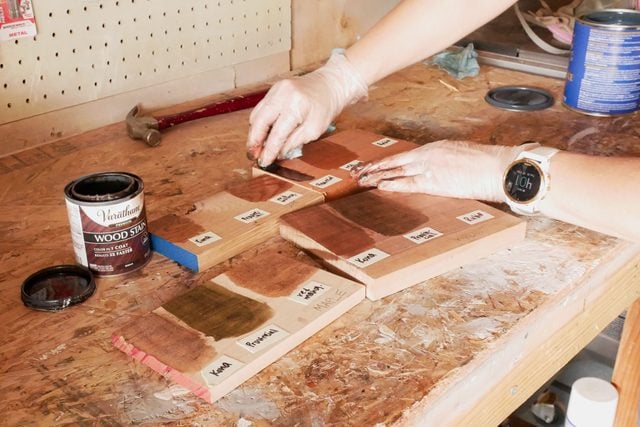
Test stains (optional)
Test your choice — or choices — on a piece of scrap wood that’s the same species as the furniture you’re staining. Or find an inconspicuous area of your piece, like the underside or back. Testing provides a more accurate expectation of what your finished piece will look like.
Different wood species respond differently to stain. Oak has a deep, open grain that will show through almost any stain. Maple and cherry, conversely, feature smoother surfaces due to their closed grain.
Proceed as follows:
- Wear disposable gloves to protect your hands from the stain.
- Stir the stain before use, because the pigment often settles at the bottom of the can.
- Apply a few stains on the scrap or inconspicuous area with a shop towel or rag, and label each one.
- Wait for the stains to dry. Stain can look different with time.
- If you like, custom-create a shade by mixing stains from the same type and brand. Mix up enough for your whole project, because matching a custom mix is next to impossible.
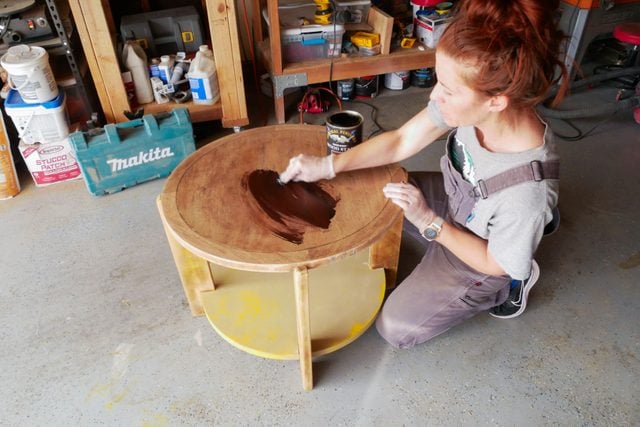
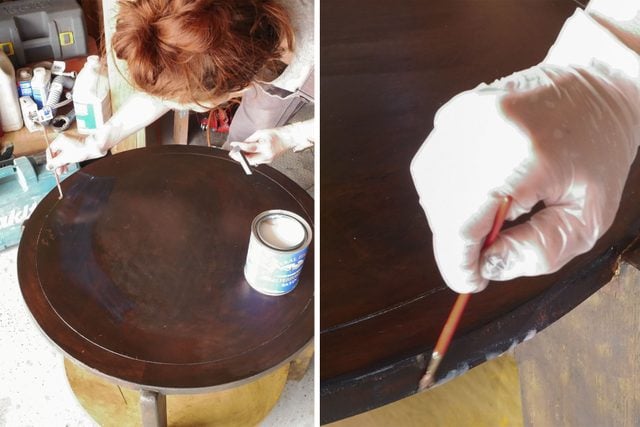
Apply stain
For my table, I’m using a water-based stain by General Finishes. I’ll go over each step in applying stain, as well as where it may vary for the other types of stain.
No matter which stain you choose, ensure you’re working in an adequately ventilated area. Then proceed:
- Stir your stain well with a paint stick.
- If using Monocoat, follow label instructions for mixing Part A (stain) and B (hardener and accelerant).
- Apply stain with a clean cotton rag or shop towel, synthetic bristle brush or a sponge brush.
- If using an oil-based stain, use a natural bristle brush. The chemicals in oil-based stain can damage synthetic bristles.
- If using Monocoat, apply stain with a staining pad, or a squeegee-type object so there’s no waste with cloth absorption.
- Use smooth, even strokes, one section at a time.
- Leave a wet edge between sections to prevent lap marks.
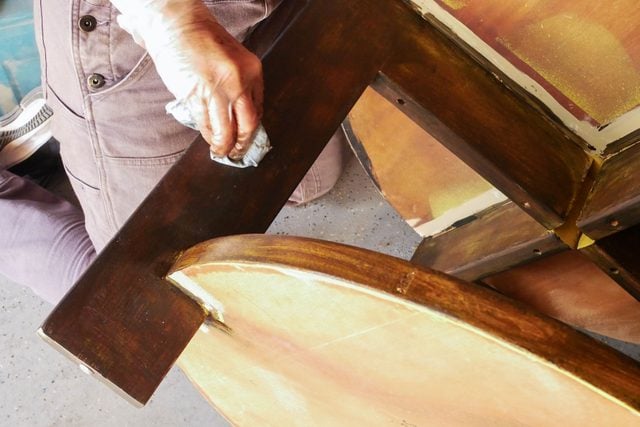
- Wipe excess stain from your furniture with a cotton rag or a shop towel.
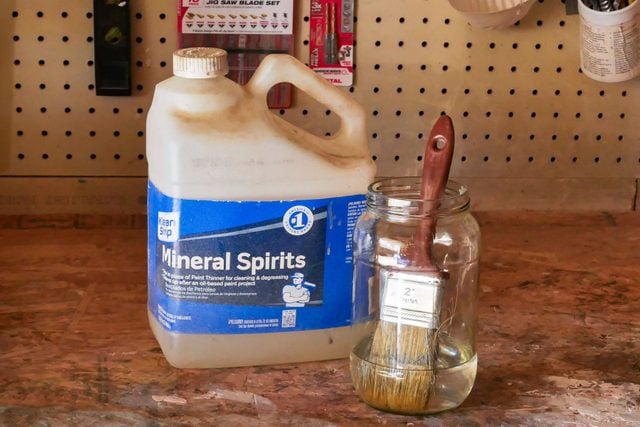
- Lighten the intensity of oil-based stain by wiping the wet stain with a mineral spirits-soaked rag.
- Let dry for two to four hours. You can use painter’s pyramids to hold your project off your workbench as it dries. (You can also make your own with blocks of wood and screws.)
- It takes four to six hours for oil-based stain to dry.
- After 24 to 36 hours, furniture finished with Monocoat can be lightly used.
Reapply stain
You may have achieved the exact color you want with one pass. If not, darken the color and intensity of your finish with multiple coats.
- After the first coat dries, apply a second coat in the same manner.
- Wipe the excess.
- Let dry for the same amount of time as before.
- Re-coat as desired.
Clean up
After you’ve let your piece dry, take care of any brushes you used to ensure you can use them for future projects.
- For water-based stain, run the brush under clean, warm water with some soap and work the stain out until the water runs clear. Let the brush air dry.
- For oil-based stain, partially fill a jar with mineral spirits and set the brush inside for a bit. Stir it around to dislodge the stain, then let the brush dry on a shop towel.
- Safety tip: Never discard oil-soaked rags in your garbage bin. They can spontaneously combust. Instead, immediately put them in a flameproof, water-filled container.
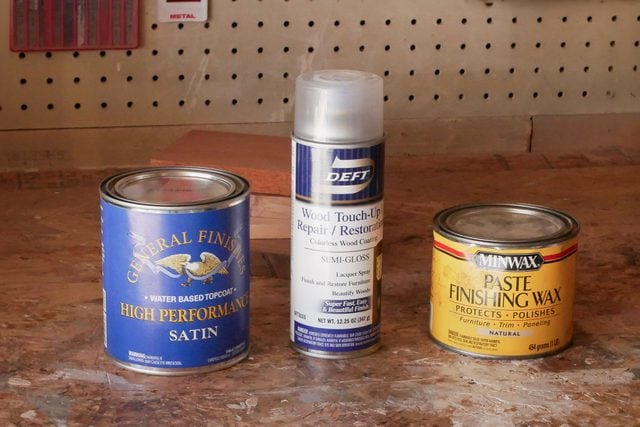
Choose a topcoat
Unless you used Rubio Monocoat, you’ll need a topcoat to protect the stain you’ve applied.
Choose a topcoat based on the anticipated use of the surface. Note that water-based polyurethane can go over oil-based stain, and vice versa, as long as you follow increased dry times.
Decide sheen based on your aesthetic. Matte, satin, eggshell, semi-gloss and gloss are your options.
- Water-based polyurethane: This is the easiest topcoat to apply and it cleans up with water. It’s fine for lightly used pieces of furniture and dries in two hours, but will need multiple coats to give your stain more durable protection.
- Oil-based polyurethane: This can withstand daily use, like the tops of dressers and tables. Note, however, it can develop a yellow tint over time.
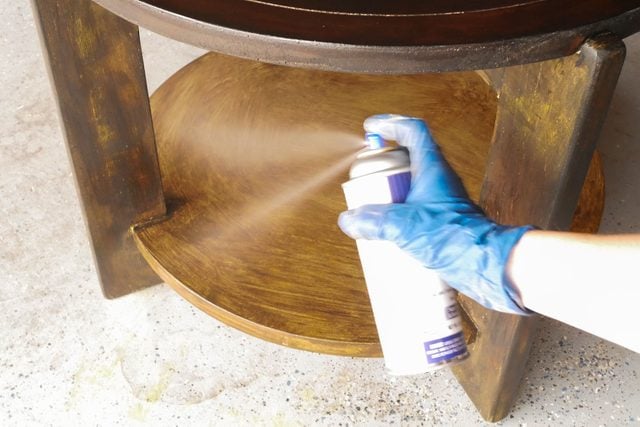
- Spray lacquer: An oil-based spray lacquer eliminates the fuss of brushing and lets you access hard-to-reach areas. No clean up is required if using an aerosol. This topcoat is not for heavily used furniture.
- Wax: Paste finishing wax should only be used on seldom-used pieces of furniture. This gives a creamy, hand-rubbed, smooth finish without glare. Wax is not a hard, protective finish, like polyurethane.
Option 1: Apply water-based polyurethane topcoat
- Stir well before applying.
- Apply water-based polyurethane using a sponge brush, a high-quality synthetic brush, a high volume low pressure (HVLP) sprayer or a smooth roller.
- If spraying with your HVLP, use the recommendations on your topcoat for HVLP tip sizes and thinning. Wear a respirator for lung safety.
- Beware of excess polyurethane drips. Catch them with a clean sponge brush or a fine paintbrush. Otherwise, it will dry milky white.
- Brush on poly in broad daylight to see lap lines and ensure you don’t miss sections. You also can use a raking light, a light source held at a parallel angle to the surface, to reveal any mishaps.
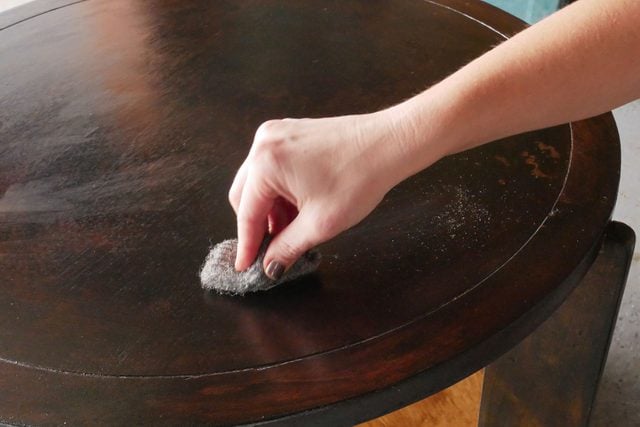
- Hand sand between coats with 320-grit sandpaper and wipe with a tack cloth.
- Two to four coats are recommended, with two or more hours of dry time between each coat.
- Clean up applicators with warm, soapy water.
Option 2: Apply oil-based polyurethane topcoat
- Stir before use.
- Apply with a natural-bristle brush in even strokes, being careful to keep a wet edge.
- Work in a well-ventilated area, and remember to dispose of rags in a flameproof, water-filled container.
- Hand sand lightly with 320-grit sandpaper and wipe down with a clean cloth between coats. Two coats are recommended, with four hours of dry time between.
- For a super-fine, mirror-like appearance, use a high-gloss poly and sand with fine steel wool between coats, building up many layers.
- Clean up with mineral spirits.
Option 3: Apply lacquer topcoat
- Wear a respirator and work in an open space.
- Shake can to mix.
- Spray as evenly as possible, six to 10 inches from the surface.
- Apply in thin, multiple coats.
- Sand with 280-grit sandpaper and wipe clean between coats.
- Re-coat based on the lacquer’s instructions for timing.
- Clear the valve after each use by hold the aerosol can upside down and spraying until the substance is clear gas.
Option 4: Apply wax topcoat
- Ensure adequate ventilation when applying.
- Dip cheesecloth or a cotton cloth into the wax and rub over the furniture surface.
- Let it dry for 10 to 15 minutes.
- Polish with a clean cloth or a weighted buffer.
- Reapply in the same manner one or two times a year.
Originally Published: February 29, 2024