
How To Install a Rain Diverter for the Roof

Updated: May 03, 2024
Channel water where you want it to go with simple, DIY-friendly rain diverters.
Introduction
If your home lacks gutters, rain pouring off your roof can give you a good soaking when you come and go. Luckily, a simple piece of metal flashing called a rain diverter can keep you dry. And, rain diverters don't just help protect you from the occasional deluge. They're also a great way to protect your home.
"I recommend rain diverters," says Pat Overson, owner of Overson Roofing of Mesa, Arizona. "They are a good device to install on your roof, especially if you live in rainy areas." Rain diverters stop water from pooling in unwanted areas, and keep your siding and walls in good shape. In short: "They make the water go where you want
Tools Required
- Caulk gun
- Extension ladder
- Extension ladder stabilizer (optional)
- Hammer
- Marker
- Pry bar
- Safety gloves
- Tape measure
- Tin snips
Materials Required
- Hot-dipped galvanized roofing nails
- Polyurethane caulk
- Rain diverter
Project step-by-step (7)
Set up your ladder
Working from a ladder or on your roof is dangerous. Always follow proper ladder safety guidelines.
- Pick a day when the temperature is above 40 degrees F, and there’s no rain in the forecast.
- Place the ladder on solid, level ground.
- Position your ladder one foot away from the wall for every four feet of climbing height.
- For example: to climb 16 feet, place the bottom of the ladder four feet from the wall base.
- Extend the ladder three feet above the roofline if you will be climbing onto the roof.
- Do not use a stepladder.
Pro tip: If you’re installing diverters where gutters are present, use a ladder stabilizer so you don’t crush your gutters. Stabilizers distribute weight to the roof or wall, rather than the gutter.
Cut diverter to length
- Measure the doorway where you will be installing the rain diverter.
- Add two feet. The diverter should extend a foot past the door on each side but can extend farther.
- Cut the diverter to length using tin snips.
- Wear safety gloves when cutting and handling metal flashing.
- Mark the center of the diverter with a marker.
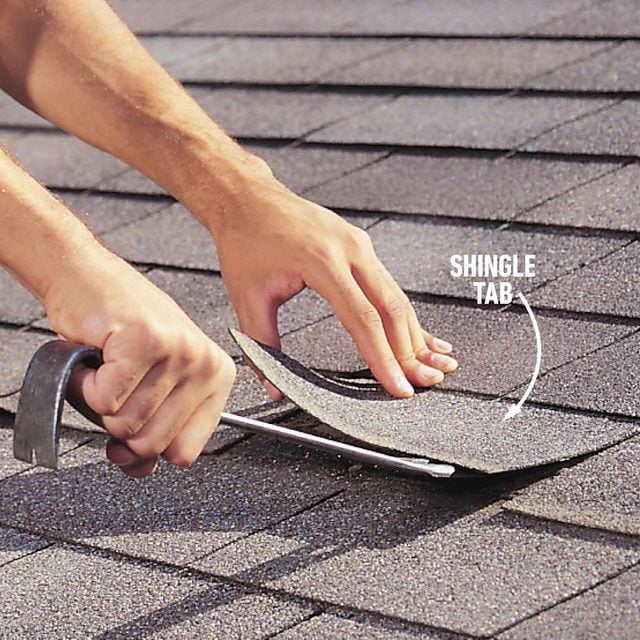
Loosen shingles
- Determine the course of shingles where you want to place the diverter.
- Over a doorway, this is usually the second or third course.
- Find the center of the door and make a mark on the roof above.
- Measure and mark where the ends of the diverter will be so you don’t pry up too many shingles.
- Carefully push the flat end of a pry bar under each shingle tab.
- Lift the shingle tabs so that you can easily slide the diverter underneath.
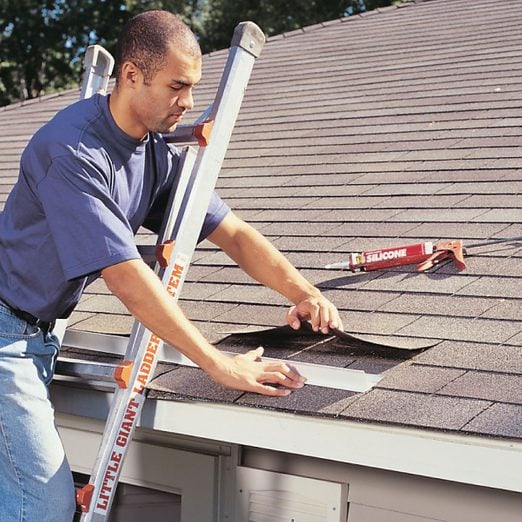
Install the diverter
- Slide the diverter under the shingle tabs, lining up your center marks.
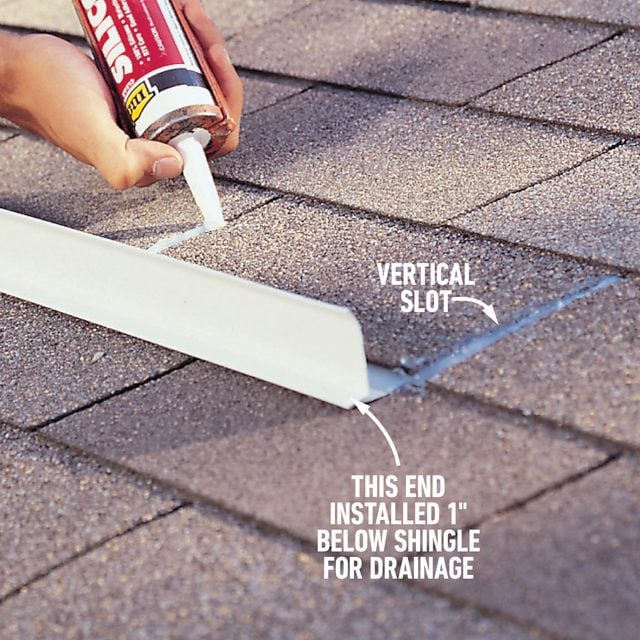
- Angle the diverter so water flows to one side of the doorway.
- One end should be tight to the shingle, the other about one inch below.
- Lift the shingle tabs and nail the diverter into place using galvanized roofing nails.
- Space the nails approximately two feet apart, or follow the instructions that came with the diverter.
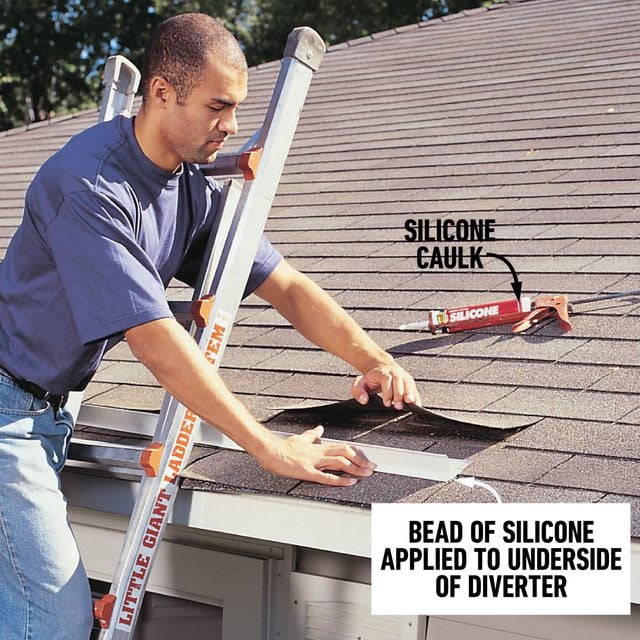
Apply caulk
- Dab polyurethane caulk on every nail head and under every shingle without a nail.
- Press the shingles down to re-seal the shingle.
- Run a bead of caulk in the seams to prevent water intrusion.
FAQs
Are rain diverters worth it?
Yes. Inadequately channeled water can lead to foundation, siding and interior wall damage. Plus, they keep you dry.
What problems are caused by water pooling on a roof?
Water that pools on roofs or gets backed up by inadequate gutters can cause your roof to leak, rotting the underlying building materials.
About the Experts
Pat Overson is the owner of Overson Roofing in Mesa, Arizona. Overson started roofing houses in 1977, soon starting his own company, which now serves multiple cities in the Phoenix-Mesa-Chandler metropolitan area.
Originally Published: November 28, 2018