


Don't give up on your lawn until you try these remedies
Multiple Days
Beginner
$101–250
Introduction
With a combination of soil additives, fertilizers, and tender, loving care, you can change your lawn from scraggly to golf-course green in one season.Tools Required
- Broadcast spreader
- Bucket
- Garden rake
- Shop vacuum
Materials Required
- Chicken manure
- Crabgrass preventer
- Grass seed
- Gypsum
- Herbicide
- Slow-release fertilizer
- Soil activator
- Winterizer fertilizer
Achieving a lush grass lawn doesn’t have to be a constant struggle. And you don’t have to pay big bucks for a lawn service to douse your yard with chemicals either. Learning how to fix your lawn and grow healthy, green grass is mainly just a matter of knowing what to give your lawn and when to give it.
In this story, we’ll show you what to do in the spring, summer and fall to get a grass lawn so nice you could cut it up and sell it as sod. These steps will work for any yard, regardless of climate or soil type.
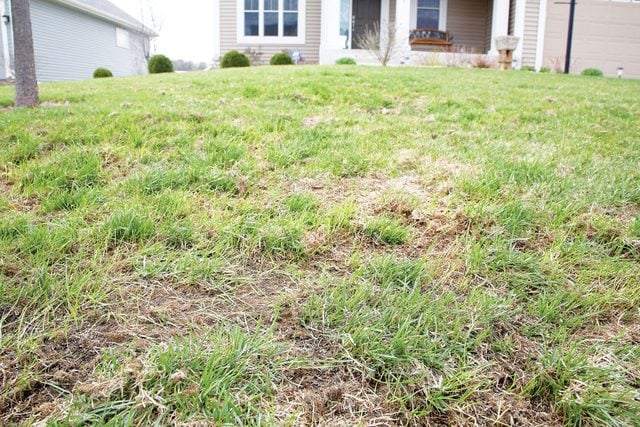
We worked with lawn care expert George Dege, better known as Mr. Lawn. Following Mr. Lawn’s advice, we worked on the lawn shown here from spring to summer. In March, it had dead patches of grass caused by voles. By August, the grass over the entire lawn was so thick we felt like we were walking on a shag carpet. And the grass lawn looked great too. It was noticeably greener than the neighboring yards.
We also spoke with Craig Elworthy, the founder of Lawnbright, to answer some of the most frequently asked questions about patchy lawns.
About the Experts
- George Dege has been teaching lawn care classes since the 1970s and has helped thousands of homeowners improve their lawns.
- Craig Elworthy is the founder of Lawnbright; he’s combined his 20+ years of tech experience with his knowledge of lawns to help his clients learn what it takes to fix a patchy lawn.
Project step-by-step (15)
Step 1
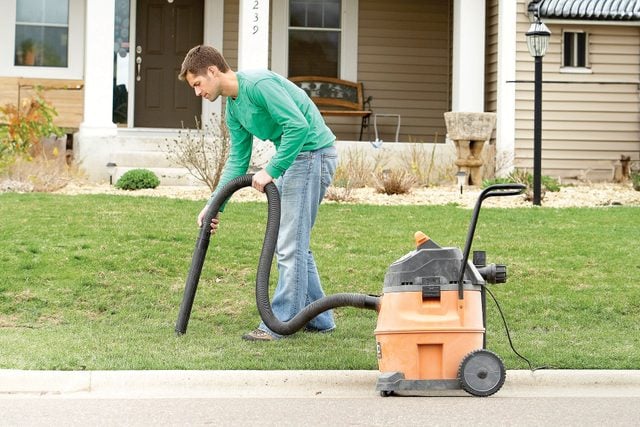
Spring Care: Vacuum the Pebbles
- Gravel and sand hinder grass growth, so vacuum them up.
- Start along the street and vacuum into the yard until you no longer hear stones getting sucked up.
- Then do the same thing along the driveway.
Step 2
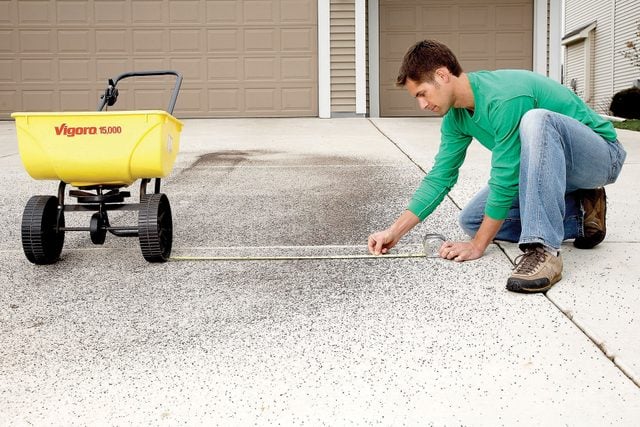
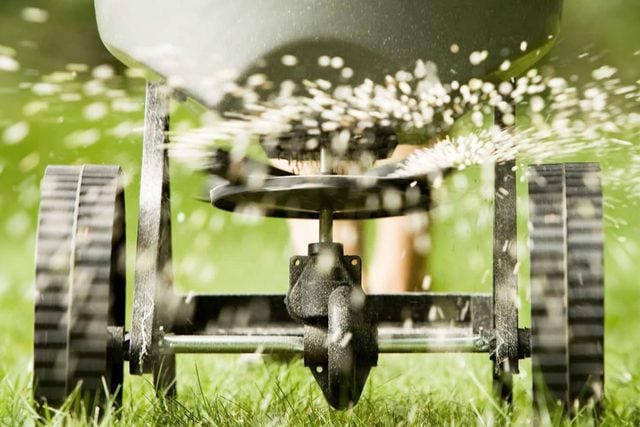
Check the Spreader’s “Throw”
- To apply the right amount of fertilizer, measure from the wheel to the edge of the dispersal pattern.
- Space your passes across the lawn so the coverage overlaps by 6 to 8 inches.
- Do this test every time you spread a new product.
Step 3
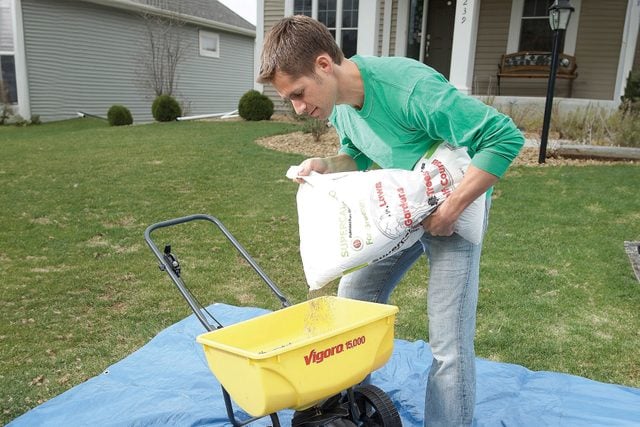
Don’t Spill on the Grass
- Spills and leaks can saturate one spot of your lawn and kill your grass, so park your spreader over a tarp or your driveway when filling the hopper.
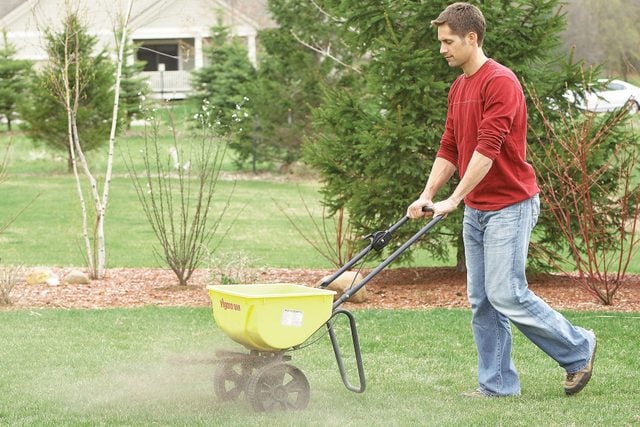
Step 4
Apply Fertilizer Between Mowings
- Between your second and third spring mowings, apply lawn fertilizer.
- Pro tip: Use a fertilizer with slow-release (time release) nitrogen.
- Follow the spread rate listed on the fertilizer bag and spread it on the entire lawn.
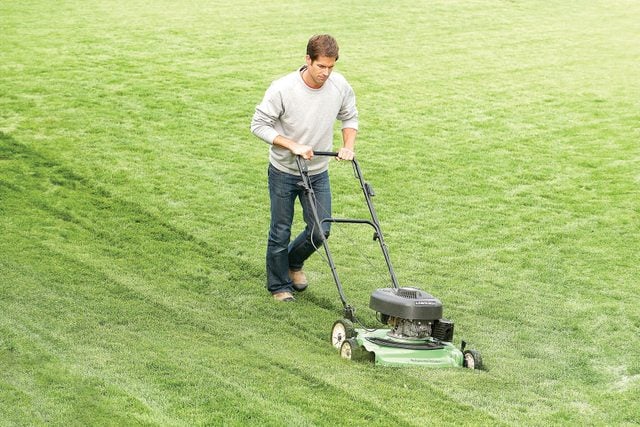
- Pro tip: For your spring and summer mowings, cut just the top third of the grass. So if your grass is 3 inches high, take 1 inch off the top. Mowing more than one-third stresses the grass. You can mow the grass shorter in the fall.
Step 5
Apply Soil Activator
- Fifteen days after applying the fertilizer, spread soil activator on the lawn to help retain water, loosen clay soils, aerate the soil, decompose grass clippings and reduce erosion.
- Note: A 40-lb. bag covers 4,000 square feet.
Step 6
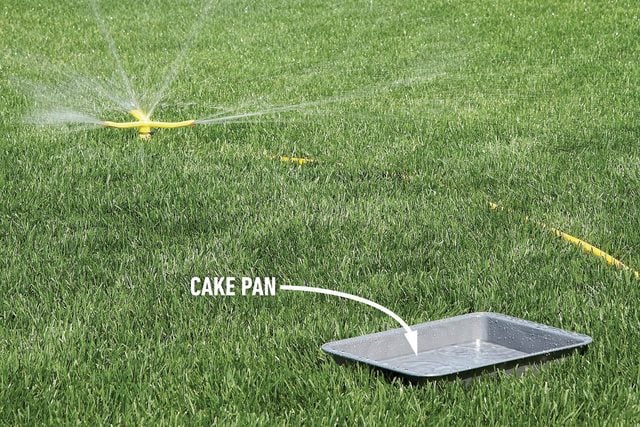
Late Spring, Early summer: Measure the Right Amount of Water
- Set a cake pan halfway between your sprinkler and the edge of the spray pattern.
- Watch your clock to see how long it takes the sprinkler to fill the pan with 3/8 inches of water.
- Water for that amount of time three times a week, unless it rains.
- Increase from 3/8 inch to 1/2 inch when the daytime temperatures are above 80 degrees F. Learn how to save your lawn during drought.
Step 7
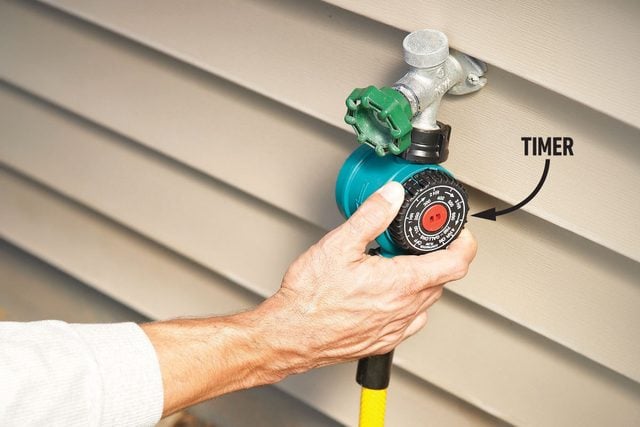
Water with a Timer
- If you don’t have an automatic sprinkler, an inexpensive timer frees you from watching the clock every time you water. The timer controls the sprinkler, so you’ll be sure the lawn gets the proper amount of water.
- Pro tip: The best time to water is early morning, when the sun starts to rise. Watering at night leaves the grass wet too long, which can cause fungus and other diseases in the summer.
Step 8
Neutralize Dog Spots
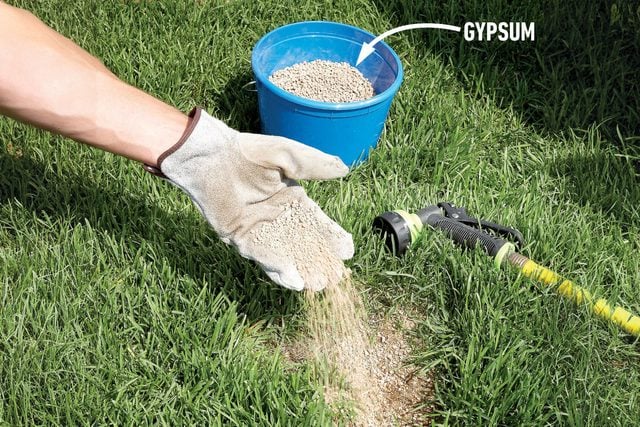
- Gypsum and water are the antidotes for dog spots in your yard. Gypsum neutralizes the dog urine, and the water soaks the area for new grass seed. If you treat the brown spots early, your grass won’t die and you can fix your lawn that much easier.
- Wearing gloves, sprinkle a handful of gypsum over any dog spots.
- Saturate the spot with water.
- Plant new grass seed in the bare spots and keep it watered.
Step 9
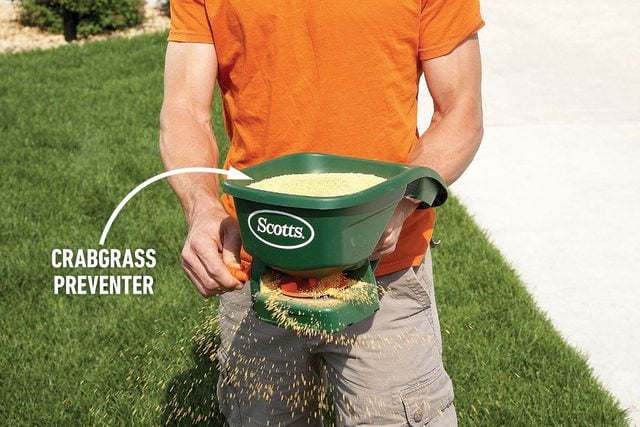
Stop Crabgrass Before It Starts
- Crabgrass will grow when the soil warms up to 55 degrees F. If you apply the preventer too early, it will be ineffective. And once the seeds germinate, it’s too late. In northern states, late April is the best time. Mid-March is recommended for southern states.
- Apply crabgrass preventer to any areas where crabgrass previously grew, which is typically along the street, driveway and sidewalk.
- Pro tip: A hand spreader is perfect for small areas, like along the pavement where crabgrass tends to grow.
Step 10
Fertilize in Late Spring
- In mid-May, give your lawn its second application of lawn fertilizer.
Step 11
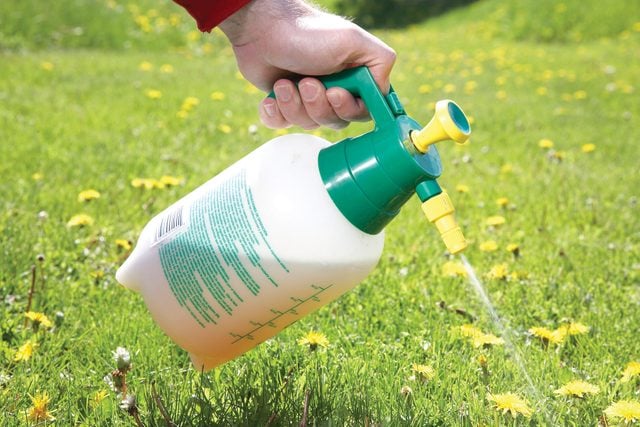
Mid- to Late Summer: Spot-Spray Individual Weeds
- If you have just a few weeds, apply herbicide to affected areas with a pump sprayer.
- Pro tip: Be sure there’s no rain in the forecast for 24 hours.
Step 12
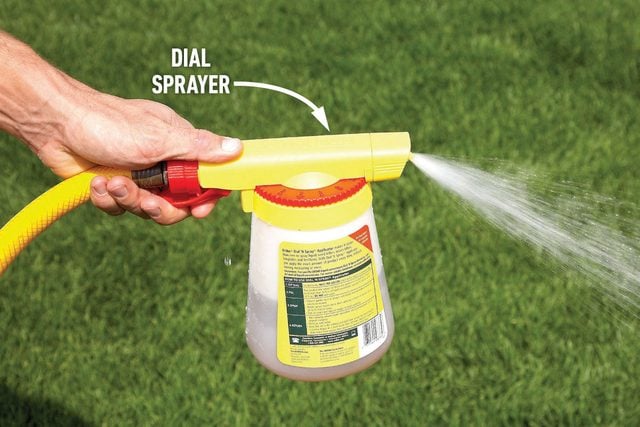
Use Your Hose for Large Areas of Weeds
- Pour concentrated herbicide into a dial sprayer and hook it up to your garden hose.
- Turn the dial on the top of the sprayer to the setting recommended on the herbicide container (such as 2 tablespoons per gallon of water).
- Spray the weeds.
- Pro tip: Spray the herbicide on a calm day so the weed killer won’t drift onto your plants and flowers.
Step 13
Apply Chicken Manure
- In mid-August, spread chicken manure to the lawn. You could give your lawn a third application of fertilizer, but chicken manure works even better because it contains more nitrogen, which gives the grass a healthy, green look (there’s hardly any odor). Within two or three days of applying the manure, you’ll see the lawn really green up.
- Pro tip: A 40-lb. bag covers 4,000 square feet.
Step 14
Fall Lawn Care: Prep for Winter
- In early to mid-September, apply soil activator over your yard, just as you did in the spring.
- Two weeks after that, give your lawn its final application of fertilizer for the year.
- Pro tip: Use a winterizer fertilizer (a 40-lb. bag covers 10,000 square feet). This specialized fertilizer has more potassium to help the roots grow deeper, which lets the roots absorb and store nutrients until the ground freezes. When the ground warms up in the spring, the grass uses those nutrients to jump-start its growth.
- Keep mowing your lawn until the grass stops growing.
- On your final mowing of the year, cut the grass to 1 to 1-1/2 inches high. This reduces the chance that your lawn will get snow mold and vole damage.
- Now you’re done caring for your lawn until spring!
Step 15
FAQs
We asked Lawnbright founder Craig Elworthy to answer a couple of the most frequently asked questions about how to fix your lawn.
What causes a patchy lawn?
- The most common issue is a lack of proper fertilization and mowing. Mowing is often looked at as a chore, but frequent mowing (once or twice per week) is actually the single most important thing you can do for your lawn. Cutting off a small amount of the grass tip each time you mow sends a signal to the grass to thicken out laterally.
- Fertilizer also has a similar effect. If your lawn never receives the nutrients it needs, it will thin out and become patchy in areas of the lawn. When combined with mowing, fertilizing will also help your lawn spread out to fill in bare patches.
When should I call a pro to fix my lawn?
Most patchy lawns can be fixed by the homeowner without needing to call in a pro. You should call a pro only if you don’t have the time or inclination to address it.