How to Frame a Structure Using Energy-Saving Techniques
Updated: Jul. 12, 2023
Here's a framing technique that maximizes insulation space and reduces heat transfer through the walls.

Varies
Intermediate
Varies
Introduction
By utilizing traditional building methods, this framing method maximizes insulation and minimizes heat transfer.Tools Required
- Basic carpentry tools
- Circular saw
- Compressor
- Drill/driver
- framing nailer
- Levels
- Sawhorses
Materials Required
- 2x10 Lumber (or bigger depending on header size)
- 2x4 lumber
- 3" framing nails
- Mineral wool insulation
- Vapor barrier
Building sustainably doesn’t always involve new and innovative building products. Sometimes it takes a traditional building method, modified to improve energy efficiency. That’s exactly what we did when designing the framing for our Sustainable Retreat.
We wanted to keep it simple and efficient, so we built double 2×4 walls. This double-walled framing technique adds lots of insulation and removes the heat transfer that happens through the studs. This path to sustainable home building succeeds by using a skill anyone can learn, instead of experimenting with a new material.
Project step-by-step (6)
Frame the outer walls
Begin by building the exterior walls as normal. Start with a top and bottom plate cut to the length of the wall and mark out the 16 inches on-center stud layout, as well as the window locations with jack and king studs.
On a standard roof with a ridge beam, the layout is marked on the top and bottom plate at the same time. On this shed-style type of roof, we laid out the heights of the walls on the floor to transfer the layout to the top plate and get an accurate measurement for each stud.

Tip up the outer walls
Cut all the studs, including the jack, king and cripple studs for the windows. Line them up with the layout marks and nail them through the plates. Tip up each wall as you build them, brace them plumb and fasten them together at the corners.
Pro tip: When building a shed-style roof, save yourself time and write down the measurement for the studs so you don’t have to re-measure for the opposite side.

Lay out the inner walls
Once the exterior walls are tipped up, cut a 2×4 bottom plate three inches shorter than the distance between the walls. Place it between the walls with a 2×4 block spacer at the ends. Then copy the layout of the exterior walls onto the new bottom plate. Transfer the marks to the top plate, then cut the studs and build the wall.

Tip up the inner walls
We built the end walls first and tipped them up as they were built. We used a 2×4 spacer between the inner and outer walls to position them and nailed them through the bottom plate. We make sure we nailed them into the joist below and not just the subfloor whenever possible.

Framing the window openings
Transferring the stud layout from the outer to the inner wall makes it easy to match the window openings. But at the windows, not all the framing parts need to be transferred to the inner wall.
Since the outer wall bears the weight of the roof, it will contain any headers, jack and king studs, reducing the amount of framing material needed and maximizing the insulation space of the inner wall.

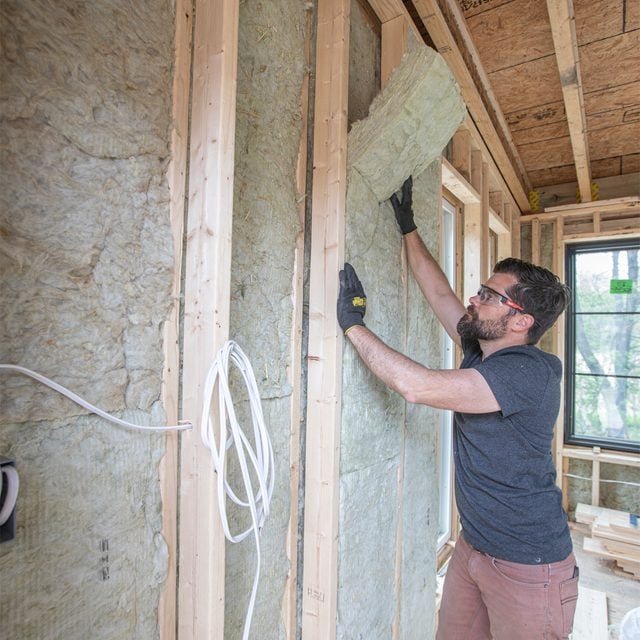
Insulation installation
After sheathing and roof installation, the final step to making these walls extra efficient is filling the stud spaces with insulation.
We started by filling the outer wall with mineral wool insulation, a sustainable home insulation option, cutting the batts to fit the stud bays. Then we did the same with the inner wall. Lastly, we covered the wall with a vapor barrier before installing the wallboard.