
How To Fix a Dryer That Doesn’t Dry Clothes

Updated: Nov. 29, 2023
If your clothes dryer fails to dry clothes, try clearing the dryer vent tube before calling an appliance repair tech.
An hour or less
Beginner
$20-50
Introduction
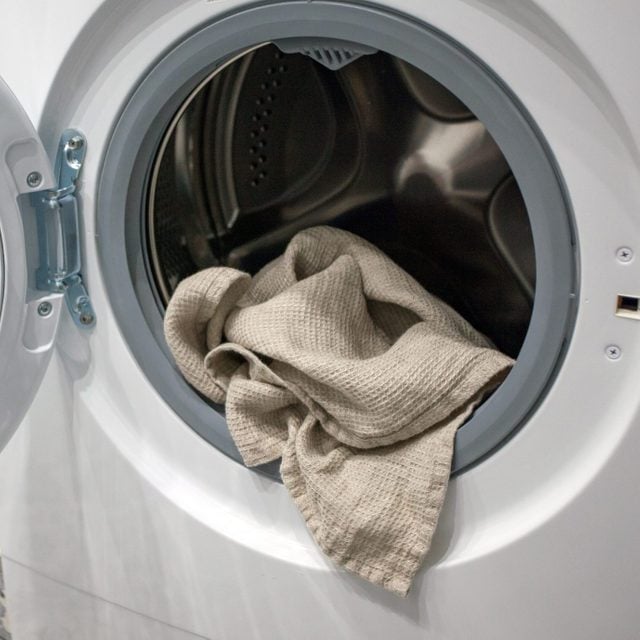
It's disappointing to open up the dryer door and find damp, dank-smelling clothes. As an appliance technician with more than 30 years of experience, I 'm often asked to repair a dryer that no longer completely dries clothes. Often, the problem stems from a lack of maintenance.
Dryers are all about airflow. A dryer with poor airflow will take twice as long to dry clothes as one with good airflow. Your dryer heats the air that mixes with your wet clothes, then carries that moist air out of your house through the dryer vent tube.
A clogged dryer vent tube or lint filter can severely diminish your dryer's efficiency, wasting time, energy and money. On top of that, clogged or poorly installed dryer vent tubes cause thousands of dryer fires each year in the U.S.
You can clear a clogged dryer vent tube yourself without calling a pro. Here's how to get a no-longer-drying dryer working again.
Tools Required
- Dryer vent-cleaning kit
- Dust mask
- Electric hand drill
- Flathead screwdriver
Project step-by-step (9)
Test Dryer
- Set your dryer for Normal Dry and turn it on.
- Wait three minutes for the dryer to get up to temperature.
- Go outside and feel the exhaust coming out of the dryer vent tube. The volume of air and the heat should feel like a hair dryer.
- If you DON’T feel a strong volume of air, accumulating lint is most likely clogging the moist airflow. Move on to the next step.
- If you DO feel a strong volume of air, then you know the problem isn’t the common clogged vent tube. Instead, the issue is the less-common failed heating system which will take a pro to resolve. My guess is it’s a blown (and inexpensive) hi-limit fuse.
- If your dryer tube vents on the roof, which is common in condos and apartments, proceed to Step 4. (Lint clogs vertically vented tubes much faster because the blower fan has to fight gravity to get the moist air out of the dryer.)
Clean Dryer Vent Tube Exit
If the airflow is weak:
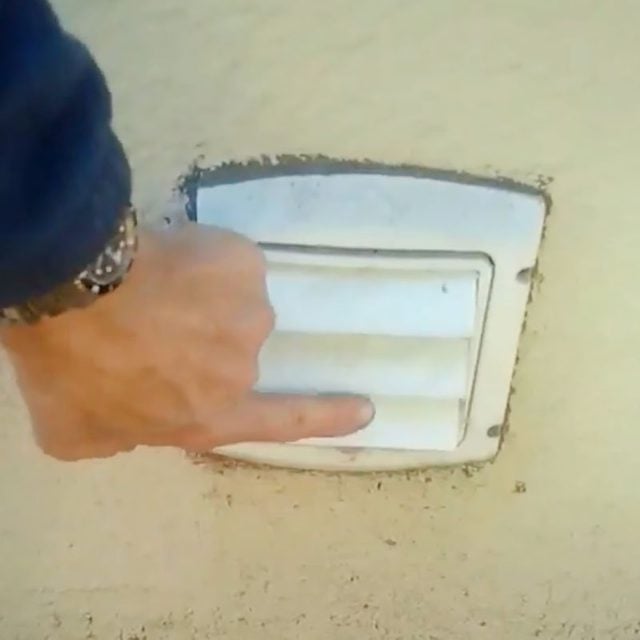
- Go inside and turn off the dryer.
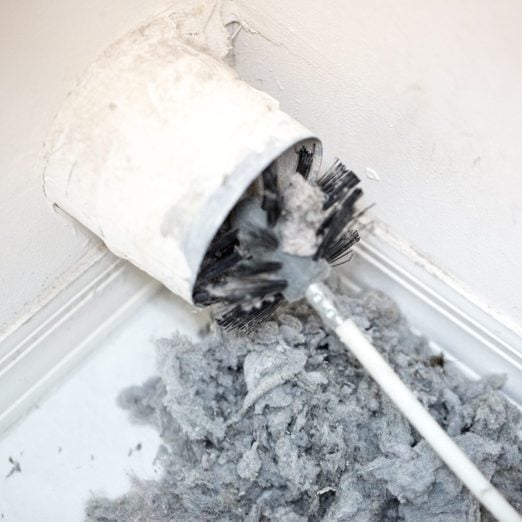
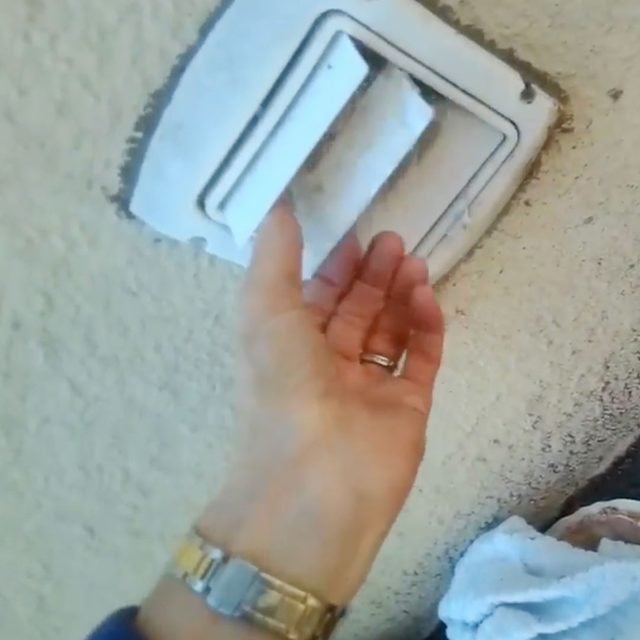
- Go back outside and examine the dryer vent tube where it exits your home. It’s likely covered by three plastic louvers or a plastic screen, which keeps small animals out of the tube. These screens are also notorious for filling with dryer lint and obstructing more than 90 percent of the dryer exhaust.
- Remove the louvers or screent.
- If your driver vent tube has plastic louvers: Carefully bend them slightly so their end pivot pins can come out of the holes in the plastic side housing.
- If your driver vent tube has a plastic screen: Use a flat-head screwdriver to carefully pry off this screen.
- Wash the louvers or screen with hot water to clean any stuck-on lint. Learn how to clean a dryer vent.

Clean Out the Dryer Vent Tube
- With the louvers or screen removed, go in as far as your arm will reach and remove as much lint as you can.
- Go inside and turn on your dryer.
- Go back out and feel the volume of air again. It should feel strong, like a hair dryer.
- If airflow is still weak, move on to the next step.

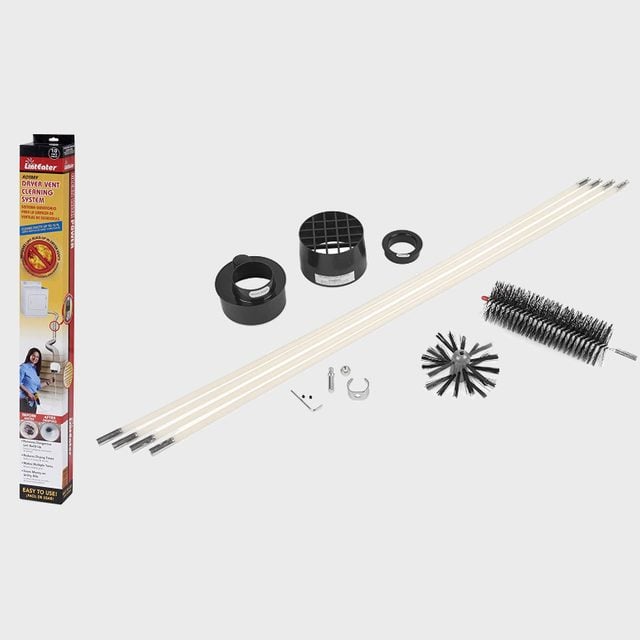
Purchase Dryer Vent Cleaning Kit
- To continue, you’ll need a dryer vent-cleaning kit.
- They’re available online for less than $35. Some home improvement stores sell them as well.
- Kits generally contain four three-foot sections for cleaning vent tubes up to 12 feet long.
- For vent tubes longer than 12 feet, purchase a 12-ft. dryer vent-cleaning extension kit.
- Measuring the distance from your dryer to where the tube exits your house to determine its length. Often it’s less than 12 feet.
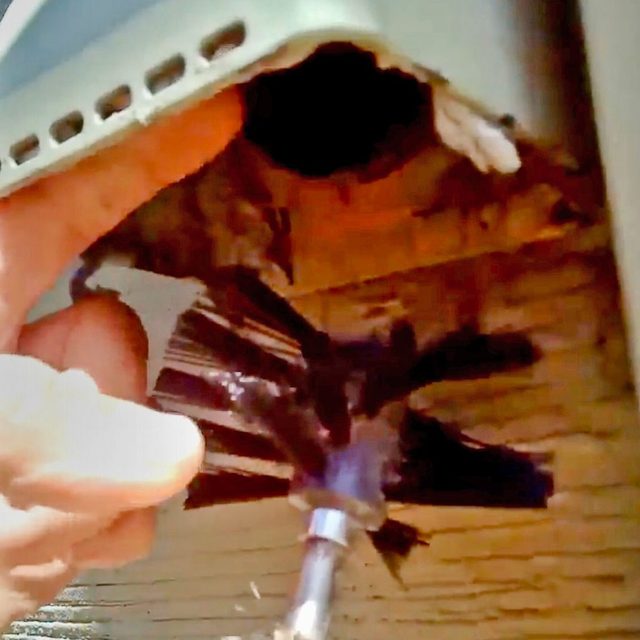
Use Dryer Vent Cleaning Tool
If you have a verticle tube vented on the roof, you’ll need to clean it from inside your home, so wear a dust mask! Get behind the dryer and loosen the hose clamp where the vent tube attaches to the dryer. Then continue with the steps below.
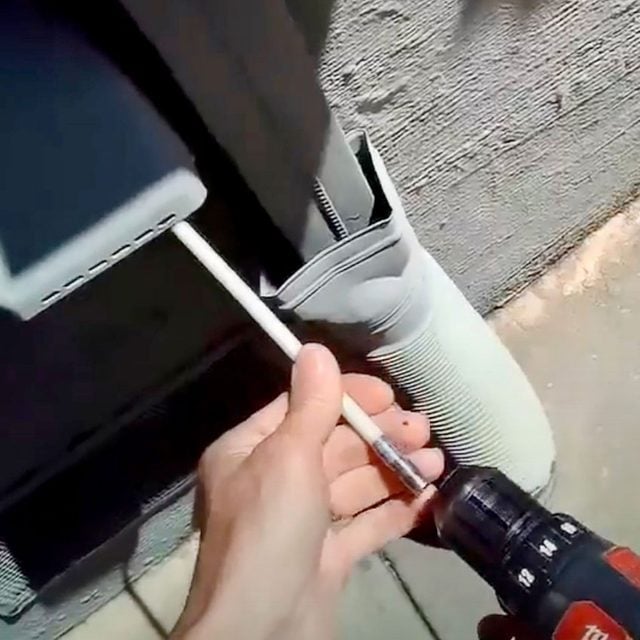
- If working from outside your home, put the first three feet of the cleaning tool into your dryer vent and connect the other end to your drill.
- Make sure your drill is set to turn clockwise. Warning: Spinning the drill counter-clockwise will make the sections of the tool come apart inside the dryer vent tube.
- Turn on the drill and move the vent-cleaning tool back and forth. The tool breaks up lint stuck to the walls of the tube.
- Carefully pull the tool out of the tube. Lots of lint will come with it.
- Remove the vent cleaning tool from your drill. Get rid of warm, moist air with the help of a roof dryer vent.
Add Dryer Vent Cleaning Tool Extensions
- Add the next three-foot section of your flexible tool.
- Put the six feet of the cleaning tool into your dryer vent and connect the other end to your drill. Make sure your drill is set to turn clockwise.
- Move the tool back and forth as you spin the drill.
- Carefully pull all six feet out of the tube to get rid of the clogging lint.
- Now add another three-foot section to clean further into the tube.
- Repeat the process, adding additional three-foot sections until the tool has reached all the way to the dryer.

Remove Dryer Vent Cleaning Tool
- Once you’ve cleaned the entire tube, pull the tool back by three feet and remove that three-foot section from your drill and the other sections.
- Repeat until all sections are removed.
- Warning: As you pull out the last section, a lot of lint may come out, too!
Check Airflow
- Turn on your dryer.
- Warning: A big cloud of dust will likely come out of your dryer vent tube. Run the dryer for five minutes to let the dust settle before going out to test the airflow. Inhaling the dust can be bad for your health.
- After five minutes, go outside and check the airflow volume. It should feel noticeably stronger. If not, repeat the process from Step 5 until the clog is gone and you feel a strong volume of air.
- It may take more than two attempts, especially if the vent tube is more than six feet long.
- You may want to try cleaning the tube from inside, following the steps above for a vertical dryer vent tube.
Finish the Job
- Replace the dryer vent tube exit screen or louvres.
- If working from inside the home, re-attach the dryer vent tube.
If you notice that your dryer still isn’t heating quite like it should, there are a few more things you can try to get it working properly, including cleaning the dryer filter housing. If all else fails, call a pro to diagnose the issue.
Originally Published: March 03, 2022