
I've seen these same mistakes made over and over. The solution for every one is simple. Let me show you. Julio
Avoid These Common Plumbing Mistakes
1
/
8
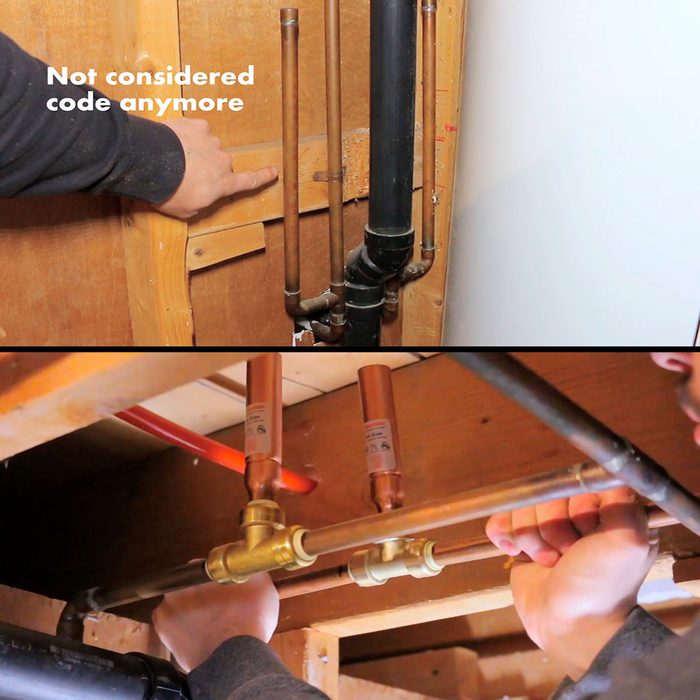
Not installing water hammer arrestors
Before these nifty devices appeared, some plumbers installed a tee with an 18-in. section of pipe that would be filled with air upon filling of the system and cushion any hammering inside the pipes. But these pipes would eventually fill up with water and become useless. To prevent knocking in the pipes, it’s highly recommended to install dedicated arrestors like these. These are most commonly installed near fast valve closing appliances, such as a toilet or washing machine.
2
/
8
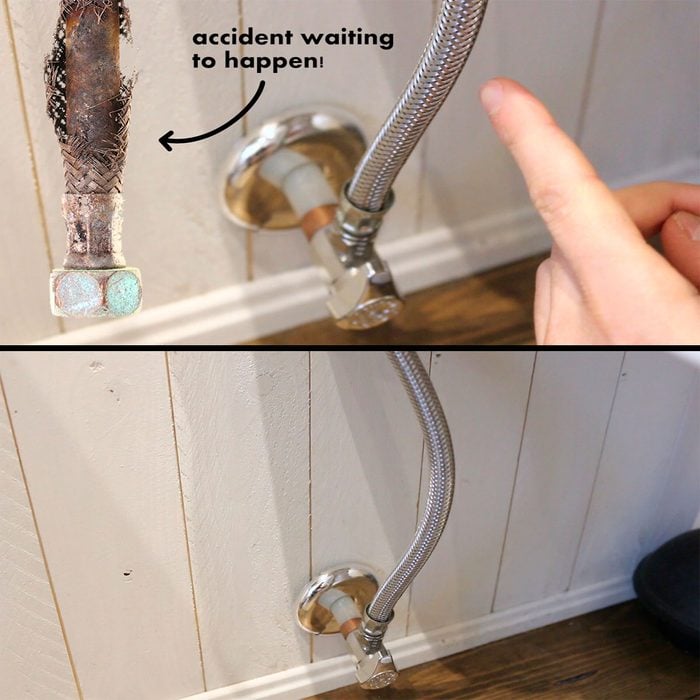
Reusing flexible hoses
Speedways, otherwise known as flexible hoses, are one of your home’s weakest link in terms of plumbing. These flexible hoses are made of rubber and have a stainless-steel jacket to protect the core from anything that could damage them such as animals and so on. These hoses should be replaced soon every five years or so. Always replace them when fixing or replacing fixtures.
3
/
8
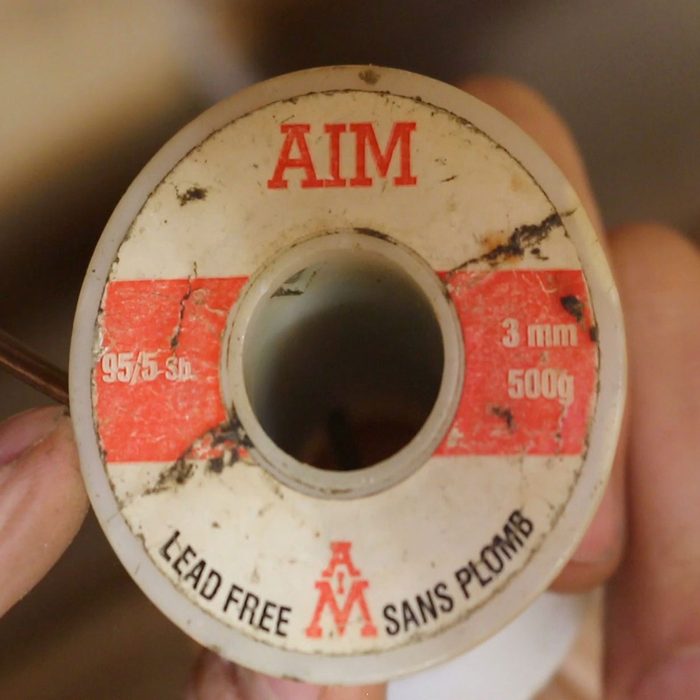
Lead solder on a potable water pipes
Many homes built before the 1980’s used lead solder to join copper pipes together. Modern building codes ban lead solder for potable water systems. Lead has been replaced with 95/5 mix of tin and antimony. Lead solder is still available however, so always check before to make sure you are using the correct one.
4
/
8
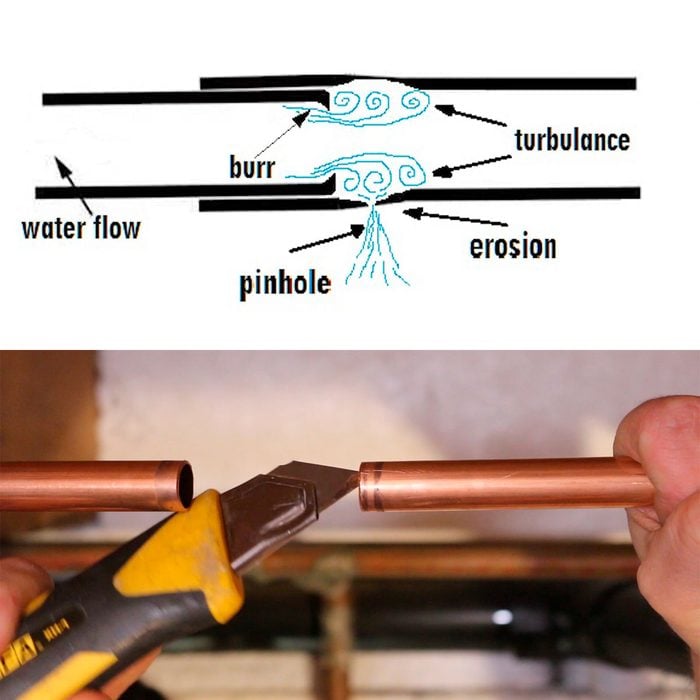
Not deburring the inside of pipes
When a pipe is cut, a burr is formed which reduces the pipe’s inner diameter and causes turbulence. Turbulence can negatively affect water pressure and can actually prematurely wear away the walls of a pipe. To resolve this issue, always deburr your pipes. You can use a round file, a utility knife or a dedicated reaming tool.
5
/
8
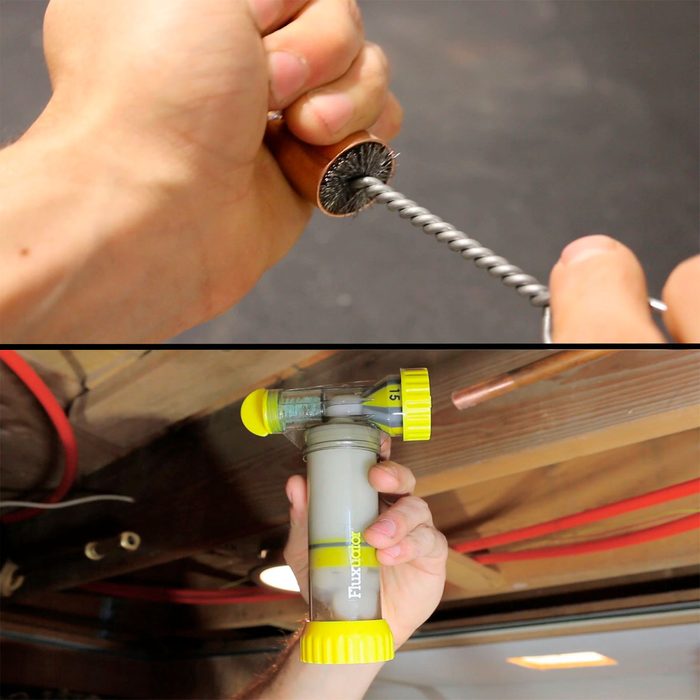
Dirty pipes and contaminated flux
When soldering, cleanliness is crucial to creating a leak free joint. Copper pipe and fittings oxidize when exposed to the air and need to be properly cleaned before soldering. You could use a fitting brush, or abrasive paper or cloth. To speed up the process, I cut the handle off the end of a fitting brush and use it in my drill. Also, make sure the flux you’re using is clean and free of debris. I use this flux dispenser because it does a great job of keep the flux free of contaminants. http://www.fluxuator.co.uk/
6
/
8

Not enough support
Not supporting pipes adequately can cause joints to fail and lead to expensive water damage repairs. To make sure this doesn’t happen, always add a hangar at least every 6 feet when working with ½-in. and ¾-in. copper.
7
/
8

Wrong dope/tape order
There’s a lot of controversy on whether you should put your pipe dope on first or after applying your Teflon tape. The answer is simple: tape first then dope. If you apply the dope before the tape, the tape will be pushed away instead of staying on the threads, possibly causing your joint to leak. The proper way of doing is to install your Teflon tape first, then apply your pipe dope if so desired. This method will give you a much cleaner finish and reduce the chance for leaks.
8
/
8

Cross-threading a pipe or fitting
Cross–threading, or stripping, is when the threads of a fitting do not align with the treads of a pipe. When the misaligned fitting is tightened, new threads are plowed into and over the existing threads destroying them in the process. Cross-threaded pipes often leak. This is a common mistake that a lot of beginners and DIYers make. A crossed-thread is easy to diagnose, it’ll be a lot harder than usual to tighten, and the pipe will not look straight in relation to the fitting.
To avoid cross-threading pipes and fittings, always start the connection by hand, and make sure they screw together smoothly before using a wrench to finalize the tightening process. It also helps to start off in a counter-clockwise direction until you feel the threads properly mate.