
Seasoned professional painters have learned from experience what paint works best in any situation, what equipment is durable and yields the best results, and how to get the best-looking finished product in the least amount of time.
Tips and Tools for Achieving Better Painting Results

Updated Jun. 07, 2024
1
/
12
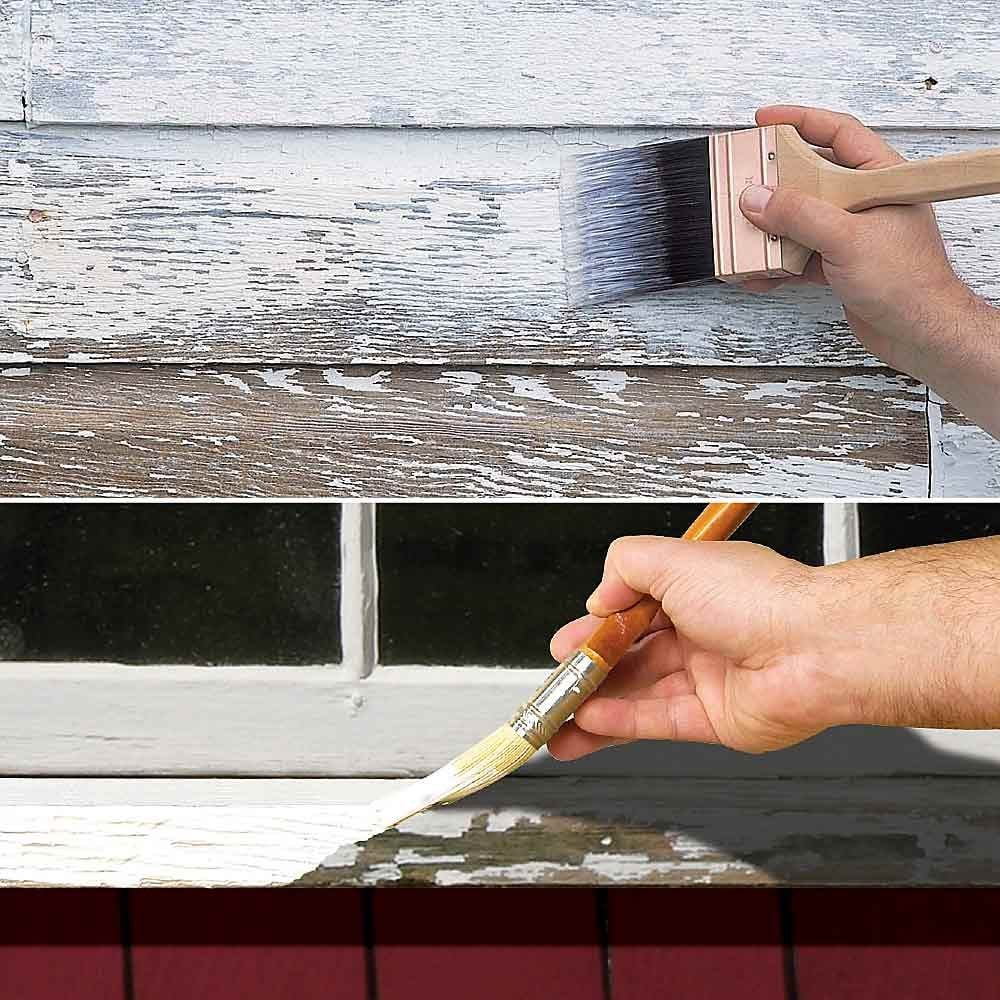
Lock Down Peeling Paint
If you have peeling paint to deal with, Zinsser’s Peel Stop Triple Thick Primer can save you days of tedious scraping. It penetrates the old paint and bonds it to the surface below, preventing peeling and cracking. You still have to remove loose paint, but you can skip the hard, thorough scraping job that’s usually required. And because it forms a super-thick film, this primer also hides minor surface cracks and evens out the irregularities of a weathered or scraped surface.
If repainting isn’t in the plan but you need to prevent a weathered surface from getting any worse, take a look at Peel Stop Clear Binding Sealer. It works just like the primer, but it’s thinner and dries clear. Both Peel Stop products can be applied to interior and exterior surfaces. They’re recommended for use on wood, metal, stucco, concrete and brick. You can topcoat with any latex or alkyd paint.
2
/
12
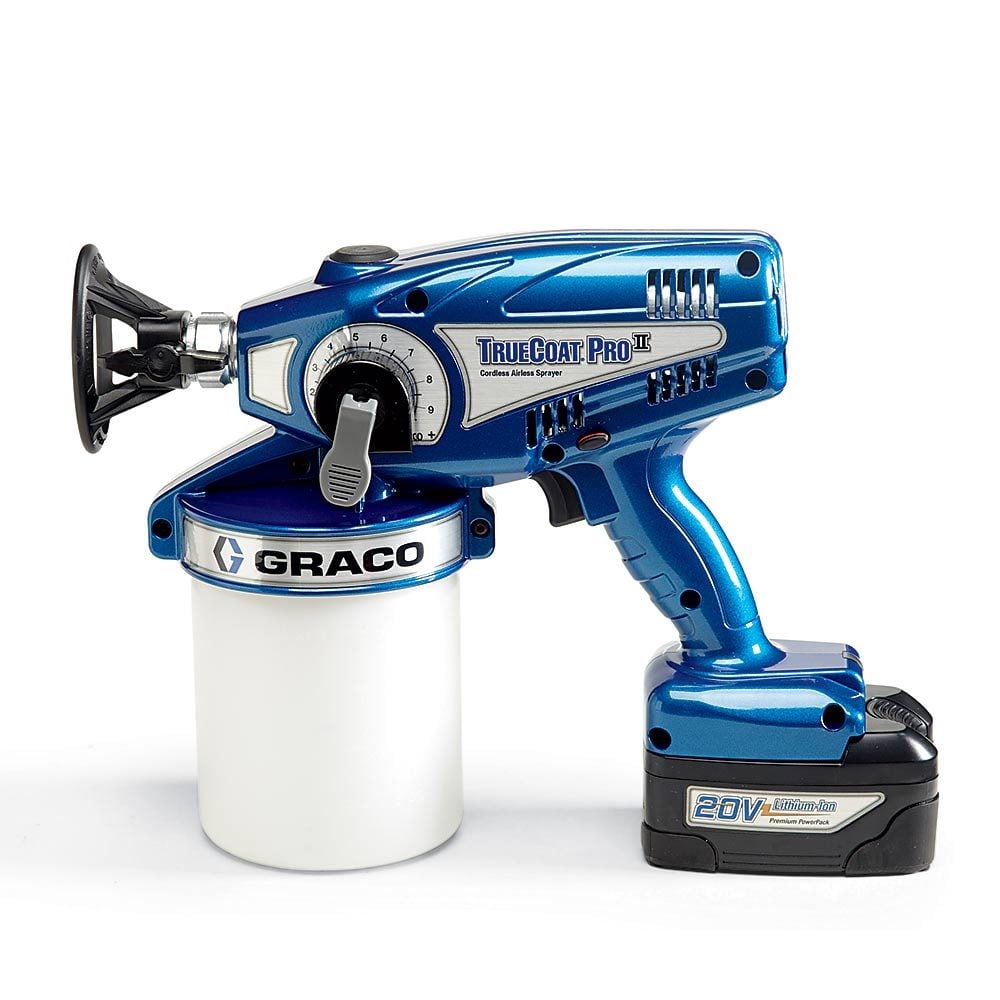
Pro-Grade Portable Sprayer
Photo courtesy of Zinsser
Graco is the most recognizable name in the professional line of paint sprayers, and now it offers a line of portable airless sprayers that deliver the same quality as the larger cart-style models. Have a job that requires covering the walls in one color and the doors in another? Use your big sprayer on the walls and the TrueCoat Pro II on the doors, and eliminate the hassle of switching colors. It also works great for touch-up and trim work.
These sprayers are the real deal. They’re fully repairable. They spray unthinned paint and the suction tube swings freely so you don’t have to hold the sprayer perfectly horizontal as you do with most entry-level models. The corded model has a long, flexible 15-ft. cord that reduces the need for extension cords. And for you guys who hate dragging cords and hoses around, Graco makes a cordless version (shown). You can find these products online, at Rockler stores, paint stores and home centers.
3
/
12
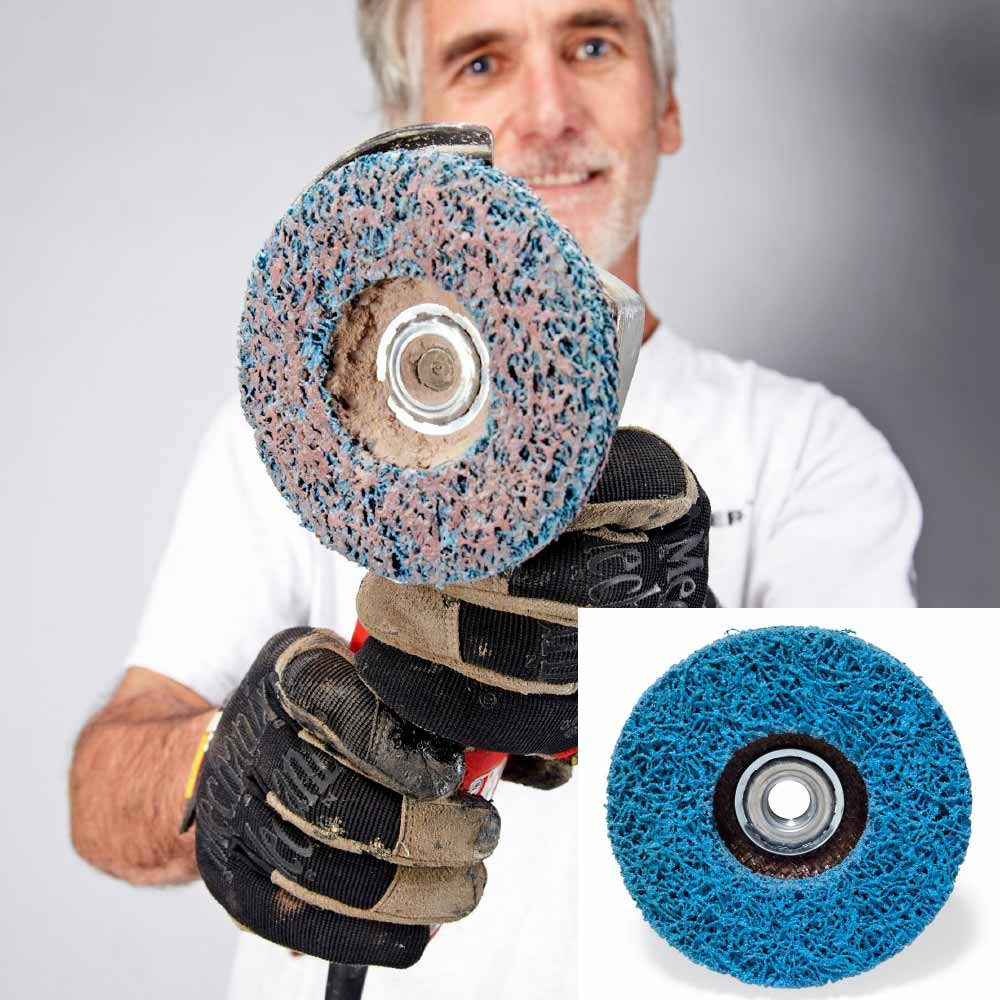
Rapid paint remover
If you work on a lot of old house with lots of peeling paint, you’ve got to become a bit of an expert on paint removal. Where there’s only a layer or two of latex, this Norton RapidStrip wheel mounted on a 4-1/2-in. grinder is the perfect setup. The discs aren’t cheap, but they’ll remove a lot of paint before wearing out. And the aggressive grit combined with the high grinder speed removes paint fast, too.
(Note: Don’t use this method for lead paint removal, as it sprays dust and chips into the air.)
4
/
12
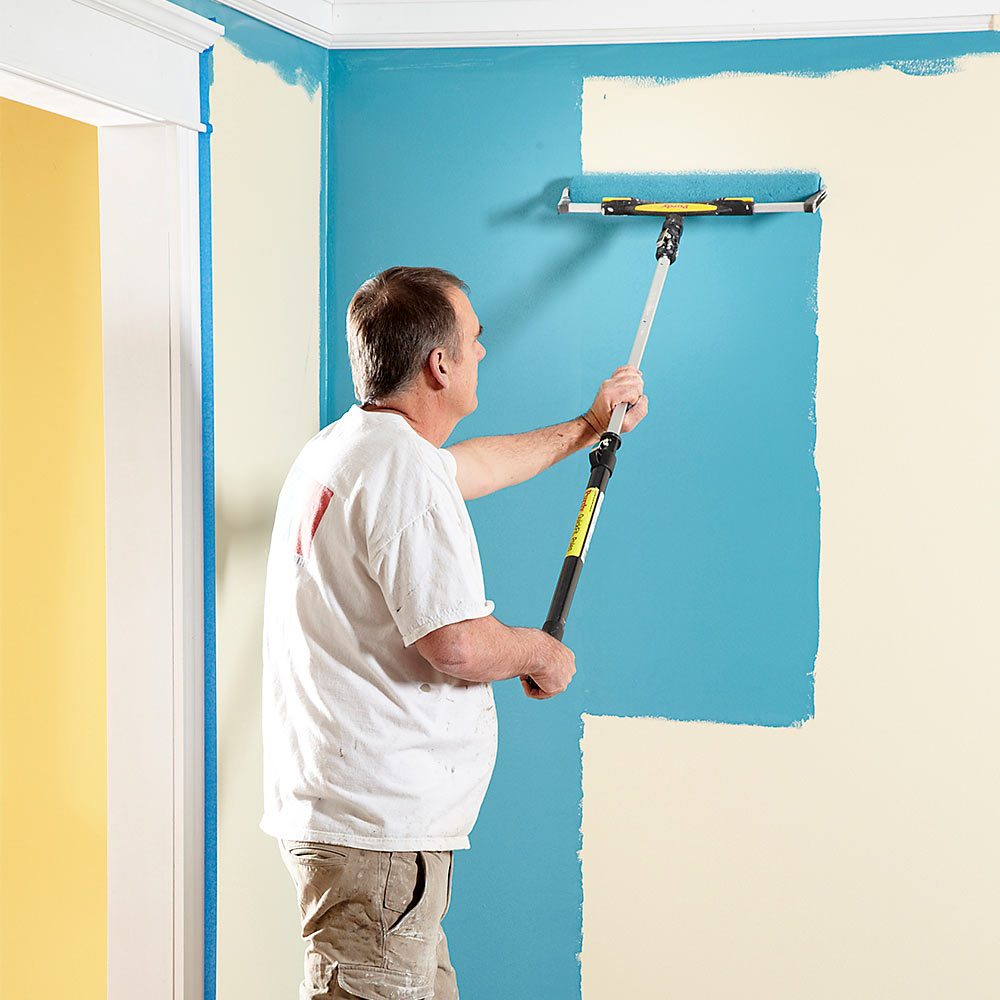
Paint twice as fast with this extra-wide roller
An 18-in.-wide roller setup like this may not be for everybody. Pro painters use them for the obvious reason that they can paint twice as fast as they can with a standard 9-in. roller.
If you have a lot of large, unbroken walls and ceilings to paint, the investment in a large paint pail, 18-in. roller cage and 18-in. cover makes sense. You’ll definitely save a bunch of time. Plus, because the roller is supported on both edges instead of just one, it’s easier to apply consistent pressure and avoid roller marks left by paint buildup at the edge of the roller.
You’ll find 18-in. roller equipment at most home centers and paint stores.
5
/
12
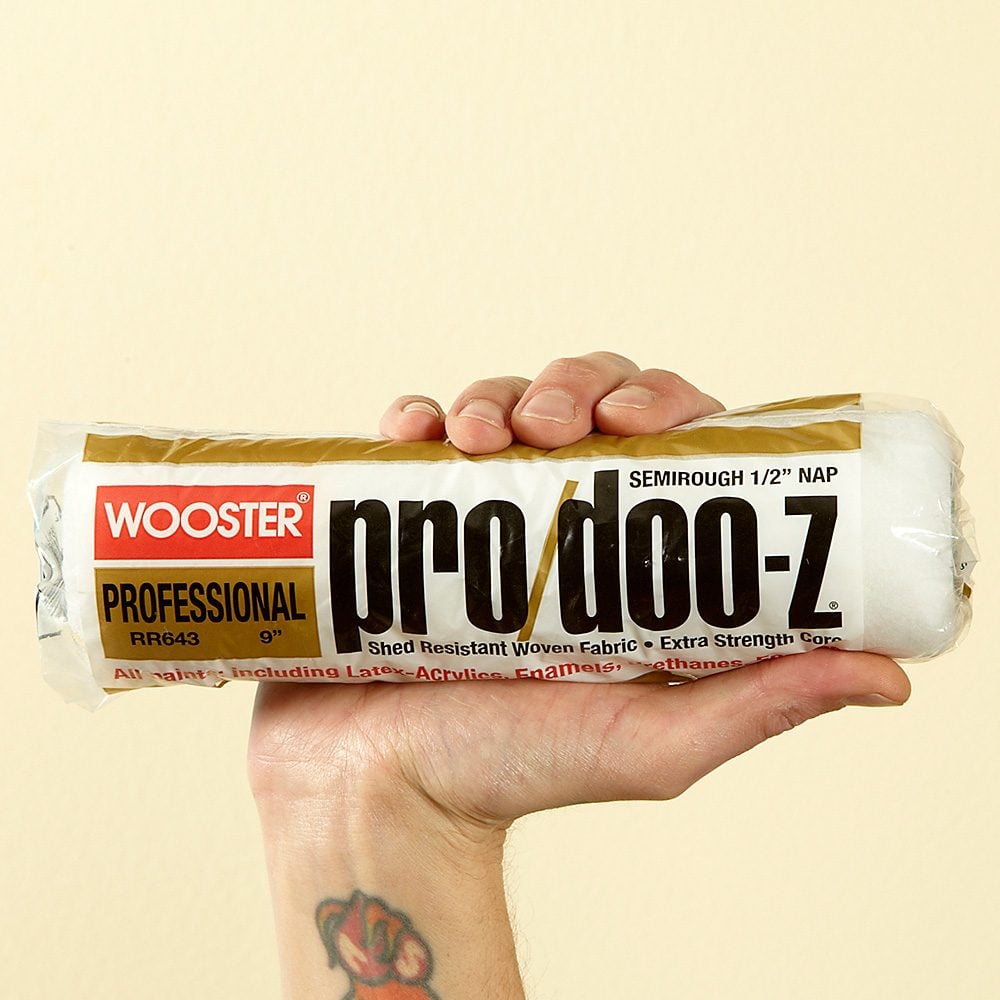
Look for a shed resistant, woven roller
If you’re picky about how your walls look when you’re done rolling on the paint, then you’ll want a way to avoid leaving a trail of roller fuzzies behind. Look for rollers that are labeled “shed resistant woven”. They cost a little more than some covers, but the smooth, lint-free finish is worth it.
6
/
12
Replace your roller tray with a pail
Pro painters almost never use paint trays because they’re awkward to move around, especially when they’re fully loaded with paint, and someone always steps in them. A paint pail solves these problems and more. Pails hold more paint than trays, and you’ll find them easy to move around and tough to step in! As an added bonus, if you use the plastic lining tip we show here, you can practically eliminate cleanup. You’ll find paint pails at home centers and paint stores.
- Line the pail to simplify cleanup: Use thin painter’s plastic to line the pail. Cut a piece of plastic and drape it into the pail. Add your paint and then run a band of masking tape around the perimeter to hold the plastic in place.
- Drain the leftover paint back into the can: When you’re done painting, just bundle up the plastic and pull it out. If there’s leftover paint, hold the plastic over your paint can and slit the bottom with a utility knife to drain the paint back into your paint can.
7
/
12
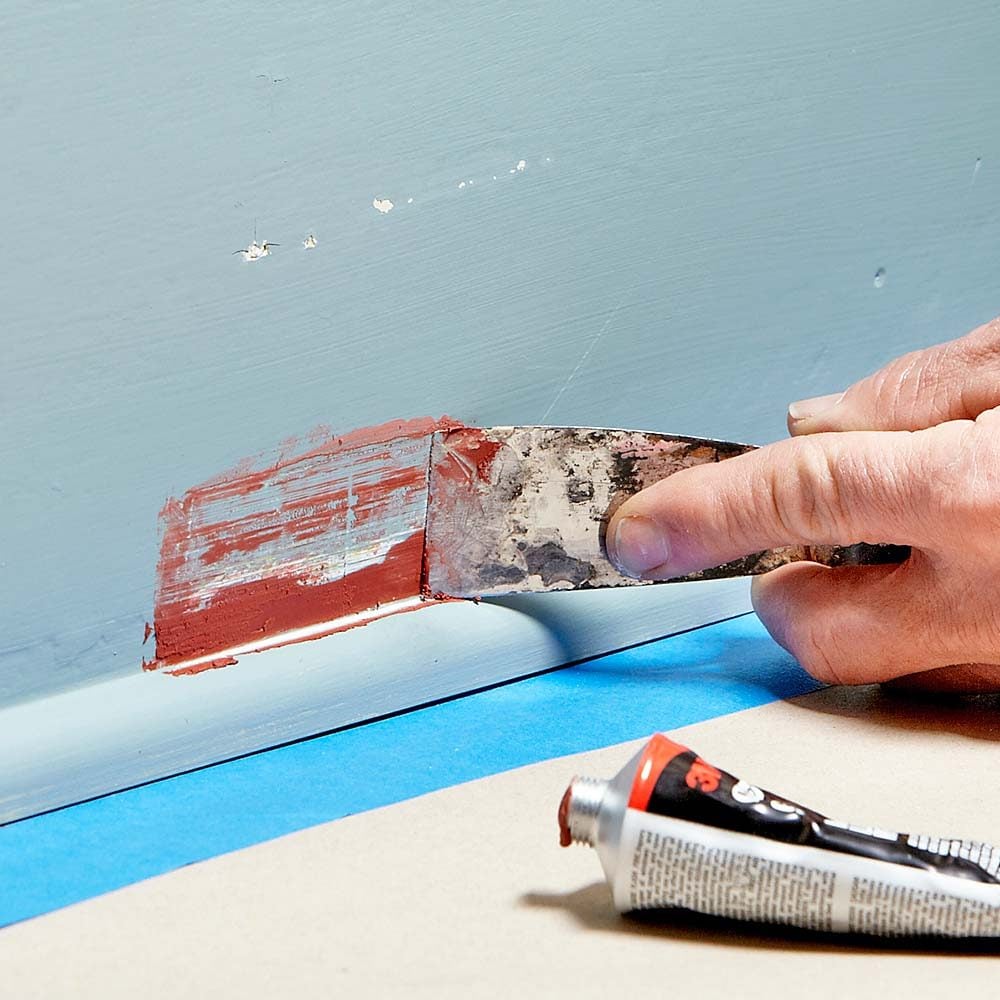
Patch with glazing putty
If you’ve done much auto body repair, you’re probably familiar with glazing putty. On cars, glazing putty is used to fill small scratches and imperfections before painting because it spreads easily and dries quickly and is easy to sand. These same properties also make glazing putty ideal for filling shallow damage in trim. Get a 4.5-oz. tube of 3M Bondo Glazing and Spot putty. You’ll find glazing putty in auto parts stores, hardware stores and some well-stocked paint stores.
8
/
12
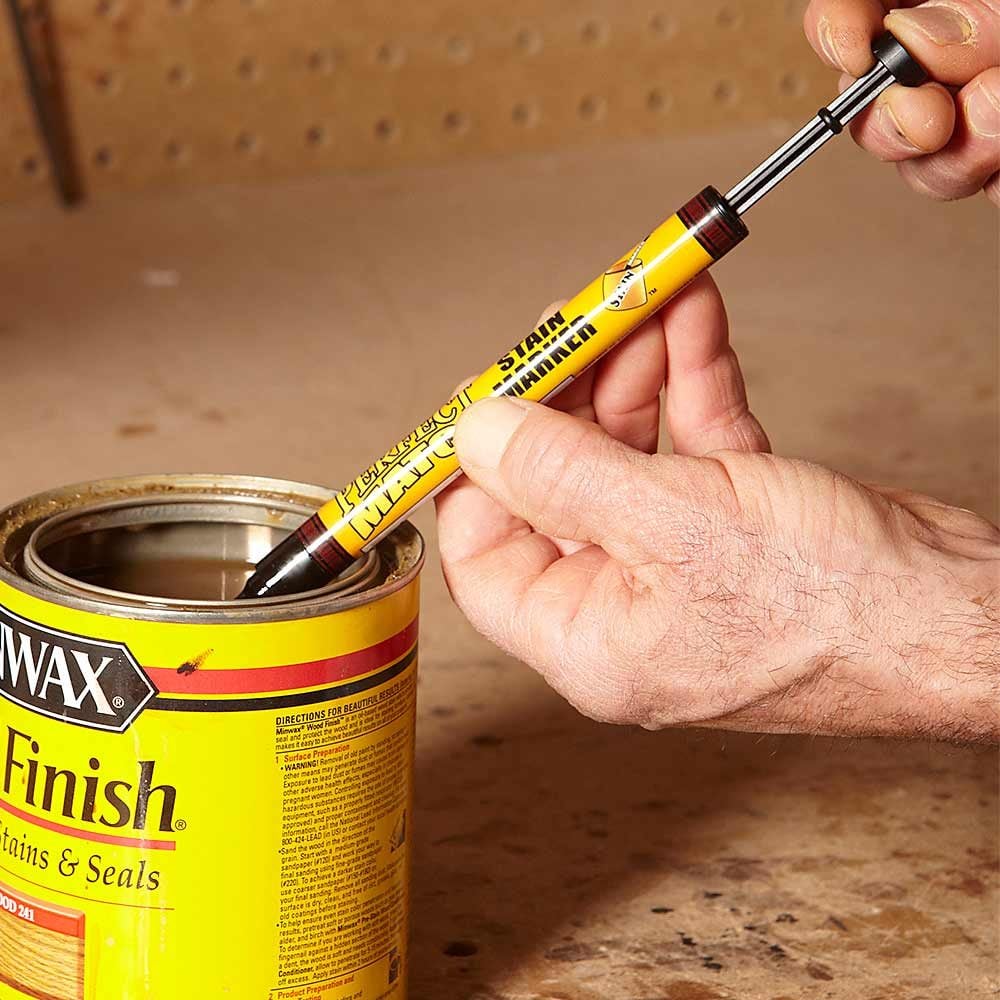
Custom-color stain markers
You don’t have to settle for a stain touch-up marker that’s close enough. Get an exact match by loading this Perfect Match Stain Marker with the same stain you used on the project. the pen loads like a syringe. Remove the felt tip, stick the end of the pen into the stain, and pull the plunger back to suck stain into the pen. Remember to stir the stain first. Replace the felt tip and you’ve got a custom-color stain touch-up marker.
9
/
12

Speedy roller cleaner
The Rejuv-a-Roller is so easy to use that we don’t even mind cleaning roller covers. Instead of buying cheap roller covers and throwing them away, we buy top-quality covers and reuse them. Here’s how it works: Slip the roller cover into the tube and plug the end. Then connect the hose to a faucet and turn on the water. When the water runs clear from the bottom holes, the roller is clean. If you own a roller spinner, you can speed up drying and fluff the roller nap by giving it a quick spin. But it’s not necessary.
10
/
12

Paint may not stick to exterior block wall
Block walls naturally have moisture in them and they’re also very porous, so spraying water on them lets even more water soak into the blocks. Painting block walls seals in moisture, which eventually causes peeling paint.
To fix the problem, first scrape off the loose paint. Then paint the blocks with an exterior latex paint that’s formulated for use with brick or stone. The paint will allow the blocks to “breathe” so moisture won’t build up inside the blocks and cause peeling.
11
/
12

Quick-draw tape dispenser
Quick-draw your masking tape for all those painting prep jobs. Hang a key chain carabiner—the larger, the better—on a belt loop and slide on a roll of tape. Now you can dispense the tape on the go and never waste time searching for the lost roll. This tip works great for electrical taping jobs as well.
12
/
12

How to avoid lap marks
To avoid lap marks, roll the full height of the wall and keep a wet edge. Lap marks are those ugly stripes caused by uneven layers of paint buildup. They occur when you roll over paint that’s already partly dry. (In warm, dry conditions, latex paint can begin to stiffen in less than a minute!) The key to avoiding lap marks is to maintain a “wet edge,” so each stroke of your roller overlaps the previous stroke before the paint can begin to dry.
To maintain a wet edge, paint an entire wall all at once. Start at one end, running the roller up and down the full height of the wall, moving over slightly with each stroke. Move backward where necessary to even out thick spots or runs. Don’t let the roller become nearly dry; reload it often so that it’s always at least half loaded. Keep the open side of the roller frame facing the area that’s already painted. That puts less pressure on the open side of the roller, so you’re less likely to leave paint ridges.