
How to Build a Platform Deck
Updated: Apr. 25, 2023
A detached, ground level deck is the easiest way to add useful space to your backyard.

Intermediate
Introduction
If you want to expand your outdoor living space, a ground level deck might be your best option. Since it’s not connected to a house, it can go anywhere in your yard and doesn’t require deep footings. Because it rises just inches above ground, it doesn’t need stairs or railings. All together, these factors make it a cost-cutting, labor-saving alternative to standard decks and patios. It’s simple, too. If you have a little building experience, you can do it in a weekend!Materials Required
- 1-1/2" positive placement nails (1 box)
- 12" x 12" cardboard boxes (20)
- 1x6 x 16' grooved deck boards (23)
- 1x6 x 20' solid deck boards (4)
- 2x6 double joist hangers (3)
- 2x6 joist hangers (64)
- 2x6 x 12' pressure-treated lumber (21)
- 2x6 x 16' pressure-treated lumber (6)
- 3-1/8" ACQ framing nails (1 box)
- 3-1/8" construction screws (1 box)
- 3/4" x 12" x 12' fascia boards (5)
- 3x3 inside corner plates (5)
- 60-lb. bags of concrete mix (20)
- Adjustable post bases (Simpson EPB44PHDG) (13)
- Hidden fasteners system
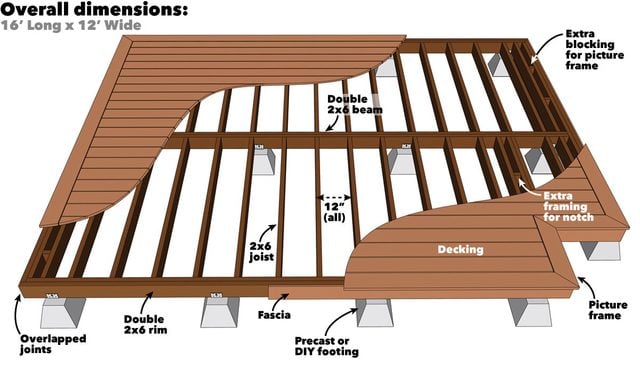
Start with a plan
You can follow our platform deck plans or create your own. Here are some things to keep in mind when building a ground level deck:
- A platform deck can be any shape, but basic rectangles are easiest. The fireplace notch in the corner of our deck made the whole structure a bit more complicated.
- Your deck can be any size. But if you’re using 2×6 framing material as we did, place footings no more than 5 ft. 11 in. apart, and limit joist length to no more than 6 ft. 8 in.
- This ground level deck is “picture framed” (see Photo 11). The frame hides the cut ends of the decking but also adds some labor, such as miter cuts and blocking to support the decking. A simpler approach is to raise the fascia so it covers the ends of the decking.
- The decking makes up most of the cost. The total materials bill for this deck was about $5,000. We chose Fiberon’s Horizon decking because it’s super tough, beautiful and will stay beautiful with just occasional cleaning. Inexpensive options such as pressure-treated decking could cut the total cost in half, but they will require refinishing every few years. Cedar, pressure treated and composite are the most common decking materials.
From barren space to favorite place
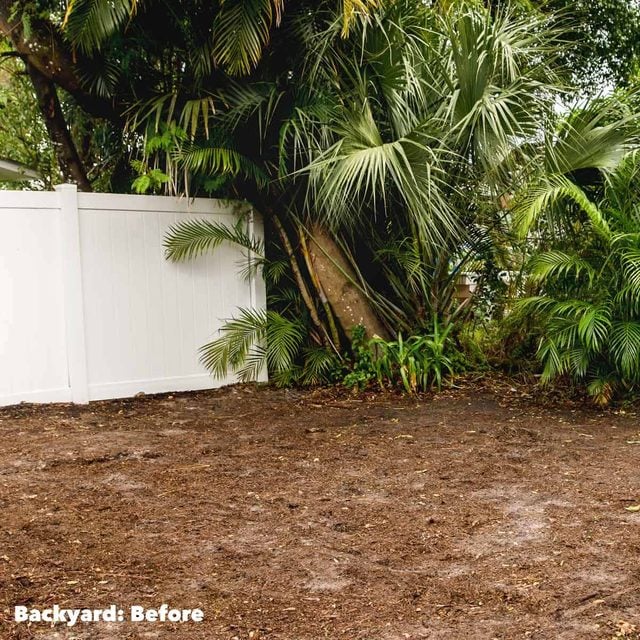
Four years ago, Jenna and Jake bought a small house and got . busy turning it into a home. So far, they’ve built a garage and a chicken coop from the ground up and fixed up the front porch after Hurricane Irma toppled a tree onto the house.
Like a lot of homeowners, they wanted more living space, but weren’t ready to build an addition. The solution was in a neglected corner of their backyard—the perfect spot for an outdoor living room based on a simple platform deck. I hopped a plane to Florida to help them build it. Three days later we were sitting on this finished deck, happily complaining about our sore muscles.
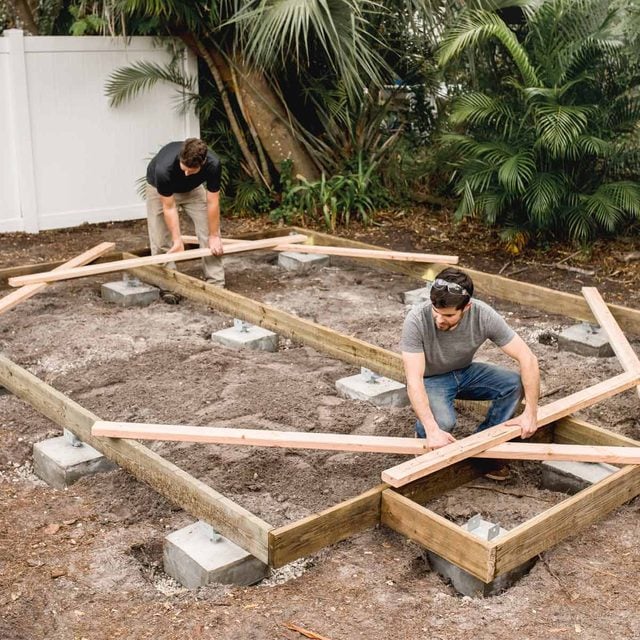
A simplified layout method
The standard way to position deck footings involves a maze of stakes and strings, endless measurements and lots of head-scratching. Instead, Jake and I assembled the perimeter (or “rim”) of the deck, squared and braced it (Photo 1). Then we used it as a template to mark the footing locations (Photo 2). No strings, no guessing, and we had everything laid out and ready for digging in less than an hour.
Then we moved the (heavy!) rim aside and got to work digging the footing holes (Photo 3). I was anticipating lots of roots in the sandy Florida soil, but the digging was easy. We made sure the holes were deep enough to hide our footings and wide enough for us to be able to shift them to catch the frame when we moved it back into place.
Easy, adjustable footings
You may be able to buy precast footings, but we were unable to find any in the area. Being DIYers, we made our own by pouring concrete into 12 x 12-in. cardboard boxes ($2 at home centers). Later, we drilled holes in the concrete to accept the adjustable post bases (Photo 4).
Once it’s in place, the post base is adjustable with the turn of a nut. This allows you to speed through setting the footings instead of leveling them all. Before setting the rim onto the post bases, we lined up the brackets and made sure the beam and opposite rim joist were parallel (Photo 5). We moved the rim back into place and shifted the blocks to fit the frame into the post bases (Photo 6).
Complete the rim
With the tricky parts of the job done, Jake, Jenna and I doubled up the rim by adding an outer rim joist that overlaps the joints of the inner rim joists (Photo 7). A cutting list is helpful, but in this situation, I always measure and cut each piece to fit. We fastened the outer rim to the inner rim with three nails every 12 in. It was Jake’s first time using a framing nailer, and the first few squeezes of the trigger sent two or three nails in at once. After I showed him how to avoid doing this, he made sure Jenna had a turn. As all my experience teaching women and girls would have predicted, Jenna outdid Jake and nailed off the rest of the outer rim in perfect rows with no misfires. They both learned that a framing nailer isn’t as intimidating as it looks.
Level the rim
You can level a deck with a standard level or a high-tech laser level. But I went low-tech with a water level, which is fast, simple and super accurate. We used a store-bought version that connects to a garden hose ($12 online), but any type of clear tubing will work. To check for level, set the water line at one corner of the rim and tack the tube into place. Then move the other end of the tube from point to point, raising or lowering the post bases (Photo 8).
Hang the joists
Composite decking isn’t as rigid as wood, so we placed joists every 12 in. instead of the standard 16 in. Jenna lined up the joists while I toescrewed them from the top (Photo 9). It’s easiest to start the screws into the joists before you hold the joists in place. Then I attached the joist hangers with a positive placement nailer (Photo 10). To support the picture-frame decking, we added an extra joist about 3 in. inside the rim joist and blocking every 16 in. in between.
Deck it!
To mark the picture frame, we snapped chalk lines 3-1/2 in. from the outer edge of the rim. This accounts for 3/4-in.-thick fascia and allows the decking to overhang the fascia by 1-1/4 in. Taking measurements from the intersections of the chalk lines, we mitered the boards and placed them around the perimeter (Photo 11).
When the picture frame is in place, you can start filling in the deck boards. We used hidden fasteners (Photo 12). During my planning, I had carefully calculated the widths and spacing of the deck boards so they would fit perfectly inside the picture frame. But when Jake and I got to the last few boards, I realized we were going to end up about 1/2 in. past our picture frame. After I got over the shame, we fired up the table saw and cut 1/2 in. off the width of the board.
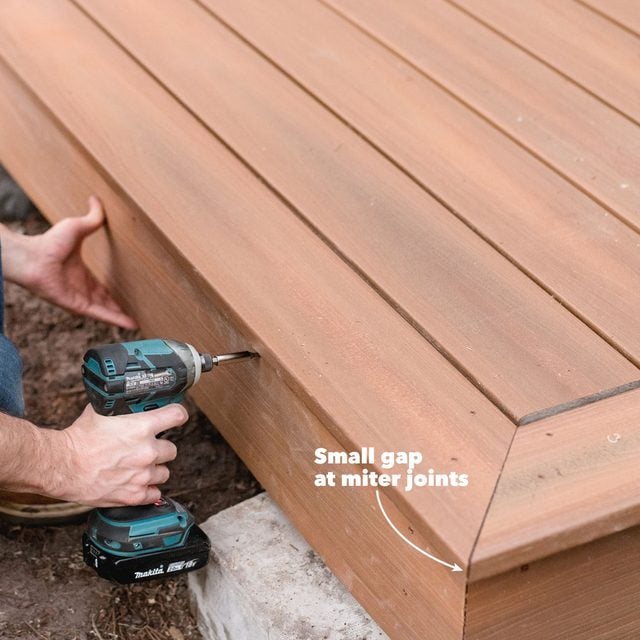
Finish up with fascia
Before we could enjoy the deck, we needed to install the fascia board to cover the rim joists. Fascia is installed with mitered corners with a slight gap in between and fastened with the same type of composite screws we used on the picture-frame boards (Photo 13). With an extra hand, installing these was a snap.
When everything was put together, we relaxed and celebrated a job well done. In true DIY fashion, Jake wouldn’t let me throw anything away—he plans to use some decking cutoffs to build a tabletop.
Project Plans
Project step-by-step (13)
Build and square the rim
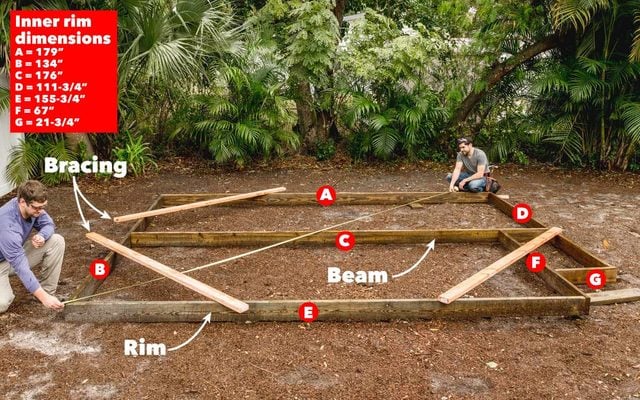
Assemble the rim joists, which form the perimeter of the deck, and add the beam. Take diagonal measurements to square the rim, then brace it with 2x4s. We added an extra 2×4 to act as a handle for moving the rim later.
Mark the footing locations

Position the rim and then mark for the footing holes with spray paint. We placed footings about 5 ft. apart and positioned them so they wouldn’t interfere with joist installation later.
Dig the footing holes
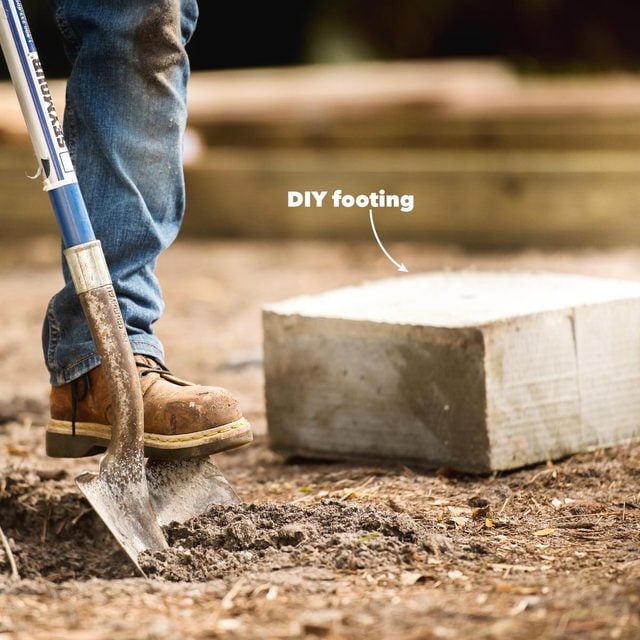
Make the holes about 10 in. deep and a couple inches oversized so you can adjust the location of the footing. Add 2 in. of gravel and set the footing in the hole.
Insert the post bases
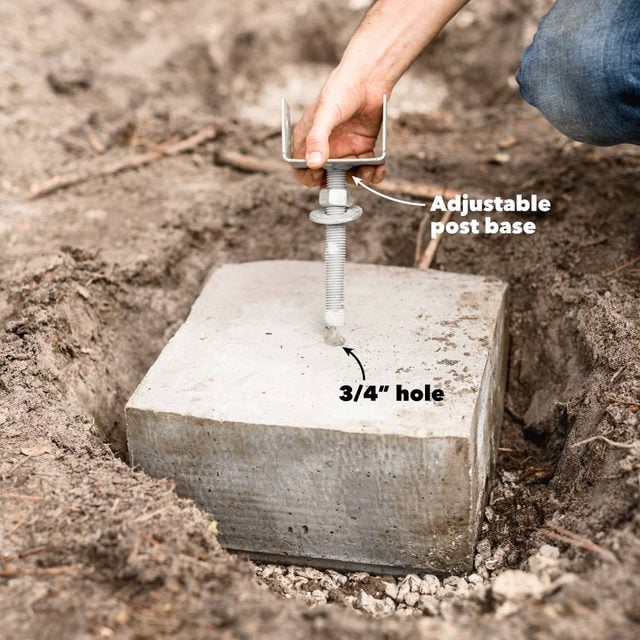
Place the post bases in the hole in the footings. Start with bases adjusted to their lowest height. Later, you’ll turn the nut to raise or lower the bracket.
Line up the footings
Pick out straight boards to line up the brackets. Make sure the footings form straight lines and that the rows of footings are parallel to one another.
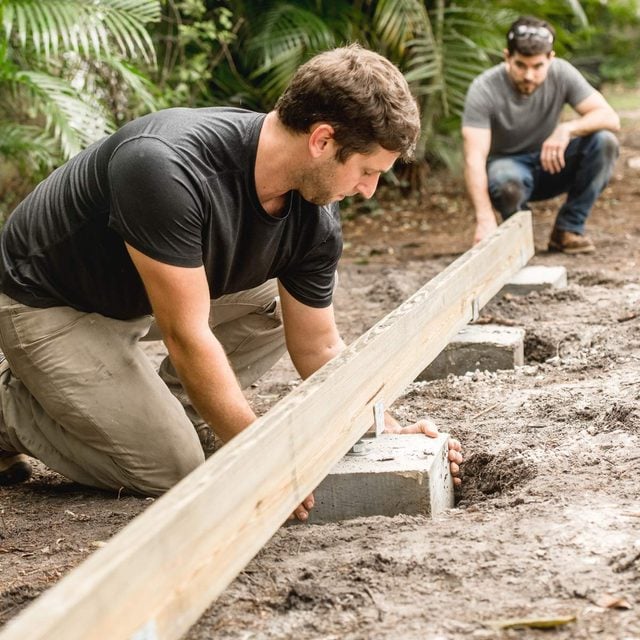
Set the rim onto the footings
With a few strong helpers, move the rim back into place. Lift the frame and move the footings so the framing falls into the brackets.
Double up the rim

Nail on the outer rim joists. Doubling up the rim will make the deck very sturdy. You may need to shift the footing slightly to fit.
Level the rim
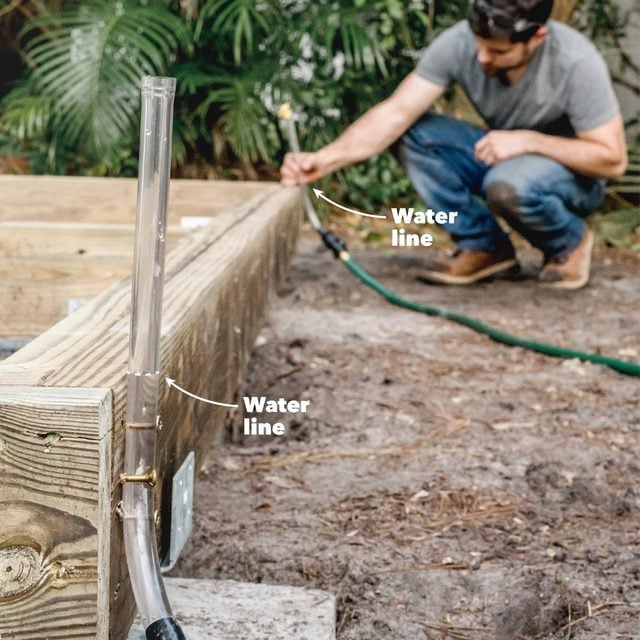
Be sure the framing is level before adding the joists. We used a “water level,” which is clear tubing connected to the ends of a garden hose. Mount one end on a corner of the rim, then check the height of the water to level the other corners. Once it’s level, nail the brackets to the rim joists.
Tack the joists into place
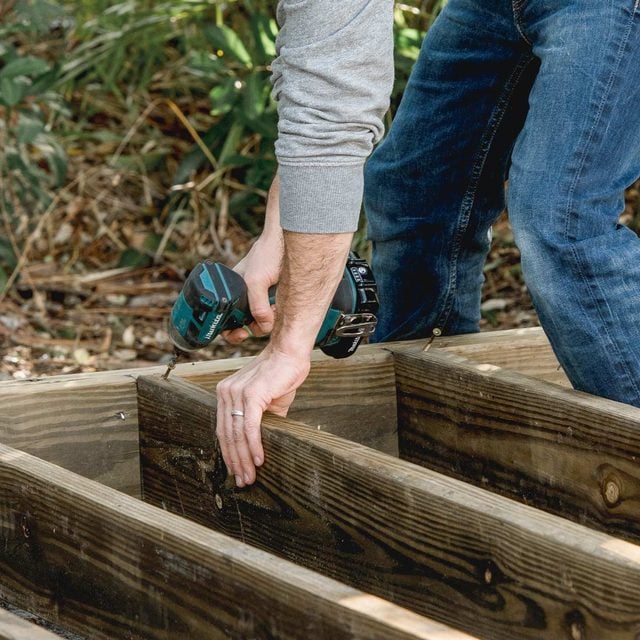
Fasten each joist end with a screw driven at an angle. The screw will hold the joist in position so you can install joist hangers, which provide the real support.
Add joist hangers
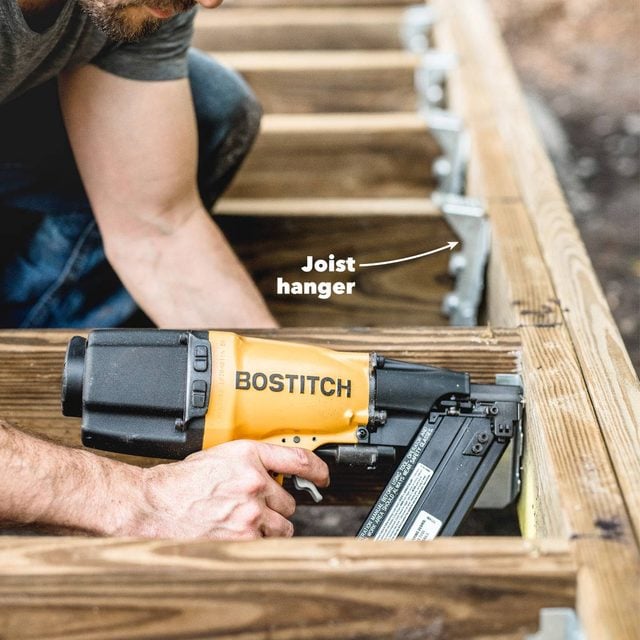
Make sure the joist hangers hug the joists and that all nail holes are filled. A “positive placement” nail gun makes quick work of this job and saves your elbow.
Picture-frame the deck
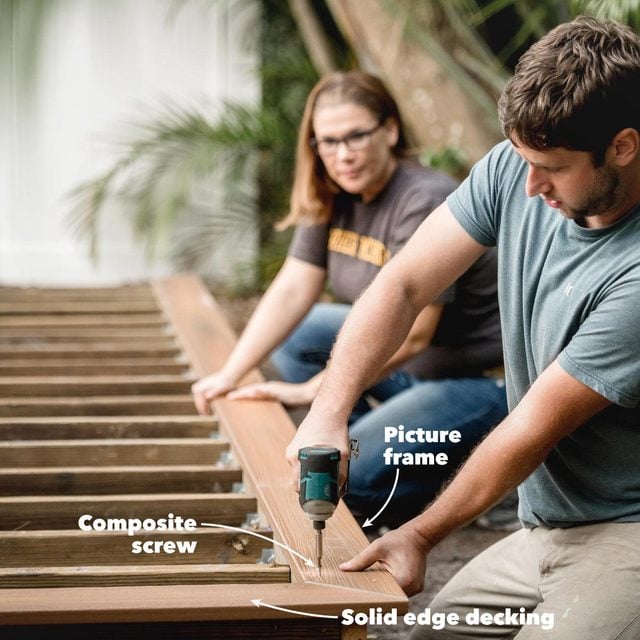
Install a perimeter frame to hide the cut ends of the decking. Miter these deck boards and fasten them with screws. You’ll have to leave gaps for expansion; check the decking manufacturer’s instructions.
Attach the decking
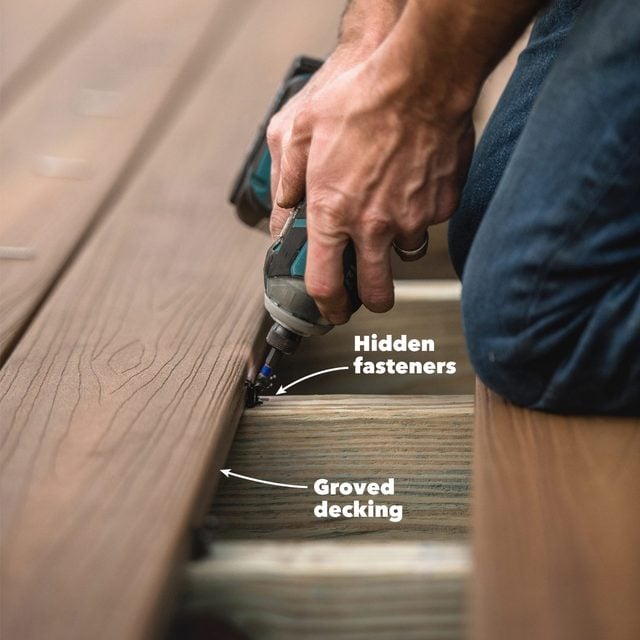
We went with hidden fasteners for our decking. These clips fit into grooves and are screwed to the joists.
Finish with the fascia
Cover the rim joists with a fascia that matches the decking. Ours was 12 in. wide, so we had to cut each board to fit between the decking and the ground. Learn how to build a painting platform.