
How to Make a DIY Kayak Rack

Updated: Jul. 13, 2023
Need a kayak storage solution? This rack costs less than one you can buy, and it's easy to build. We'll walk you through it step by step.
2 to 3 hours
Beginner
Around $60
Introduction
Kayaks bring hours of fun, but storage can be a problem. They're big and awkward, and leaning them up against the garage or sticking them in the corner of your shed is hardly a permanent solution. If you've been thinking about buying a rack for your kayaks or other paddle boats, why not make one instead?
This project could not be easier. Dimensional lumber, deck screws and a few tools are all you need to get those kayaks up off the ground and out of the way. I have a 10-foot kayak, but I'm thinking of upgrading. I built my kayak rack as separate supports, so I can change the center span distance to handle a larger boat later. This design also makes the rack easier to move.
This two-kayak rack features sturdy 4x4 posts for uprights, 2x6s for the bottom racks and 2x4s for the top racks. If you have three or more boats, this design easily modifies — just make the posts taller and/or space the racks out differently. If you don't want the rack in two pieces, add crossbars to the back.
In just a few hours, you'll wonder why you didn't do this sooner. Let's go!
Tools Required
- 1/8-in. drill bit
- Drill or impact driver
- Miter saw
- Pencil
- Speed square
- Tape measure
- Utility knife
Materials Required
- 2x4 dimensional lumber - 8-ft. long (2)
- 2x6 dimensional lumber - 8-ft. long
- 3-in. deck screws
- 4x4 post - 8-ft. long
- Wood glue or all-purpose glue
- Yoga mat; pool noodle or other padding
Project step-by-step (6)
This project was featured on At Home with Family Handyman: Saturday Morning Projects.
Cut the lumber
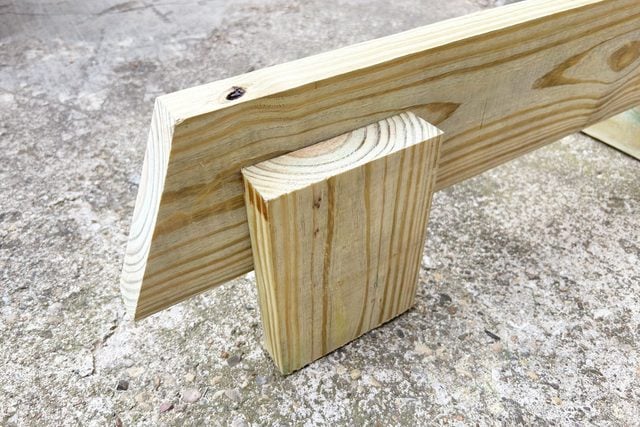
- Cut the 4×4 in half.
- Cut the 2×6 into:
- Two 32-in. pieces, mitered 22.5 degrees on one end (bottom racks).
- Two 7-1/2-in. pieces (bottom rack feet).
- Cut the 2x4s into:
- Two 28-in. pieces, mitered 22.5 degrees on one end (top racks).
- Four 18-in. pieces, mitered 22.5 degrees on both ends (upright feet).
- Two 20-in. pieces, mitered 45 degrees on both ends (cross braces).
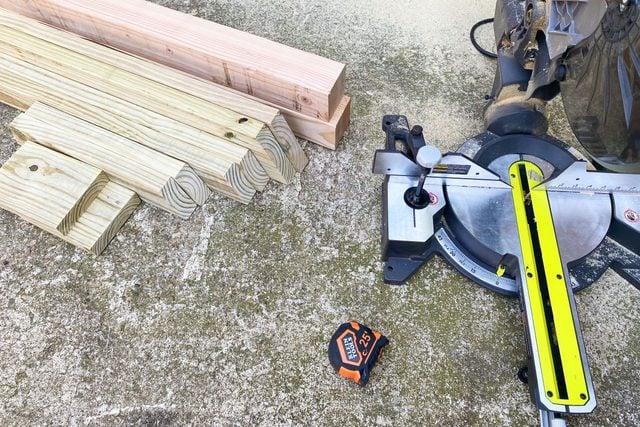
Note: When mitering 2×4 cross braces and 2×4 feet, point both cuts inward, like boats (\__/).
Make the uprights
- Stand up the 4×4 post.
- Place two 18-in. 2×4 feet on either side of the post, long-side down. Mark top of 2x4s on post with pencil.
- Lay the post flat and center one base support flush with pencil line and end of the post.
- Attach with deck screws.
- Flip the post over and repeat on opposite side.
- Repeat on the other post.
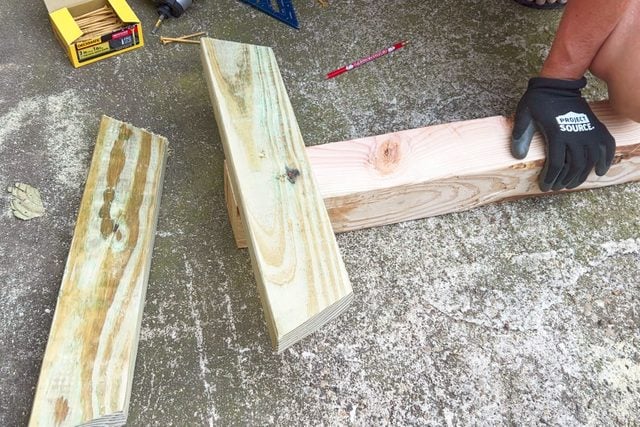
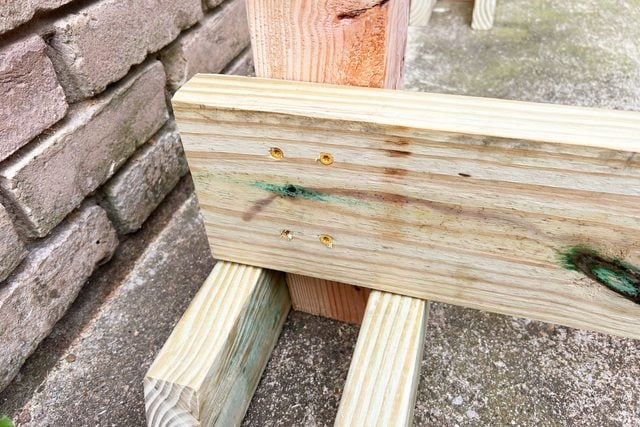
Make the bottom racks
- Measure 3-1/2 in. from one end of the short 2x6s and mark with pencil.
- Draw lines on marks with a speed square, wrapping the line around the sides.
- Lay the longer 2×6 on a table or the ground and align the foot near mitered end.
- Line up pencil marks with the bottom edge of 2×6.
- Attach the foot with deck screws.
- Repeat on the other 2×6, making them mirror images of each other so each foot will be inside the 2×6 when complete.
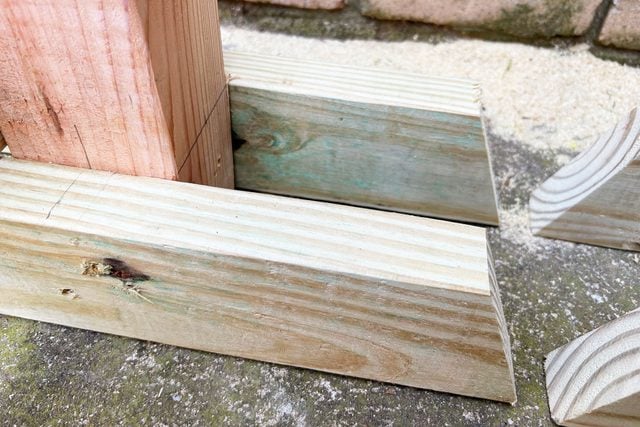
Attach bottom racks to the posts
- Stand the 4×4 posts upright, side by side. Align so the 2×4 feet are pointing outward and will be perpendicular to the kayak support racks.
- Place one 2×6 rack (non-foot end) to the outside of one post, resting on both 2×4 feet.
- Attach to the post with deck screws.
- Repeat on other post, also placing rack to the outside of post.
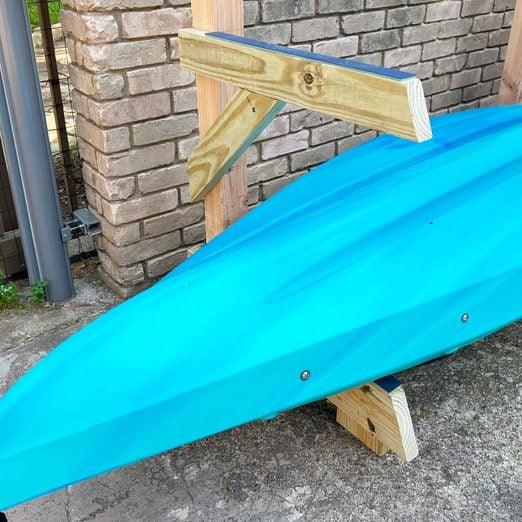
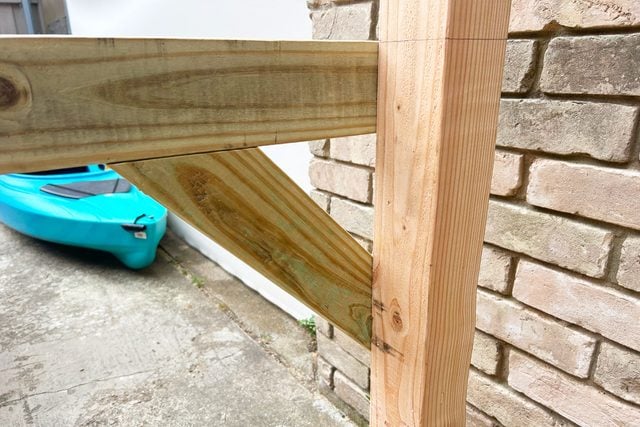
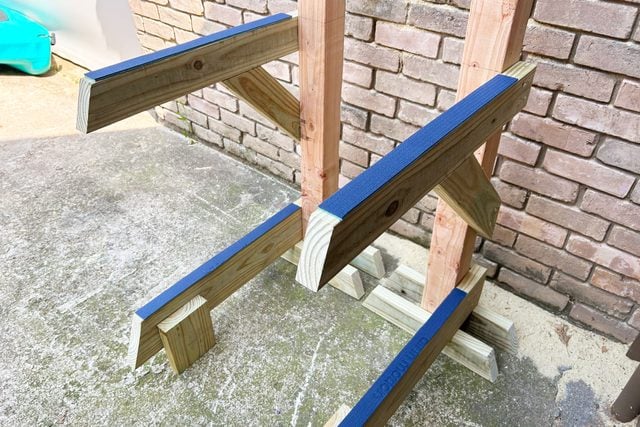
Add the top racks
- Measure 20- to 24-in., or other distance dependent on your kayak size, from the bottom racks. Mark the posts with a pencil.
- Attach 2x4s on your marks at a 90-degree angle to the posts, on the outside.
- Fit cross braces under the racks and screw to the side of post.
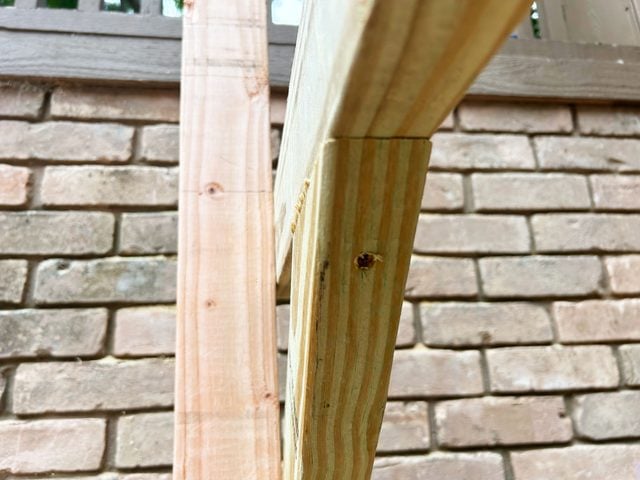
- Carefully screw braces to underside of racks.
- Drill pilot holes to prevent narrow edges of wood from splitting.
Add padding and kayak
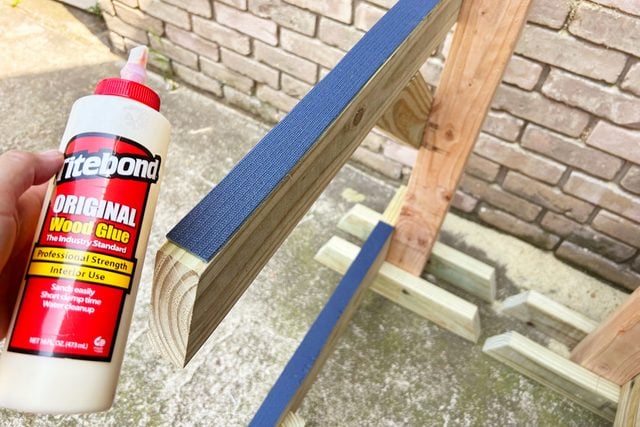
- Cut padding into four pieces that will fit on racks.
-
- If using a yoga mat, cut strips equal to the width of 2×4 rack arms with a utility knife.
- If using a pool noodle, carefully cut lengthwise so the noodle can be fitted over the 2x4s.
- Glue padding to the rack arms. Avoid staples so you don’t scratch your kayak.
- Position racks approximately five feet apart for a 10-ft. kayak. Adjust spacing as needed for larger boats.
- Store kayaks deck-side down so rain, snow and leaves don’t accumulate in the cockpit.

At Home with Family Handyman is streaming now on XUMO, The Roku Channel, LG Channels, Plex, fuboTV, Sling Free and the Family Handyman app, available on iOS, Apple TV, Android, AndroidTV, FireTV and Roku devices. And if you don’t see your preferred streaming option on the list, additional streaming platforms will be available soon.