
Convertible Miter Saw Station Plans
Updated: Jun. 30, 2023
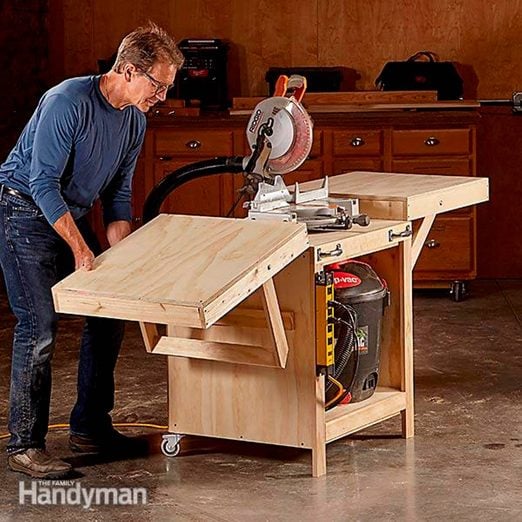
A huge work surface when you need it, compact storage when you don't
A full day
Intermediate
$51–100
Introduction
Storing a miter saw can be tough. Most people don't have the space to leave it set up with long support tables. Storing it under the workbench is a pain: You gotta dig it out, set it on sawhorses and then figure out how to prop up stuff while you're cutting. A high-end manufactured stand is great-but probably costs as much as your miter saw. So what are you going to do? Build this simple miter saw cabinet!Tools Required
- Circular saw
- Drill/driver - cordless
- Miter saw
Materials Required
- 1-1/4-in. screws
- 1-5/8-in. screws
- 1/4" x 4' x 4' pegboard (1)
- 1x3 x 10' pine (4)
- 1x4 x 10' pine (2)
- 2-in. screws
- 24" piano hinges (2)
- 3-3/4"-tall casters (2)
- 3/4" x 4' x 8' plywood (1)
- 5/16" locknuts (4)
- 5/16" washers (8)
- 5/16" x 2' carriage bolt (4)
- Casters (3-3/4" height) (2)
- Wood glue
Project step-by-step (10)
Build four frames and assemble the cabinet
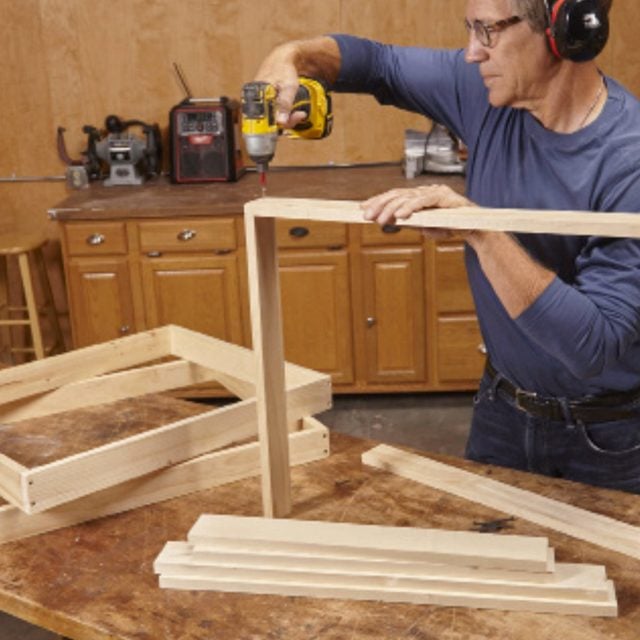
One will form the top of the cabinet and another will form the bottom. The two wing frames must be sized to suit the height of your miter saw’s table.
Cut the plywood panels
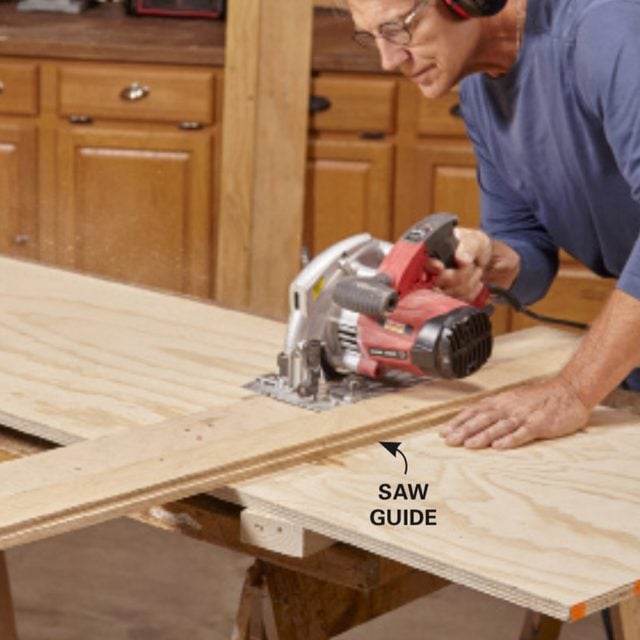
With homemade saw guides, perfect cuts are a cinch.
Assemble the cabinet
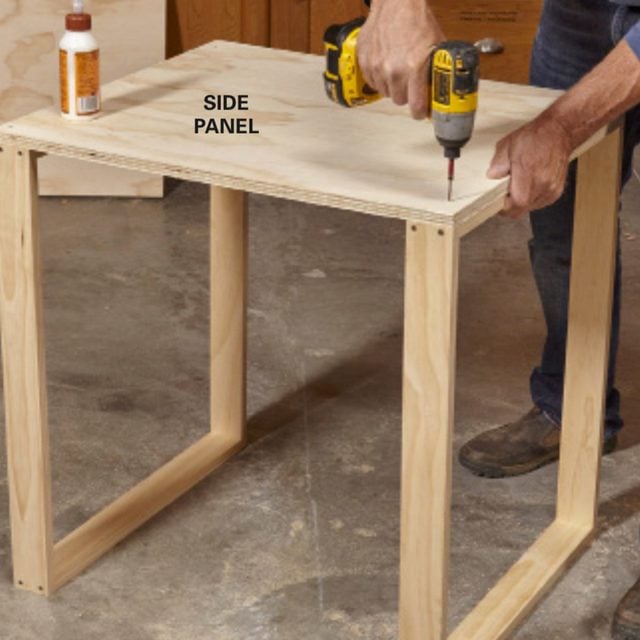
Secure the side panels to the top and bottom frames using screws and glue.
Add the top and bottom panels
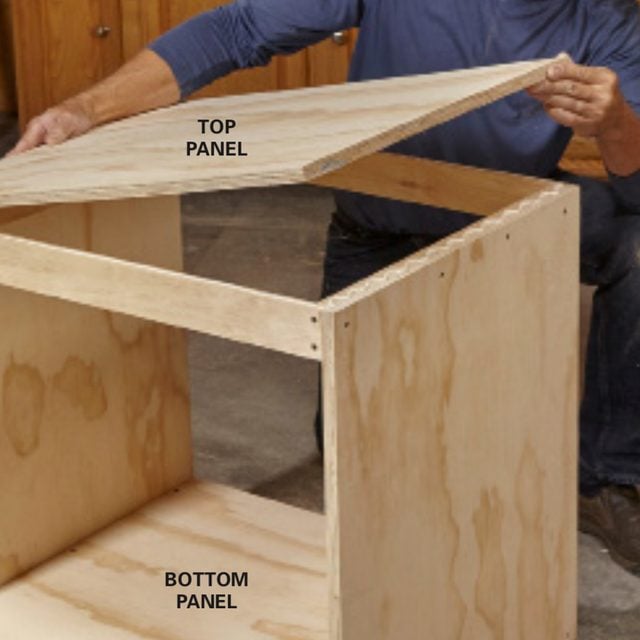
Carefully align the panels with the edges of the frames to ensure that the cabinet is square.
The heart of this miter saw stand is four frames: the top, bottom and two wings. They’re all the same length and width, BUT the top and bottom boxes are made from 1x3s (A, B) while the two wings are made from 1x4s (C, D) ripped to width based on the height of your miter saw’s table. To determine the width of those boards, measure the height of your miter saw’s table, then subtract 3/4 in. (the thickness of the plywood wing panels). Use a table saw or a circular saw and guide to rip those boards to width.
Cut the boards to length on a miter saw (don’t you wish you had a convenient place to do that?), then use glue and screws to assemble the frames (Photo 1). Predrill holes at the ends of the long frame sides (A) so they don’t split when screws are installed.
Use a saw guide to cut your plywood. (Learn how to make your own saw cutting guide here.) All the parts are 24 in. wide, so begin by ripping a full sheet down the middle. Cut the two side panels (E) as shown in Photo 2. Position the top and bottom frames on the floor and install the sides (Photo 3) using glue and screws. Cut and install the bottom (F) and top (G) panels as shown in Photo 4.
Cut the back (M) to size and install it. Make sure the cabinet is square while securing the back. We used pegboard to allow better air circulation (and maybe even provide a little extra storage space), but you can use any type of panel that’s at least 1/4 in. thick.
5 Fantastic Features
- The support wings, when extended, give you 7 ft. of working room. When closed, the cabinet takes up only 33 in.
- The casters in back allow you to easily move the cabinet, while the legs in front keep it rock-solid when you’re using the saw.
- There’s a convenient space for your shop vacuum-super handy if that’s your miter saw dust collector.
- There’s plenty of storage space for blades, wrenches and other miter saw gear.
- At under $100, it costs far less than most store-bought stands-and has features they don’t.
Give it wings and feet
Attach the face frame
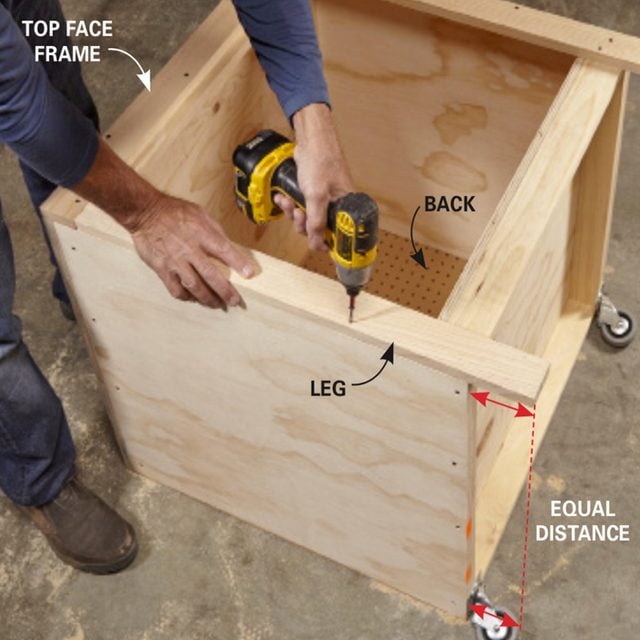
Cut the face frame legs so they extend beyond the bottom of the cabinet the same distance as the casters. Also install the cabinet’s back.
Secure the wings
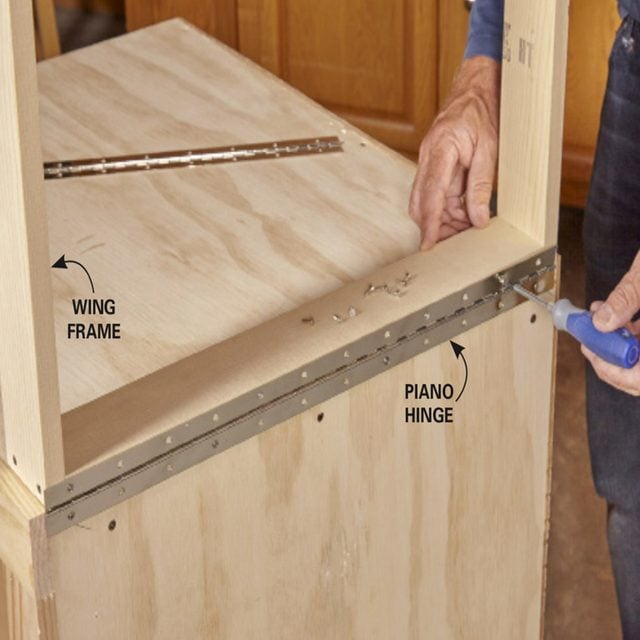
Install the hinges with the wing positioned as shown to give you the right hinge height.
Mount the brackets
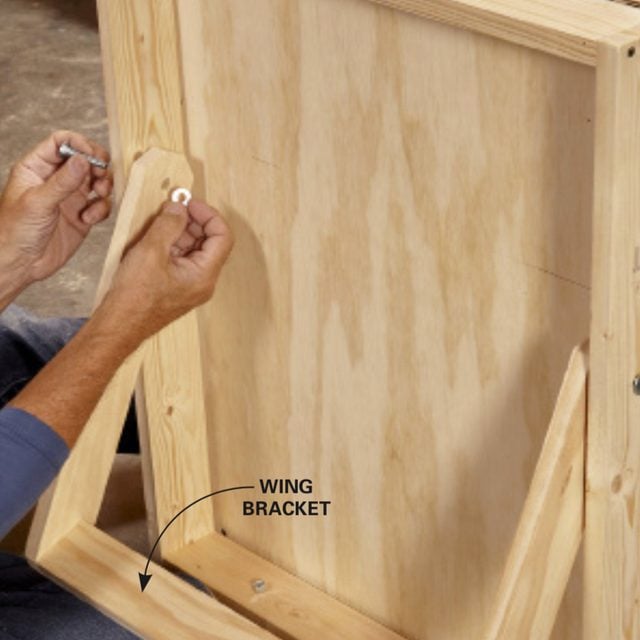
Cut the wing brackets and position the holes as shown in Figure A.
Position the cleats
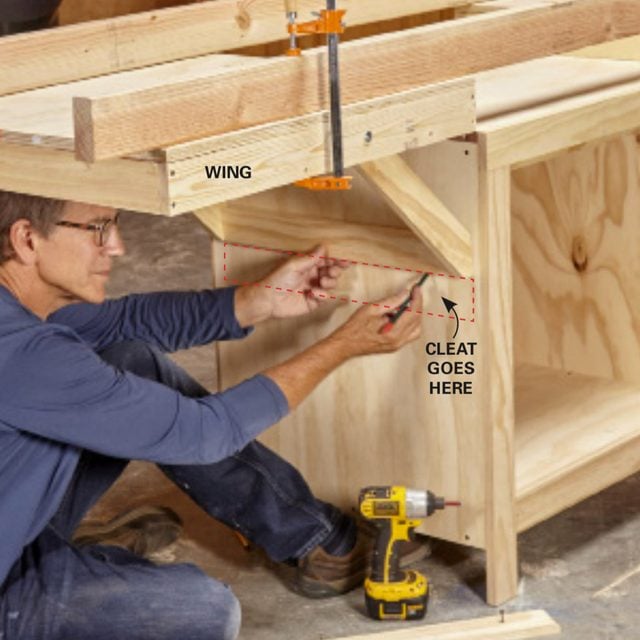
Secure the wings in the raised position using straight 2x4s and clamps, then mark the bottoms of the brackets. Position your cleats 1/4 in. above this mark.
Turn the cabinet upside down and install the two back casters. Use swivel or fixed versions depending on your needs. Lay the cabinet on its back and install the top face frame (J). Install the two face frame legs (K) as shown in Photo 5, cutting them so they extend past the bottom of the cabinet the same distance as the casters (in our case, 3-3/4 in.) Finally, install the bottom face frame (L), keeping it flush with the top of the plywood so the inside of the cabinet is easy to sweep out.
Secure the ‘wing frames’ to the cabinet using 24-in. piano hinges (Photo 6). Set the wing frames on the cabinet while installing the hinges to give you the right hinge position (you want the hinge knuckle flush with, or slightly above, the top of the plywood). Cut the wing brackets (N) and rungs (P), then nail them into a U-shape. Drill 3/8-in. holes through the wing brackets and 5/16-in. holes in the sides of the wing frames as shown in Figure A, then connect them with 2-in. bolts (Photo 7). Install the wing panels (H) using glue and screws.
Lift the wings and support them in the open position by clamping two straight 2x4s to them as shown in Photo 8. This will give you the approximate correct ‘in-use’ position for the wings. Swing the wing brackets against the side of the cabinet and mark a line along the bottom (Photo 8). Swing the supports out of the way and install the cleats 1/4 in. above these marks; this extra 1/4 in. gives the wings the lift needed to create a flat surface. Periodically check the wings to make sure they’re even with each other and adjust the cleats up or down as necessary.


Final touches
Accessorize your cabinet
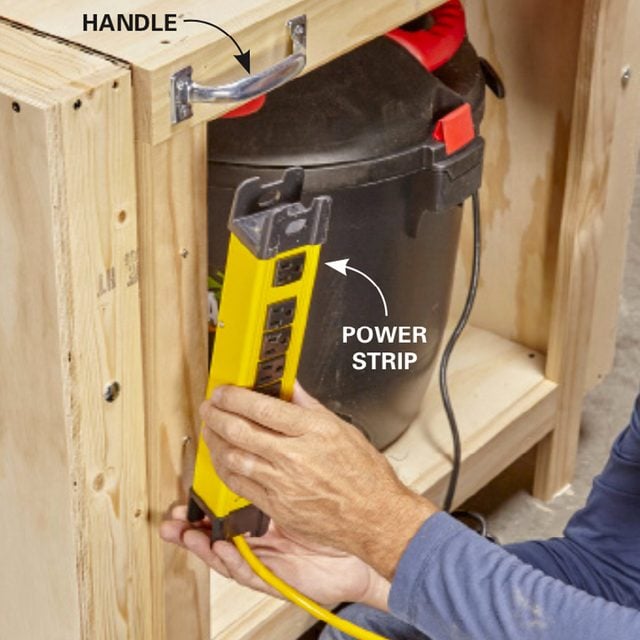
Add handles and a power strip. If you want to use a vacuum for dust collection, cut a hole in the back for the hose and cord.
Apply two coats of polyurethane to protect the wood, if desired. Cut a hole in the back of the cabinet for your shop vacuum hose and cords. Secure the handles to the front for moving the cabinet. Secure a power strip to the face frame so you can plug your saw, vacuum and even a work light into one convenient place.
Retrofit a Miter Saw With a Laser