
Miter Saw Table
Updated: Mar. 10, 2022
This simple miter saw table has some great advantages and takes less than an hour to make.
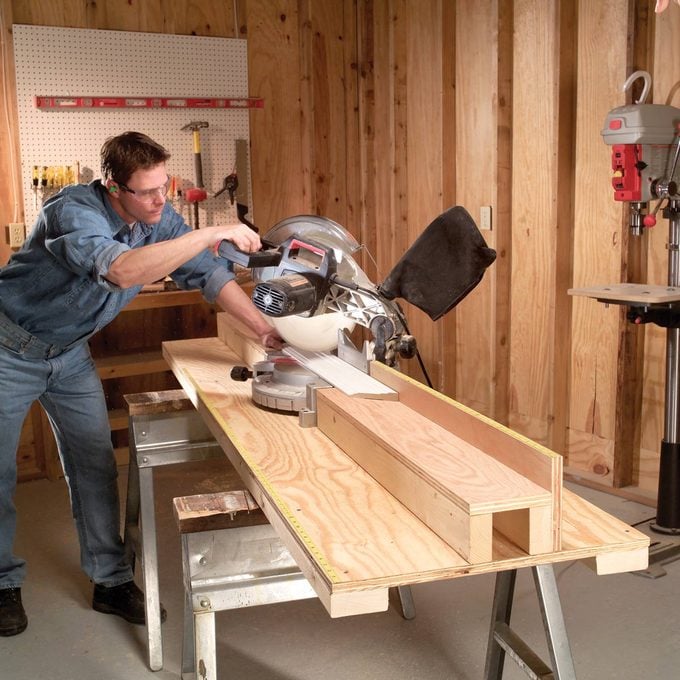
This simple miter saw table designed by David Radtke has some great advantages and takes less than an hour to make. Just cut a 21-in. x 96-in. piece of 3/4-in. plywood and screw it to a pair of 8-ft. 2x4s as shown for the base. Mount the miter saw to the base with screws or bolts. Next measure the height of the saw’s base and make outfeed tables to the right and left of the saw. Then align a fence with the saw’s fence and screw it to the back of the outfeed tables.
Here’s how to make the table even more efficient. Buy two adhesive-backed measuring tapes (one right and one left) and trim and stick them to the tops of the fence for making cutoffs without fumbling for a tape measure. Then buy another and align it with the end of the large base for measuring and marking miters without a standard tape measure.
You can buy Biesemeyer or Delta 6-ft. left-to-right or right-to-left adhesive-backed measuring tapes at tools.ontheweb.com. The right-to-left (part No.79-070) and left-to-right (No. 79-069) tapes cost $9.99 plus shipping. They’re also available at Ballew Tools. (800-288-7483) for $9.45 plus shipping (same part numbers). You can also buy 12-ft. lengths for long tables.