
47 Handy Hints for Your Workshop

Updated: Oct. 06, 2023
From tool hacks to genius storage ideas, these handy hints will help you save money, complete projects more efficiently, and definitely have more fun in your workshop.
1
/
46
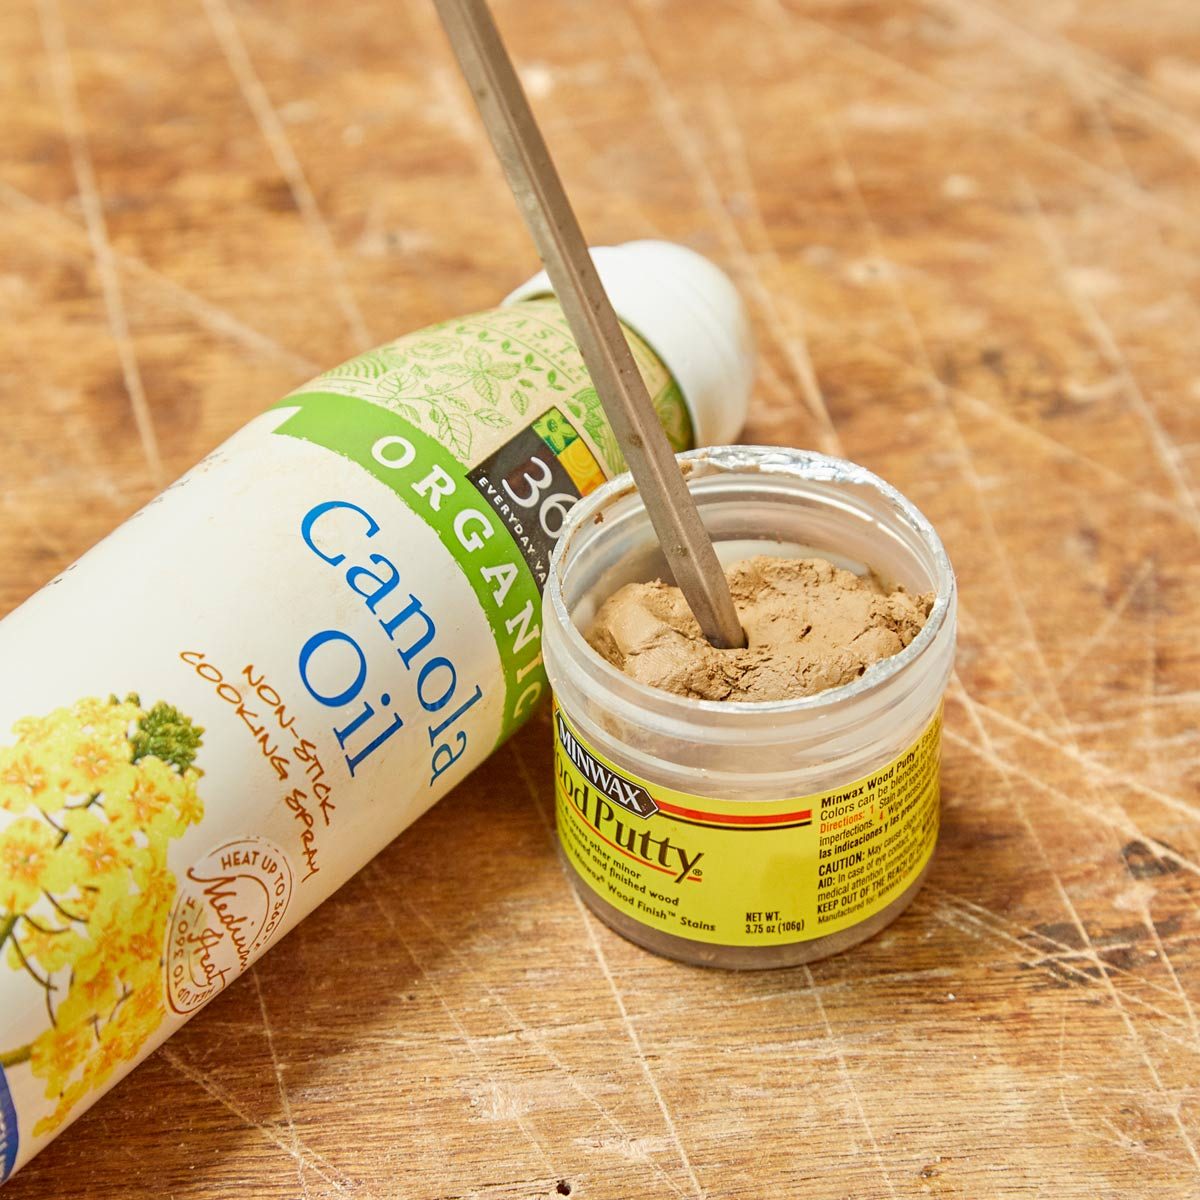
Reinvigorate Dry Putty
Coming to the final steps in a project and finding my jar of putty as dry as the Serengeti and hard as a rock is frustrating. My solution is to remove the putty with a screwdriver and knead it with canola oil until it's a usable consistency. The putty isn't quite as good as new, but it works in a pinch. It's a messy job, so wear latex gloves. – Richard Ryder
Check out all the PVC hacks you've ever wanted to see.
2
/
46

Ad-Hoc Micrometer
Measuring diameters can be difficult. Sure, it works OK to just measure the end, but if you need accuracy, here's my method. Take apart one of your combination squares and slide the head to another square so that the straight edges are facing each other. Set one of the square heads at an even measurement and then slide the other head until both are touching the part you're measuring. Read the measurement right off the ruler! Here are 20 more measuring hacks add DIYers should know.
If you’re using a tape measure, making sure to follow this tape measure hack. Plus, this combination square hack will help you draw any line perfectly straight.
3
/
46

Use a Sneaker to Clean Sandpaper
Make sandpaper nearly new again with a lowly old sneaker. Start up your power sander and dust collection system (remember to wear hearing and eye protection). Then slowly press the rubber sole of an old sneaker along the sandpaper—you'll see a difference instantly!
4
/
46

Copying Cuts
When I need a just a few boards cut to the same length, instead of setting up a stop, I use the first board as a template. Just set it on top of the next piece, line up the ends, slide the template piece against the blade and cut. – Brad Holden
5
/
46
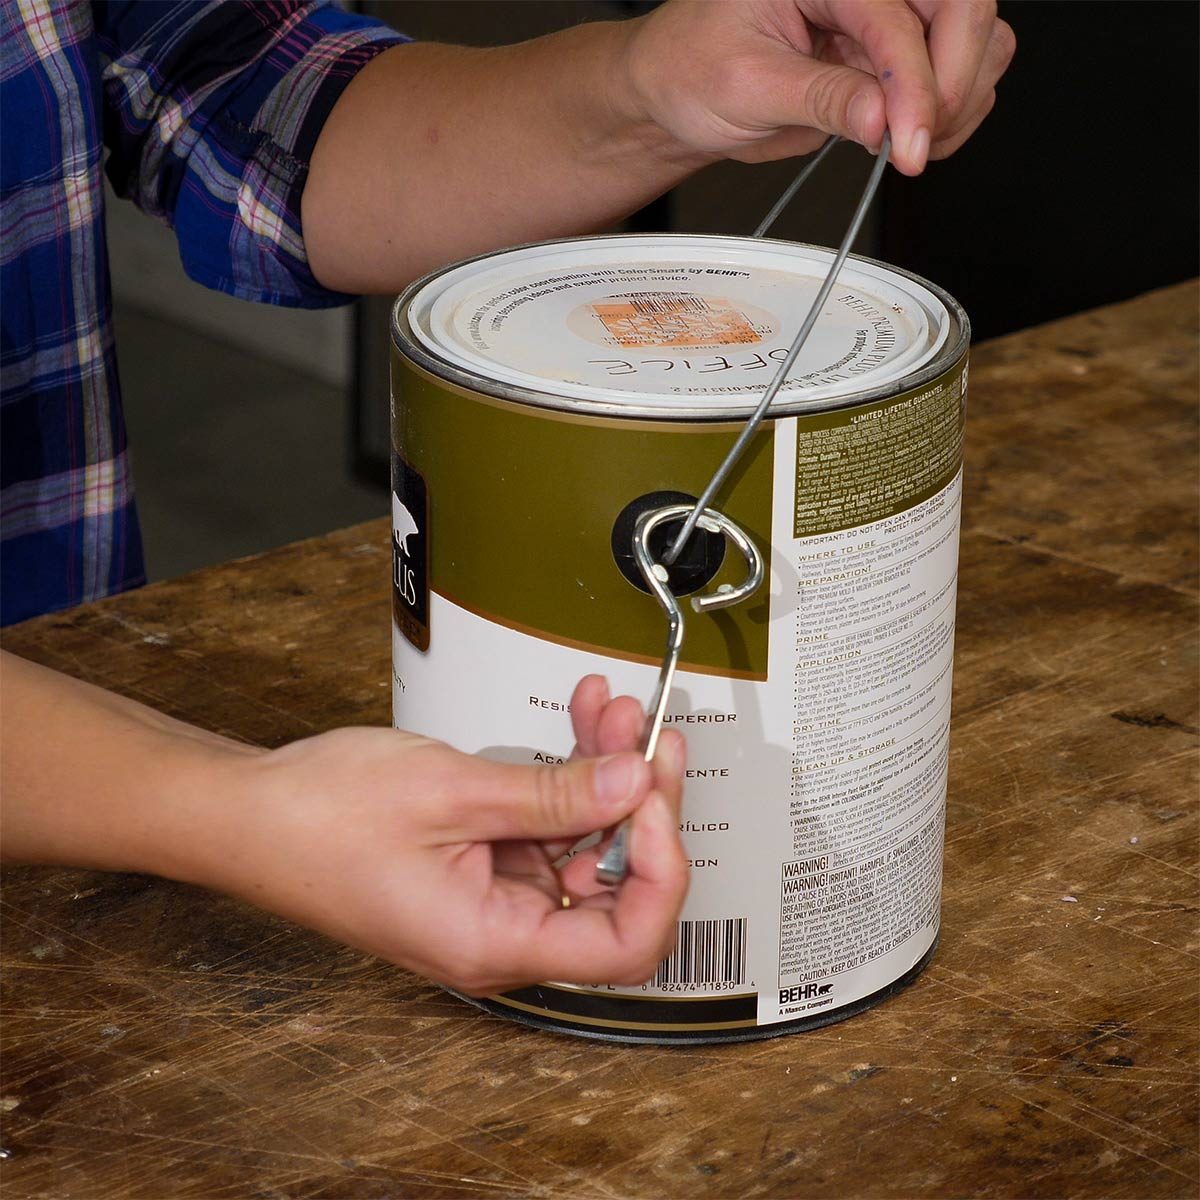
Paint Can Opener on Hand
Always have a paint can opener on hand when you’re ready to start a painting project. Use pliers or a multitool to slightly bend open the loop of the opener. Then hook it onto the handle of the paint can you just purchased.
6
/
46
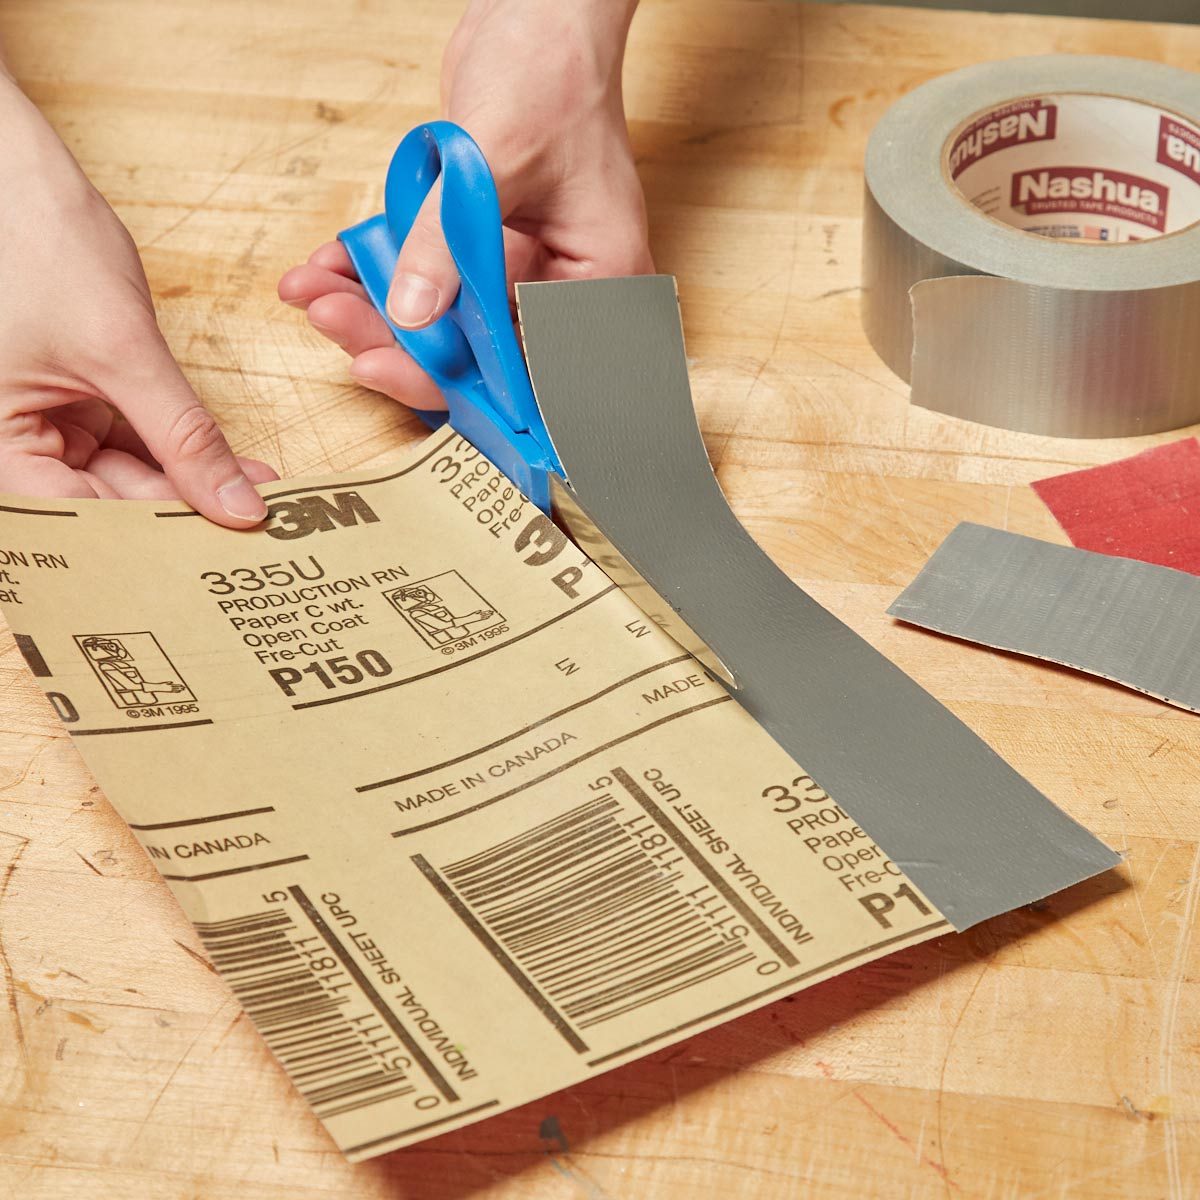
Super-Strong Sandpaper
"I do a lot of finish-sanding freehand, without a sandpaper block, so I can smooth edges and get into nooks and crannies. But the finer grits are usually bonded to thinner paper and, at least for me, the paper is too thin and ends up tearing long before the grit wears out. So I apply duct tape to the back of the sandpaper. The sandpaper is still flexible enough to sand a tight radius and it's far more durable. You can use this super-strong sandpaper like a shoeshine rag." — Chuck Merchant
7
/
46

Tear Out Saving Tape
Cutting with a jigsaw causes nasty tear out in plywood. To limit tear out when cutting out small shapes, I cover the whole work surface with masking tape and draw the shape onto the masking tape before cutting. Nothing eliminates tear out altogether, but this greatly reduces it.
8
/
46
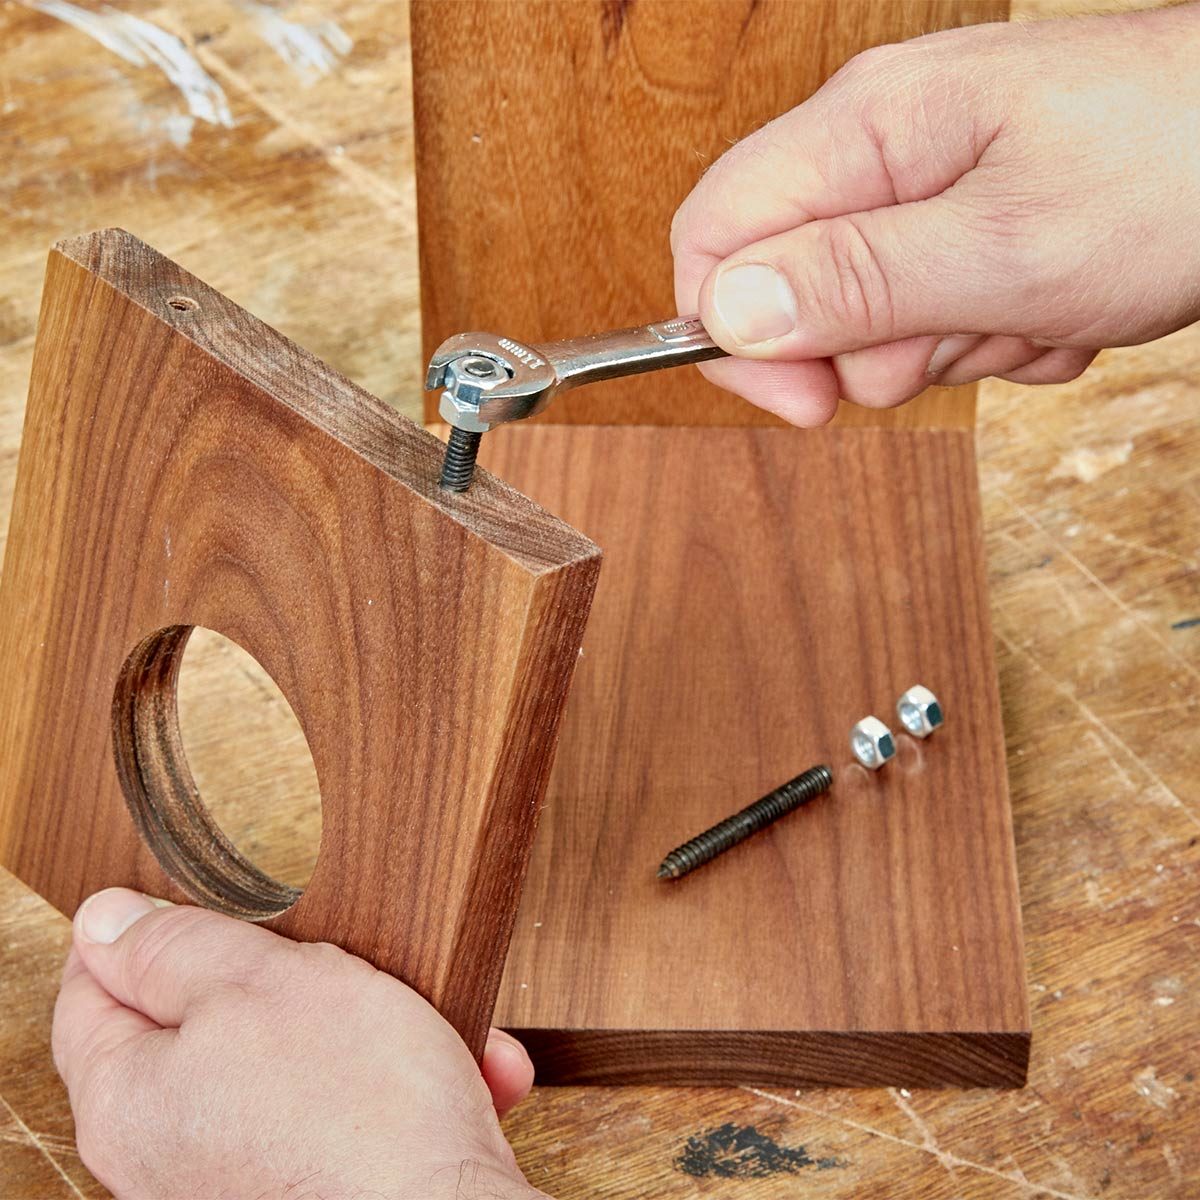
Bolt Head Hack
Make a bolt head for any threaded rod by locking two hex nuts together. Then you can use a nut driver or wrench to turn the threaded rod or screw in fasteners such as hanger bolts.
9
/
46
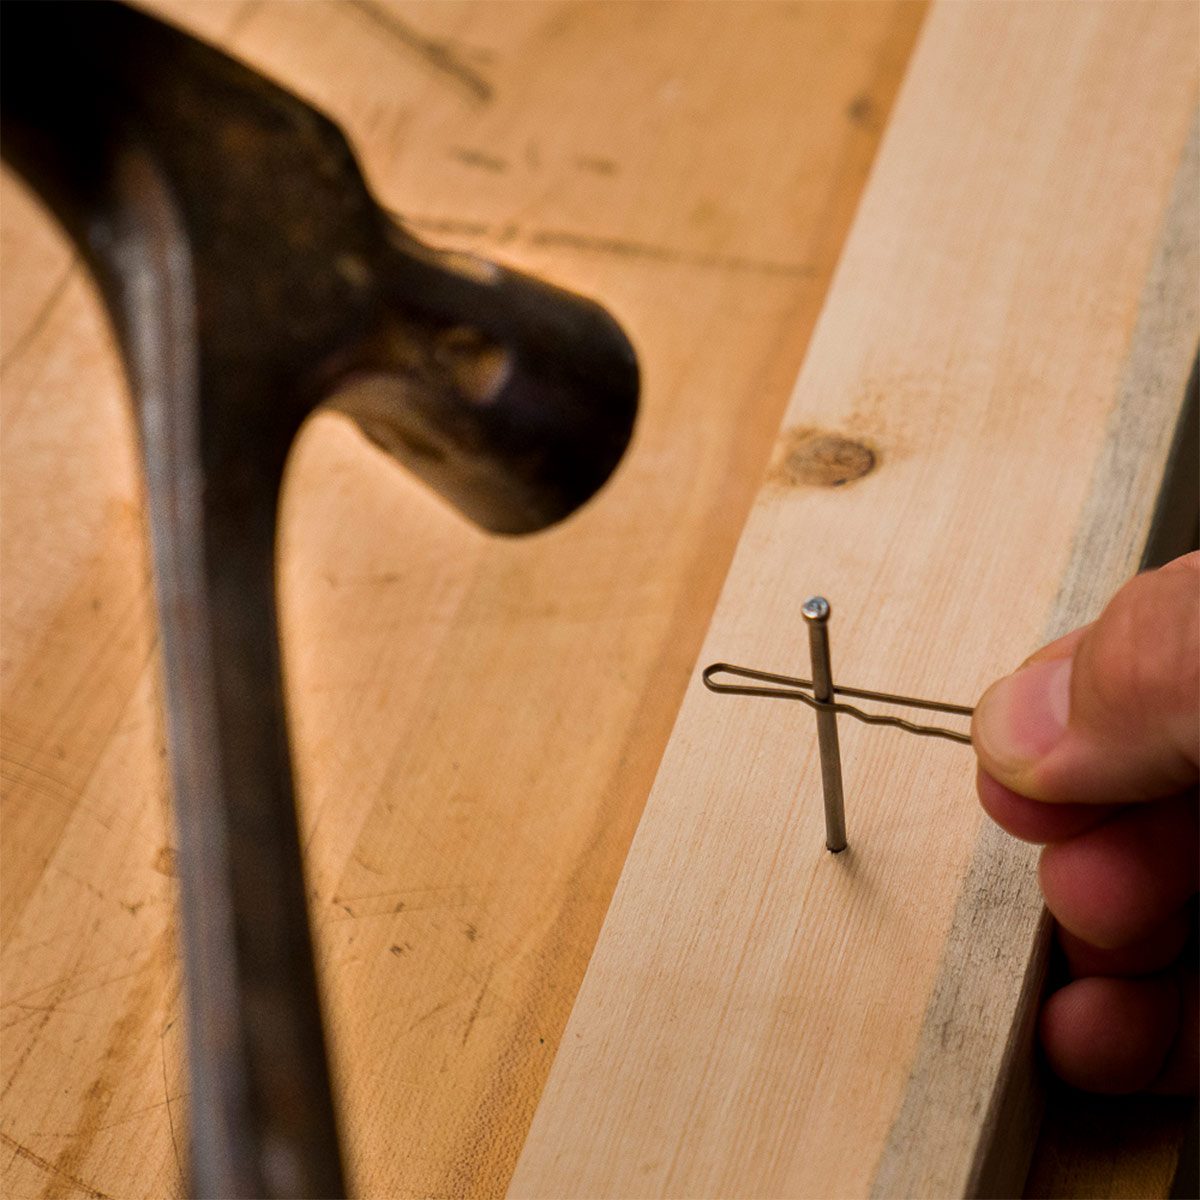
Bobby Pin Nail Holder
There's no need to risk hammering a finger when working with tiny nails or in tight quarters. A common bobby pin makes a great nail holder—and keeps your fingers at a safe distance! Once the nail is started, remove the bobby pin and continue hammering away.
10
/
46
11
/
46
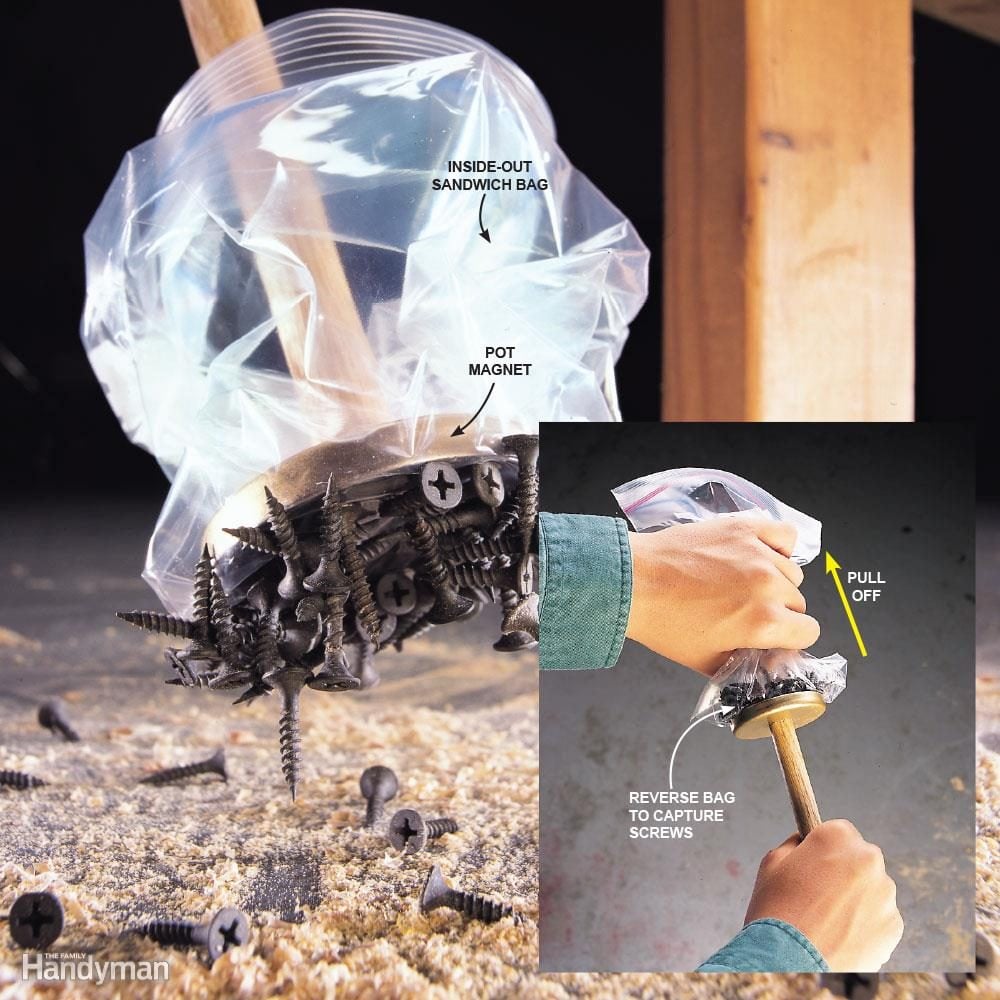
Magnetic Broom
When you spill screws, nails, brads or other small metal parts on a dusty shop floor, pick them up in seconds, minus the dust. Screw a 3-in. dia. pot magnet on the end of a wood dowel to create your 'picker-upper.' To use this tool, place an inside-out sandwich bag over the magnet and start sweeping the area. The hardware will leap up to the powerful magnet as you 'sweep' the floor. To unload and bag the metal pieces in one quick step, just pull the bag off the magnet.
12
/
46

Trigger-Style Bench Clamps
Trigger-style bar clamps make perfect workbench hold-down clamps. First, punch out the split-tube stop at the end of the clamp's bar and then slide the trigger head off. Slip the bar through a bench-dog hole and reinstall the trigger head. If your bench doesn't have dog holes, just drill a hole wherever you need it.
13
/
46
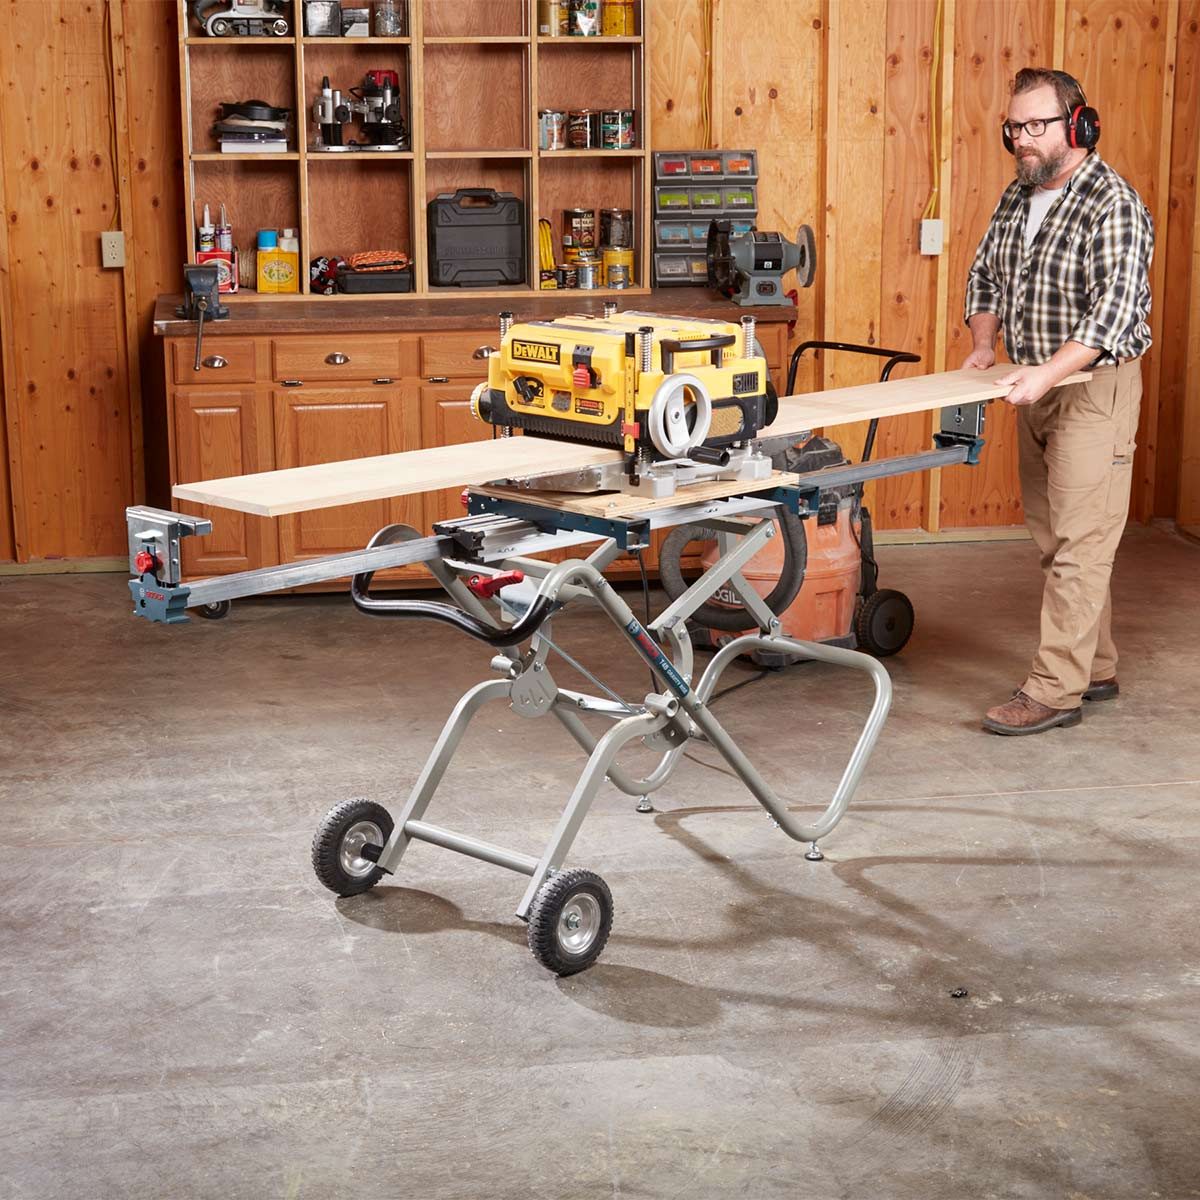
More Planing, Less Exercise
Planing boards with a portable planer can provide you with a lot of exercise. But rather than running from the infeed side to the outfeed side before the board flips your portable planer, try this instead: Attach your portable planer to a board; then fasten the board to a miter saw stand. Then planing boards won’t wear you out so quickly!
14
/
46
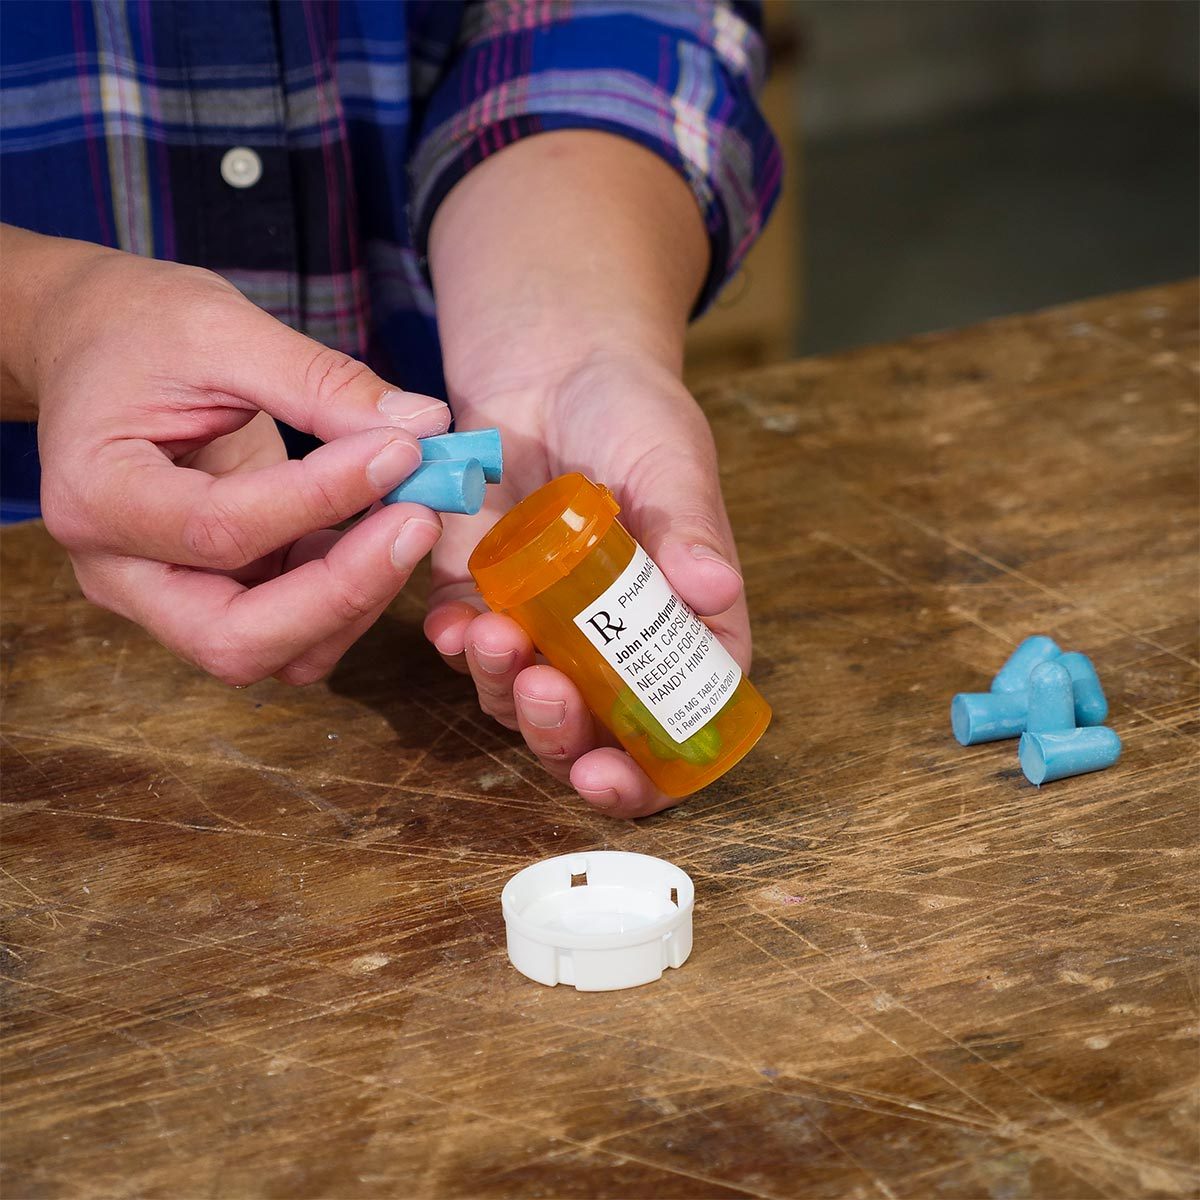
Rx Bottle for Earplug Storage
After losing the storage tube that his pack of earplugs came with, Mike Yalch discovered an alternative: an empty medicine bottle. It keeps his ear protection clean and on hand at all times, as the small container fits perfectly in his pocket.
15
/
46
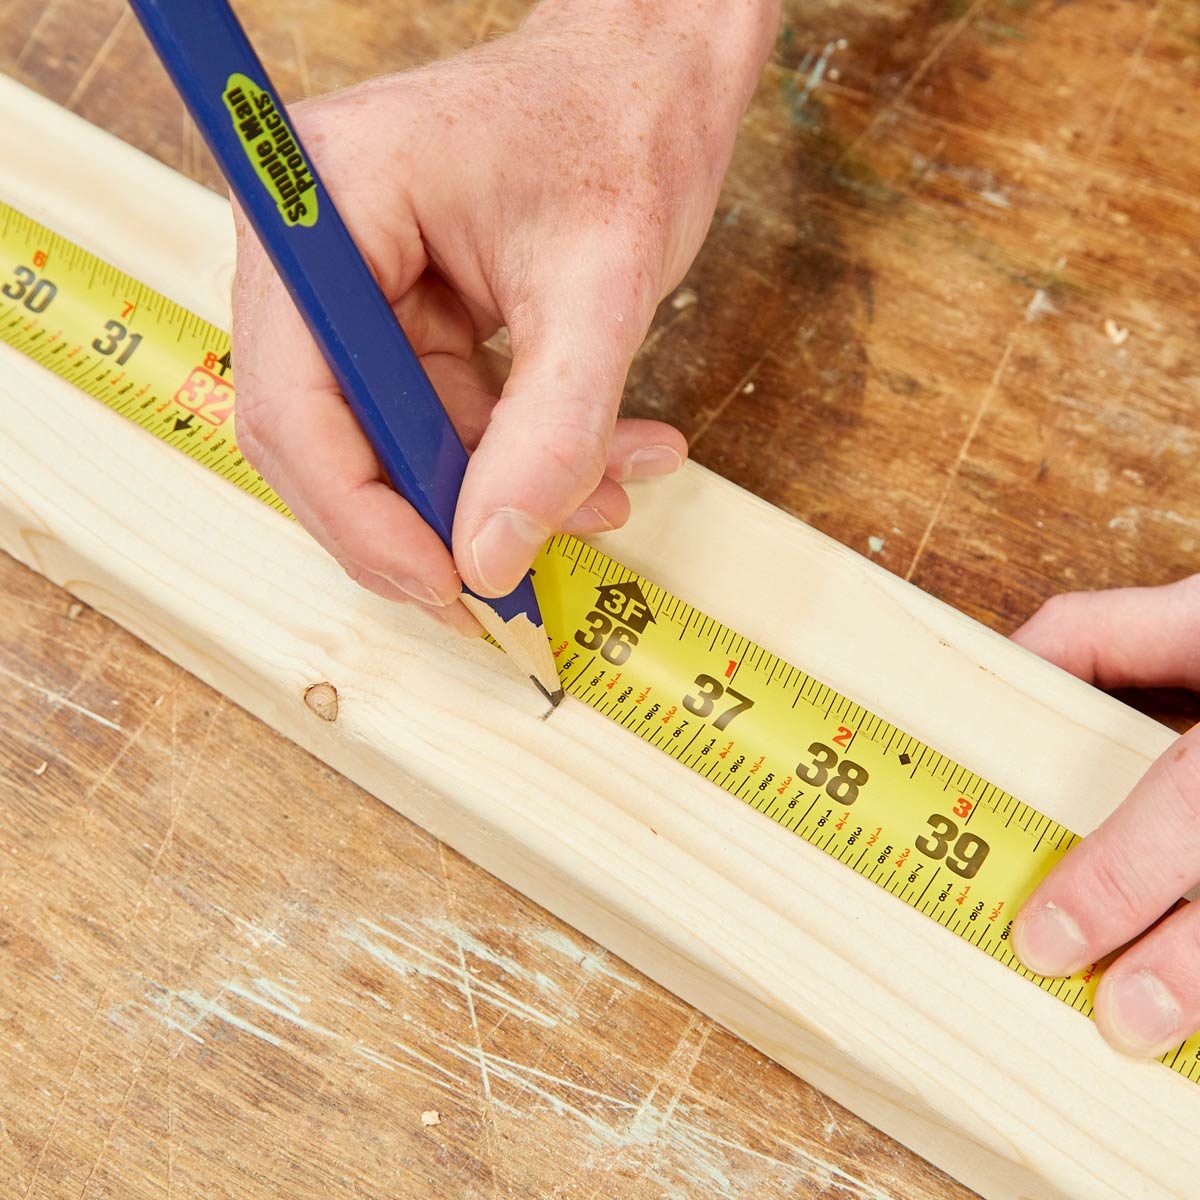
Cut From Both Sides
When I'm on a jobsite where time is money and I need to make a couple cuts on the miter saw I measure my cuts from both ends of the board. I only need to take out my tape measure and pencil once. Over the course of a day, that time saved adds up. – Travis Larson
16
/
46
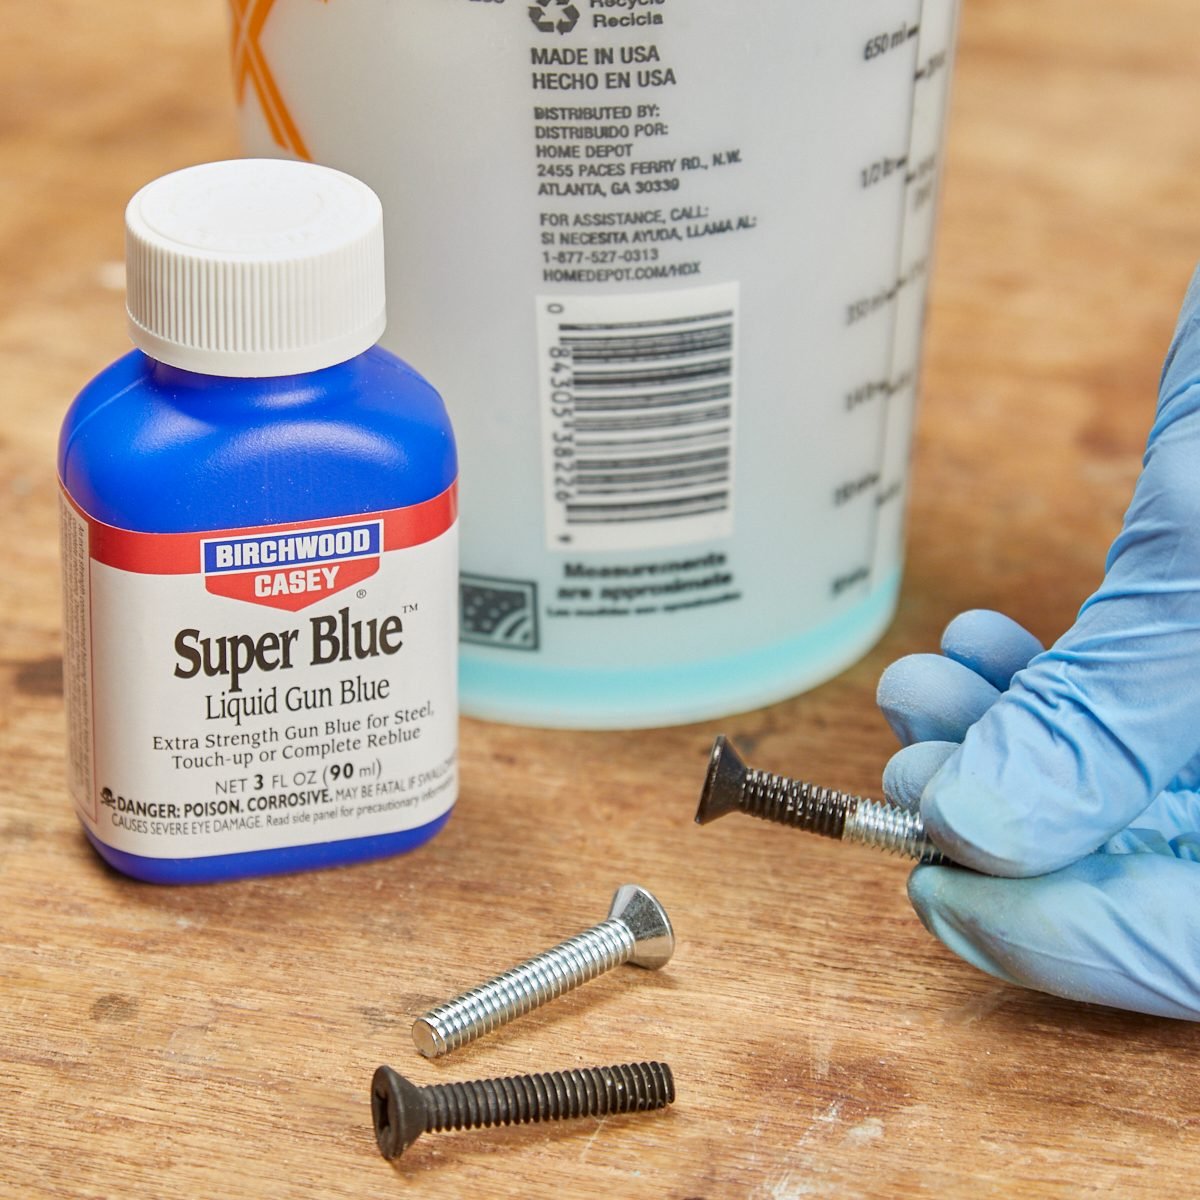
Instant Hardware Patina
I’ve found that using gun bluing ($10/3 oz. at sporting goods stores) gives off-the-shelf hardware an attractive, aged patina. Simply dip nuts, bolts, washers or other hardware in a cup of gun bluing. When the hardware turns black, rinse it with clean water and dry it with a paper towel. Be sure to wear rubber gloves and eye protection.
17
/
46
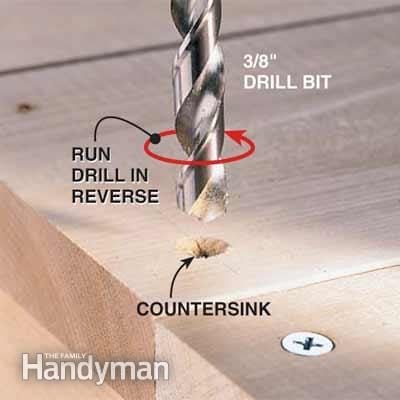
Makeshift Countersinking Tip
Try this 'emergency' technique for drilling countersink holes for screwheads in softwoods like pine, cedar and redwood. A 3/8-in. twist drill bit—spun in reverse on slow speed—will bore a clean-edged countersink hole without grabbing and tearing. Because the drill cuts slowly, you can easily control the countersink depth.
18
/
46
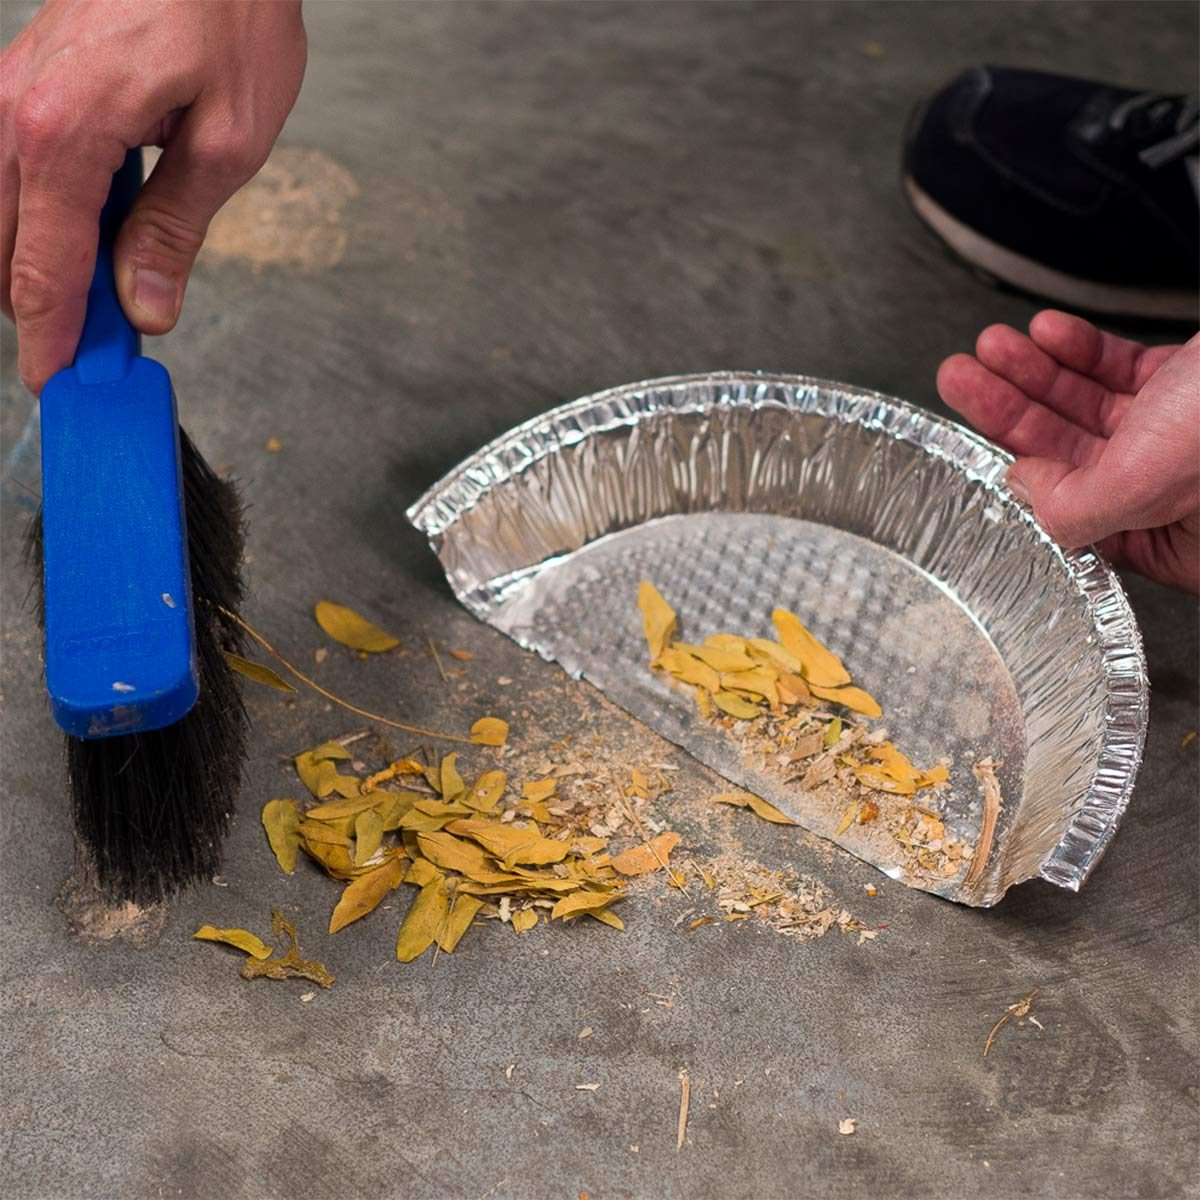
Pie Plate Dustpan
Create a quick disposable dustpan out of an aluminum pie plate. Use tin snips or heavy-duty scissors to cut the pie plate in half. Sweep up the mess and toss it in the trash!
19
/
46

Stay-Put PVC Pipe Cutter
Here's a nifty way to cut PVC pipe on the fly. Just make a couple of notches in the top of a 5-gallon bucket. Set the pipe in the notches and you've got a stable spot for sawing. As a bonus, you can load up the bucket and carry your tools along, too!
20
/
46
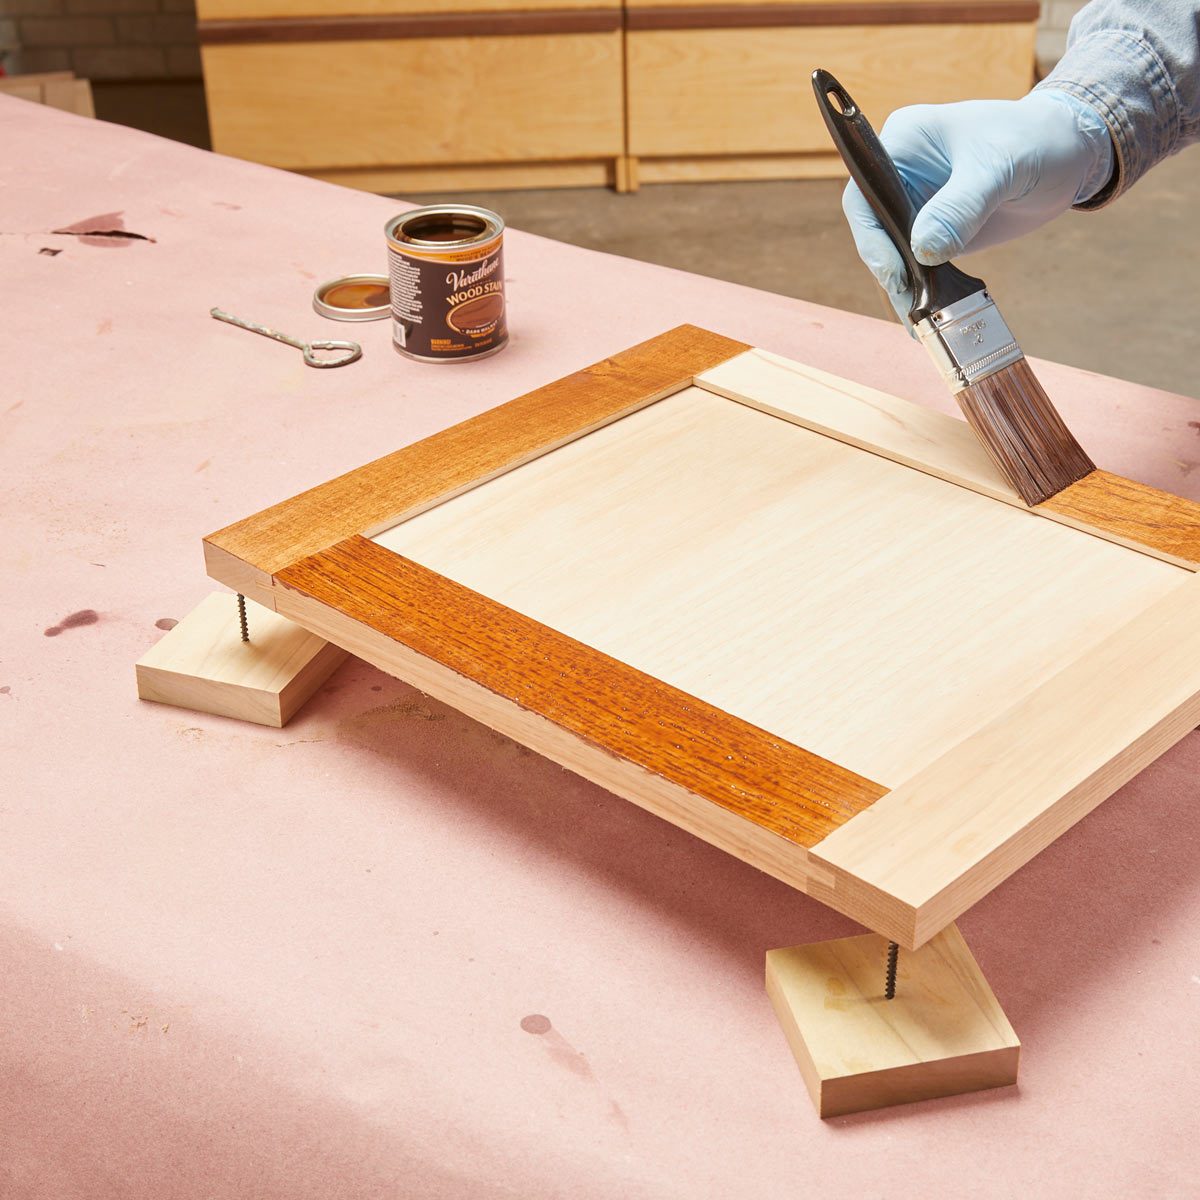
Shop-Made Finishing Helpers
Tired of waiting for finish to dry on one side before finishing the other side? You can purchase standoffs, but it's also really easy to make them yourself. Simply drive 2-in. drywall screws through 2-in. x 2-in. squares of 3/4-in. thick stock. The screw points will leave a divot in the finish that can be touched up later, but I always let the back side of my project rest on the screws while the finish dries.
21
/
46
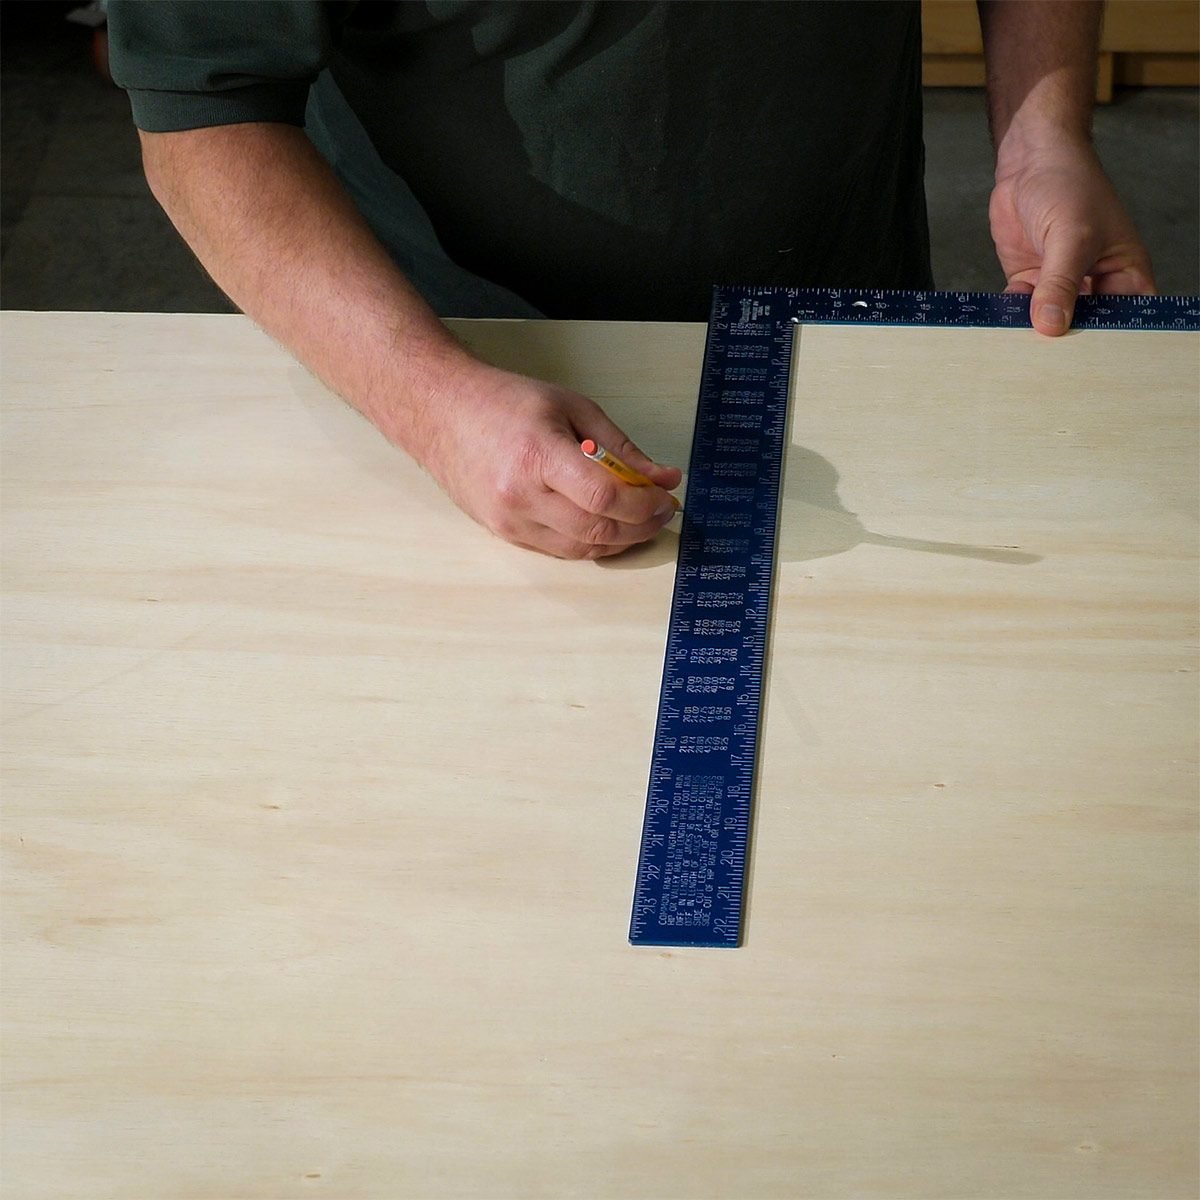
Check if a Square is Square
Follow these simple steps for ensuring that your square is square: Align the short side of the square with the factory edge of a piece of plywood. Draw a line along the edge of the long side of the square. Flip over the tool and align the base of the mark with the same edge of the long side of the square. Draw another line. If the marks do not align perfectly, the square is not square.
22
/
46

How to Fix a Square
Before tossing your off-kilter square and spending money on a new one, try fixing it with this simple process. Use a center punch, a hammer and an anvil. If the sides of the square are too close together, punch the inner corner. If the sides are too far apart, punch the outer corner. Check your progress, and repeat as needed until the square is square.
23
/
46
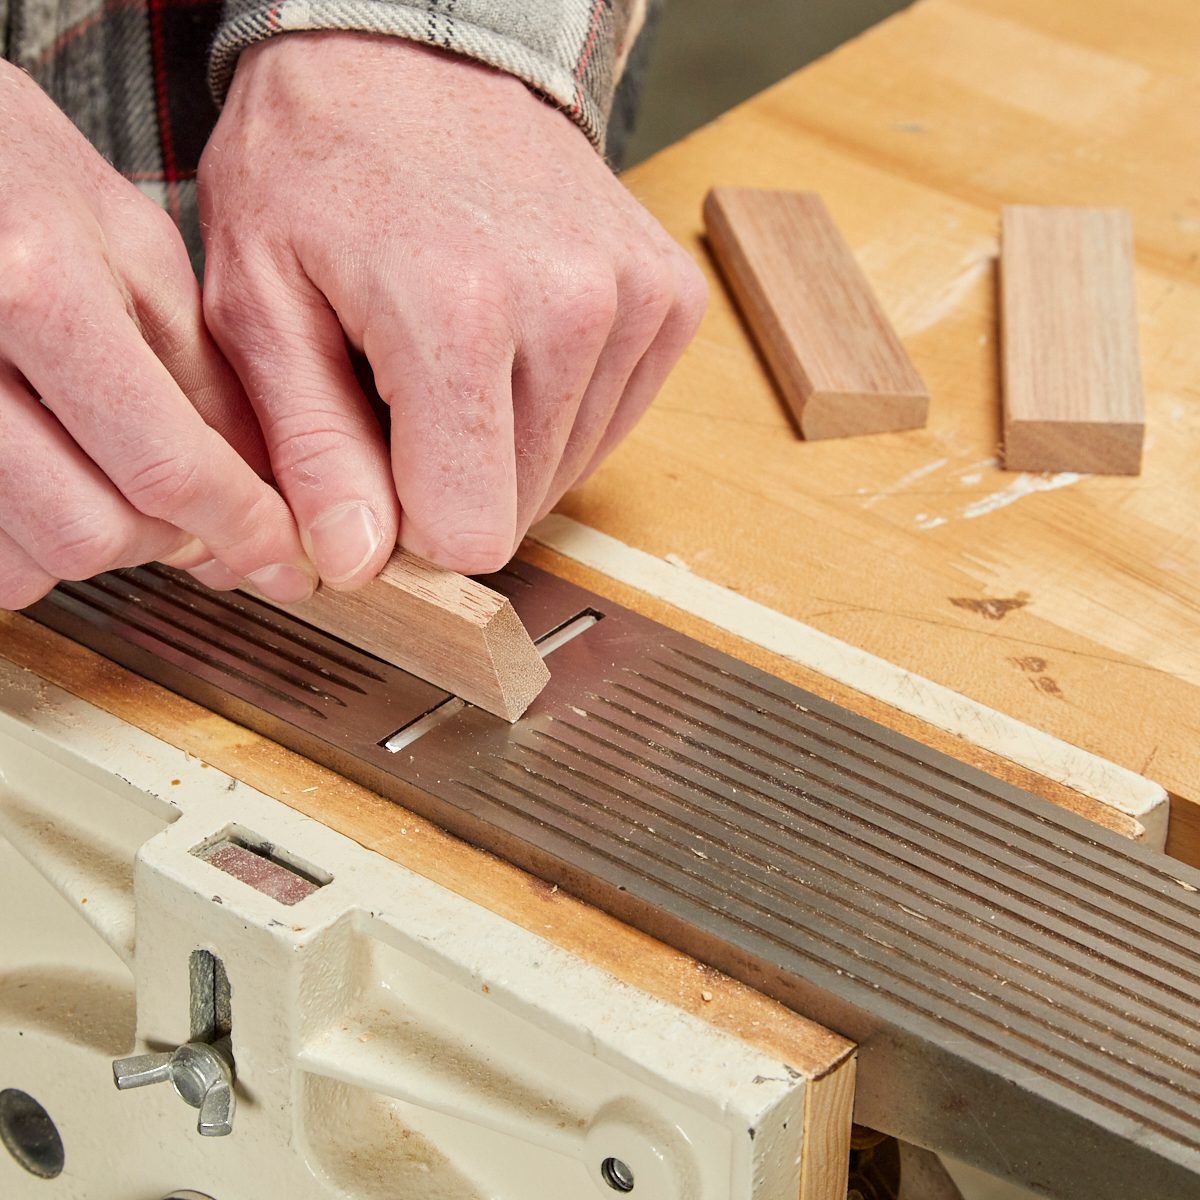
Small Parts Jointer
Here’s a way to joint or shape work pieces that are too small to hold in a vise. Flip a hand plane upside down and clamp it in your bench vise. Now you can pass the wood over the plane to joint the edge.
24
/
46
25
/
46
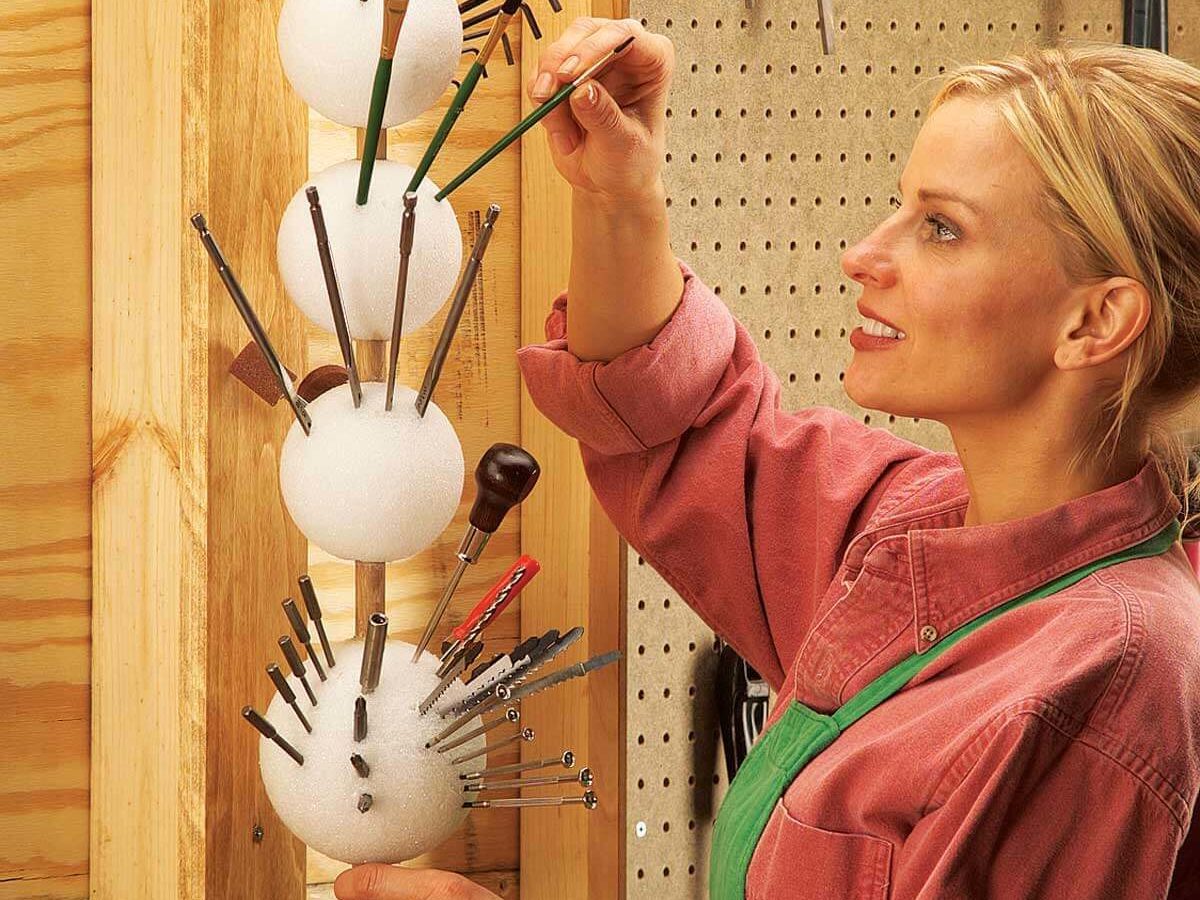
Foam Ball Tool Storage
Here's a pointer on storing pointed tools for instant availability. Drill 5/8-in. holes through a few 4- or 5-in. foam craft balls (available at craft stores), and skewer and glue them along a 5/8-in. dia. dowel with construction adhesive. Screw together a 3/4-in. wood bracket, drilling a stopped 5/8-in.-diameter hole 1/2 in. deep in the bottom end and a 3/4-in. hole through the upper end. Screw the bracket at a convenient height, slide in the foam balls and load them with drill, router and spade bits; paint brushes; screwdrivers; Allen wrenches; awls; X-Acto knives; pencils and, well, you get the point.
26
/
46
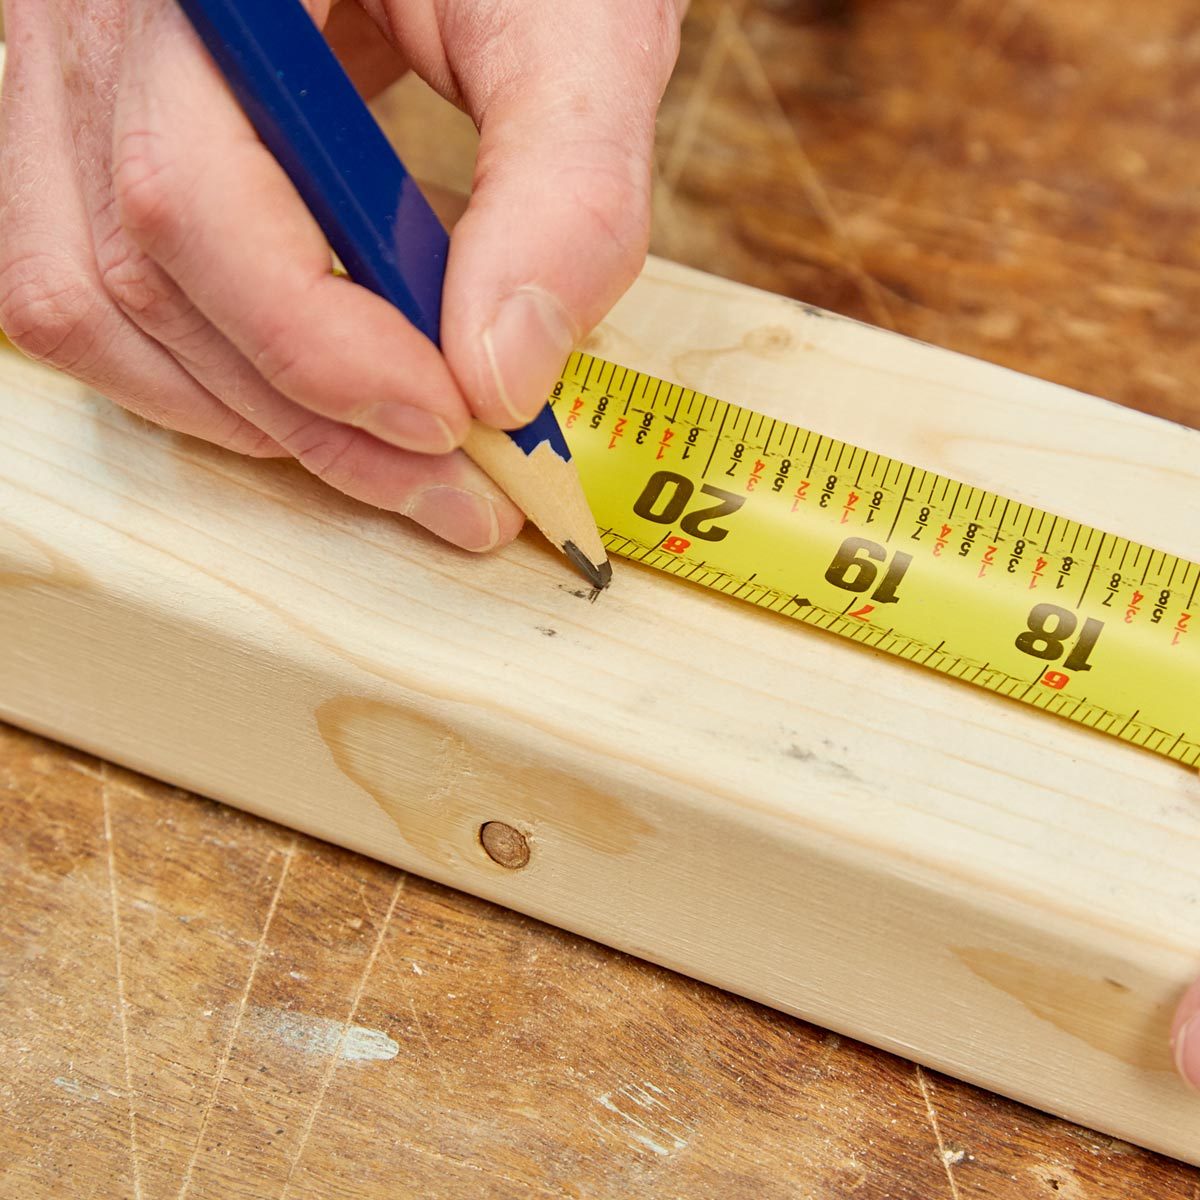
Measure Once, Cut 10 Times
If I'm cutting a bunch of boards to roughly the same length, I mark them all at the same time. With every mark, I add 1/8 in. to allow for the blade thickness. For example, if I'm cutting 12 in. boards, the first mark is at 12 in. The second is 12-1/8, the next one is 12-1/4, then 12-3/8 and so on. I don't use this trick for precision, but is a great way to save some time on the job site. – Travis Larson
27
/
46

Kitty Litter Pouch for Tool Protection
Make a rust-preventing pouch for your toolbox with a scoop of silica crystal kitty litter, a piece of breathable fabric and a zip tie. Toss it in your toolbox to keep out excess moisture and protect your prized possessions.
28
/
46
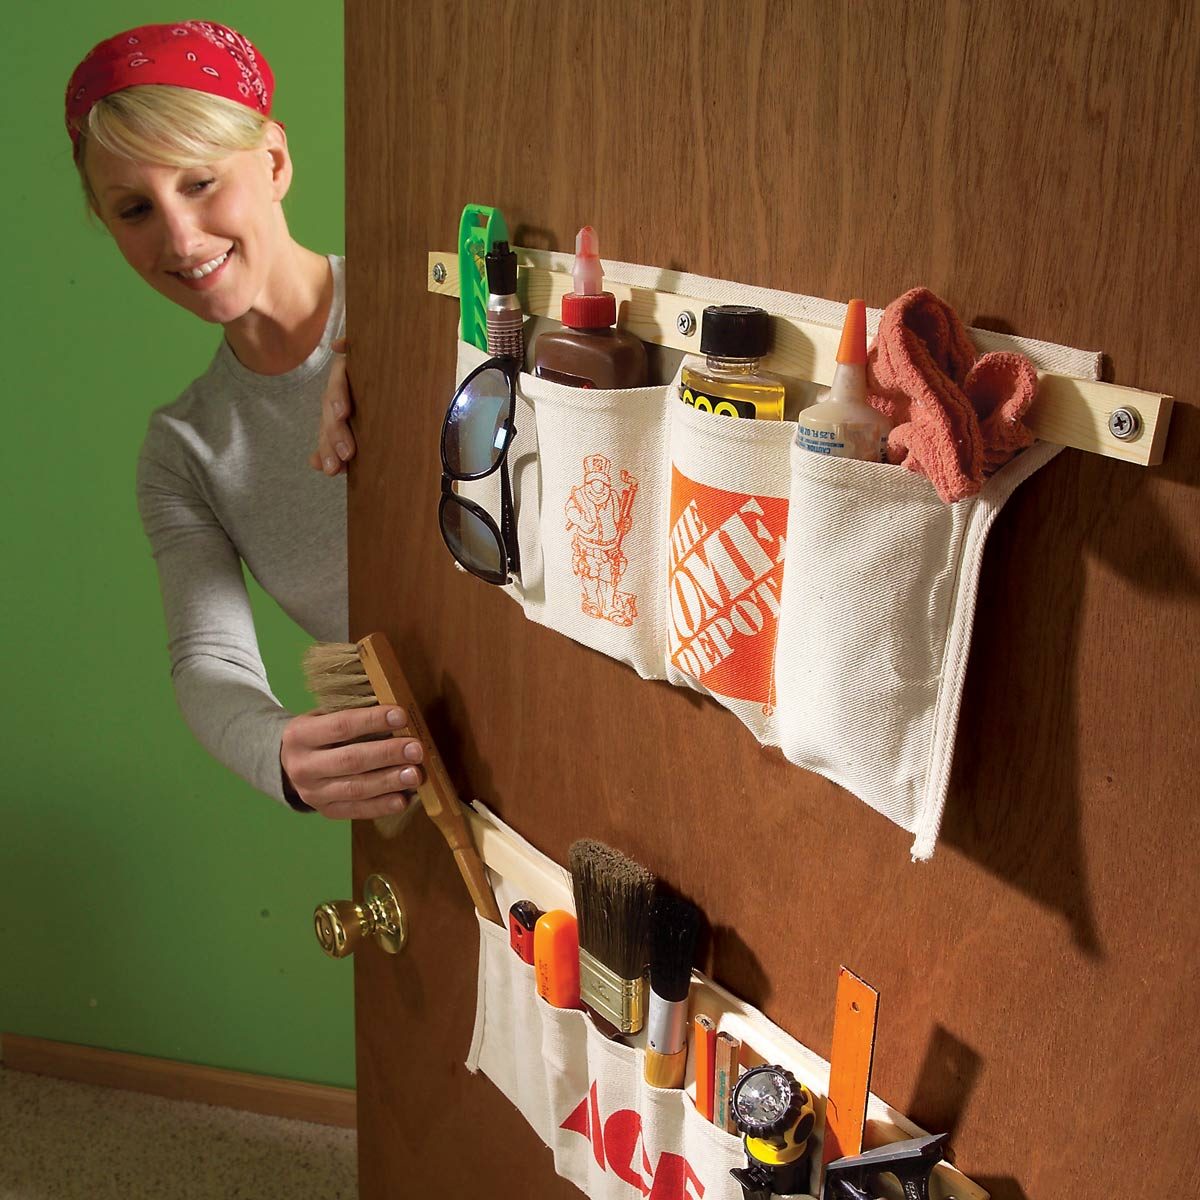
Behind the Door Storage: Tool-Apron Storage
Tool aprons can be modified to store nearly any household item. Just sew a variety of pocket widths in the aprons, then mount the aprons by screwing a wood strip through the top of each and into a door. For hollow-core doors, use hollow anchor fasteners to hold the screws firmly to the door.
29
/
46
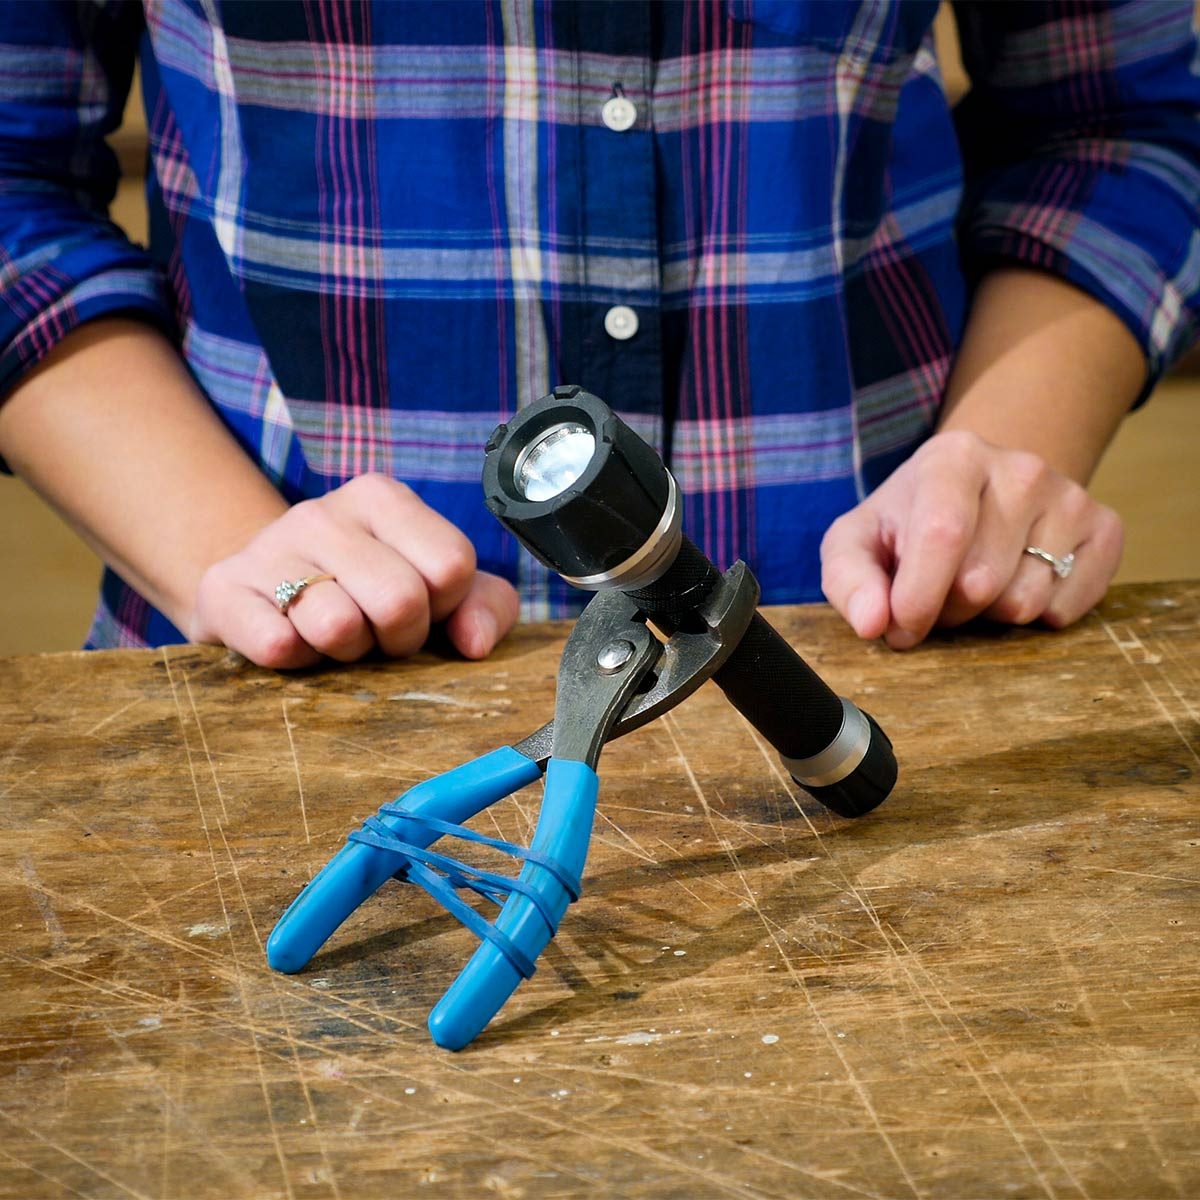
Hands-Free Light Hack
Make a hands-free light in a snap with a flashlight, a pair of pliers and a rubber band. Place the flashlight in the jaws of the pliers; then wrap a rubber band around the handles of the pliers. That’s it! Point the light wherever you need it.
30
/
46
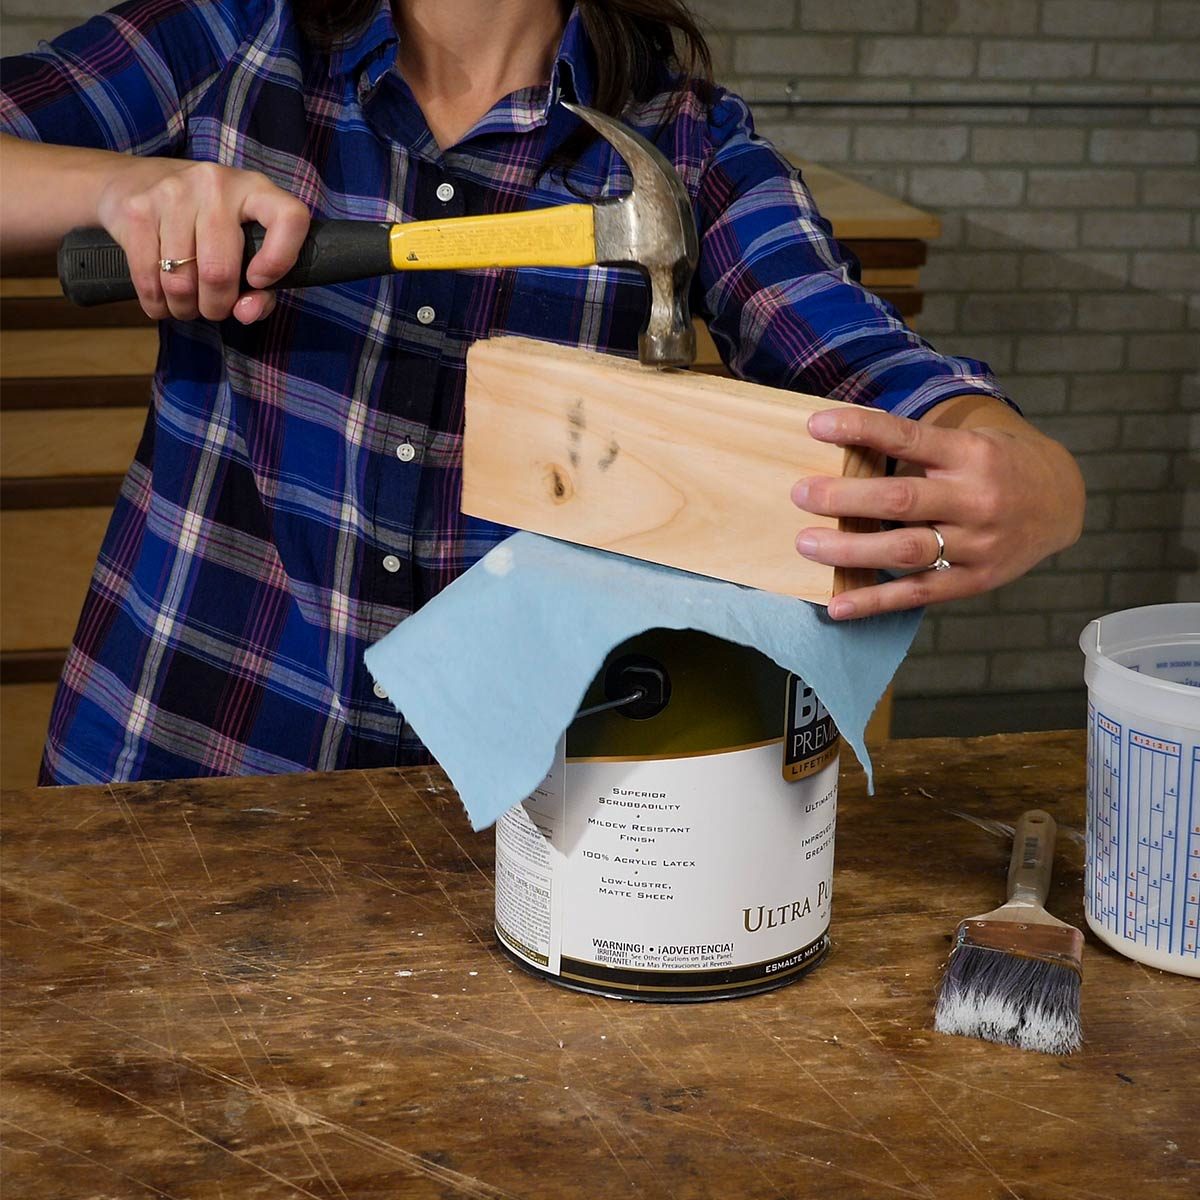
Close Paint Cans with Less Mess
Stop paint splatter when you re-seal a paint can lid by covering it with a rag or paper towel. Then place a wood block just larger than the diameter of the paint can across the lid and hammer the center of the block. Rotate the block a few times, hammering the center each time, to seal the lid without damaging the top of the can.
31
/
46
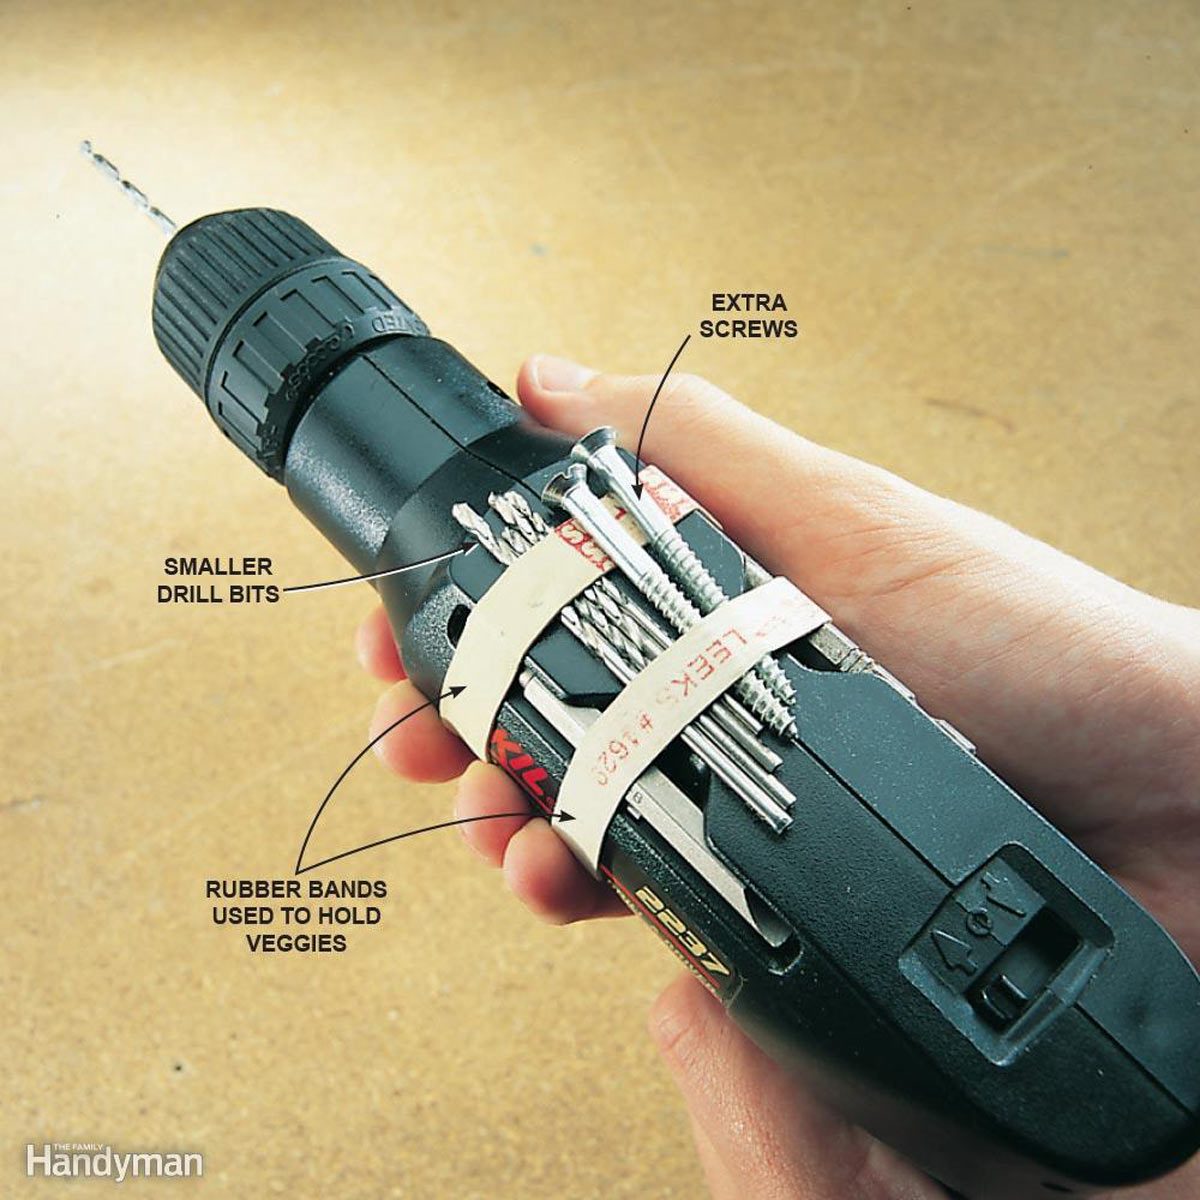
Drill Bit Girdle
Save those wide rubber bands that are wrapped around broccoli and other veggies and stretch them over your electric or cordless drill. Use them for onboard storage of smaller drill and driver bits and screws.
32
/
46
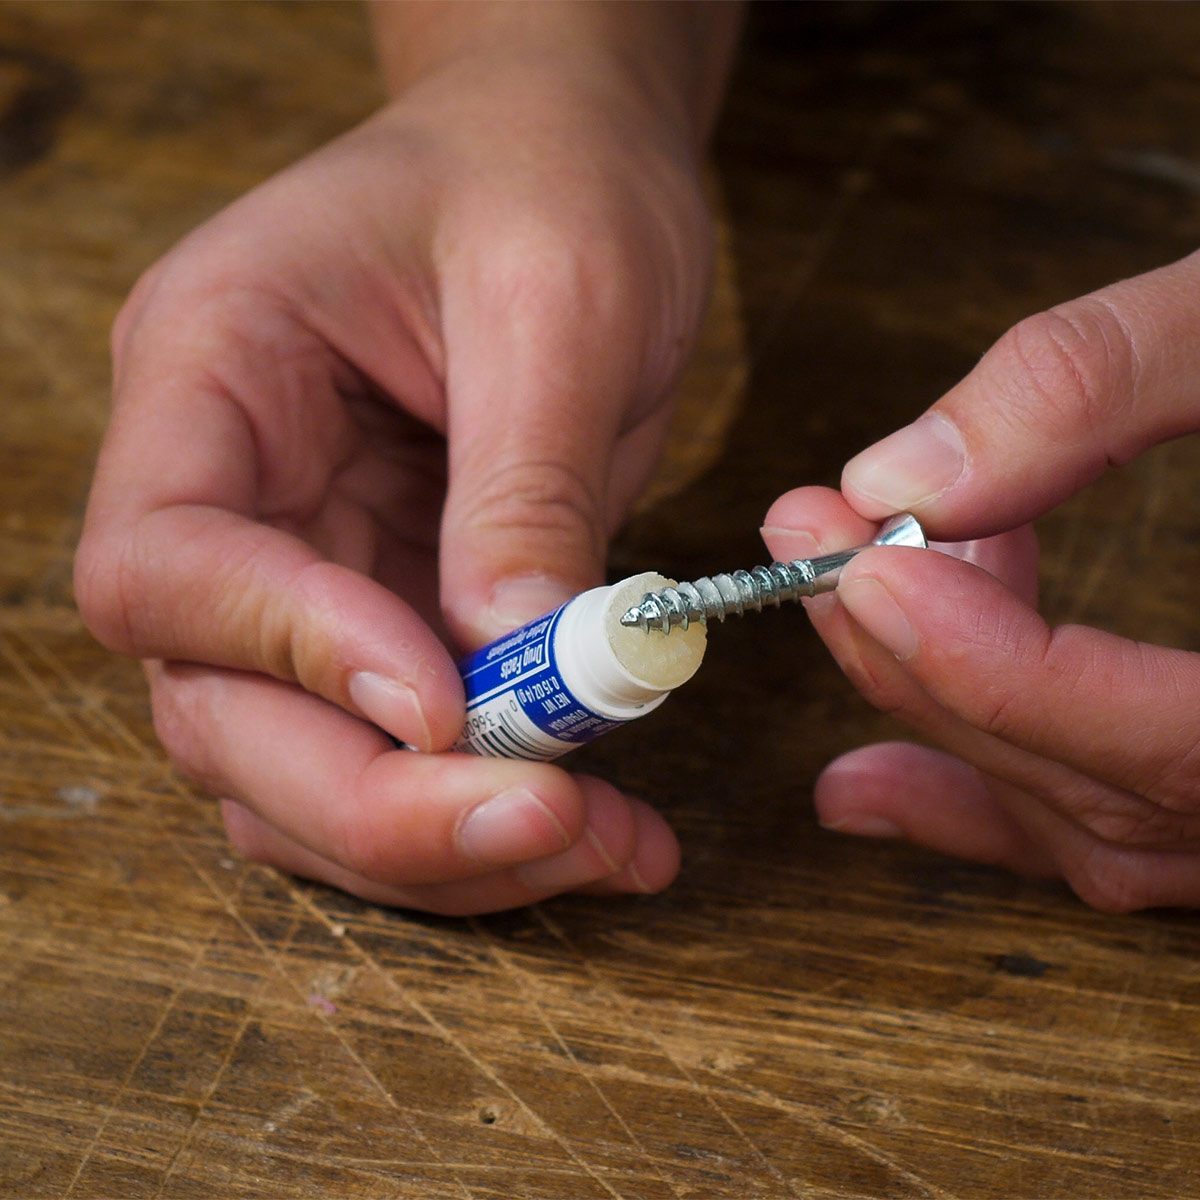
Chap Stick for the Toolbox
If you enjoy working with hardwoods, you know how important it is to lubricate screws. It’ll make driving the fasteners easier and reduces the amount of heat produced. But what if you don’t have a bar of soap or a pile of beeswax nearby? Reach for your tube of Chap Stick!
33
/
46
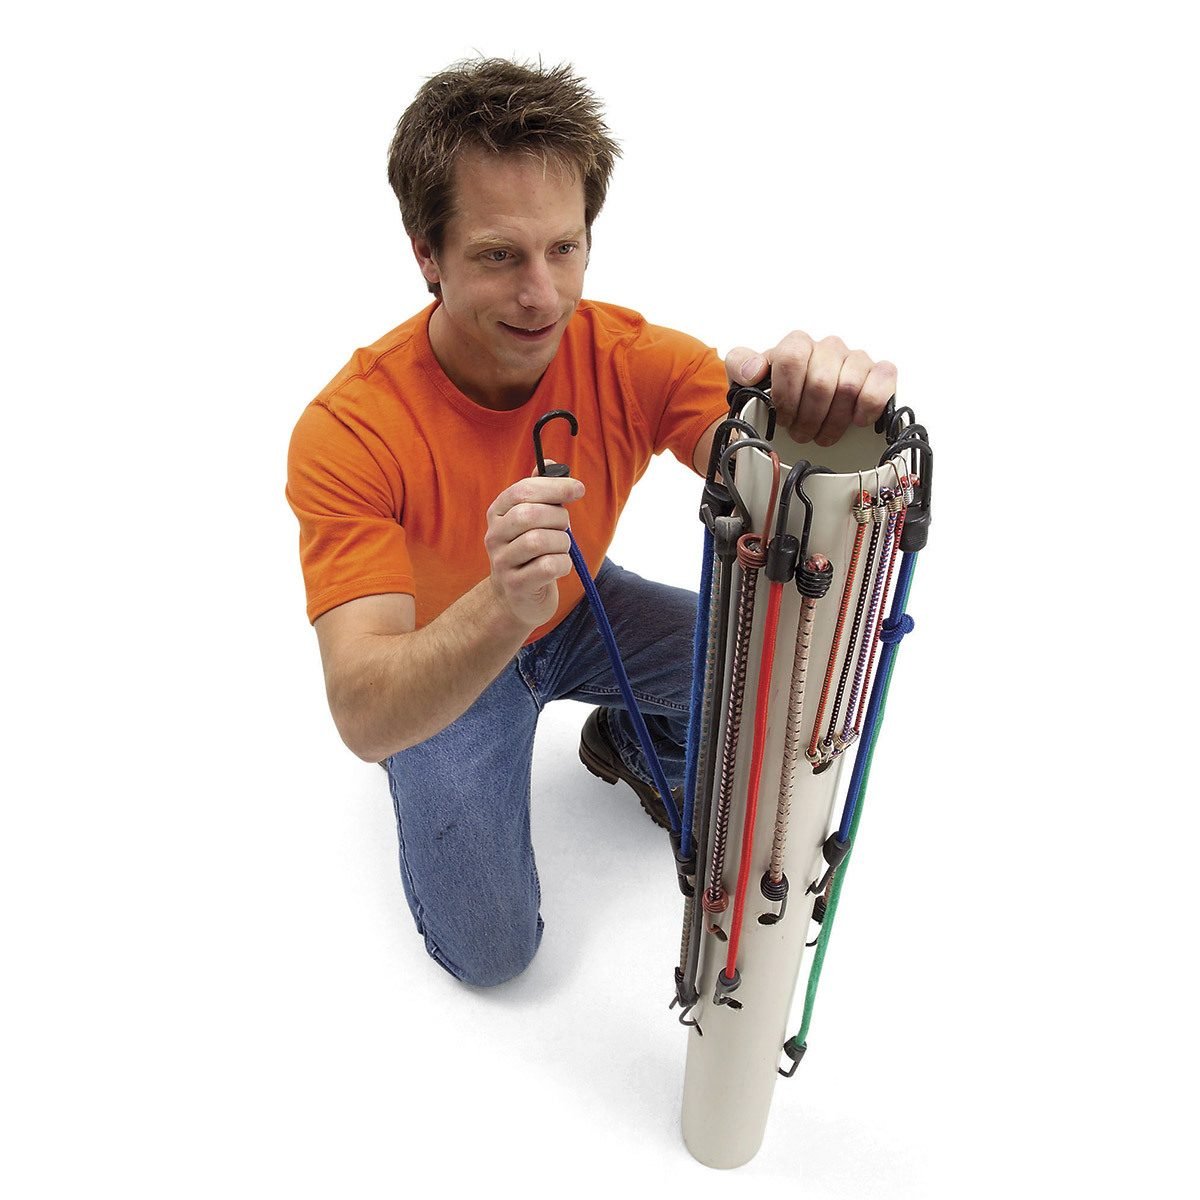
Bungee Cord Organizer
Elastic cords can quickly become a tangled mess. Find the one you need at a glance with this handy rack made from 3- or 4-in. PVC pipe. Just drill 1/2-in. diameter holes in the pipe to match the slightly stretched lengths of your cords. Keep it in your trunk or shop, out of the reach of children.
34
/
46
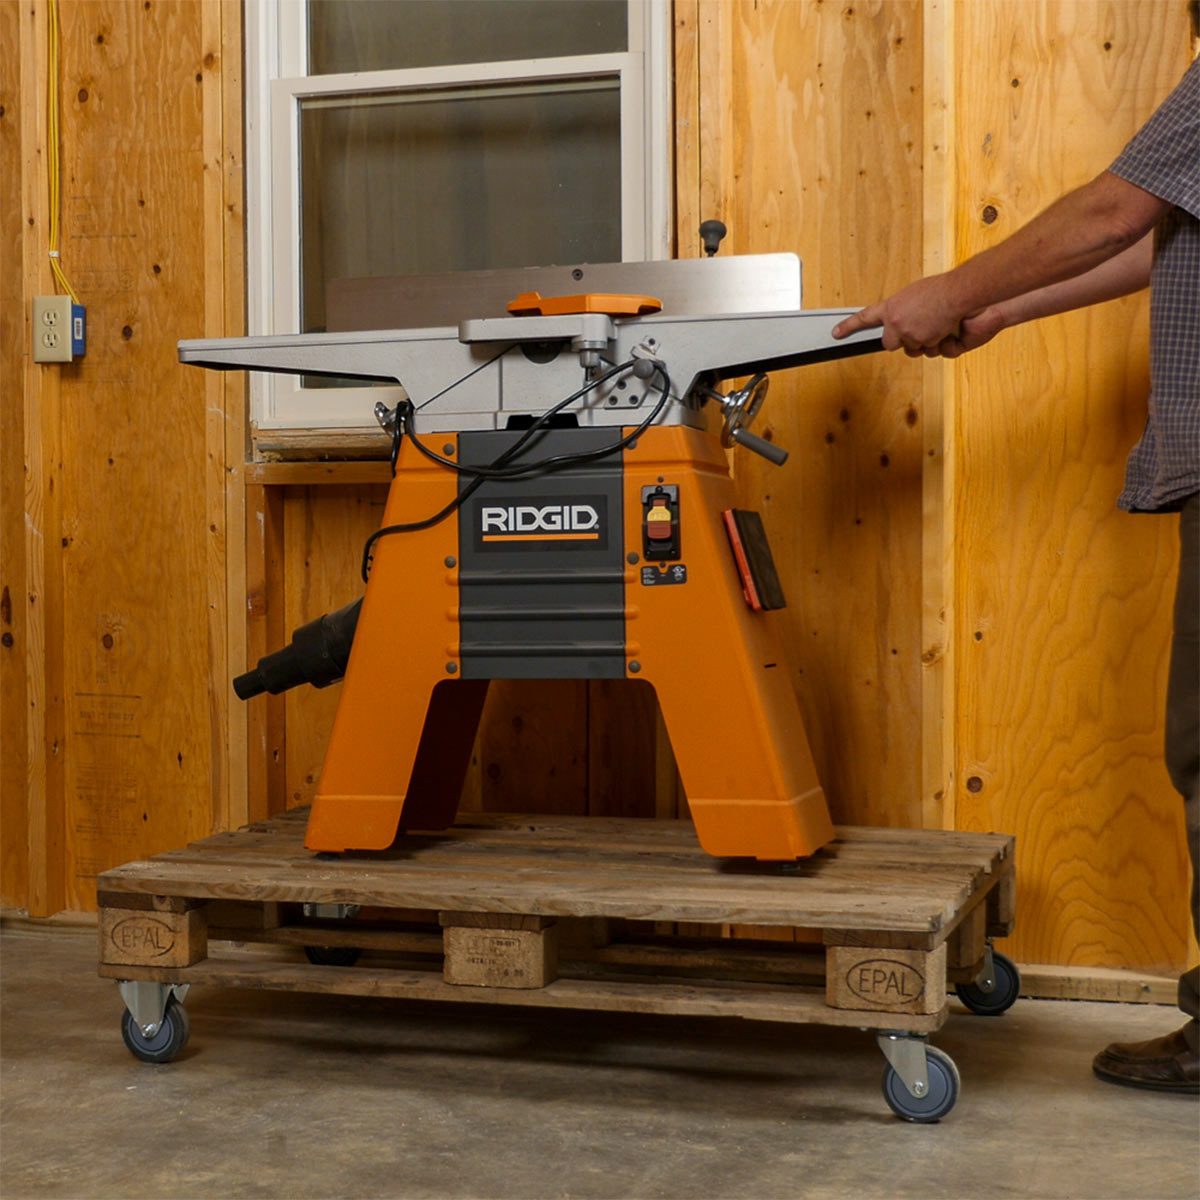
Pallet Dolly
This simple and inexpensive hauler is perfect for transporting loads of lumber or heavy tools around the workshop. Add a bit of reinforcement to the pallet first; then install four swiveling casters, one at each corner. You’ll wonder why you didn’t make a pallet dolly sooner!
35
/
46

Moisturized Wood Putty
Wood putty is often a one-time use product for me. Before I even think about using it a second time, it’s dried out. The trick I found was to fill an empty paint can with water and store all my putty jars submerged so no air can get in. Now I can finally say that I have seen the bottom of a putty container. – Kim Boley
36
/
46
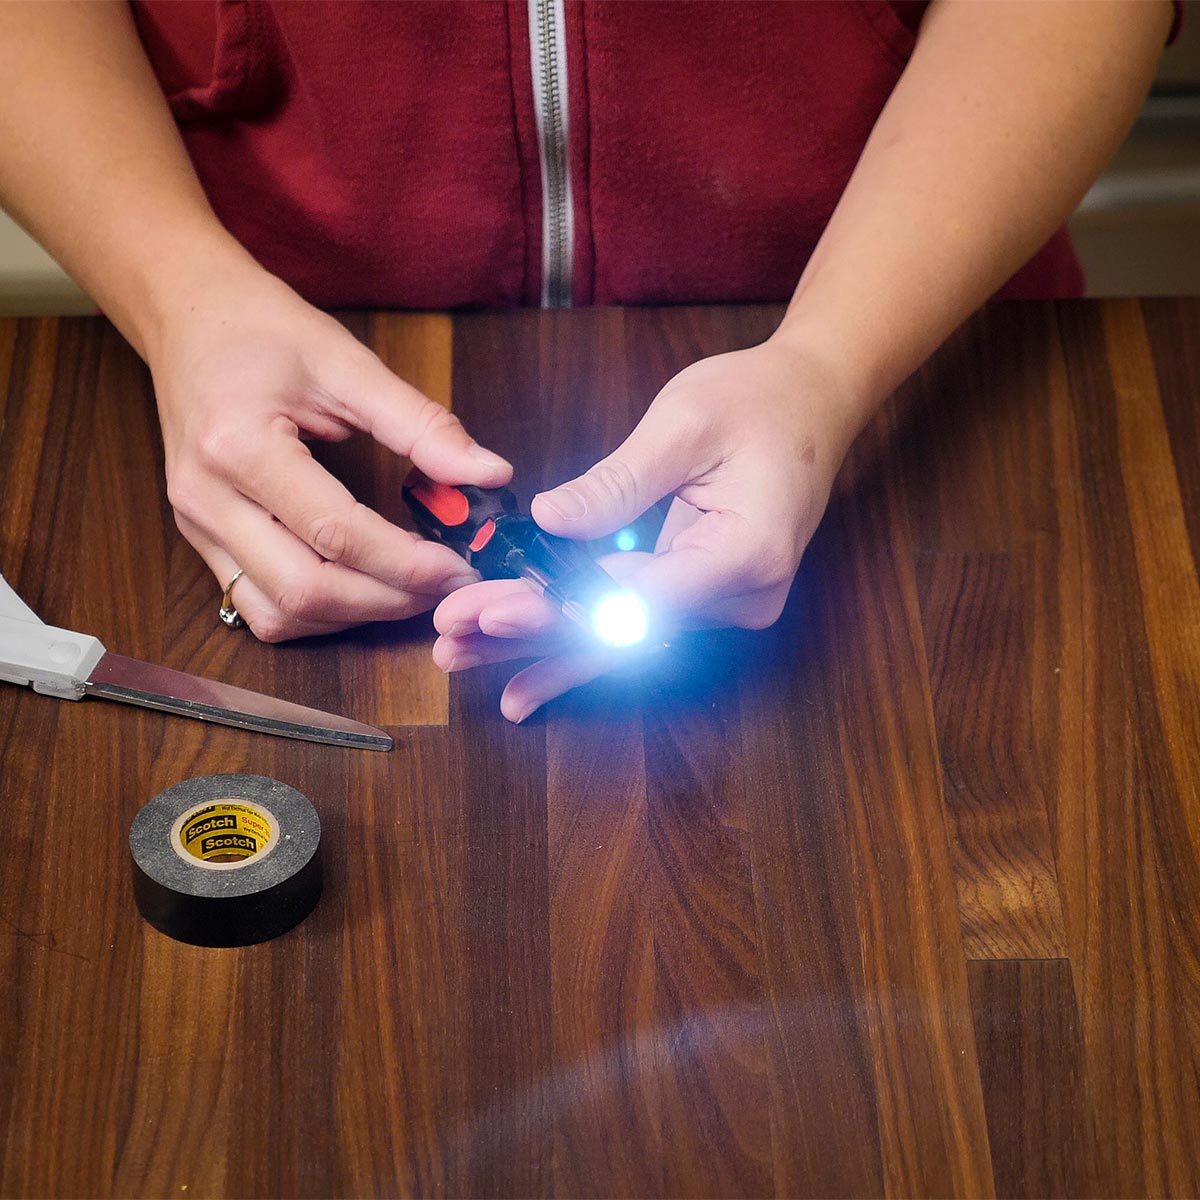
Lighted Screwdriver Hack
No need for fancy hand tools with built-in LED lights, opt for this lighted screwdriver hack instead. When working in a dark space such as inside a cabinet, make your own lighted screwdriver by taping a keychain-size flashlight to the shaft. It'll shine the light right where you need it.
37
/
46
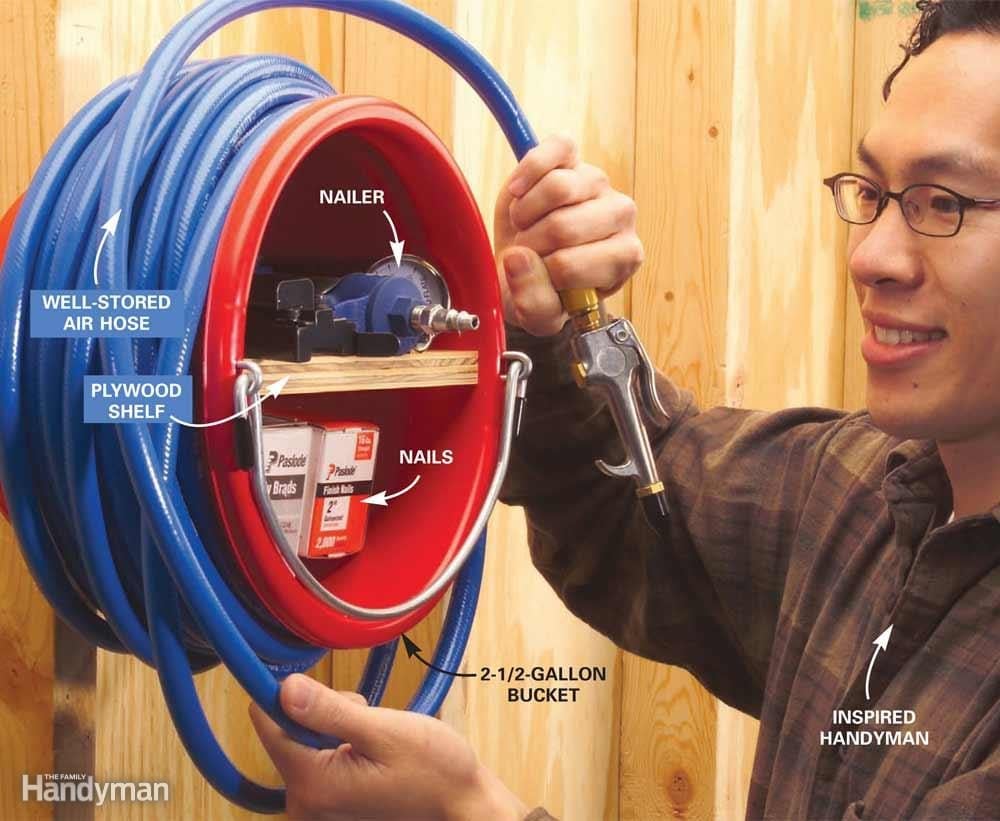
In-the-Bucket Air Tools
A 2-1/2-gallon bucket is all you need to store air tools and hoses on a wall right by the air compressor. Screw a 3/4-in. plywood shelf inside the bucket to create two storage areas, then attach the bucket to the wall with a couple of lag bolts and washers. Load up the bucket with nailers, nails, tire pressure gauges and other accessories and coil the hose around it. Check out more tool storage tips.
38
/
46
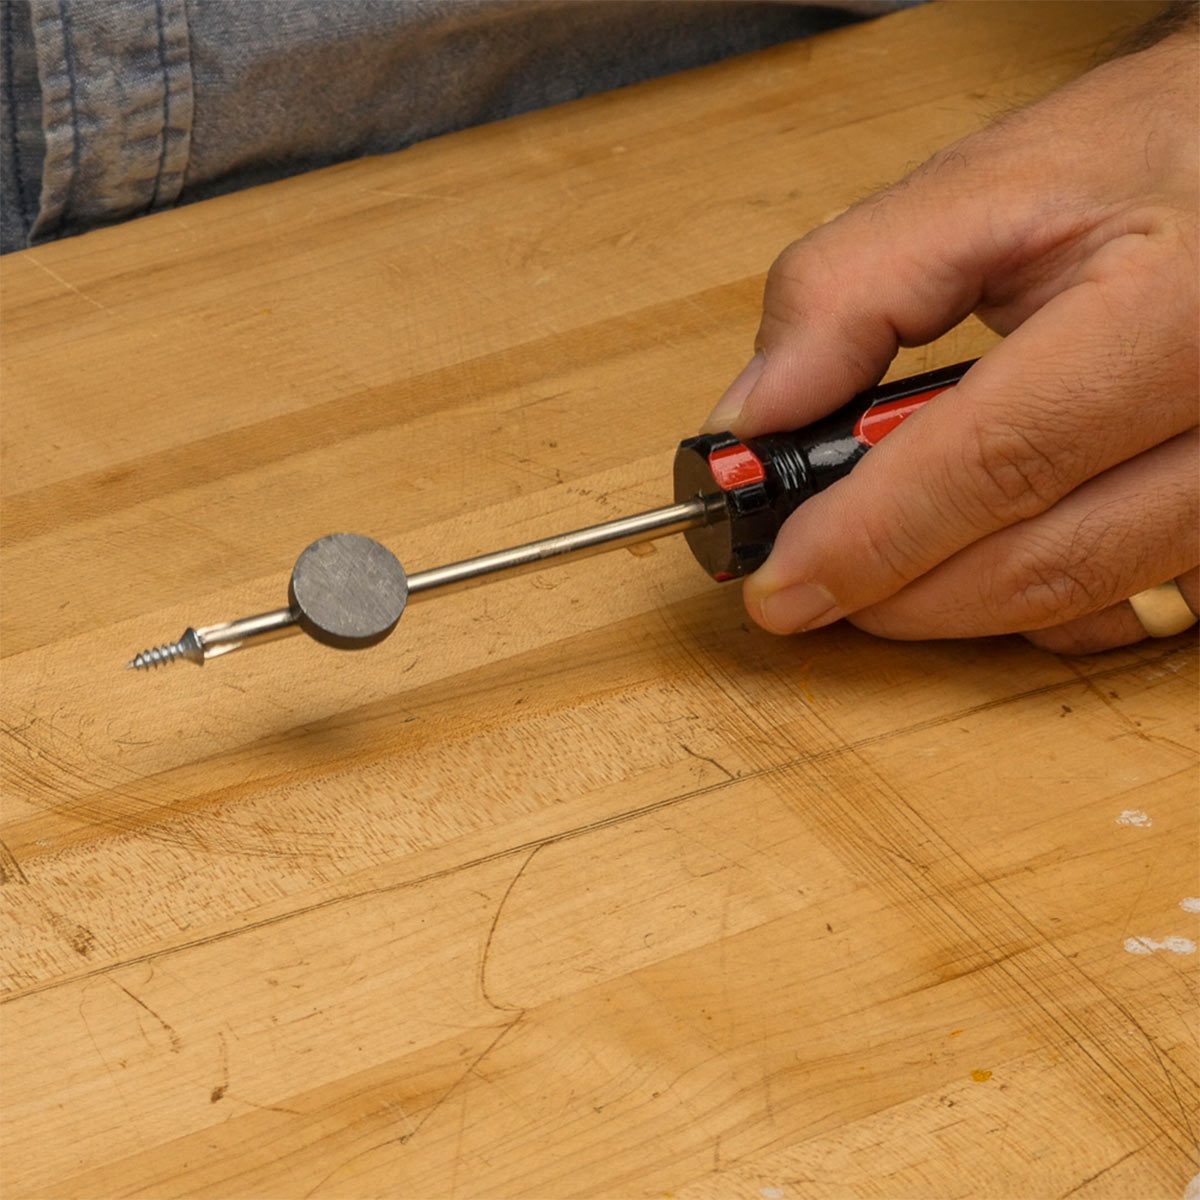
How to Magnetize a Screwdriver
Magnetize the end of a screwdriver to drive screws with just one hand. This hint is especially useful for working in tight spaces where there isn’t room for you to hold a screw with one hand while you turn the screwdriver with the other.
39
/
46
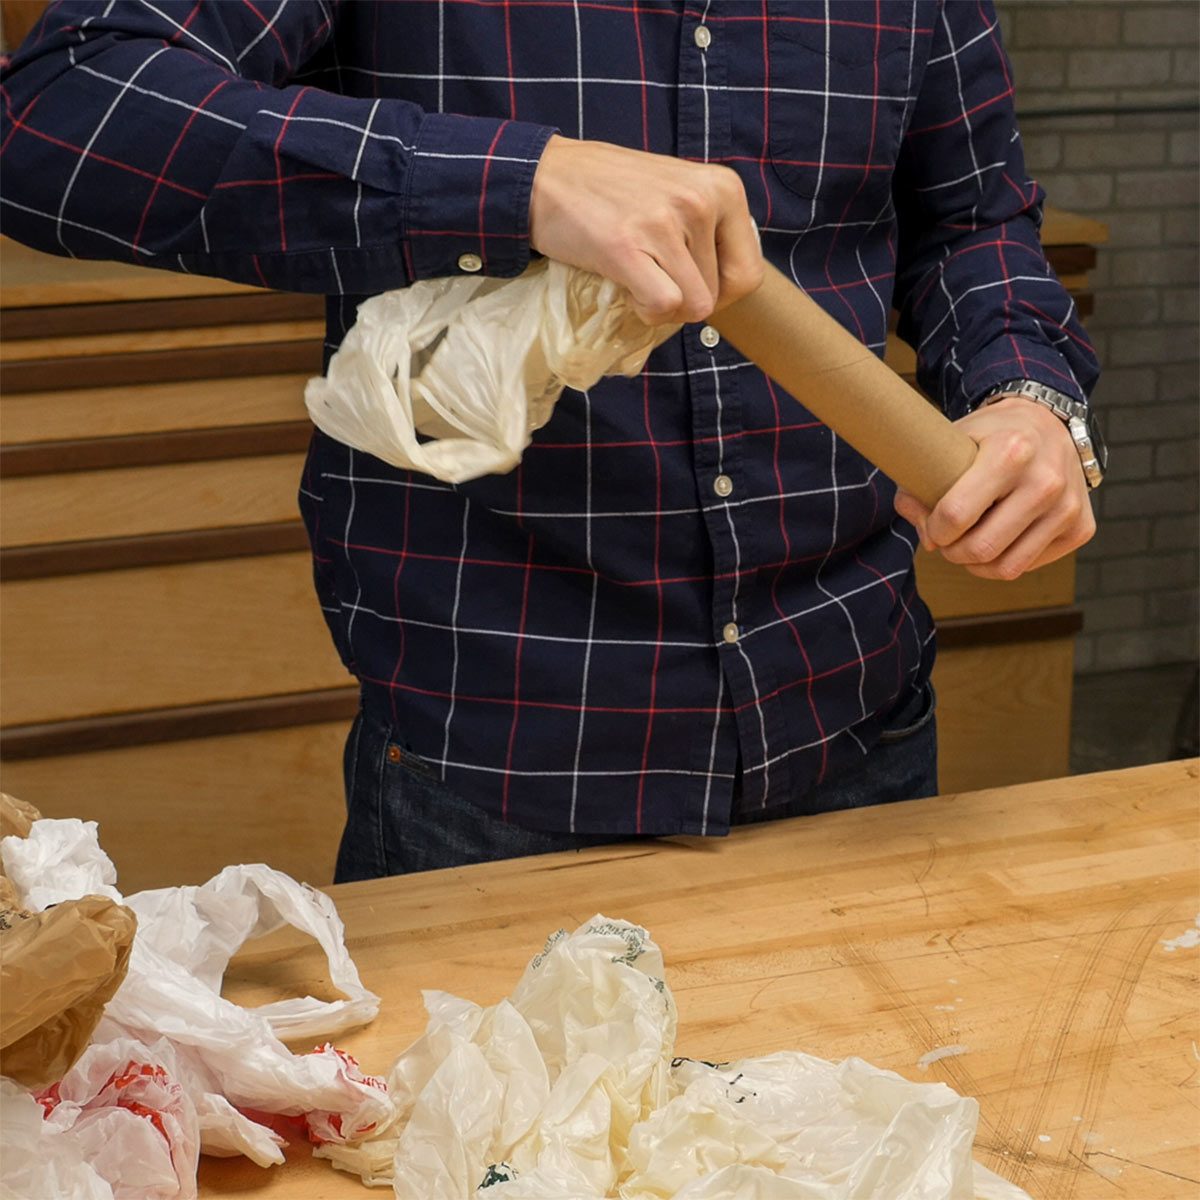
Paper Towel Roll Bag Storage
There are many uses for plastic grocery bags in the workshop. You can use them to seal up brushes and rollers during a painting project, so you don't have to wash so much stuff between coats. The point is, it's worth keeping a handful of plastic grocery bags on hand in the workshop, and here's a great tip for storing them: Stuff as many plastic grocery bags as possible into an empty paper towel roll. Then toss the roll in a drawer or cabinet. The cardboard tube keeps the bags contained, and it's easy to pull one out at a time when you need it.
Check out more home hacks using cardboard tubes.
40
/
46
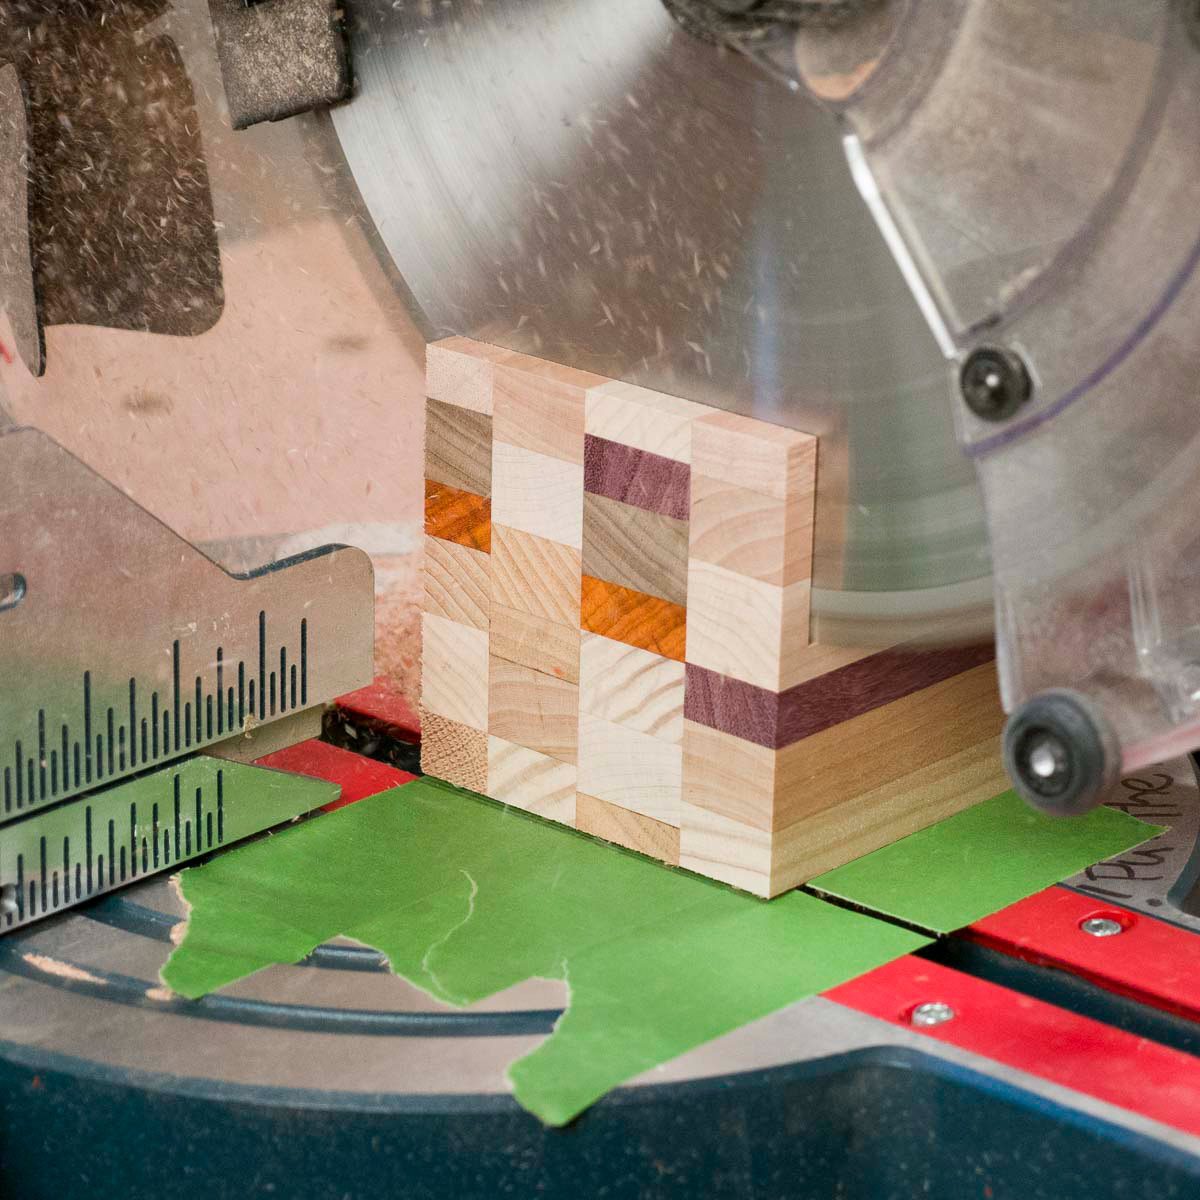
Cheap Zero-Clearance Miter Saw
When offcuts fall into the miter saw's throat plate, they become projectiles. When the offcuts are actually the finished pieces – like these thin coasters – it's not only dangerous it's maddening! My solution is to place a couple layers of tape over the saw's throatplate and cut a kerf. My parts no longer go airborne and it gives me a great place to mark cut lines. – Will Leighton
41
/
46
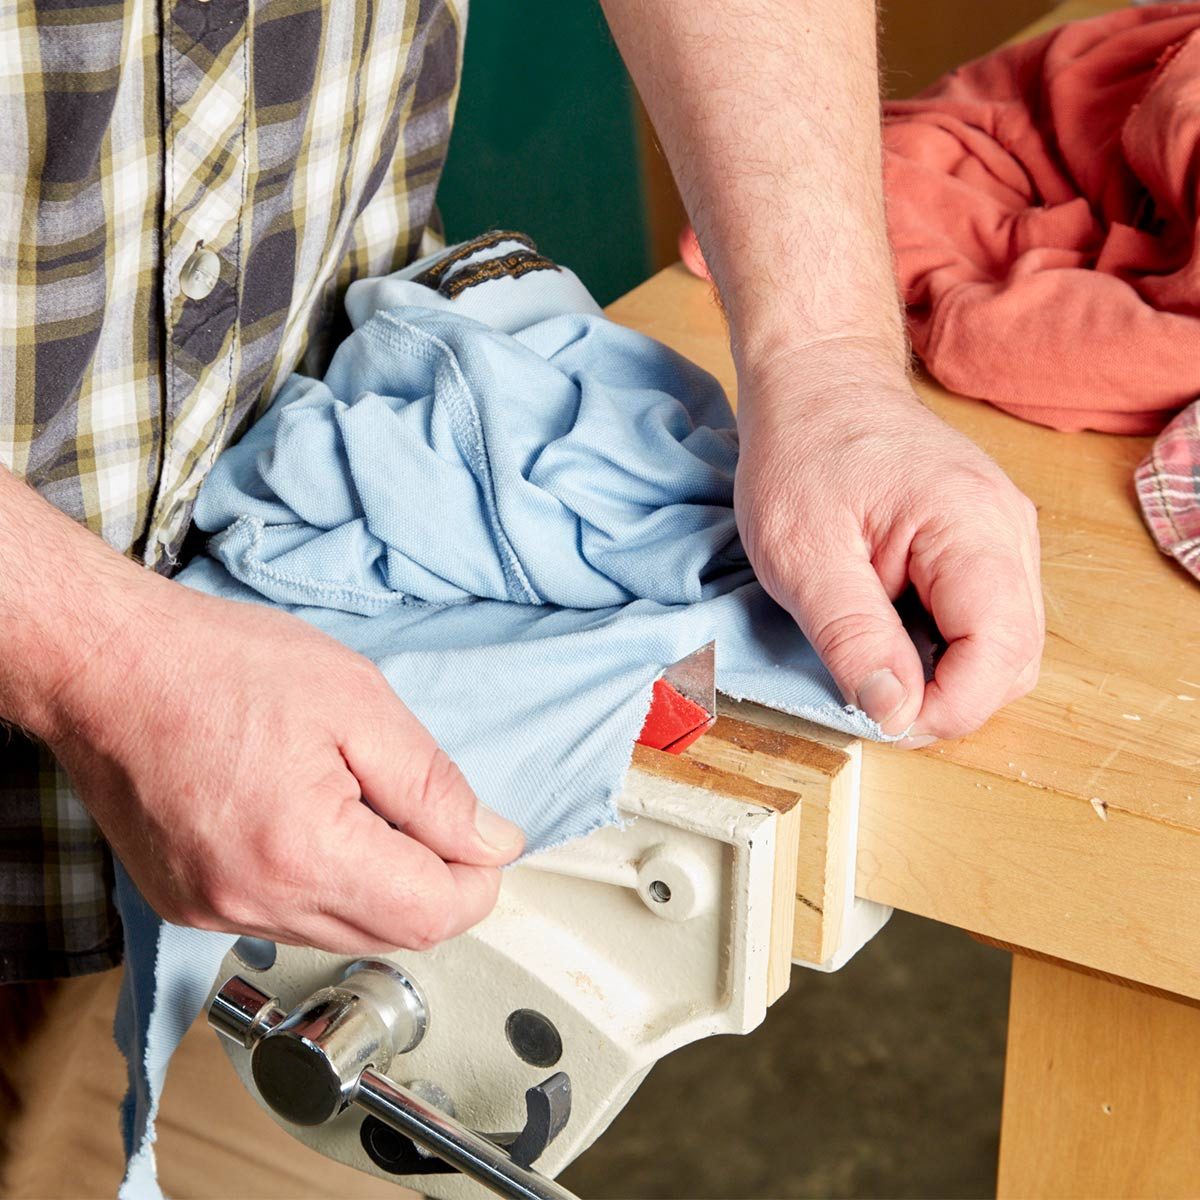
Handy Rag Cutter
Easily cut up old t-shirts and towels to use as shop rags with this simple cutter: Clamp a sharp utility knife in a vise and start cutting the material. Continue cutting or tear the material into the desired size and shape.
42
/
46
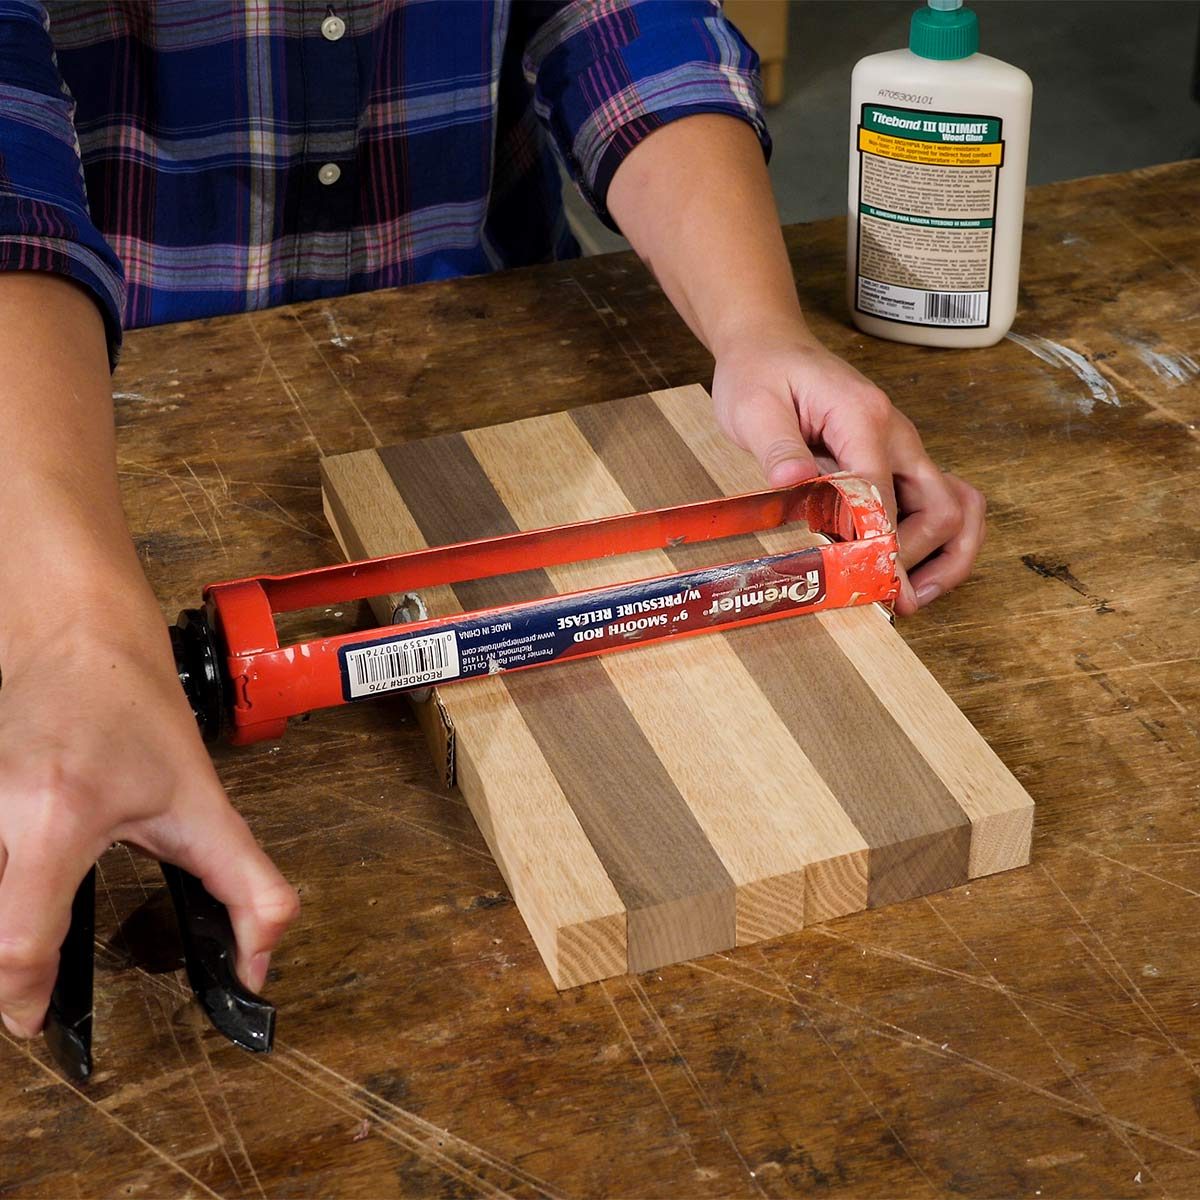
Caulk Gun Clamp
Did you know that you can use a caulk gun as a clamp? It’s perfect for gluing up small projects such as a cutting board. Just place a couple of pieces of scrap wood or cardboard at the ends of the caulk gun and then squeeze the trigger to apply pressure.
43
/
46
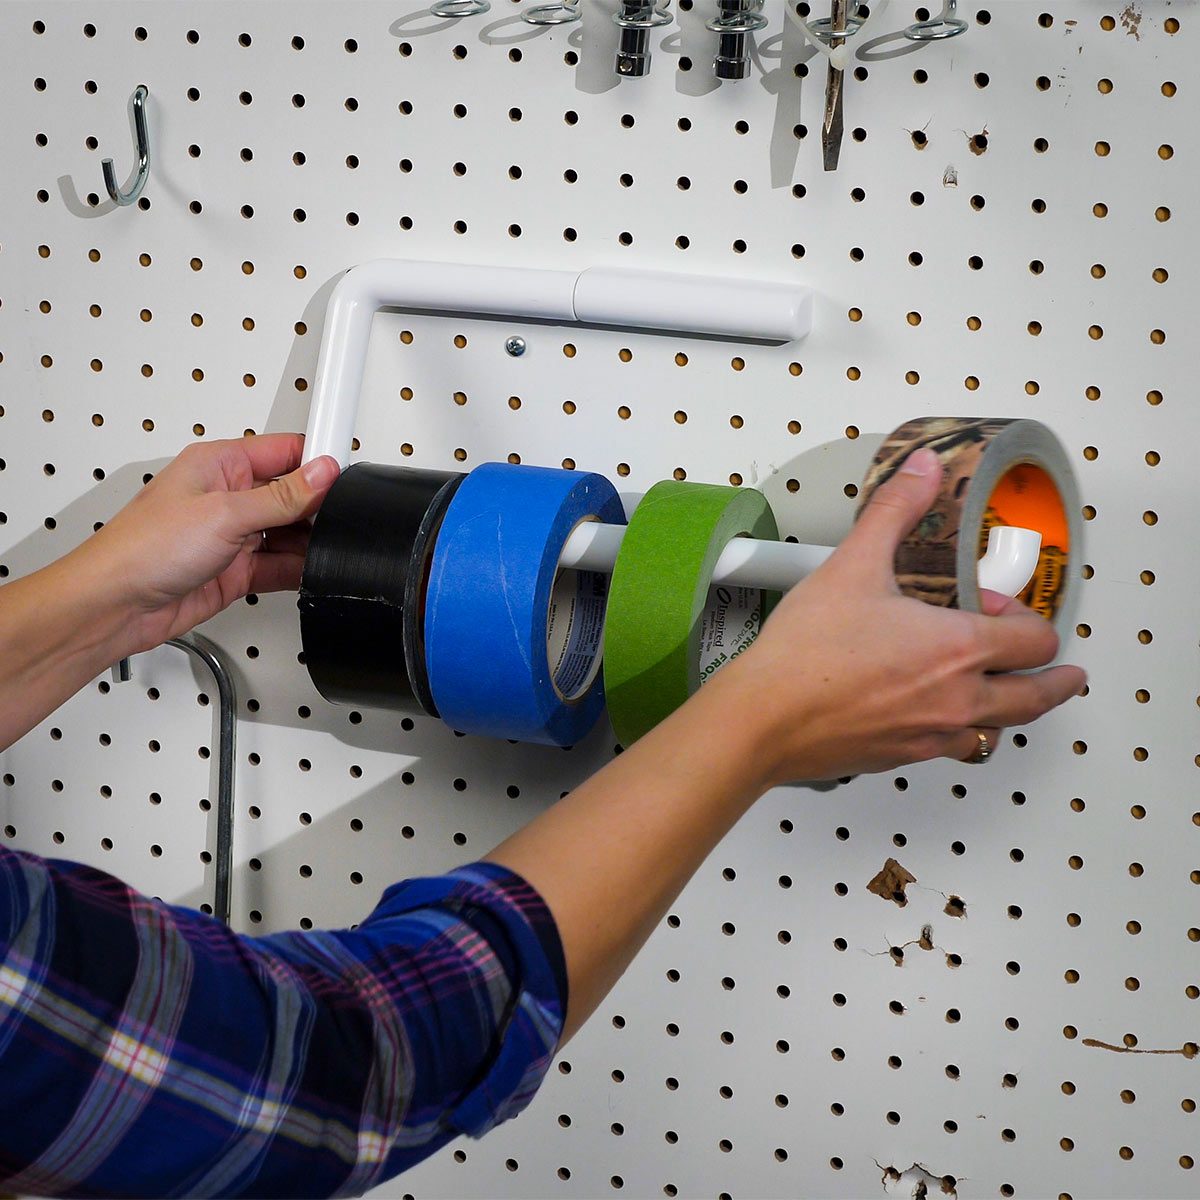
Paper Towel Holder Tape Storage
Rather than take up space in a drawer or cabinet for storing rolls of tape, mount an old paper towel dispenser to your wall or pegboard. It can hold several rolls of duct tape, painter’s tape, etc., within easy reach. And unlike stashing tape in a dark cabinet or cramped drawer, the paper towel holder makes it really easy to find the specific tape needed for different jobs. A dowel-style paper towel holder designed to sit on top of a countertop would also work for corralling rolls of tape. And it’s portable, so you could take it with you for painting and repair jobs around your house.
44
/
46
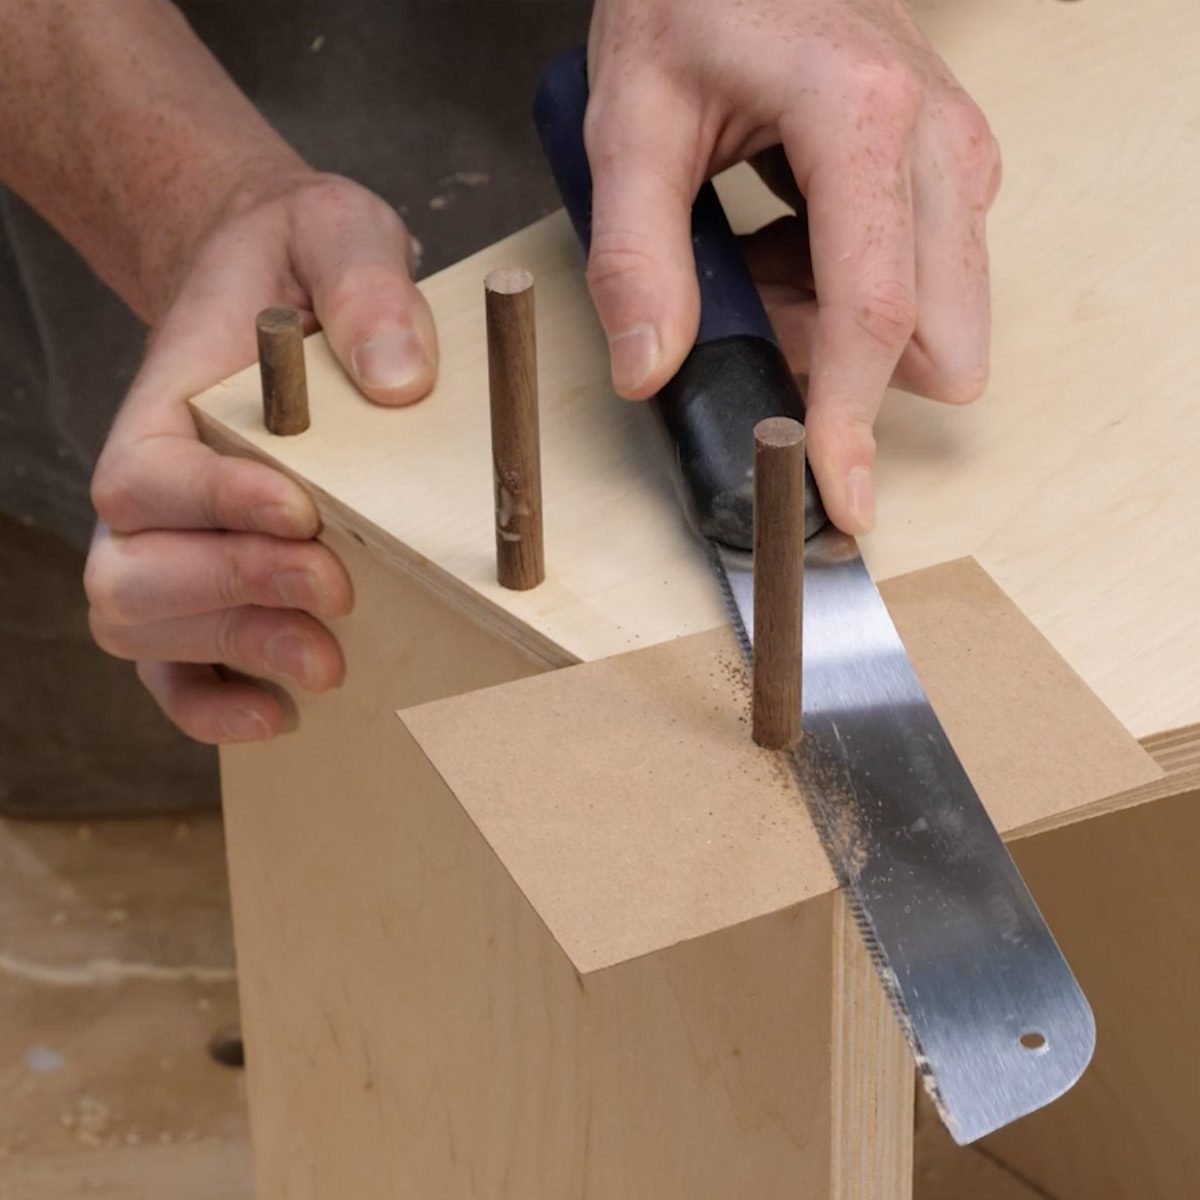
Flush-cut ShieldEven when using a flush-cut saw I take precautions to save wood surfaces from marring. My trick for trimming dowels is to cut a hole in a thin piece of cardboard or plastic and fit it over the dowel. This way the blade never touches the wood. The remaining dowel sands flush in a snap. – Brad Holden |
45
/
46

Leftover Paint Mixing
I have several rental properties that seem like they're always in need of repainting. Instead of throwing out leftover paint, only having to buy more later, I put it to use. I take multiple cans of interior latex, partially used paint and primer, any sheen, any color and mix them all together. It doesn’t matter how much junk or debris is in the paint. Just pour it all in. I use a power mixer to blend them, and then dump all of the mixture into a bigger container. I did twenty gallons of paint once using a big round plastic tub. After all the assorted paints are in the “vat” are mixed, it usually ends up an off-white or antique white. The sheen is usually an eggshell to satin. If the color is too loud, I tone it down by adding a can of white paint. Now, I pour the paint into 5-gallon buckets with strainer bags inside. Lift out the strainer bags to remove any debris and pop on a lid to keep the paint fresh. This is a great way to use up leftovers when you do a lot of painting. – Spike Carlsen. Plus: Check out 11 more painting hacks from our expert field editors.
46
/
46
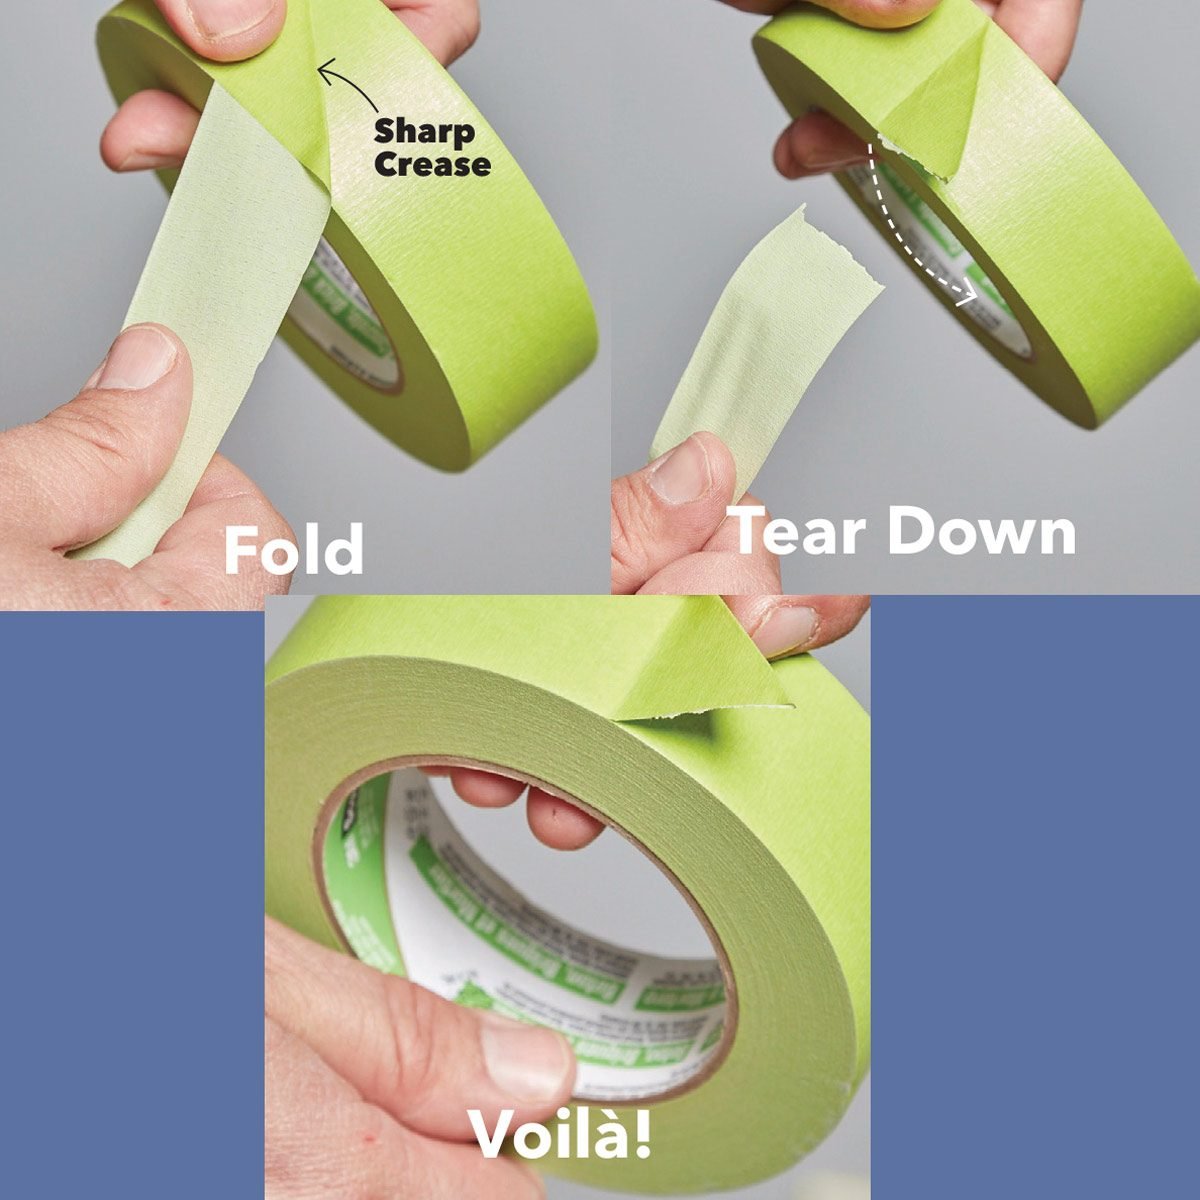
Tape-Tearing Tip
Here's an easy way to tear tape and get a starting edge at the same time. Simply fold the tape under at a 90-degree angle to the roll. Then, with a snapping motion, pull the tape against the edge of the roll. The tape tears, leaving a triangular starting tab. This won't work with plastic tapes; those must be cut. — reader Chris Henrichs. Plus: How to Tape Drywall