
Wood Movement 101: How It Works and How to Control It
Updated: Mar. 13, 2024
Wood movement causes heartbreak when projects crack and warp. Learn how to master these simple techniques and save yourself some nightmares.
If your plans don’t accommodate wood movement, you’ll end up with trouble.
Width movement is the main issue
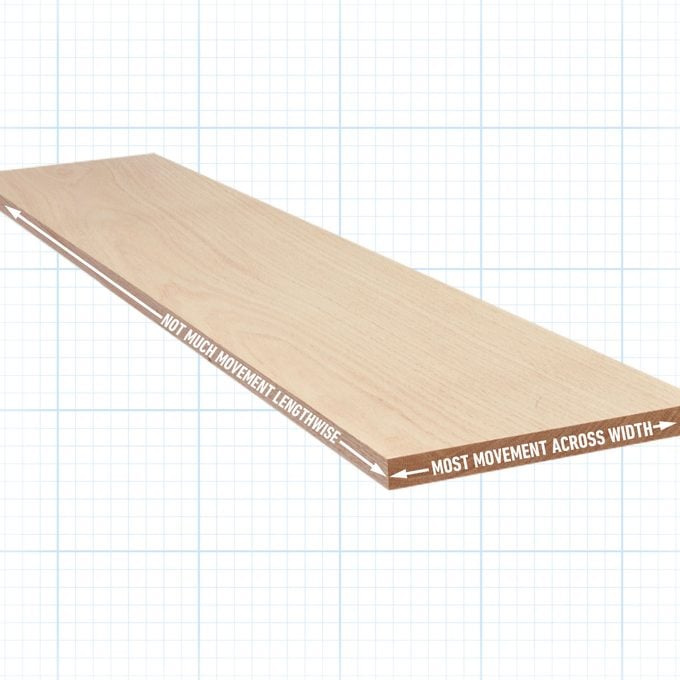
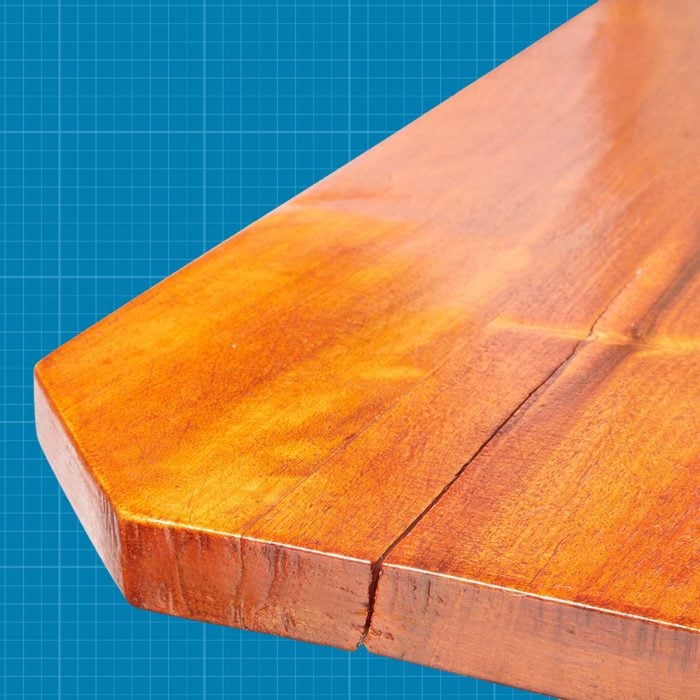
Wood moves as its moisture content changes. Wood doesn’t move much lengthwise, so you don’t have to worry a lot about boards getting shorter. But a board can move quite a bit across its width. A board that’s 6 in. wide during a humid summer might shrink by 1/32 in. in winter. That’s not much, but it’s enough to cause a crack in a tabletop or gaps between floorboards.
Movement is caused by moisture content
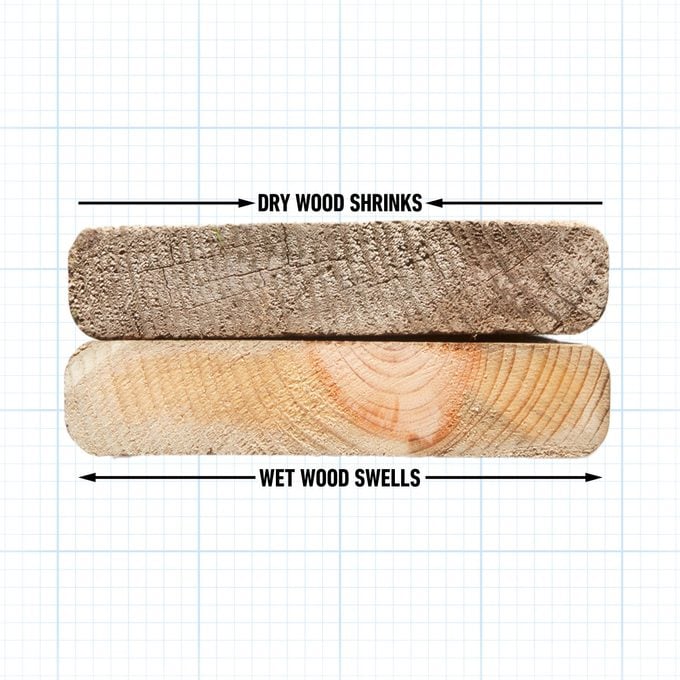
When wet wood dries, it shrinks. The amount of movement is determined by the type of wood and the degree of change in its moisture content. Applying a sealer or paint can moderate wood movement. But it’s nearly impossible to seal wood so completely that its moisture content stays constant.
Wood can also change shape
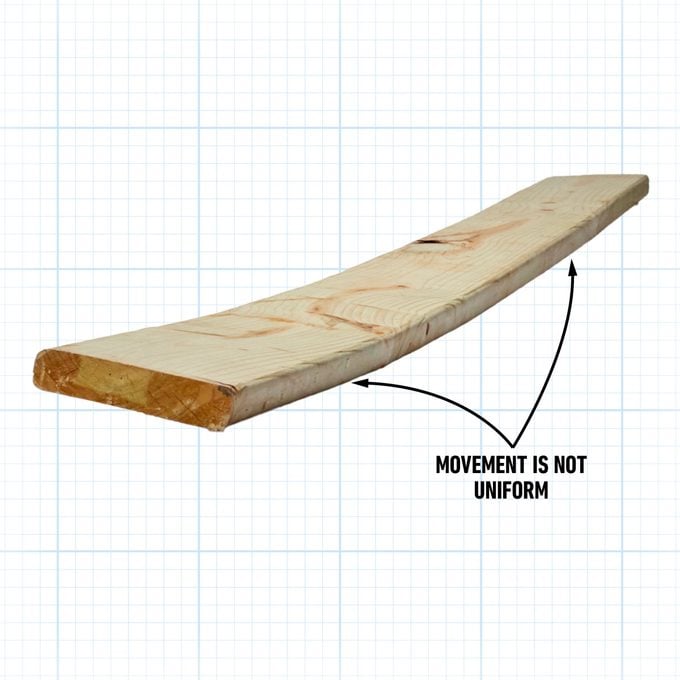
Movement within a board isn’t uniform; one section might move more than another. That leads to warping, twisting and cupping. Most of these changes happen in the initial drying phase, but wood can change shape later, too.
Vertical grain is more stable
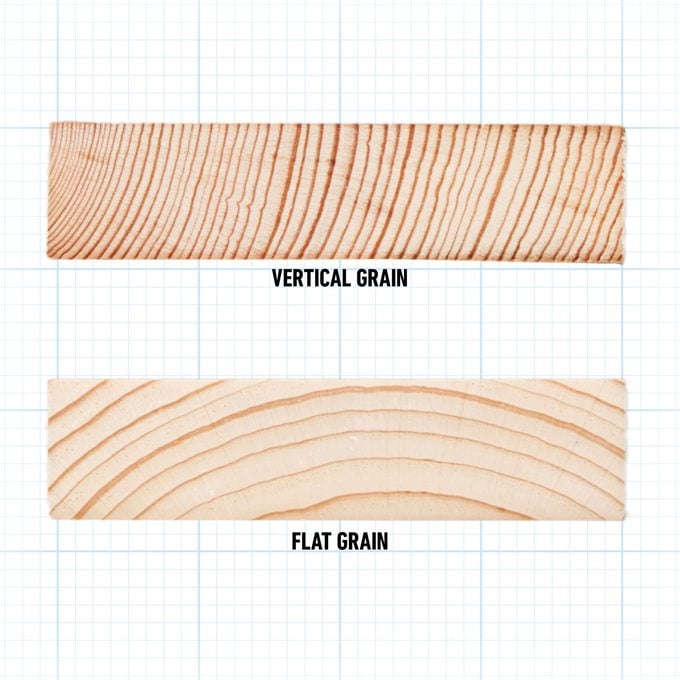
Inspecting the grain pattern on the end of a board will reveal whether the board has vertical grain or flat grain. A flat-grain board will move about twice as much as a vertical-grain board with the same change in moisture content. But because cutting quarter-sawn lumber is much less efficient, vertical-grain boards are expensive and can be hard to find.
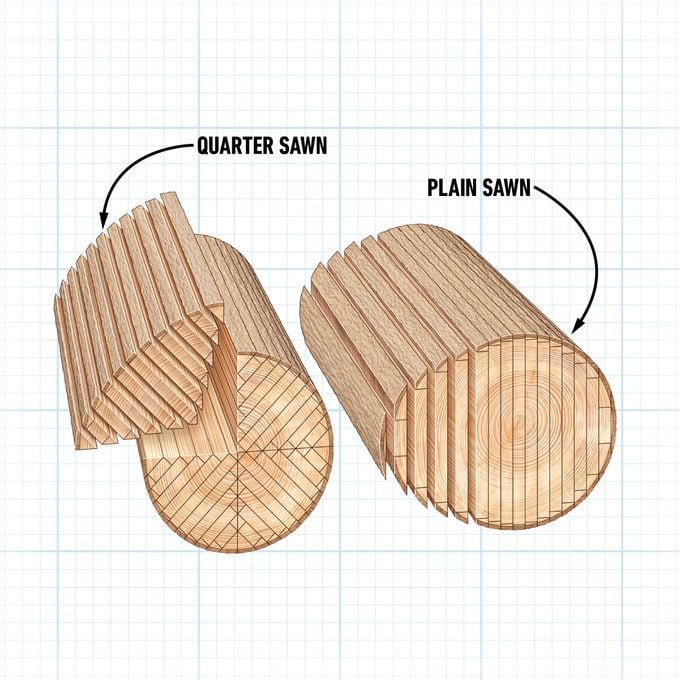
How a board is cut from the log also affects how much it moves. Quarter-sawing yields “vertical grain” boards, while plain-sawn boards have “flat grain.”
How to Tame Wood Movement
You can’t keep wood from moving, but these tips and strategies can help you avoid problems.
Avoid miters outdoors
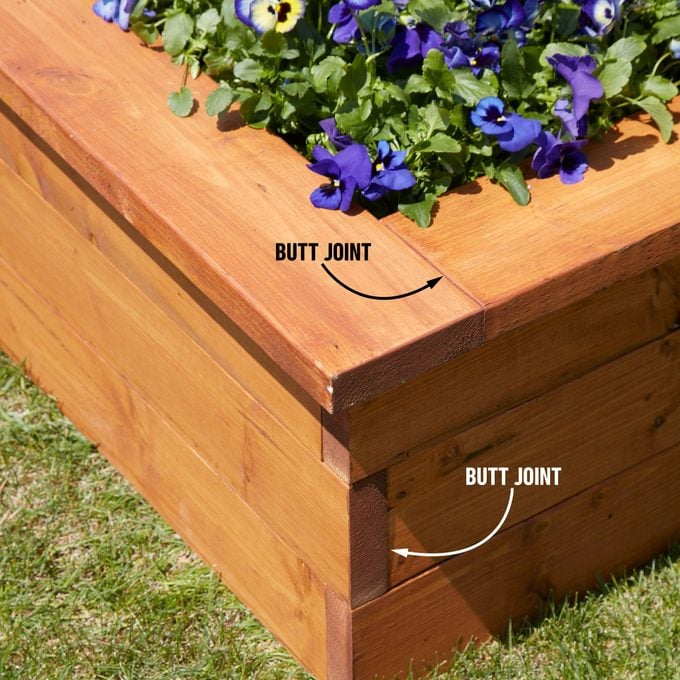
Miter joints hide end grain and look more refined. But the effect is ruined when the miters don’t meet tightly. Huge changes in humidity, and wetting and drying from rain and sun, cause wood to move more outdoors than it would indoors.
So whereas a miter joint will look good for decades indoors, it may start to look really bad after only one season outdoors. That’s why it’s usually better to avoid miters outdoors whenever possible. Use a butt joint instead.
Plan for deck board movement
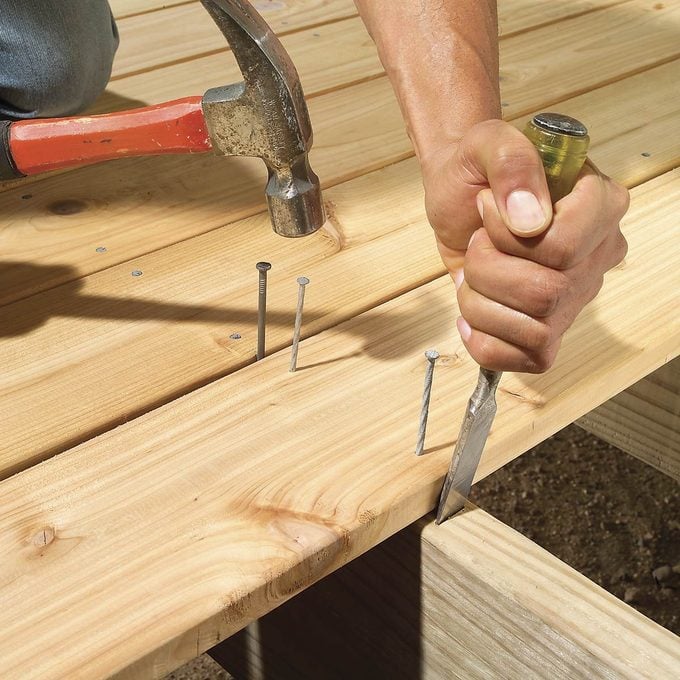
Deck boards can shrink or expand after they’re installed, depending on how much moisture they contained when you fastened them down. To allow for this, space wet treated boards with a 16d nail (1/8 in.) and dry boards such as cedar decking with a carpenter’s pencil (5/16 in.).
Allow expansion space for wood floors
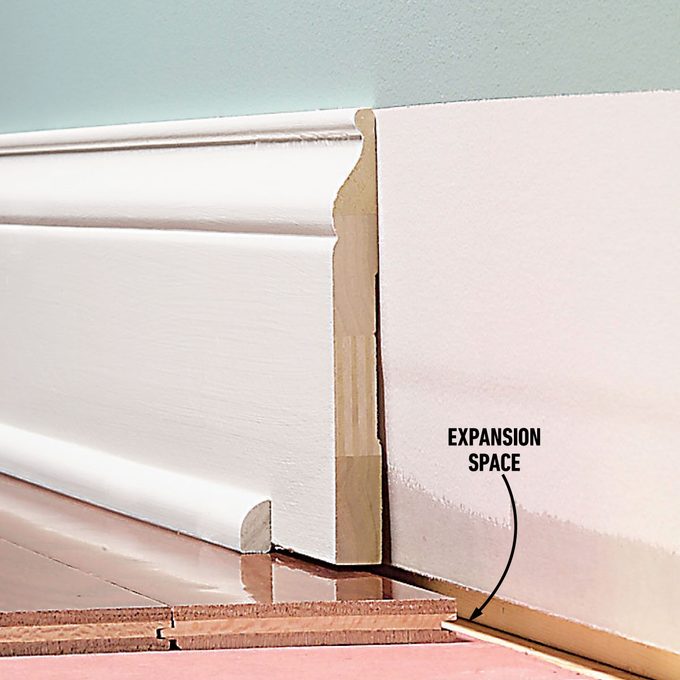
If you’re installing an engineered wood floor, follow the instructions carefully—they include all the information you need about spacing. In general, floating wood floors that aren’t nailed or glued down require about a 1/2-in. space around the perimeter and enough clearance at thresholds, doorjambs and other obstructions to allow movement. Solid wood floors also require at least a 1/2 in.-wide expansion space around the perimeter.
Let tabletops float
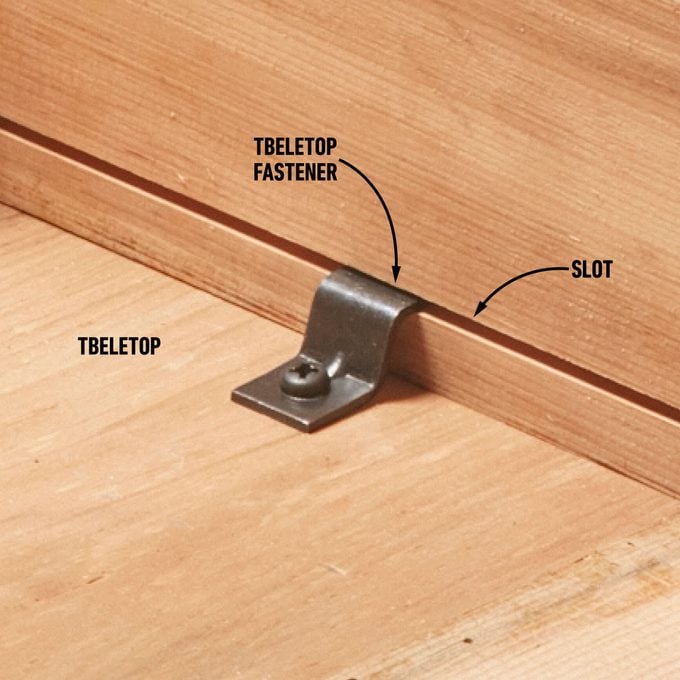
One of the most common errors that beginning woodworkers make is to securely fasten wood tabletops to the underlying frame. Tabletops tend to be wide, and wood moves a lot across its width.
Restricting the movement with screws or nails can cause the top to crack as it shrinks. To avoid this, use special tabletop fasteners or some other method that holds the top down but still allows the top to expand and contract.
Let wood acclimate
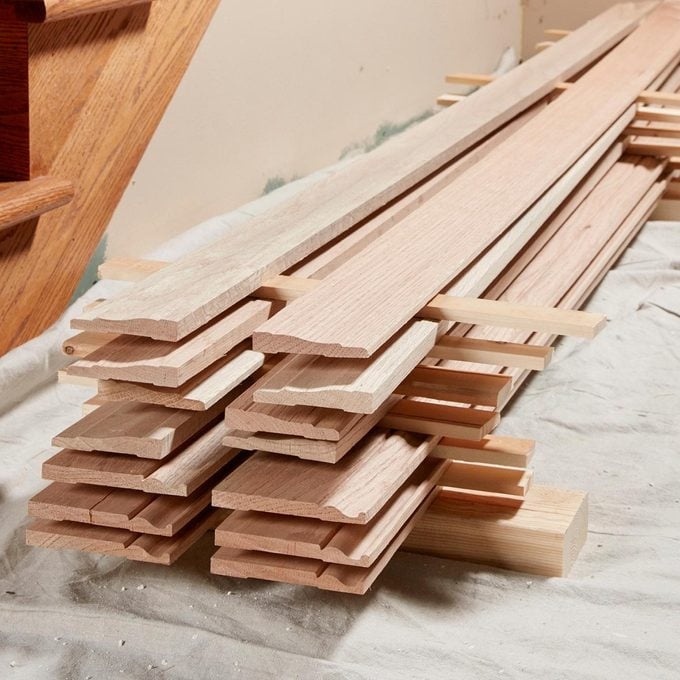
Since the relative humidity of your indoor space may be quite different from the humidity where your trim or flooring was stored, you should always allow time for the material to acclimate. The wider and thicker the trim or flooring boards are, the longer you should leave them in the space before installation.
Thin, narrow trim may only take a day or two to reach equilibrium with the room’s relative humidity. Wide or thick boards should be left in the room for at least four days before you install them. Of course the trim or flooring will still move a little after it’s installed, but at least most of the change will have occurred beforehand.
Avoid wide boards
Of course there are times when you have to use a wide board or you want to use one because it looks better. But always be aware that movement in wide boards, whether it’s cupping, twisting or something else, will be more pronounced than in two or more narrower boards. Gluing several narrow boards together will result in a more stable tabletop than gluing two wide boards together.
Manufactured wood holds paint better
If you’re planning to paint an exterior project, consider building it from a manufactured product rather than solid wood. Wood movement requires the paint to flex constantly, and eventually the paint cracks and peels. Manufactured wood substitutes from companies like Louisiana-Pacific, AZEK or James Hardie are more stable than solid wood. And because these products move less, they provide a better surface for paint.
Pre-finish tongue-and-groove
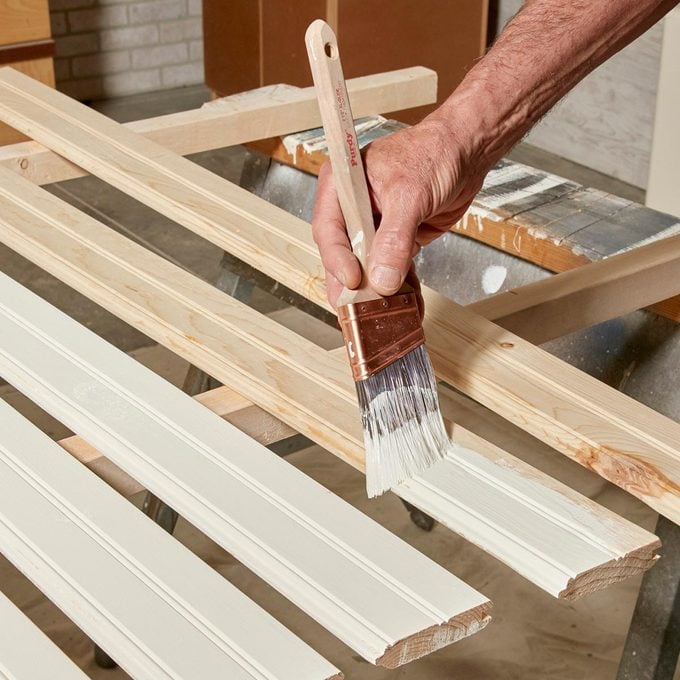
As tongue-and-groove boards expand and contract, the spaces between them change a little. If you don’t pre-finish the boards, you’ll see exposed raw wood on the tongue when the boards shrink. But finishing the boards before you install them will solve this problem. Just be careful to avoid a buildup of finish in the groove; it could make the boards hard to fit together.
Don’t fill cracks on wood floors
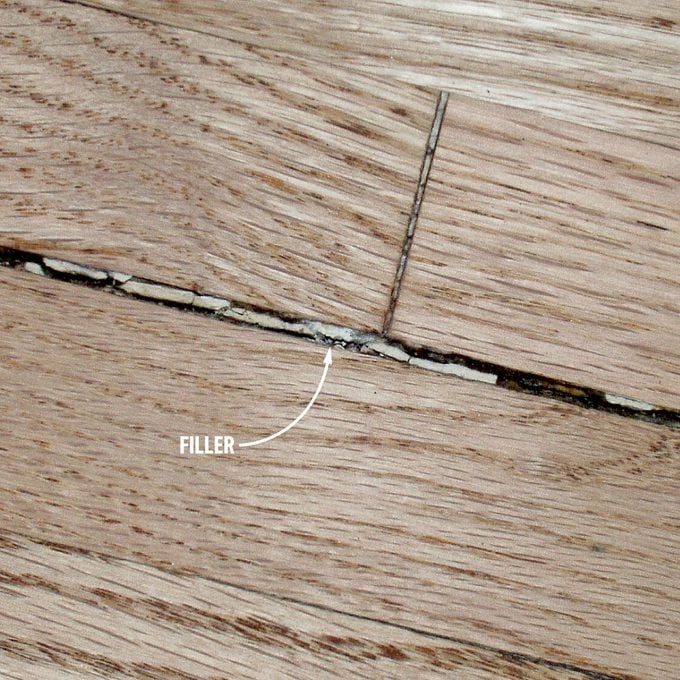
If you have wood floors, especially old ones, you probably have some cracks between the boards. It’s tempting to try to hide the cracks with wood filler, but it’s not a good idea. As the floorboards expand and contract, the filler will crack and fall out, leaving you with an unsightly mess that’s hard to fix.
Let parts warp before assembly
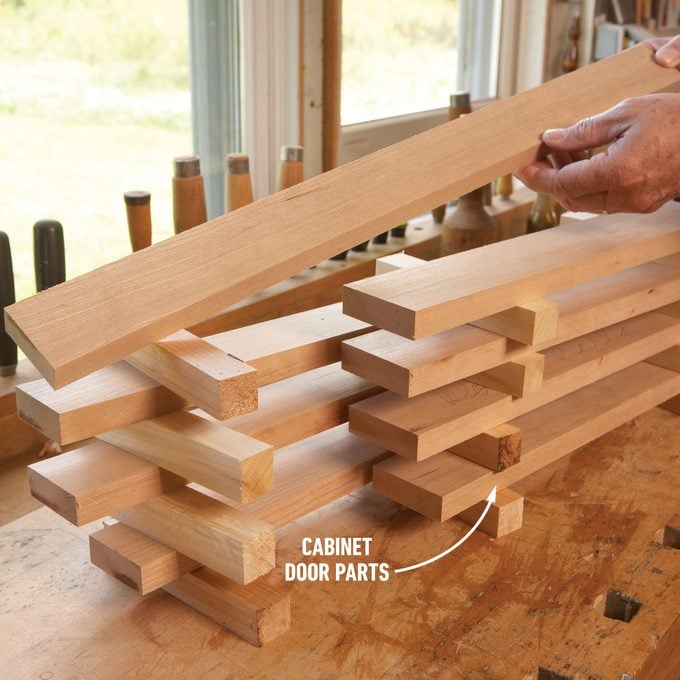
When you go to all the trouble to build cabinet doors, you want to make sure they aren’t going to warp or twist after assembly. One way to prevent this is to cut your parts then stack them with spacer boards (stickers), and let them acclimate for about 24 hours before building the doors. Be sure to cut extra parts so you can replace any boards that warp.
Extra Credit
Substitute sheets for boards
As you’re planning your next woodworking project, don’t assume it has to be built entirely from boards. Veneered sheets of plywood and MDF are more stable and are a good alternative to solid lumber. These veneered sheets are less likely to bow or cup, and won’t crack like lumber.
Choices at home centers are usually limited to oak, birch or maple veneers. If you’re looking for something else, such as cherry or walnut, check with a local hardwood lumber supplier or a full-service lumberyard.
Sticking doors
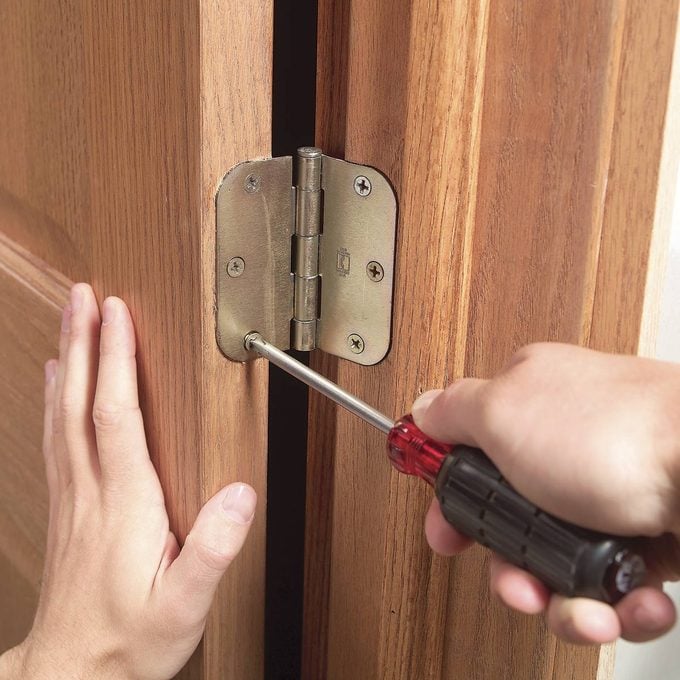
Sticking and rubbing doors are a common problem caused by wood movement. High humidity is usually the culprit, so some problems can be avoided or solved by keeping the humidity levels in your house low. But when this isn’t practical, you’ll have to resort to solutions like tightening door hinge screws or planing or sanding the door edge.